Showing posts with label elementary art class. Show all posts

Monday, December 15, 2014

In the Art Room: Kindergarten Reindeer!

This giveaway is now closed. Kindly click on my name at the top for the latest post and giveaway. Thank you!

Alrightie friends, as promised, today begins my lil 10 Days Til Christmas Giveaway madness (and I say "madness" because me attempting to stay on top of blogging each day AND giving y'all stuff is going to be nothing short of a Christmas miracle). As I blabbered about yesterday, each day I'll share with y'all a post (I'm super behind on sharing what's been happening in the art room and some DIY's, so brace yourself for the barrage) AND giving away some giveaways (oooooh, so that's why they call 'em "giveaways"! I always wondered). So, without further ado, here's what's up for grabs today...(no, not a brand new car, silly. I ain't Oprah).
Daw, some super cuteness Christmas fabric, yay! Each piece is about 1/2 of a yard so they would be perfect for small DIY projects (totes adorbs stocking, anyone?) or, if sewing ain't your thang, use it in collage projects (how cute would a Christmas cookie recipe book covered in this fabric be?!). I'm currently using that top fabric for a dress and the middle fabric was used in the creation of this Christmas light-up number. The bottom fabric was thrown into the mix for the fun of it. 

So just how do you go about scoring this goodness? Kindly do the following: 

1. Please follow this here blog. You can do so by clicking on the "Join this site" button on the right of your computer screen. Already a follower? Thank you so much!

2. Leave a comment below about your thoughts on directed drawing projects (which is what this here post is all about. That and giveaways, of course). Or, for my non-art-teacherin friends, what you'd do with this fab fabric!

3. Do leave your email address so I can let you know that you're the Winner, Winner, Chicken Dinner!

Winner will be announced tomorrow afternoon along with tomorrow's giveaway item (it's another good one!). International friends, you are welcome to play along! Tomorrow, not only will the new item be up for grabs but I'll have slightly different requirements for y'all. I hope you'll pop back in to see if you won and what I'm giving away!

Until then, let's chat about these here Kindergarten Reindeer, ermkay?
I had my lovely kindergarten kids for the last time before break recently. They had just completed their Winter Collage Landscapes so I was in need of a one-class project that would hold their attention and teach 'em some new skillz with an art supply that is new to them: oil pastels!
To begin, I greeted the kids in the hallway and told them that they'd be going shopping for one clipboard and one sheet of paper, their choice of color. After the kids reported to the floor, they were to place their paper and clipboards in front of them to give me the Super Duper Special Signal that they were ready to learn. At this point, I projected a photo of a giant buck that my husband had caught a photo of on his deer camera. The kids loved seeing the deer and talking about all the parts of his body and face. My hubs loves to hike in the woods near our house and has found a couple of deer antlers there. I allowed the kids to touch the antlers and we talked about texture. I also told them how deer lose their antlers in the spring but grow new ones later. One smartie said, "Oh, like us! We lose our teeth but a new one grows back!"
After that chat, the kids were excited and ready to draw a deer of their own. I told them that'd we be using a lot of round shapes and rounded lines for this drawing. Step by step, I walked them threw the directions you see above. Once the deer was drawn (with the option of making Rudolph or not), the kids were sent back to their seats to do three things: draw snowflakes, add a black line for (optional) Christmas lights, use red and green tempra cakes to add finger printed lights. 
Of course, this guy's name came up a lot (painted my lil ole me a while back). Our word of the week was "nonconformity" (which is a lot for a 5 year old to comprehend). I explained how different Rudolph was and how that made him special. When doing guided drawing, I always emphasis how unique each of our drawings should be. Even though we are following the same steps, we are all different (like Ruddie!) and thus should have reindeer as unique as us. This takes the pressure off the children who are concerned that their drawing doesn't look just like mine or their friends. I always remind them that if I had wanted all their drawings to be alike, I would have simply given them a coloring sheet. And what's the fun in that?!
By the way, this isn't my first time down Reindeer Lane with the kindergarten set. These guys were created a couple years back. You can read all about 'em here
I'm curious to know where y'all stand on guided drawing. I'll usually do one (occasionally 2) with kindergarten and first grade during the school year but for the older kids, not so much. One of the reasons I enjoy teaching it is that it helps reinforce that everyone is an artist and everyone is unique. I had one special needs student who was so thrilled with herself that I got permission from her teacher to walk her around after art and share her drawing with anyone she could find. She stopped nearly everyone in the hallway with, "Do you like my drawing? I'm an artist!" It was simply the best.
However, I know there are some that are strongly opposed to directed or guided drawing. Perhaps it's too much instruction. Maybe it's restricting creativity. I know for my TAB friends, this is nails-on-a-chalkboard worthy. I hosted a wee bit of a debate on my blog last winter about this very topic and touched on it again in this post about craftsmanship
I wonder, why is this topic so polarizing amongst art teachers? I think, when taught right, directed drawing can simply introduce children to one way of drawing something (in this case, a reindeer) while reminding them that there are many ways to go about it. 
So just how did we end the lesson? With kindergarten, I love to take them on end-of-the-class gallery walks where we look at everyone's work, give e'm a complement and a round of applause. In this case, I borrowed a sleigh bell from my neighbor and we went on a sleigh ride around the room cheering on all of our friends. 

Looking forward to hearing from you, friends. And, good luck!

 photo signature_zpsd10b3273.png
Read more »

Tuesday, December 2, 2014

DIY: A Pack-a Attack-a Alpaca (AKA, Tales from an Alpaca Addict)

It could easily be stated that there are many a thing wrong with me. I suffer from anti-cleaning disease. I have a super bad and unshakable case of I-despise-cooking-itis. Not to mention the car-that-looks-like-an-army-of-hobo-clowns-live-in-it disorder which I deal with on a daily basis.

However, despite all my countless flaws, I never thought I'd add Alpaca Addict to the list...and yet...
Each and every time I look longingly at the photos from my alpaca trip, I'm all...
For that reason, I went on a wee bit of an alpaca-crafting bender over Thanksgiving break. With the help of my moms-in-law who, by her artsy nature, is always (willingly) dragged into my crafting adventures, we sculpted and papier mached these bad boys.
I know, right? Like, so super cutes it burns your retinas. And we used a buncha scrap supplies that woulda otherwise ended up in the recycling bin. Or in the back of my car with the hobo clowns which is more likely the case.
So just how did these lil guys come to life? Lemme start by showing you what our kitchen table looked like after the tofu-kery and pumpkin pie were cleared away...
So just what did we use? Well, lemme start by saying that is not mashed potatoes in the middle of the table. To craft our Alpaca Ornaments, we used:
*  Clothes pins for the legs. The ones with the metal wire hinge thingie work the best.
*  Wallpaper paste. Not be confused with mashed potatoes. Like, ew.
*  Aluminum foil scraps. I saved all the foil scraps from the kids' projects this year thinking that we'd come up with something to create. 
*  Newspaper torn into strips. What with Black Friday ads, we had plenty of newspaper to use. 
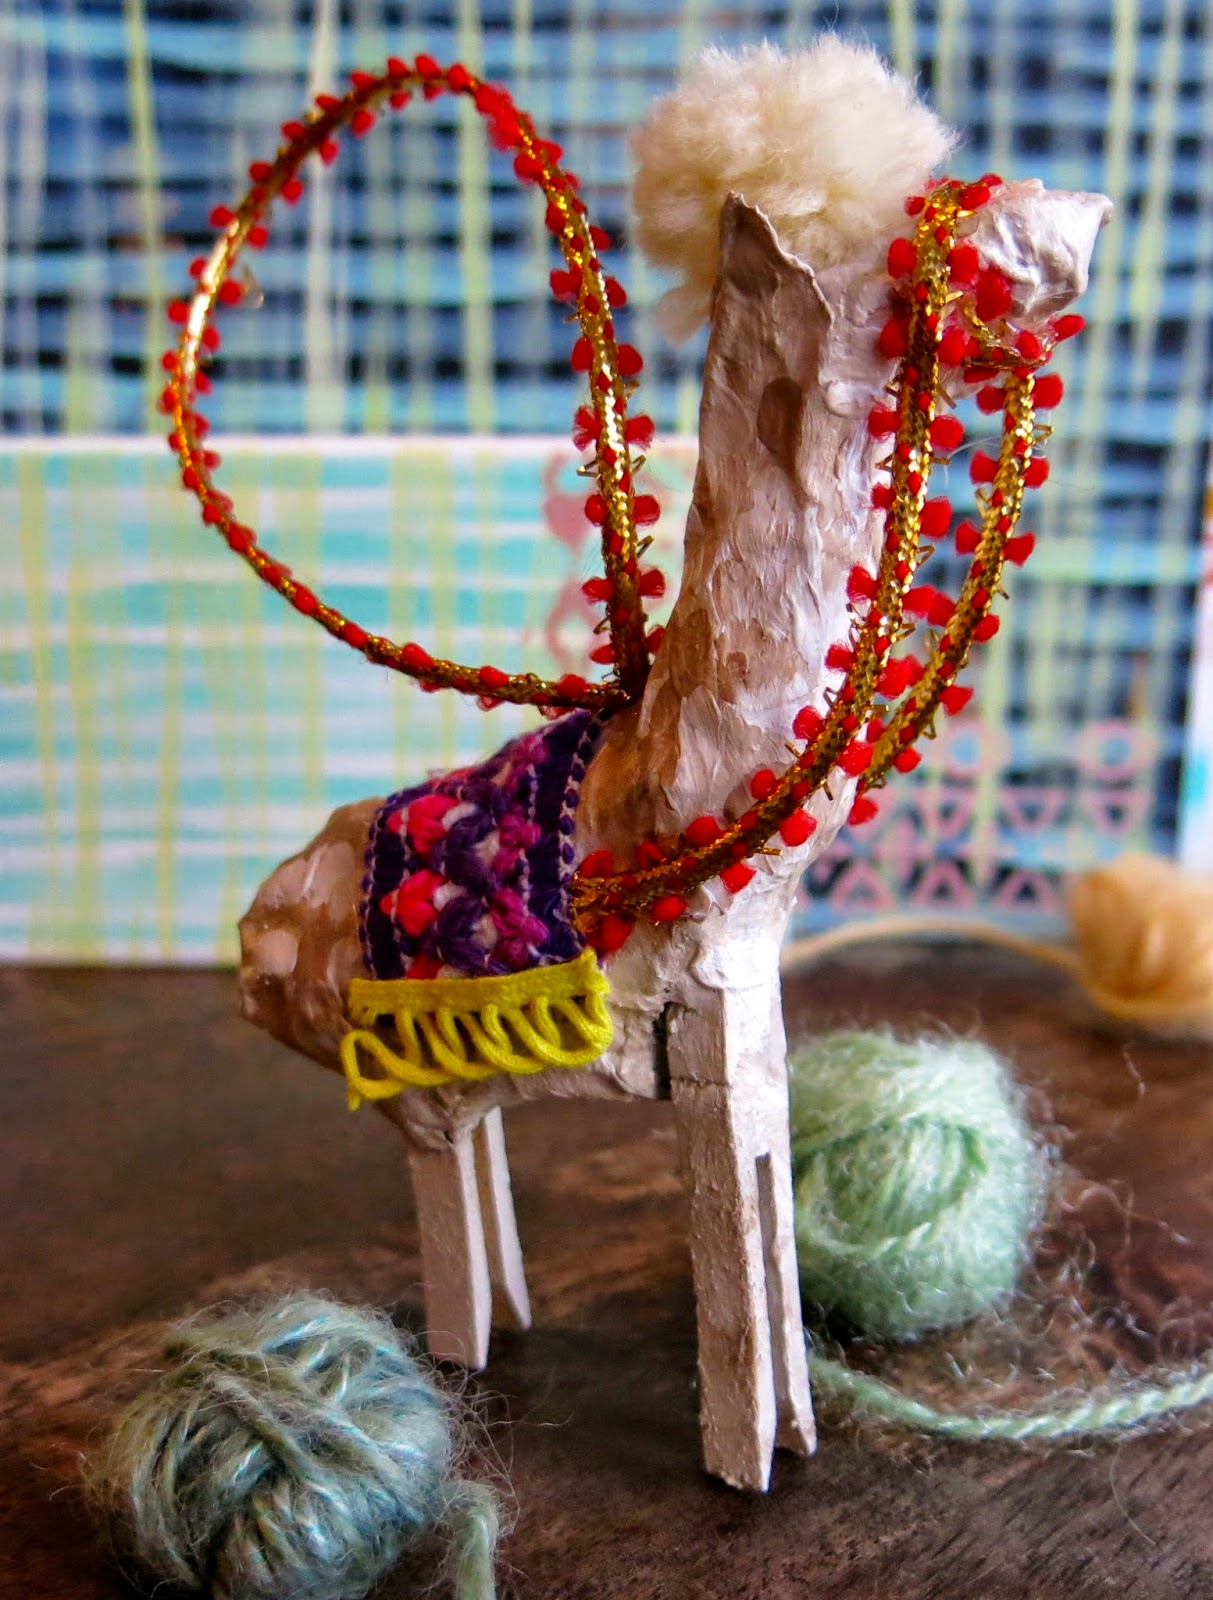
To create the body, we simply stood two clothes pins on end and crumpled a piece of foil over them for the body. Another piece was then wadded up and added for the neck and head. From there, we commenced wrapping the alpacas with newspaper. The ears were created by folding a wad of newspaper up to create a triangle shape and then attached. Because of their small size, these guys really took no time at all. And they were pretty easy once we figured out how to sculpt the body. I'm thinking my third and fourth grade kids could totally handle the scandal. 
After drying overnight, we give the little dudes a base coat of white to hide the newspaper print. From there, I just started slapping colors on the little guys whilst merrily scrolling through my alpaca pics for inspiration.
Then came the hair stylin's. When I was paper mache-ing, I didn't have a clue how to go about creating the hair. However, on a trip to the craft store, I found these super awesome pom-pom-making contraptions that worked out perfectly.  
In my bottomless stash of stuff (which reminds me, I can also had crazy-crafty-hoarder to my list of illnesses), I also happened to have yarn the exact color of my lil alpaca friends. So I promptly set to creating pom-pom alpaca afros. 
Also in my stash were some ethnic ribbons for the "blankets" to drape over the backs. These were hot glued into place.
Sparkly ribbony stuff was added for the hanger and viola! All ready for the yet-to-be-dragged-outta-the-closet Christmas tree!
 At some point during all this alpaca-madness, I got the crazy notion to paint some stationary. Because, you know, why not?
 I'm thinking that if I can fight off the urge to keep them myself, I just might gift these sets for Christmas. 
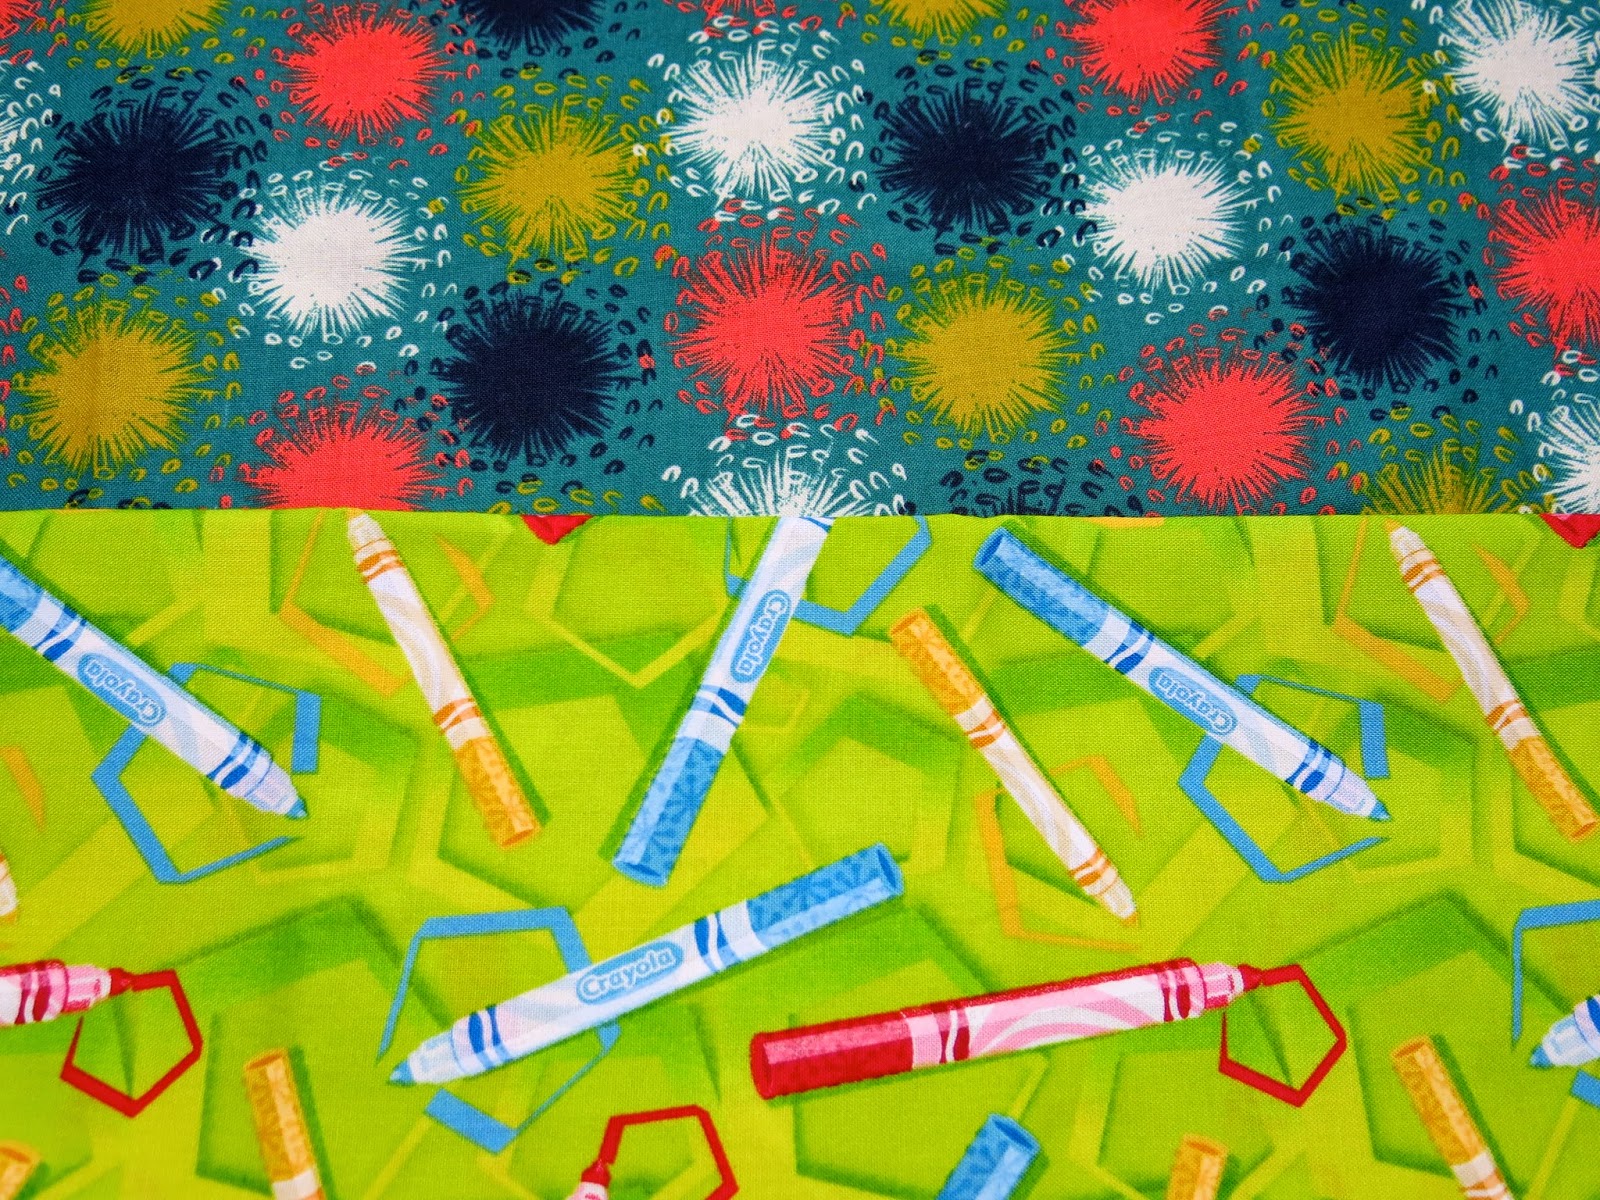
 I went about making them factory style on the dining room table (you know, because the kitchen table was full of papier mache and alpacas. As it should be). I started by just dry brushing some stripes...
 And some more stripes before stenciling. I found this super groovy ethnicy stencil at Michael's and bought it even before I had a plan. And I'm so glad I did because I loves it so.
After the background dried a bit, I sketched in some alpaca silhouettes in paint. Half the time they ended up looking like giraffes, llamas, deer or some creature from the Black Lagoon but I was determined to just keep painting and make 'em work. 
Once dry, I thickly painted stripes, dots and patterns on the back of the alpaca to mimic a blanket. I also added a lil line around the alpacas so they wouldn't appear so flat. 
And there you have it! A Pack-a Attack-Alpacas! I so loved creating both the cards and the ornaments. 

So, I gotta know, did you craft over Thanksgiving break? I'd love to know what you created. If you'd be so kind, share what you made in the comments and, if you have a blog where you featured your creation, please be sure to add a link below. Thanks, y'all!
 photo signature_zpsd10b3273.png
Read more »

Sunday, September 28, 2014

What the Art Teacher Wore #116 and an Art Project Update

Oh, Flowery Day!: I've already started the long-drawn out process of packing up my summer duds and replacing 'em with fall frocks (which I'll do all over again in two months when I pack up the fall clothing and bust out the winter stuff. The fun of being a clothing hoarder never ends. Sigh). Howevers, since we are learning about colorful Latin America, I wanted to dress the part one more week before saying adios to all my colorful clothes. dress and belt: thrifted; jacket: Lucky Brand; sandals: Frye; big fat hair flower: DIY
And another photo because I just wanted you to see the back of this groovy jacket. I can't take credit for it but it's long inspired me to do the same to some snooze-fest sweaters in my closet. 

Well, hello there, kids! I dunno about you but these past coupla weeks have seemed to swallow me whole. By the time I get home from work, make some feeble attempt at cooking dinner (by the way, am I the only one that will occasionally [and by "occasionally", I mean once a week] have Pop Corn/Ice Cream dinners?) and kinda clean, up it's practically bedtime. Which is driving me crazy because my DIY mountain is piling up. My sewing room currently looks like a studio for a dozen different nut-job artsy types who lack direction and have seriously low standards of cleanliness. Which is pretty much how it always looks, dunno why I'm acting like that's anything new. 

Aside from all that slack-tasticness, I gotta tell ya that my email inbox has been filling up with some super fantastic Costume Contest entries! Are y'all planning on dressing up as an artist or artwork? If so, don't forget to send your photos my way (cassieart75@gmail.com) to enter to win a feature here as well as spot in SchoolArts magazine! Looking forward to see your costume!
In other news, I'll be speaking at Bowling Green State University Monday, October 6th! I'm excited to share with y'all how I use my (questionable) fashion sense as an inspiration for teaching. At least I think that's what I'll be sharing. Regardless, I'd love to see and meet you there!

All that aside, I thought I'd share with you the start of some Latin American-inspired work that my students began this week. Last week, you saw our inspiration and now here's a sneak peak at our works-in-progress. What in the world are your kids doing in the art room this week? 
In first grade-ville, we're working on our Amate-inspired drawings of floral and fauna. After learning about Mexico, Amate paper and macaws, we were introduced to a lil Spanish by this guy:

That's right, I totes upped my geeky art teacher game and used this giant macaw puppet to teach the kids Spanish as well as the primary colors (thanks, Folkmanis, for that wise choice of feathers!). I picked up this guy from amazon and the kids loved him. They were so excited to draw their own macaws after Manuel (his name) made his appearance.
Warm/Cool Days of Fall: I never know how to dress when it comes to fall. Cool in the mornings, warm by noon, this weather is as moody as me. dress: thrifted; scarf: Urban Outfitters; belt: Anthro 
My second grade artists are working on collage landscapes with the arpilleras of Chile in mind. We worked for several days creating painted papers (inspired by one of my fave blogs, Painted Paper! Thanks, Laura!). Now that our land is complete, it's time to add some fun details. I'll keep you posted on these beauties.
Florals and Frida: Did anyone else scoop up those Frida shirts that Forever 21 was selling? Did you know they have a "Artist Series"? They've featured the artwork of Keith Haring and Jean-Michel Basquiat which is awesome. What's not so awesome is that it's usually crop tops and tube tops. Not exactly teacher attire. But I suppose they aren't expecting teachers to shop at a place called "Forever 21", now are they? Frida top: Forever 21; skirt and shoes: thrifted
My third grade is getting ready to embark on one of my fave projects: Tree Weaving. This week they created their backgrounds. We learned how to mix three different values to create space in our landscape. The kids were allowed to use whatever colors they wanted for their paintings which meant some created deserts, fields or beaches. I can't wait to see how their woven tree looks in the foreground. 
Bird Brained Friday: Since my first graders were drawing birds, I thought a bird-themed dress would be appropriate. Not that it could compete with that bird puppet, lemme tell you. They were all, "cool dress, Stephens, now BRING OUT THE PUPPET!" Kids these days, I tell ya. sweater and dress: thrifted
Lastly, we have my fourth graders Metepec suns. These kids used the same method that my third grade students did to create a three-dimensional face. Several kids are creating a sun/moon face (those are the unfinished ones). I borrowed heavily Denise Logan's book Dynamic Art Projects (great book, y'all. Check it.) but I'm planning on having the kids do a little something different for the rays of the sun. For that, you'll have to stay tuned. Until next time!

 photo signature_zpsd10b3273.png

Read more »

Sunday, August 10, 2014

What the Art Teacher Wore #109 and Welcome Back, Crazy!

Monday, Monday: Since I was painting my windows with a Mexican market theme, I thought I'd wear a colorful outfit for inspiration. Unfortunately that rogue tube of cerulean I mention in my last post managed to douse my legs, necklace and hair. Good think I was wearing my big ole plastic apron or the rest of me woulda been Smurf-a-fied as well. top: Banana Republic, garage sale; skirt: Anthropologie, found at Buffalo Exchange; sandals: Anthropologie, gift from a buddy
Welcome Back, y'all! 

If you're like me, a crazy art teacher, you just might be heading back to school this week or in the very near future. What better way to be welcomed then by my fave after-school rerun show to watch as a kid: Welcome Back, Kotter. Even though my students have been back since Wednesday, they've not come to art yet. Oh no, that starts tomorrow. Which explains why I'm still in my pj's working on lesson plans at 1pm on a Sunday. Ahem.

Oh, before I forget...Arsty Book Club friends! So as not to overload this here blog post, I thought I'd chat about this past week's readings of Teach like a Pirate to my In the Art Room post this week. It totes ties in because it's inspired just what will be going down in there this week. So read up and we'll chat soonish. 

Now, let's chat about the Apron Sew-Along (could we possibly have more going on here? Me thinks not)! I got my fabric orders in this week and I thought I'd share with you what I decided to stitch into an apron. I also couldn't help myself: I bought a buncha other prints to eventually be stitched into dresses or some MC Hammer pants or culottes. So stay tuned! 

Okay, so here's what I got...
Really? Could one person be more excited about cat fabric? I don't think so.

Now, while we're still on the topic of our Apron Sew Along, please remember to prepare your fabric for stitching by washing your fabric first. The reason being is that this will remove all the sizing from your fabric (have you noticed that it feels a lil stiff? That's the sizing. It needs to be washed out before you sew). I use a delicate and cold setting on my machine. I dry as normal. You should probably wash separately (um, I never do but I'm totes lazy) just so the colors won't bleed onto the other fabrics. 

Okay, so here's a close up of what Ima be stitching with...
I know, riiiiight?! Cray-zay. But they both make me so extremely happy that I just couldn't not get them. I also think that the busy pattern will do a bang up job hiding stains. We'll see about that. Now I've gotta pick out accent fabrics (for the pocket, neck thingie and ties). For that I think I'll dip into my own stash. I'll keep ya posted. 
Totes Tuesday: I finished off my windows on this day. My super sweet custodian popped in to tell me how much he liked them...but then asked, "Don't you usually paint both sets of windows?" I told him I was just too worn out. He took a step back, scratched his chin and said, "Hm...I think I like last year's windows better." Gee, thanks! top: vintage, thrifted; skirt: old, Anthropologie; sandals: old, Target
Oh my gawd, my inner preteen just died of excitement. I cannot wait to stitch something insane with these sweet prints. I love how the framed cat at the top in the middle looks just like our Asha. Fat and furry, just how we like 'em.
Welcome, Wednesday! It was the kids very first day. It was a half day which was weird because 1. I didn't have kids in my room and 2. I was just as tired as if it were a full day and I did have kids in my room. What's up with that?! top: Forever 21; skirt: etsy; shoes with artsy shoe clips: deets here;  necklace: Paper Source
I kinda wanna stitch this into something right freaking now. I have so many sewing projects in the works that it is absolutely nuts. I have no business buying any more fabric...and yet...sigh. 
No Running with Scissors, You'll Lose an Eye! Thursday: At least that's what I told the kids when they asked, "why are you wearing a shirt with eyes and a skirt with scissors?" What I really wanted to tell 'em was "I've got my eye on you and if you misbehave you might get cut" but I just didn't think that was appropriate. Not with other teachers around anyway. eyeball shirt: Urban Outfitters; scissor skirt: Modcloth, super duper sale
Speaking of scissors, I love this sweet print on the left. I don't know if I love it with the pin fabric...but the theme is there, right? I'm still dreaming up what I want my kids to stitch up this year. I'd love any hand sewing/machine sewing project ideas if y'all have got any!
Finally Friday, I mean, Really!: I actually thought it was Friday all week long. That is not a good way to live your life as it only ends in disappointment. dress: DIY by me; belt and necklace: Anthropologie; shoes: Frye, TJMaxx
Speaking of having the kids sew, look at this! I made a lil mention of needing embroidery hoops for my 4th grade artists and a friend shipped a big ole box of these beauties my way! The kids are going to Freak the Funk Out. Yay! So much stitchin' goodness.


I do hope you guys have a super fun week! You especially, teacher friends! Just remember, if all else fails, just act like a crazy person and the kids will love ya. Welcome back!


Read more »