Showing posts with label papier mache projects. Show all posts

Thursday, May 19, 2016

In the Art Room: Crayon and Pencil Sculptures

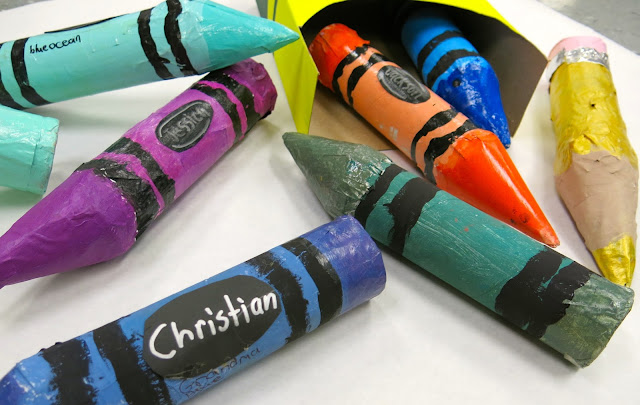
Because I'm a clay-loving art teacher with clay-loving students, I don't often venture down Papier Mache Avenue for sculpture projects. However, I knew I wanted my students to create giant-size art supplies for their fourth grade legacy. The only problem was, I knew they'd love their pencils and crayons so much that they'd wanna take it home. So my compromise was that they make one big one for the school (details on that in the near future) and one for themselves!
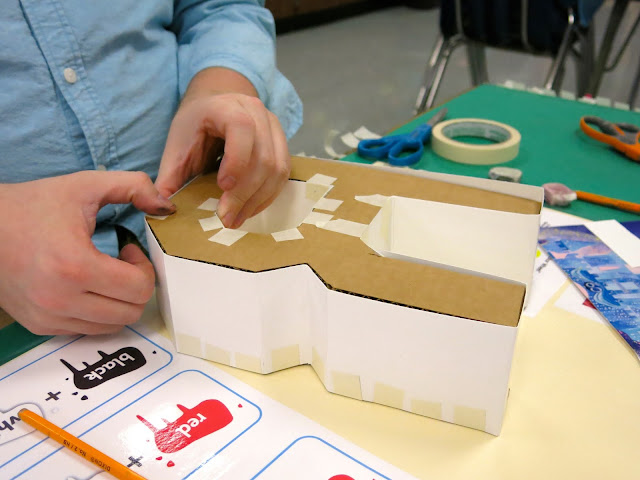
And I'm totally smitten with these! This project, like many of my others, morphed into a couple different projects from a group crayon mural to a sweet little photo op with some writing fun. In this clip, I walk you thru the construction of the armature for these bad boys. 
Because so many of us have different recipes and methods for papier mache, I left that out of the video. However, I can give y'all the dirty deets here. We used Art Paste and newspaper (that I rapidly cut on my paper cutter) to cover the taped bottom to about 2" up the bottom of the pencil. We completely covered the tag board at the top to about 2" down. Covering the tube was not necessary unless the kids just wanted to do it. For me, it was just important that they get the papier mache portion complete in one hour class period. 
The following class, we primed the sculptures which took all of 7 minutes. Knowing that, I created the Crayon Collaborative lesson (video below). This proved to be a great tie-in and just so much fun!
 The following class, the painting began. Students had to decide if they were creating a pencil, a crayon or a colored pencil. Once the colors were mixed, the kids set to painting. Early finishers resumed work on their collaboratives.
Finally, we added the sweet little details. The metal tooling for the pencil band and the labels for the crayons. Modpodge was also added to seal and protect (and add a little shine!). Again, every time we had a spare moment, we went back to our other project. It made for a chaotic and messy class time but, eh, that's what art is all about, right?
The kids came up with the most creative names for their crayons, it cracked me up!
Like, whuh? Grannie really digs a certain blue, perhaps? Maybe it's the color of her hair? I need to find out!
Here's a peak at the collaboratives they worked on as well. 
We used chalk...but I'm sure oil pastels would work really well for this process. And less dusty!
 By the way, not all chalk is created equal. I'm a big fan of Koss brand chalk. It's not cheap but that's because it's good. 
Save that pastel-y chalk for the sidewalk, y'all. 
 Can you guess which gender created this set of crayons? 
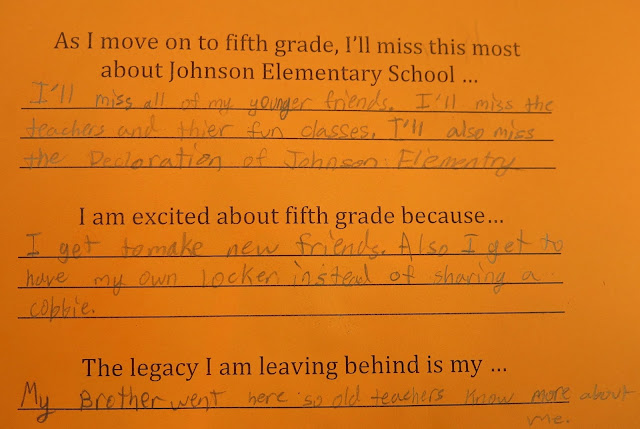
 It's my sweet fourth graders last year at my school. I've taught these children art for five years! I'm going to miss them and I know they are going to miss our school. So I created a little cloudy background, got a big lined piece of paper and had them pandomining writing their thoughts on the past and future. 
These images, along with their writing, were on display in the halls of the art show. It was hung next to their artwork for the year. Meanwhile, their sculptures were featured in the art room. 
 Of course, I had to read what they wrote! I do not know what "crazyness" this kid speaks of. 
 My younger students are fascinated with these giant art supplies and keep asking if they will be making them. I don't often repeat lessons out of sheer boredom...so I told 'em I wasn't making any promises but I did explain the process to them. 
 That last line, geesh. So sweet. 
 Here's a peak at one of the larger pencils that were created. These are staying behind with the school. Some of them are HUGE!
Let's hope brother has a good reputation! Until next time, y'all! 
 photo signature_zpsd10b3273.png
Read more »

Thursday, January 7, 2016

In the Art Room: 3-D Letters!

Hey, y'all! I'm back, as promised, with the other awesome project I did during my fab-o art teacherin' PD this week! In case you missed the "I Am" books post, let your fingers do the clicking and check it here. In the afternoon, the leader of our PD, Daryle Grenead, taught us how to make these super fun 3-D letters! 
Full disclosure: a good buddy took Daryle's class a while back and gifted me her half-finished ART sign (thanks, Deb!). So I got to skip several steps and fly straight to the papier-mâché and painting. You know, the fun stuff. But don't you worry, I took several photos of my friend Jennifer's hands while she worked away on creating her letter so I could share them here with y'all. She's a glorious hand model, that Jennifer. You'll see. But first! 
Check out the inspiration that Daryle created and shared with us! He recommended doing this project with middle schoolers. He also mentioned that if they do something like their name, each letter takes about one art class to tape and papier-mâché. For our time's sake, each of us did one letter (well, except for me). 
To start, Daryle recommended using stencils to help the kids cut out their initial. We simply laid the stencils over the cardboard and traced. Two will need to be cut out with box cutters, one for the front and the back. Daryle said he cut the letters out for his younger students to save on instructional time and for safely issues. If you are doing an entire word as I have, you simply lay out the letters of your word on a large sheet of cardboard. Make sure each letter is touching, tape the letters together and trace onto the cardboard. This way, when you cut it out, it is one solid piece of cardboard, not multiple pieces. 
 Once you've cut out your two letters (or your complete word, cut twice), lay a piece of heavy duty poster board beside your letter. The width of the board will determine the depth of your letter. As you lay the board beside the letter, add tick marks as each corner of the letter. This is where you will fold the poster board. 
 As my friend Jennifer's lovely hands are demonstrating. 
 Once that is complete, fold the paper along your tick marks. 
Which is easier to do if you score the board first with a dull pencil and then fold over matte board. 
 Ta-da! You can start to see the shape of the letter! 
Using masking tape, start taping the edge of the letter to the poster board. You'll need to use a couple pieces of poster board to complete the letter so be ready. 
 And have tape ready. 
While Jen was taping away, I started snapping pics of my buddy David working on his R. Notice that when he was done with one side, he fitted the other cut out into place and started taping that down. Also, don't forget to create that super fun inside piece! 
And bring on the snotty papier-mâché! Layer the whole stinkin' thing. Now you see it would take the kids multiple days to do just a letter. A great art club/after school/summer camp kind of project, says moi. 
 I love that some folks skipped the letter idea and did things like this and symbol and we even had a dollar sign!
 Of course, you can see here, I was pretty spoiled by my friend's half finished efforts. I just had a lil work to do and let it dry over night. 
For the more advanced set, Daryle had created these amazing pieces for our TN football team. 
 Before painting, Daryle suggested painting everything with a coat of white acrylic. Then add color and seal with a clear coat. 
 I couldn't wait to get to school the next morning and finish my sign! The best part was splatter painting it. Seriously, y'all. I now know why ole Jackson had a thing for paint slinging, it was a blast!
And now it hangs proudly at my Art Supply Store. The kids loved seeing it today! 
 photo signature_zpsd10b3273.png
Read more »