Showing posts with label weaving a pouch. Show all posts

Tuesday, June 19, 2012

In the Art Room: Weaving, Part 2

Woven pouch created by one of my fantastic fourth graders.
Hello, crafty kids and grown-ups alike! Today I am going to show you how to add a flap to your woven pouch. If you've no idea what I'm talking about, you can quickly get caught up to speed by reading Weaving, Part 1. I do hope you'll join in on this weaving adventure. Ready to start? Okay, let's weave a flap!
You know you are ready to weave the flap when your weaving is at your desired height. I tell the kids that their weaving must be between 4-7", no taller, no smaller. Once there, you might want to trim those pesky pieces of yarn you tied together so your weaving looks a little less, er, hairy. The above is my trimmed-up, desired-height pouch.

For flap weaving, you will only be weaving on one side of your loom, not all the way around as you have been. Your first step will be to pick a side to weave your flap on. It does not matter which.
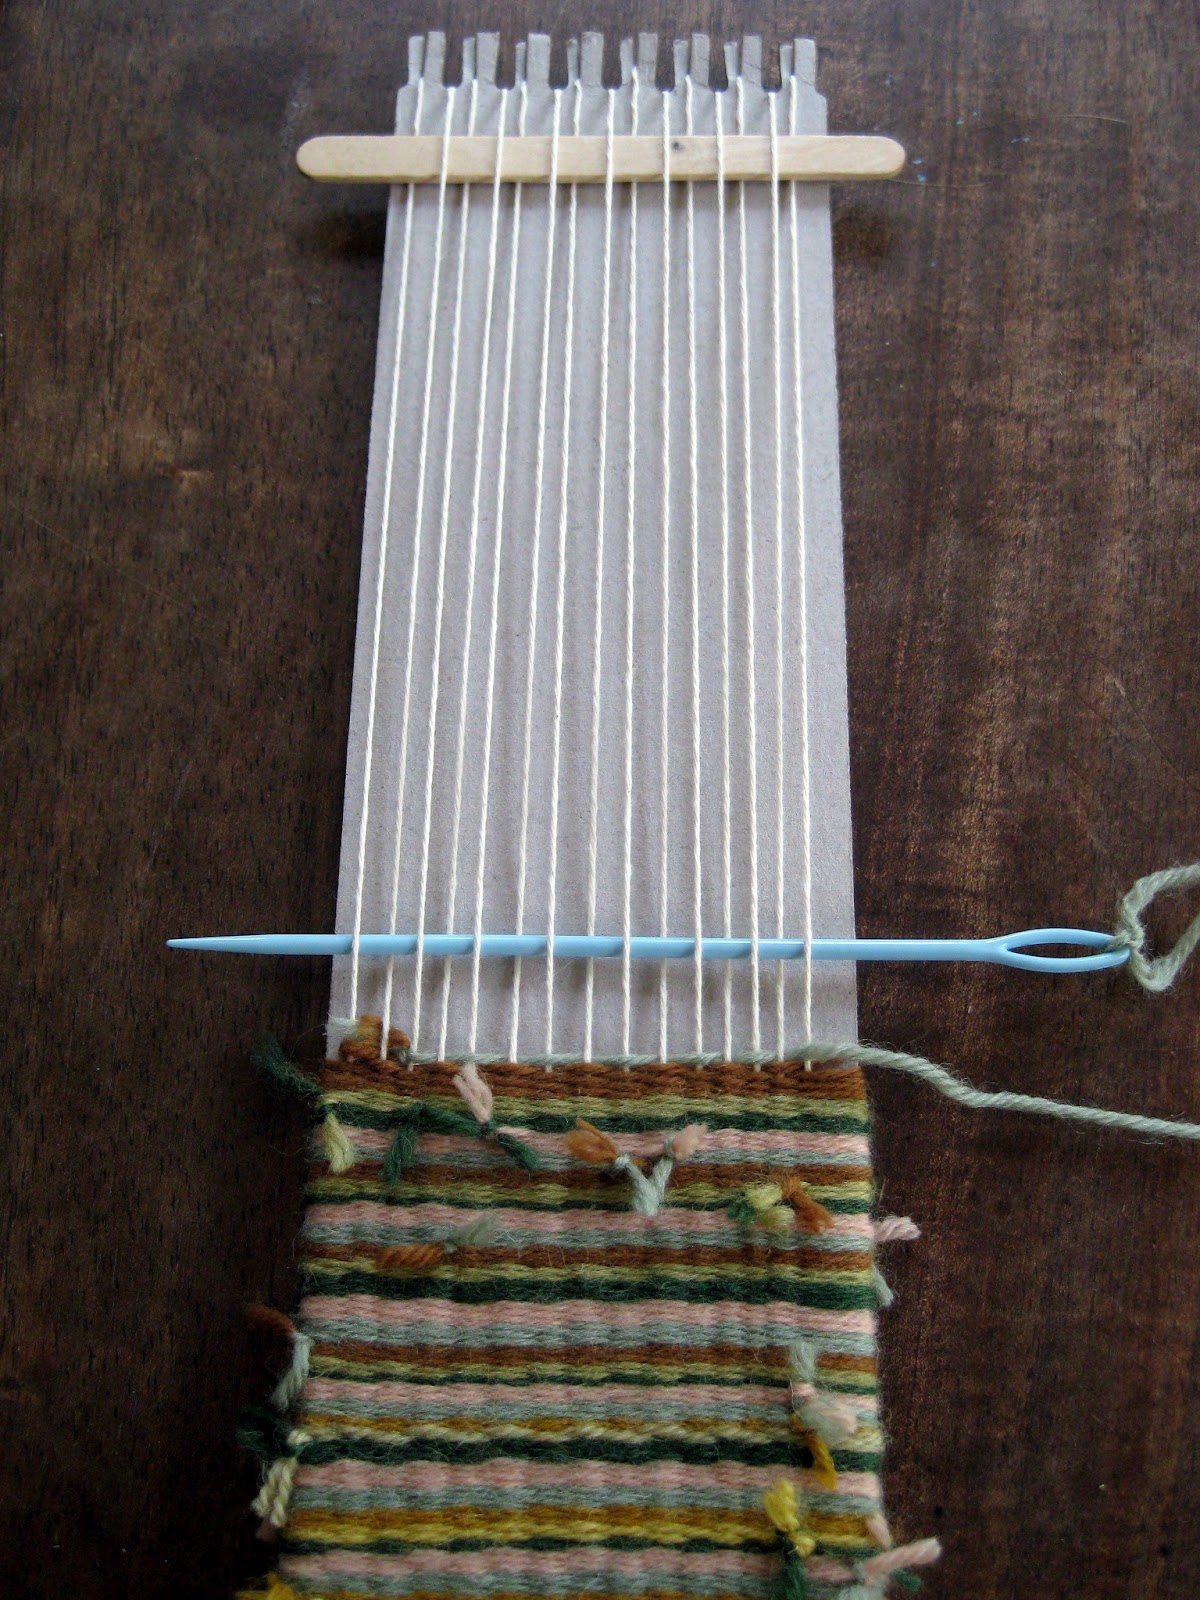
For pouch weaving, you will need to eat a delicious popsicle, stat. Preferably something chocolate. Rinse well. Weave your popsicle stick into your weaving, making certain to weave the opposite of the previous string. See above.
Now rotate your stick so that it lifts up every other string. Simply slide your needle into this string tunnel. This is where the kids Freak Out:
"What?!"
"Why haven't we been doing this the whole time?!"
"That is sooooo cool!"
Pull your needle all the way through so there is no excess yarn just like above.
Flip the stick down and use it to pack the weaving down. This means no more fork to pack the weaving. The kids like to refer to it as the "weaving guillotine". Where do they get this stuff?
Slide your guillotine, er stick, to the top of the weaving. Do not remove the stick. If you already did (tried to jump ahead, didn't you? Humph!) just reweave the stick back into your weaving. And don't do that again.
Remember, we are only weaving on one side of the loom. This means our needle will be going back and forth across our loom instead of around the loom. So, for this next step, you will not be turning your loom over but making a u-turn and weaving back. Notice I am not using the stick (I'll explain why in a moment). Be certain to weave in a pattern that is the opposite of the previous string.
Pull yarn all the way through at an arch. This will prevent some terrible thing called Draw In. More on that shortly. Slide your weaving stick down and pack the yarn.
Okay, if you smarties haven't figured it out, here is why you cannot use your stick when you are weaving in the opposite direction: you will unravel your weaving. This is why you can only use the stick when you are weaving in one direction. Sometimes the kids will draw an arrow on the stick so they know when to use the stick.


Ewww, this is bad! This is that dreaded thing called Draw In. This happens when the weaver is pulling too tightly. The year before my fourth graders tackle this weaving, we create a tapestry weaving. That's fancy talk for weaving on one side of the loom. This gives them lots of practice at avoiding and fixing draw in. You can see those weavings here.

The best way to avoid draw in: don't draw in. Stop pulling so hard when you are weaving back and fourth. Pull the yarn at an arch, like I showed earlier. The best way to fix draw in: remove it. That's right, unweave the unwanted. This might leave the end warp strings on the left and right loose making it difficult to avoid draw in again. If you notice that, turn your weaving over, pull up the slack on those strings and tape them taunt. Flip your weaving back to the flap side and resume flap weaving. Fleaving. Wlapping. Call it what you like.
And viola! Finished flap! I tell the kids their flap should be around 2" in height.
A sunglasses holder by a fourth grader.
Feel pretty good? Easy enough, right? Feel free to ask questions if you've got 'em. Next week I will show you how to remove your weaving and add a button. From there, we'll weave a cord which is the kid-crowd favorite. Happy weaving!
Read more »

Friday, June 15, 2012

In the Art Room: Weaving, Part 1

Woven pouches created by fourth grade artists. You can see more of their masterpieces at our school-wide art show here and here.

Since I shared with you photos from our art show, I've had several questions about the woven pouches that were featured. Because this project is so easy and fun, I thought I'd share it now that the kids are out of school and getting a little...well...restless. It's the perfect summer what-can-we-do-now-? craft.

In the art room, this project has become a rite of passage for my fourth grade students but can easily be created by kids as young as second grade.  Because this craft involves multiple steps, I've divided it up into four posts: Weaving Part 1: Getting Started; Part 2: Weaving the Flap; Part 3: Removing the Weaving and Finishing; Part 4: Weaving a Cord

Please, fellow art teachers and parents, leave comments below on how you teach this lesson differently. And, of course, questions if you got 'em. Have fun!
 Supplies: 
  • Scissors
  • Tape
  • a loom. I purchase ours through Sax but you can create your own with thick cardboard.
  • Thin cotton string. This was bought for a couple bucks at Walmart but in a pinch, you could use yarn.
  • Big-eyed needles. Again, Walmart would carry these in their craft department.
 Preparing your loom:

These looms that I purchase through Sax have notches in them that are too far apart. When you weave with them like this, it creates a pouch that is a little too loosely woven, in my opinion. So I have the kids cut the part that sticks up (we call them "teeth") in half. It's a struggle because the cardboard is thick and there is some moaning and groaning but they can do it. 

If you are creating your own loom from cardboard, you will want to space your notches about 1/4" apart. I'm not really into exact measurements, so I say just eyeball it. However, make sure that you have the same number of notches on the top as the bottom.
 Warping your loom:

Warping your loom is the process in which you are putting the string on your loom that you will weave over and under. To do this, start at one corner of your loom and tape your warping string into place. I have the kids put the tape at the bottom of the notches. This will prevent the kids from accidentally weaving over or under this small string.
Now begin wrapping the warp string all the way around the loom. For example, from the taped end, go down to the bottom cut notch, wrap string around the back and up to the top notch and then go to the bottom again. You should have strings on both sides of your loom, making certain not to skip any of the pre-cut or notches-you-cut.

While you are warping, keep the string attached to the cone. I do not allow the kids to cut the string from the cone unless I have checked their loom. If they have skipped a notch, this allows them to go back and fix it without wasting any warping string.
 Once you've checked the loom and are certain no notches were skipped, cut the string and tape it down. Again, tape as close to the notches as possible. Use your creepy bending finger (shown above) to scoot those other warp stings over to tape the string underneath.
 Weaving:

The process of weaving is that of going over and under the warp strings in an A-B pattern. The string you weave with is called the weft. No long needle like this one? Tape your string to the end of a pencil or skewer stick.
 Pull yarn through until you have left behind a 1" tail. Turn the loom over and weave over and under on the back. Once finished with that side, turn loom over to the original side.
 Now, this time, weave the opposite of the previous string. For example, in the photo above, I wove over and under because the string underneath was under and over.
 You know you are weaving correctly when you see something like this. Looks a little like the netting of a tennis racket.
 But it's too loose. Do you see all of those white warp strings through your weaving? Well, you don't want to. Use a fork to pack down your weaving until those warp strings disappear and all you see are the weft strings.
 Adding a new weft: 

Okay, this one is debatable. Technically, you are not to tie two stings together but overlap the strings to add another. Or something. But at this point, if I throw one more piece of info at the kids, they are likely to have an aneurysm. So, we simply double knot tie a new string to the old, snip the "tails" and keep on weaving.
 Incorrect weaving: 

How do you know if you are weaving incorrectly? Well, you'll see a lot of vertical warp strings, like you see in the yellow portion of my weaving above. This happens when you are not weaving the opposite of the previous string, but weaving the same over and over again. If you see this, you have to take it out and redo.
 Weaving away...

I tell the kids that their weaving must be somewhere in between 4-7" tall. This allows room at the top of the loom for weaving the flap and tying off the weaving. This should keep those kiddos all tied up (heehee, tempting, right?) until next week. I plan to take mine on an upcoming trip to keep me occupied.

Remember, you are weaving on both sides of the loom, front and back. Ya hear?
 So stay tuned!

Next week, we'll learn how to weave that flap. Again, feel free to leave any questions or comments and happy weaving!

Read more »