Showing posts sorted by relevance for query painted paper. Sort by date Show all posts

Tuesday, November 27, 2012

In the Art Room: Hot Air Balloons Over Paris

After weeks of working on this collage landscape, this little first grade dude is ready to take his hot air balloon for a ride. Over Paris, France, no less.
Hey there, artsy folk! Look who's launched their hot air balloons -- my fantastic first grade artists! This project has been so much fun but the icing on the cake were the giggles and squeals of laughter the kids let out when they finally saw their little likeness in the balloon. It was a lengthy project (as all of mine are, sigh) but well worth the wait. 
A hallway of hot air.
We began this project right after our world-mural self-portrait and our passport/suitcase project. I like to use this landscape collage as an introduction at the beginning of the year because so much can be packed into this lesson (painting, color mixing, texture, collage, landscape, etc). I used a similar collage landscape lesson with my second grade students for the Parisian Landscape Collage. And I also used this project last year for an Egyptian Landscape. It's one of those tried and true projects that I absolutely love.
I love how this artist positioned his Eiffel Tower in such a way that he seems to be gazing at it.
Now, I've got my students for half an hour. By the time I'm done jibber-jabbering and they are settled down to work, they have around 15 minutes of work time. That's with 5 minutes at the end for clean up and The Smartest Artist if we are really lucky. So my lessons are in baby bites. Here's how I broke down the creating part of the lesson. After looking at many a sunset and other artists works, here's what we did:

  • Day 1: Using a large vertical paper folded in half, students learn how to paint a tint of yellow (that's light yellow created with white and yellow) and a tint of orange (learning to mix the orange themselves.)
  • Day 2: Create a tint of magenta and mix purple.
  • Day 3: We chatted about clouds. If they are near the horizon, they are oh-so-small. Closer to the top of the paper, they increase in size. Many clouds have a flat bottom (which always gets a giggle) and a fluffy top. Texture is our word of the day.
  • Day 4: Using a separate piece of paper that is about a third the size of our large sheet, we create a green tint and give it a texture.
  • Day 5: Same as above, this time with blue paint.
  • Day 6: Collage Time! We looked at a map of Paris and found that there is the River Seine runs right through it. So we glued our blue textured paper to the bottom. Then we tore our green papers in half. The kids then separated the green papers depending on how wide they wanted their rivers to be. Once decided, they glued the land down.
Once that was complete, we put our landscapes away for a bit to learn about hot air balloons. This book was a wonderful resource as it names and explains each part of the balloon.
When placing our hot air balloons on our paper, we chatted about drifting outside of the rectangle format of our paper. This little one looks like she's floating away.
After reading about the balloons, we created out own:
  • Day 7: Using either warm or cold color pieces of tissue paper, the kids used watered down Modge-Podge to cover a piece of paper that they had drawn a balloon shape on.
  • Day 8: They cut out their balloons and used a sharpie to add lines that would help their balloon look more three-dimensional. 
  • Day 9: Photography Day! While the kids painted their hot air balloon baskets (which were toilet paper tubes cut in half) with vertical and horizontal lines, I took their photos. They stood in front of a large piece of blue butcher paper and put their hands over the back of a chair that had brown paper on it. I snapped two shots, one of the looking up and the other, looking down. We chatted about what they might see and that helped them become animated for their photos.
Sometimes we have early finishers. They usually meet on the floor to "play teacher" (where one student sits in my chair and quizzes the other students on a basket of three-dimensional shapes I have) or we read a book. This book was perfect. We found out that the first hot air balloon was launched in France! And that the first passengers were a rooster, a lamb and a duck.
  • Day 10: We glued down our hot air balloon, our basket and carefully cut out our photo.
  • Day 11: We chatted some more about the Eiffel Tower and it's history. We learned out to cut out a symmetrical tower and decorate it using the same lines that Gustave Eiffel used in his tower. I was determined that this would be our last day, so I may or may not have been late getting the kids to get those towers decorated and glued down.
Don't you just LOVE this?! I know I do! It was created by one of my practicum students to help support my lesson. The kids adore it, especially the fact that Jes made an appearance.
Now, while I do love these, I am secretly dying for the kids to continue to add to the landscape. But did you see how many DAYS this took? Like, a million! So, I thought I'd ask your opinion (I have in the past and you guys always come through for me, thanks!)...what do you think? Collage some more or leave it be?

Regardless, I know that these artists couldn't be more pleased with their masterpieces. Thanks for reading!


Wednesday, June 4, 2014

In the Art Room: The Art Show, Part 2

 It's kinda funny to think that just a couple weeks ago, my school's hallways looked like this. Of course, now that school's out, the halls resemble some sort of institution (which, let's be honest, those last couple of weeks, we coulda all be institutionalized. The kids, the teachers, shoot even the class pets, were all a wee bit bonkers.) As I mentioned in my last art show post, all artwork that all students have created all year is hung for this show which is like hundreds of masterpieces. The World's Most Amazing Parental Volunteers hang everie-thang, can you believe that? I'm a lucky girl, this I know.

In my last art show post, I shared with ya'll the work of the wee ones in kindergarten through 2nd grade. I've yet to share with you the clay projects that were also displayed at the art show because I'm slowly putting together the how-to posts on those babies. When that's done, I'll wrap up this art show series. Oh! And if you wanna see some art shows of the past, you can see last year's show here and here.

And now, without further jibber-jabber, I present to you the masterpieces of 3rd and 4th grade with loads of linky-loos to lessons...
 For the art show, the parent volunteers hang the work outside the classroom. I don't give any directions on how to hang...just cross your fingers and use enough sticky tack to make it stay. I love how each volunteer hangs the work differently.
 In third grade, we started out the year learning about Norway and Vikings. My amazing student teacher Rebecca had just returned from a trip to Norway and this was a lesson created by her (and influenced by Painted Paper!). I wrote up a blog post all about Rebecca's adventures and this lesson here.
 My goal for this past school year was to create a mural with each grade level. I only partially achieved that goal (my younger kiddos did a collaborative mural to be shared in an upcoming post). My 3rd grade created a Magritte-inspired mural that proved to be the art project that just kept on giving. You can see examples of that in the work at the bottom of this photo.
 Here's one part of the Magritte project with tissue paper collaged landscape backgrounds.

This enormous beast of a mural hangs right outside of my art room. I think it's there to stay a while, I love seeing it when I walk out of my art room. The details of creating this mural are here.
 The paper we used to create the birds for the mural and our collage landscapes were so cool we decided to use them in yet another Magritte-y project. Final installment of Magritte series here.

 After all that Viking and Magritte-ness, I introduced the kids to the world of Asian art with a heavy dose of Ming vases and cherry blossom trees.
 This was a super fun lesson that incorporated so many thing. A review of watercolor techniques, symmetrical vase design, drawing a narrative, shading/shadow making and new ink painting methods. Full lesson here.

 
Both 3rd and 4th grade were introduced to Chinese calligraphy. We learned to grind out own ink and paint with sumi-e bamboo brushes. This was a big hit and we seriously painted tons of these characters. After a couple of classes doing that, the kids picked their fave to mount, label and frame.
 My 4th grade this year was like a dream group. We had such a good thing going, as they loved being in art as much as I did having them. Which was a bit of a problem as I was therefore always late sending them back to class. Seeing them go at the end of this school year was very hard for me, sniff. I'll miss them so much!
They kicked off the start of this school year creating this huge mural for a canned food drive. Full details here.
 I think this Viking project was one of my favorite lessons this year. I simply love all the watercolor techniques that the kids incorporated into their work. I will definitely be doing a redo of this here lesson in the future (I have a bad habit of doing a lesson only once as I get a little bored with repeats).
 Again, another lesson with many layers of stuff taught. It's like an onion, this project. Without the onion breath.
 These guys also did some Chinese calligraphy. However, theirs included a hanger with Sculptey beads on the end of a wooden dowel and a red stamp.
 Like with the wee ones, I also have these kids write an artist biography. These are slightly different though in that they are to also have friends add comments about them. I'll share more details about those bios in an upcoming post (I keep saying that, I hope I can keep up with all this "up-coming" posting!).
 When learning about Asia, we did some Suminigashi which is Japanese paper marbling. Details here.
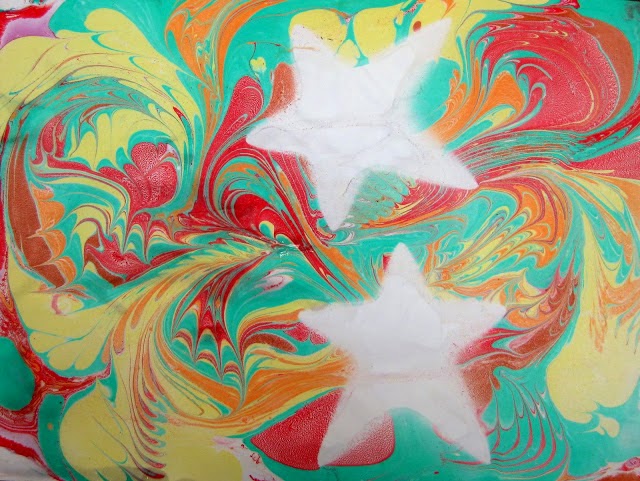
 When I ran outta paper marbling supplies mid-way through the lesson (don't you hate that?! Argh!) I did a quick switch to chalk marbling...which I kinda liked even better!
 With those stars we used in the chalk stenciling, we created some fun narrative collages.
 Near the end of the school year, we put our sumi-e painting techniques to good use with these paintings. Students could create either bamboo, cherry blossom or pine trees after practicing on newsprint.
 I've not written up a lesson on this project yet...it's on my summertime to-do.
 A favorite was adding the tissue paper leaves or flowers. They just couldn't stop adding these, loved 'em so!
 Of course, in my absence at NAEA, the kids drew these adorable Chinese pandas. When I returned, they put their watercolor painting skills to work on the background. Lesson here.
 The day before the art show, in 30 minutes, the kids created these sweet things. On the night of the art show, we also host an ice cream social. The kids painted these for the occasion and I managed to get them up the day of the show! This was seriously the easiest 30 minute lesson ever. I'll be sharing the details in an upcoming post,

And there you have it, ya'll! The 2014 Art Show! Stay tuned for the final installment of the show which will include kid clay projects. Until then!


Tuesday, February 4, 2014

In the Art Room: The Magritte Project, Three

Whatcha got here is the finale to the Mega-Magritte Project. This was seriously like the project that kept on giving. Aaaaaaand giving. Which I loved because I could tie in so much. But I do believe the 3rd grade and I are ready to move on.
Now if you are new to this blog, welcome! I've noticed a wee spike in my views thanks to The Art of Education's nomination of this here blog for Art Ed Blog of the Year (What?! I know, right? I'm just as surprised as you). If you've not checked out the blogs nominated, you should. So many of those art teachers work tirelessly on their blog. You can vote for multiple blogs so, if you feel so inclined, I'd love your vote! Okay...shameless self-promotion over.

Aaaaand, what was I saying?

Ah, yeah, if you're new, welcome, pull up a chair, introduce yourself, grab a snack, sit back and relax. But, please, try not to fall asleep. The snoring becomes a little off-putting and makes it hard for the rest of the readers to doze off.

Okay. Seriously? HOW DID I GET OFF TOPIC AGAIN?!

Magritte! I began by introducing the dude with a coupla books, visuals and, of course, a costume...

Which was probably one of the worst artist costumes to date because I couldn't see anything; my annoying loud voice echoed off the back of the apple and hurt my ears; and, to top it all off, all I could smell was my own breath. Which smelled like coffee and the Altoids I consume to mask the smell. That I now know doesn't work.
We chatted a lot about this particular piece and just exactly what the meaning of Surrealism is. We decided that it was something that looked real but couldn't possibly be real. The book Dinner at Magritte's by Michael Garland had loads of examples of that.

I decided that the 3rd grade was going to create a Mega-Magritte Mural. You can see the full lesson and finished product here. To break it down for you, the kids painted a 12" X 18" piece of paper with a tint and shade of blue. Then they used oil pastels to add stars and clouds. On the backs of their paper, they were to trace two birds, one Day and one Night. Again, head here for clear details (I'm too tired to retype it all!).

For the mural, the kids were to donate one of their birds. Their spare bird was then used in a 9" X 12" tissue paper landscape collage. That lesson can be seen here.

We chatted bunches about analogous colors for the sky and how to decide upon a color palette that would best contrast their bird.
And then we were left with these amazing negative shaped papers after we cut our birds out. I couldn't bear just recycling them. So I turned it into a literary lesson which lead to the creation of something called The Compliment Game! Here's how it worked:
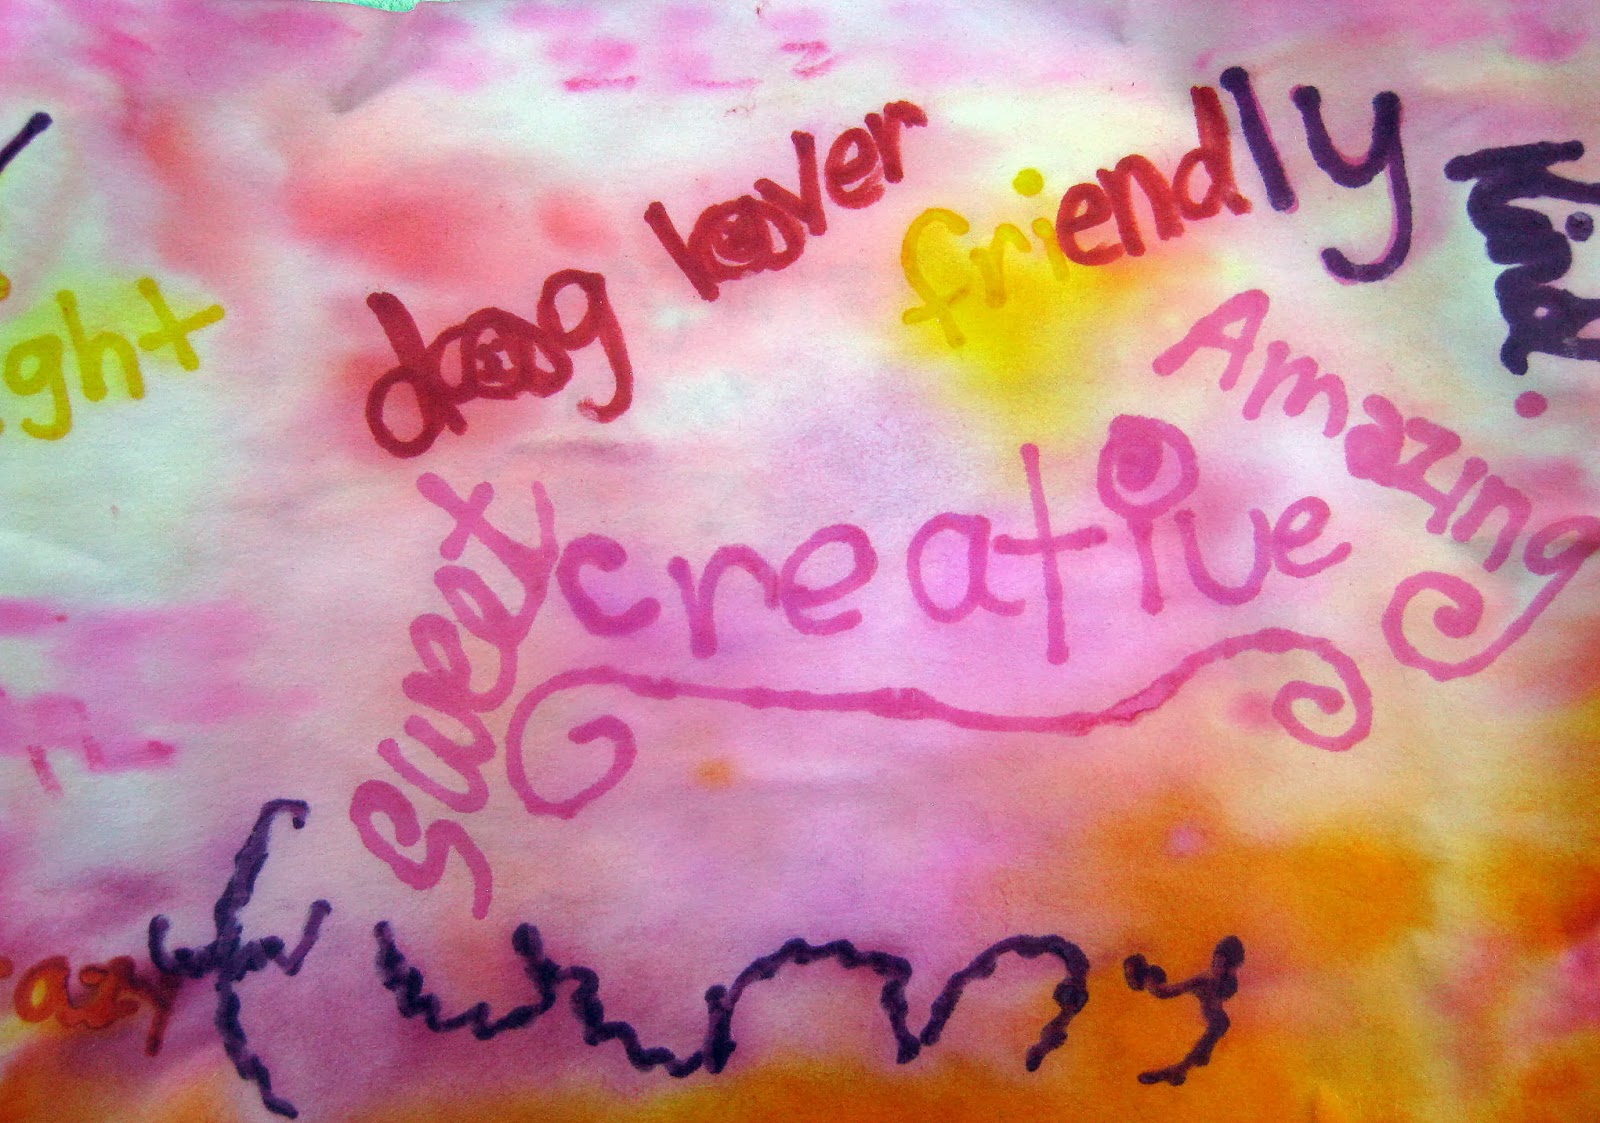
  • Each student was given a 6" X 10" piece of Rolyco's Color Diffusing paper. It has the look and feel (and does the exact same thing) as a coffee filter. The kids were to write their name and teacher code on the back. 
  • We chatted about what a compliment was. We also discussed character words. And similes. Then the kids were given one minute to fill their page with words that best described the person that they are. For this, they used warm colored water-based markers.
  • When the minute was up, they were to trade papers with their neighbors. Again, the timer was set and they were to write complimentary words that described their friend.
  • Once the timer went off, the kids swapped papers with the person across from them. They had to read the back of the paper to know who they were writing about.
  • Timer off. Swap with neighbor. One more round.
  • After the fourth and final round, the kids were given back their papers. And you should have seen them. They loved reading what their friends had written about them! It was so sweet. 
  • Then they were to chose the words that they felt best described them and make them permanent. For this, they traced the words in sharpie, still using the warm colors.
  • Lastly, the papers were placed on a styrofoam plate and painted with water. Below is the result.


Now, for the cool color paper, I tried a couple different things. We didn't play the game this time. Instead one class (the one you are seeing) wrote words that told the person they would like to become. What they dreamed they could be. Which was pretty cerebral for 'em. 

For another class, we wrote words that described what we are like on the outside since that was the opposite of the words that described our character. This seemed much easier for them. If they ran out of words, they could ask a friend. Although, you gotta be sure an emphasis compliment again as I do believe I read "stinky feet" on someone's paper. Thankfully, Senor Stinky Feet has a good sense of humor. The last paper was also traced in sharpie and painted.
For our final step, we added our wordy papers to our negative shaped birds. And, viola! We can finally close our Magritte-y Chapter. 

Until next time, kids, don't forget to go here and check out these amazing blogs and vote!