Not sure if spring has sprung where you are but, according to my allergies, it's in full swing here! You know, I never had allergies in my life until moving to Tennessee. Now I have the pleasure of a sneezy nose, watery eyes and sinus pressure like a hammer through the skull for a couple weeks on end twice a year. Good times, for sure. But I suppose the floral and fauna make it all worth is. Or something.
Anyway, I thought I'd share with you my very favorite art lessons for spring! I'm just wrapping up my spring break and trying to get my 'head in the game' as I think about how I'd like my students and me to close our school year. So today I'm sharing my very favorite Springtime Art Lessons!
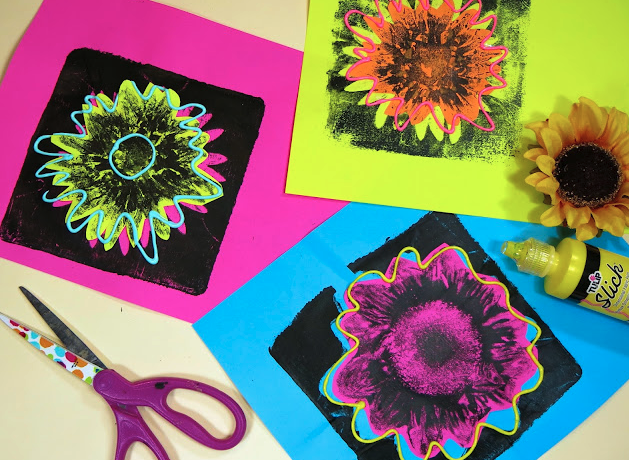
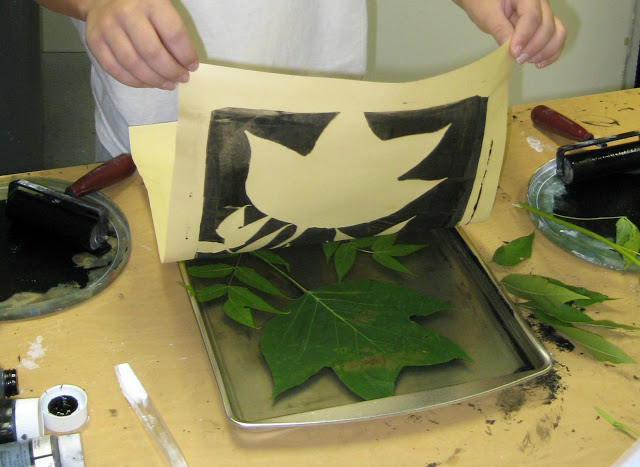
First up is this lesson I posted way back in 2012! It is one of my most popular blog posts but, to be honest, not a lesson I've repeated frequently. Why? Well, it does involve a lot of prep work, especially if you are going to make your own gelatin plates. Making your own gelatin plates is a lot of work, a lotta smelly and it's not vegetarian friendly. Gelatin is made from the bones of animals (which is totally gross if you think of all the Jell-o we ate as kids) and that always made me feel badly. However, these days, you can do a couple different things: make permanent gelatin plates (the ones in my blog post last for ALMOST a week before getting rather funky) or you can purchase the permanent Gelli plates. That's what I've done. And that's what I used for this lesson... This Andy Warhol-inspired flower print lesson (and video lesson!) was so much fun to do and a whole lot easier because we used our Gelli plates. Springtime is when we embark on a whole lot of printing in my art room so I am definitely thinking that this project will be on the agenda. We used fake flowers found at the dollar store but real ones would work as well. They just tend to fall apart a little more. Initially, I did this lesson at the beginning of the year with a second-grade class...and I think they were too young. This time, I may try it with my fourth graders or my second grade after they finish their first printing project. Printmaking is so fun to teach because once they have the basics, the kids become their very own printing factory! You can also print on fabric! I created a bunch of these printed squares using the same materials and method and then stitched them onto a dress from the thrift store. Your students could make a quilt with this idea! More info here. Nothing says spring like a big, beautiful and colorful mural! I have done two versions of this mural. Details on how my first graders created the flowers for this mural in this blog post. Curious about our What a Wonderful World mural? Video tour and more photos can be found here. Something we do every spring is a ceiling tile project. You can read how we started on this adventure here. The back story is that it was all by accident! We were hosting a sidewalk chalk artist and we were all to draw outside on the sidewalk. Unfortunately (or fortunately!) the day was to be a rainy one. So I had to think fast and we had the idea to draw on the backside of ceiling tiles with chalk. The back side has the same texture as a sidewalk and holds chalk perfectly (much better than paint!). Since then, we've done a ceiling tile each year! One year, we did flowers...which could easily translate to paper as well. Video and lesson for this right here. Looking for a fun springtime lesson for your students? These clay flowers were created by my third graders and were a hit! They came out of the kiln just in time for Mother's Day! Complete lesson here. Nothing says spring like these second-grade butterfly prints! This could also tie in perfectly with those Andy Warhol flowers as these look like early Warhol paintings! Video demo here. Whenever we are weaving, we always have tons of yarn scraps. The kids and I hate to throw them away so one year, we decided to create little still lives with them! These are the results. It was so fun to create and recycle. If you're hesitant about using chalk in your art room because of the mess ane the fact that it never seems to set, then you might want to try this lesson on for size. It's always a hit and the results look like a cross between oil painting and watercolor...and it's done with chalk and liquid starch! Lesson and video here. This collage lesson began as a sub plan! And as a way for us to use up our bottomless supply of popsicle sticks (anyone else have exactly one million trillion?!). Less own with video here! A lesson I come back to year after year is this one! We go big with these drawings and the results are always stunning. Full lesson here!
And there you have it, friends!
My top 15 art lesson for the spring. Thanks for dropping by!