Fall is upon us, y'all! Thank goodness as I'm just about over these super hawt Tennessee temps! For the occasion, I thought I'd put together a big ole blog post of my very favorite lessons for fall. Some of these are advanced and would work well with older students too!
To find each of these lessons, just tap on the links. Nearly all of the lessons have a instructional video for your artists and some come with free downloads. As always, these are for you to use with your artists and I provide them for free. PLEASE do not reuse/repackage them and sell them as your own on TPT. I hate that I have to say that...but it happens.
Okay, grab those fall leaves and let's dive in!
Let's kick things off with this here sculpture lesson! These little pumpkins would be fun for any lil pumpkin to create and they are super easy! Sculpt in one class and paint the next. Done! Find the lesson here.
My students LOVED anything spooky! This lesson is inspired by a contemporary artist. I know your students will also love the paint smearing aspect of this project! Find it here.
My students LOVE drawing sheets and love creating silly characters! This sheet (and video!) is totally free! Have students practice draw along with me on a dry erase board before diving in on their own Candy Corn Characters. Find the video and this free download here.
Oh man! Did my students love this lesson! We used Gelli plates and Dollar Tree sunflowers to print these on bright and bold copy paper. To give them an Andy Warhol look, we used puffy paint for the outline. These are always show stoppers! You can find the lesson details here.
If you want to share printmaking with your students but don't want the mess...than have you ever tried Marker Printing?! It's so fun and easy! Check it out here, you'll be amazed!
To deck the halls with a little bit of spooky, why not try these big-eyed owls on for size? This lesson incoorporates weaving, collage, watercolor painting and more! You can find the lesson video and details here.
I'm a HUGE fan of Celluclay! For your older students, they could make a pumpkin head planter! Any plastic planter will work...or even a plastic water jug! All the details can be found here.
If not a pumpkin, how about a skull?! I loved making this big guy...and the spider palm plant at the top was just so funny! I think I need to add some eyes to him though, what do you think? All the details here!
Aliens and monsters are always fun to create during this time of the year. I love this lesson because students work BIG and use their bingo daubers (you know I love 'em!). You can check out the lesson details here.
Did someone mention monsters?! These Loud Mouth monsters are inspired by the artist Greg Mike. I also paired it with a lesson for students to have choice in what their monsters could be saying. You can find the handouts for this as well as the video here.
Here's a lesson I did every year because it was always such a hit!
Need a lesson on painting landscapes? I loved this one and each turned out so colorful and happy. We looked at many fall landscapes and the colors of the fall. You can find the lesson details here.
One of the most popular lessons on my blog is this one! When I did it, I used homemade Gelli plates which are a total pain to make! So if you have Gelli plates you'll love this lesson...and it will be so much easier! You can find the details here.
Need a fall collage lesson? I did this one with my first grade and they loved it! We painted, printed and collaged. You can check out the details here.
Need a fun fall weaving lesson? This is it! I would recommend this with small groups if you are working with children in second grade and younger. I did this with my third graders in the spring...so maybe, for this time of year, this would be best suited for fourth grade and up. Lesson here!
If you are like me, then you often struggle with those initial first couple of art lessons. I find a theme always helps me get the wheels turning. And The Dot, a wonderful picture book by Peter H. Reynolds, is always a great place to start.
I've used this book so many times in my art room that I actually had to buy a second copy as I wore the first one out! I read it ever year to all grades on one of those very first days of art. Speaking of, I shared a little of my first day in a blog post a while back...and realized I had not done a follow up post! I'll be working on that this week.
For now, I thought I'd share my very favorite Dot Day lessons...all 15 of em! Many of these have videos that you are welcome to use in your art room as well as free downloads. As I share, I'll let you know the level of difficulty and time each of these requires. Okay, let's dive in!
After reading The Dot, have students brainstorm and draw as many 'things that are round' that they can think of. Try sliding this free download into a sheet protector so students can draw on it with a dry erase...and save some paper!
Dots on a Dot!
Here's a fun and easy one that can also be done on the round paper: Dots on a Dot! I love to have a stash of colorful dot sticks in my art room because they come in so stinkin' handy this time of year! For my kindergarters, we usually just use one dot in the middle and paint around it with watercolor or tempera cakes. For my older students, I like to allow them to place a couple of dots and paint. They always look so colorful and fun! Lesson plan here!
Kindergarten Dots!
Here's the second lesson I do every year with kindergarten. You can see the little dot right in the middle. I have a video of myself teaching this lesson, including introducing painting to my youngest artists, here!
Probably my all-time fave dot day lesson was this one where my students got to explore a variety of media from walk to marker prints to tempera paint and even spin art! While it was mighty messy with a lot of clean up, it was a blast! You can check out all the details here.
If you need a fast and fun activity, this is it! All you need are pizza pans from The Dollar Tree and some tempera paint. Allow the kids to paint on the pan and then pull a print by pressing paper onto the wet surface. You can find a videos and lesson details here.
Paper Sculpture Dots!
I took my FAVORITE kindergarten lesson and just made the paper round...and viola! We had ourselves some dots! These are so fun springing from the hallway walls. You can find the lesson for this here.
Cardboard Painted Dots!
A lesson that I LOVED and did over and again for years was this first grade painted dot lesson. We used cardboard pizza rounds (I found mine at Gordon Food Services) and tempera paint. We began the lesson with the black lines created with either bingo daubers or a paintbrush and India ink. Complete lesson here!
I loved hanging these with paper clips in the ceiling...they always lasted until the Fire Marshall came to visit.
Coffee Filter Dots!
Of course, making a coffee filter dot is the good ole standby that never fails to look beautiful! However...I do have a word of advice: ALWAYS add the water and allow these to dry on Styrofoam plates. This way, they will retain the color...otherwise, the color will leave the circle and stain the surface below. Details here!
Also! Did you know you can buy those GIANT coffee filters? They are HUGE and would make epically fun dots!
Dot Day Sub Plans!
Need some sub plans OR...just need something simple because you are covering rules and routines with no time for the messy stuff just yet? Try this FREE download!
Dot Day Weaving!
Feeling adventurous?! Why not try some circle loom weaving for Dot Day? It's actually the painting portion that you could stop at and skip the weaving...these painted plates always look so fabulous and the kids love making them. We use Chinet plates and tempera paint for the best results. You'll be amazed how pretty these turn out! Check the lesson here.
Sparkly Dot Relief!
My third graders created these one year. They built their dots with Styrofoam plates before covering them in foil and coloring with sharpies. They were so simmery and sparkly in the halls. Details here!
Stitched Dots!
Okay, I only recommend this for small groups or kids who are in fourth grade and up! Once we got the hang of these, it was AMAZING fun and the kids loved it. But, just like learning anything new, there was a learning curve we all had to get over. I did create a video that helped a lot! You can check it out here.
AND...did you know that I have an email list? I share lots of freebies and lessons there too. To join, just visit here...it will take you to my store with my books but a pop up will allow you to sign up for email.
Today I thought I'd put together a big ole blog post of some of my very favorite lessons that both introduce and continue to explore painting with children. So if you are looking for a fun and engaging lesson for kids of all ages, I think you'll find something here. Thanks for dropping by!
If you've been hanging out with me for a while, then you've seen me share my method of painting with my students. Here's a little background on how the journey of the Paintbrush Ballerina began:
If you'd like to hear a little big of the book, check this out:
I wrote the book in rhyme as those have always been my most favorite books to read to children. In this story, our paintbrush friend who has been abandoned in a watercup in front of palette tells the tale of the Paintbrush Ballerina. You can read more of the book and see the illustrations here.
It's tough to watch out students struggle with the most essential art supply: the paintbrush. And it's a real bummer to see the destruction they do to our expensive brushes! So I took everything that I learned from 25 years of teaching art to small children and put it into this book!
If you'd like to see me talking to my kindergarten about how to use their paintbrush, then check out this video here:
If you are curious about my teaching methods and would like to see more, I have a playlist on my YouTube channel called "A Glimpse Inside" where you can visit me as I teach my students.
Keeping that brush on it's toes is always the goal! Check out this sweet kindergartener doing just that!
Alright, now let's dive into those lessons, shall we? I have no rhyme or reason to the order of these lessons. This is just a big ole smattering of some of my faves!
Let's start with kindergarten who are my very favorite! After learning about the order of the color of the rainbow, we dive into painting our own with tempera cakes. Tempera cakes are a fave in my art room as they are low mess and, low prep and the colors are just beautiful! I'll circle back to this lesson in a moment.
Now let's skip forward to third grade. By then, you'd think they'd have a better idea of how to handle their brush. BUT I gotta tell ya, 'tis not the case. Even tho it feels like we say the same things all day long (cuz we do!) we are saying it to different groups of students! So I had the same sayings and phrases on constant repeat...and the bit about the Paintbrush Ballerina was one I always said. AND they always love!
To read all about bingo daubers and why I love them in the art room, visit here. If you've not tried them out in your art room yet...be prepared to fall in love!
When it comes to painting, it can be overwhelming as to where to start! Do I begin with color mixing? Mark making? Introducing white and black to share tints and shades?
Here's what I've learned: start wherever you like! BUT start with just one thing. That's the easiest for you and your students. So, first things first, begin with how to use the paintbrush! THEN...maybe go with mark-making. I introduced my students to a wide range of color and mark-making ideas to create these beauties.
For many years, this is how I introduced both painting and line to my kindergarten students. By limiting the color to just black (we used a diluted black ink to allow the brush to paint more smoothly), we could focus on just the brush and the lines. From there, we were able to add color!
When it came to introducing color to kindergarten, I usually did that, like I mentioned, the day after our black and white line painting lesson. That's when we did the rainbow paintings. BUT...since I'm skipping around a bit, you'll have to scroll down a pinch to see that first rainbow lessons.
Many of my kindergarten lessons are born out of "the fast finishers need another something to paint!". And that's what happened here! After painting the rainbow, many students then got a sheet of paper and painting stripes of rainbow color. This served to be the perfect background for these adorable self-portraits!
So sorry these are kinda out of order. Truth be told, when I try to edit or move images around, they tend to disappear. So...it's easier if you just scroll then if I sprout more gray hairs.
Meanwhile, in first grade, we took the idea of our paintbrush being a ballerina a little further. We listened to music and had her paint across our page!
More info here. You can also check out how we made these into beautiful weavings!
And now...color mixing! These wee Mouse Paint masterpieces were created by kindergarten. The best part...the Hobby Lobby frames!
I recently had someone give me a hard time about this...
I shared that often, at the start of the school year, I do the same lesson with all of my students, kindergarten through fourth grade. Why? FOR MY SANITY! I'm usually trying to set up my classroom, introduce a thousand routines and just keep my head above water. Once I have my Back to School footing, I feel good venturing into different lessons with everyone. But, to start, we all begin with the same supplies, same visuals and same lesson.
This commenter DID NOT like that and let me know.
Now look, I'm cool with sharing your thoughts and opinions but...there's a way to do it. AND if you aren't an art teacher then...you might just wanna sit it out, you know?
Regardless! I did THIS same lesson with all students AND put a twist on it so it ended up being a big ole collaborative. So there! ;)
Now, let's jump forward to fourth grade! Here's one of my favorite landscape lessons based on folk art. We created these with tempera paint and you can check out more about this lesson here.
My second grade students created these paintings with either a warm or cool color watercolor background. When using watercolor, I often have my students decide if they will use one family of color or the other. This keeps their paintings from becoming 'muddy'.
This lesson with fourth grade introduced my students to tempera cakes and many different painting methods. We began by painting these stripes of color that were later used to draw buildings in Sharpie. Full lesson on this process, with video, here.
We used cardboard circles as our base for our snowglobe. I had my students create three sketches first. They LOVED those little small circle paintings so much that we turned THEM into a project too!
This snowglobe lesson was done with tempera cakes. And glitter...which I don't recommend, ha!
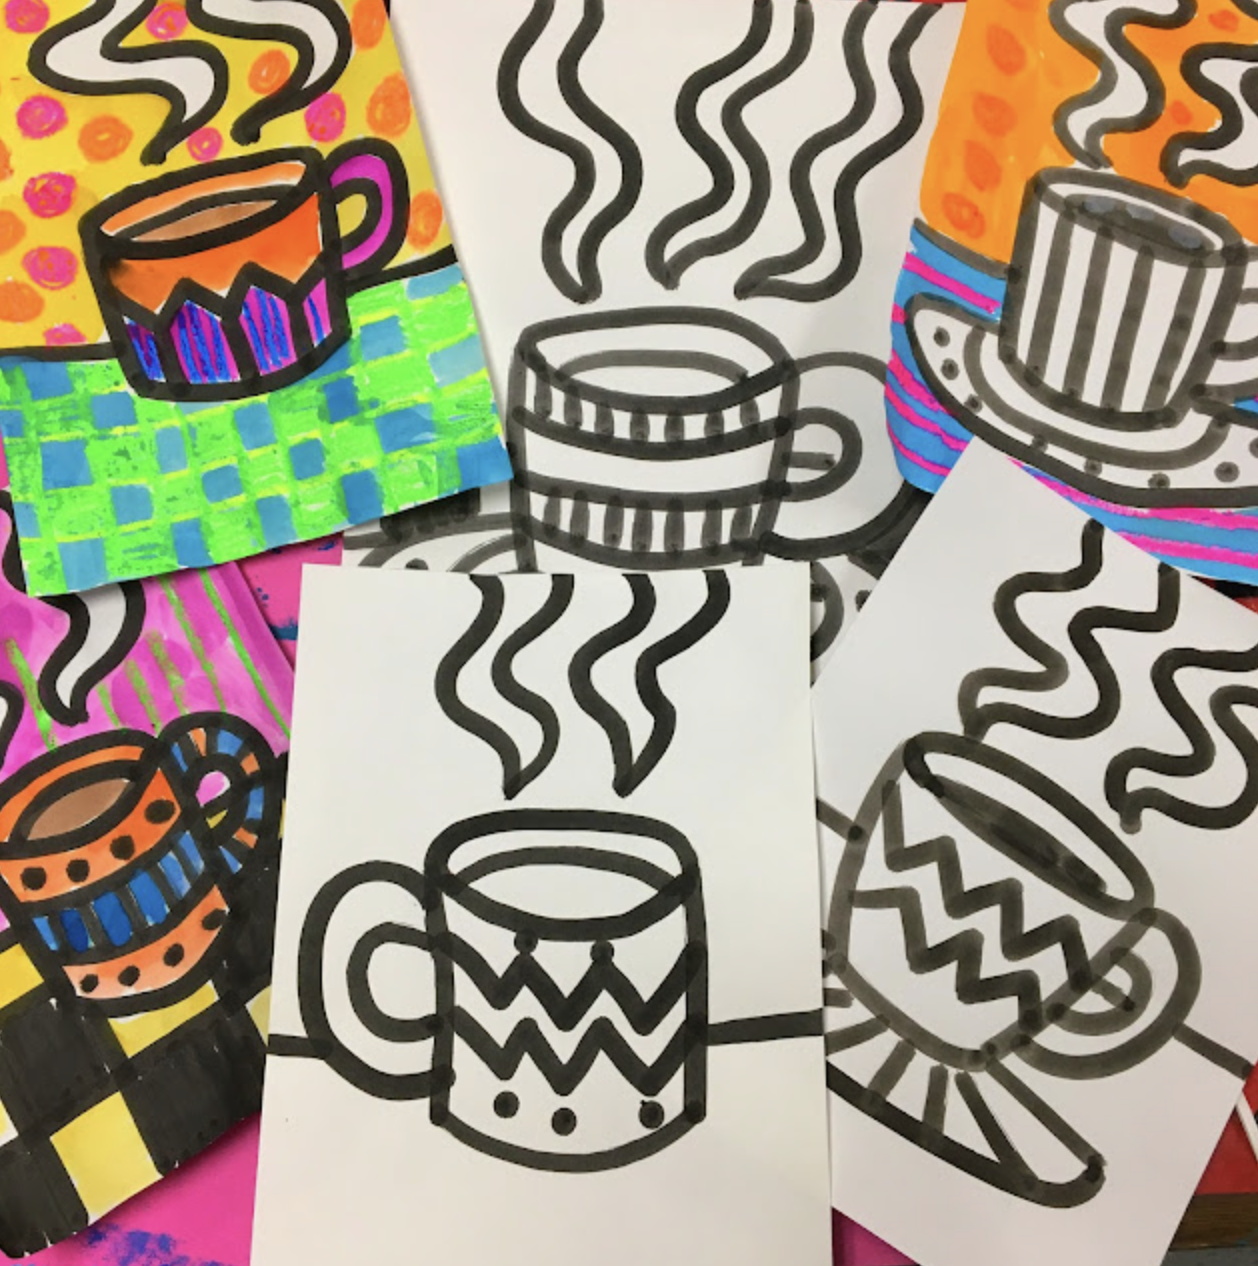
I've done a couple hot chocolate/cup of coffee based lessons (I may be a little biased, I suppose!) and you can find this lesson here!
Let's circle back to the ole bingo dauber, shall we? It's like a Sharpie on steriods!
I LOVE that we can create the most epic contrast with the bold black ink and these bright paints! We are using Jack Richeson's neon tempera cakes here.


 Let's kick things off with this here sculpture lesson! These little pumpkins would be fun for any lil pumpkin to create and they are super easy! Sculpt in one class and paint the next. Done! Find the lesson here.


.png)