Showing posts sorted by date for query art costume. Sort by relevance Show all posts

Sunday, August 19, 2018

What the Art Teacher Wore #202

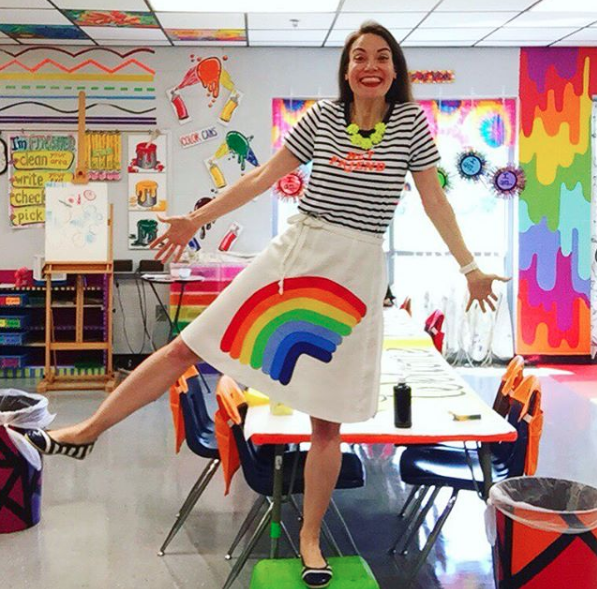
 First Day of Art, 2018! I had to wear this costume I scored from Amazon. Y'all, it's THE WORST COSTUME. If you follow me here, then you saw what a limp (ahem) paintbrush I had. I seriously had to clip a small hole in the brush and insert a thin dowel rod into it. As for the palette, it is too small (it IS a kid's costume so there's that) and I'm not even sure if I'm wearing it right. No matter tho, the kids LOVED it!
Happy first week of school with kiddos to me! To celebrate, I thought I'd share my school photo from third grade. This is pre-glasses and pre-(much needed)braces. I'm obviously channeling the sister-wife look with my Holly Hobby get up (you 80's kids know the reference) and my long hair. Can you believe that blonde? I'd love to have that cornsilk hair again!
My week back was filled these rules and routines and this Getting to Know You sculpture lesson. It was a super week back and I'm excited to start next week!
 For my older students, next week will be their second art class...for my littles, it will be their third and fourth. This coming week will be our last to work on our sculptures before each grade level dives into their start of the school year projects. Brace yourself, we are going to be doing some exciting things.

I DON'T KNOW WHAT THOSE THINGS ARE YET. 

But I'm pretty sure they'll be exciting. I hope. And pray. 
Wore my Coloring Book Dress this week. It's crazy to think that the kiddos who colored most of this dress, who were in kindergarten at the time, are now in 3rd grade! I love wearing this dress and hearing them remember laying on this fabric while it was on the floor and coloring all over it. The fabric is from IKEA and we used fabric markers. 
 I was super thrilled, humbled and excited to be featured in Scholastic Teacher's Cool Teachers feature. I'm far from cool but I was stoked that they think I am. Thank you so much, Scholastic!
 Each year, I try to make a Back to School Dress...and, sadly, this year, I totally dropped the ball. Why? What's wrong with me? Honestly, I think that summer went to fast and the school year started too soon. Can I get a do-over? When's fall break again? This one was made a couple years ago from a pattern I've not repeated. Those giant shoulder wing things were a one time deal. 
 With all the kiddos doing sculptures my art room is quickly becoming a land mine of sculptures. I'm all WATCH YOUR STEP, PEOPLE to anyone who dares walk around my room. 
 So I'm trying a couple new classroom management thingies this year and this is one of 'em. I plan to share my fave management techniques this week, right here, so stay tuned. For now, I'm just sharing a snapshot...any guesses how I plan to use this?
 I can't even explain the face other than I was born with it. This dress was created from my all time favorite IKEA fabric. A sweet art teacher sent me a remnant and I created a dress with every scrap! More details here
 Mid-way through the week, I switched the background paper to black and I'm LOVING it. I plan to display these in a checkerboard pattern and I'm beyond excited.
 I have an ever-growing list of things I wanna do/try/work on/expand upon this year. Growth mindsets is at the top of my list. I'm re-reading The Growth Mindset Coach and loving it. This month, we've got a mantra to kick things off. 
 I realized after wearing this dress that it's pretty much like Art Teacherin' Camo...I nearly blend right in with my art room. Also...if you know me at all, you know I don't love washing my hair. It takes time that I'd rather spend sleeping in! So on this particular morning, I decided to just do a half bun thing or...what I decided to dub...
 My Art Teacherin' Mullet: business in the front, party in the back. After getting to school, and seeing myself in the mirror, I realized I was channeling my inner Jonathan van Ness and okay with that!
After a week of school (and MAYBE dealing with this!), Mitch and I took a quick trip down to Disney for their Not-So-Scary Halloween event. Halloween is our FAVORITE time of the year so we hit the parks a lot. It was so much fun and nice to get away for a hot minute. Back to reality tomorrow. I've got lots coming your way next week so be sure and pop back by!
 photo signature_zpsd10b3273.png

Saturday, August 11, 2018

What the Art Teacher Wore #201

Hey, friend! Well, I made it! One week down (with two of those days being PD and the rest being with the kiddos) and many more to go. I will officially see my artists on Monday...but even without the wee ones in art, this week still wore me out! On Monday, we had some professional development during the day. Our evening was our Meet the Teacher night where I thought my new shirt from Old Navy would be perfect. 
 Normally, at the start of the school year, the halls are barren and drab. If you remember, my students painted this huge HUGE banner on field day. I saved it from that day and hung it right before school started. I added some Welcome Back banners to go above these giant paintings. They make me so happy and brighten our halls. 
Monday: Shirt is from Old Navy; necklace: J.Crew Kids; skirt is vintage from Etsy; shoes: TJMaxx; headband (seen in first photo) was created by a fellow art teacher!
Every new year means trying new things. One thing I'm trying out this year is having a little mailbox for the kids to place their drawings and notes. Like most teachers, I get A LOT of fan mail...and while I love each and every one, it can eat up a lot of instructional time if I go through them during art class. I found this cute little mailbox at Joann's and my buddy Ali used her Cricket to bedazzle it for me. The idea is that the kids can place their drawings in there. I have a special place for notes and drawings called The Masterpiece Gallery. I'll keep you posted on how this goes!
Tuesday: Sweater and headscarf: thrifted; necklace: The Paper Source; belt: Amazon; dress: Modcloth

Tuesday was meant to be a work day and I felt like I got nothing done. I'm so glad that I put in my hours before most folks were in the building. I've noticed that I'm super social and love to go around and visit...and folks love to pop by and visit me. Since I was mostly prepped, it wasn't a problem. In years past, it always stressed me out and put me behind. So I guess there is something to that whole "planning ahead" thing.
Wednesday was our first day back and it was a half day. No kids in art so that meant I had time to slap together a welcome back photo op (with the help of my music teacher friend Kiera!). We were pretty proud of our 5 minute backdrop making skills. I'm just glad I'm so good at hoarding fun finds from the Dollar Tree which is where the flora and fauna are from. 
 Welcome Back Wednesday: I decided to join in on the photo op fun by dressing in my Crayon costume. Scored this bad boy from Amazon a couple years ago. 
Here's what I was wearing underneath: t-shirt: Forever21; belt: Amazon; watches: Swatch; necklace: made by me; skirt: thrifted
Since the kiddos are coming on Monday, I've been prepping our table folders. This year, I decided to laminate them so we can use them over and again each six weeks. Details about them here.
 Nearly every year, for as long as I can remember, I've made a Back to Art Teacherin' Dress. The start of this school year has been just a little busy...and my focus has been on other things. I'm so bummed I didn't make the time to create a BTS dress! I've got so many ideas in my head...just not enough hours in my day. Details on this dress I created last year here

This was our first full day with kiddos. It's been our tradition for as long as I've been at my school, to pool all the kids into the Multi-purpose room and cover school rules, make introductions, talk about arrival, dismissal, lunch and so on. Last year, we got wise and made a video that covered nearly everything. It's a great way for us to make sure all kids get the basic school information that they need to be successful.
 I used to always cover my tables in paper....but it got to be too much of a waste of paper and my time. However, I do love to do it at the start of the year as there is no confusion what table the kiddos sit at. 
 It also allows me to number the spots. I do give assigned seats...so being able to say, "Jimbo, you are Green Table #1" is so much easier when they are marked this way. Once the paper gets too gnarly for use, we'll pitch it and, hopefully, still remember our seats. 
 Fri-yippie! My tables are prepped with our first day(s) activity and I'm feeling pretty good about it. Dress: made by me, details here; shoes: Chucks; belt and crinoline: Amazon! 
 I love LOVE to do collaboratives as apart of our first days back and this year is no different. Details on this to come as I'm still working on those dirty little words: lesson plans. 
Hope y'all had a great week! Details on my Matisse-inspired necklace right here
 photo signature_zpsd10b3273.png

Wednesday, May 16, 2018

DIY: Superhero Dress with Rainbow Cape!

 Y'all! Last night was our school-wide art show with the theme Superheroes! I have SO MUCH TO SHARE WITH YOU from the big night...video tours and tons of photos so brace yourself...the Art Show Blog Posts are Coming! I thought I'd kick the series of posts off with a post of what I decided to create and wear for the occasion: my Superhero Dress with Rainbow Cape!
 Every spring, when we crack open our 500 lbs of kiln fire clay, I try to come up with a theme for our clay projects. All of the clay projects are displayed in the art room as that's the biggest space to showcase our 3D work. The first year we went with a theme, the art room was transformed into a 1950's diner. We all wore 50's style clothing and it was a BLAST. The following year, our theme was Pet Shop where all the kiddos created animals out of clay. This year, I thought Superheroes would be a fun theme and the kids LOVED it! Each artist created either a ceramic superhero, a superhero car, a bobblehead superhero, a superhero shield, you name it! I'll be certain to share all of those with you in upcoming blog posts. To display these pieces, my early finishers created Rizzi city buildings with construction paper and black paint. That was added to our covered tables and whiteboard to serve as a backdrop for our display! 
 A couple weeks ago, I decided to create my own superhero dress. I popped into Joann's and thought these three primary color prints would work well together. I used my standard mashup of patterns: circle skirt, fitted bodice and a wide waistband to create this look. 
 I'd had the idea of a cape in the back of my mind...but I just wasn't sure what it would look like. Initially it was just going to be a yellow cape with a palette appliqued to the back. Then I got the idea to use this stash of satin rainbow fabric to create a cape. I've NEVER made a cape before...so this took some toying around. I made a mock cape out of muslin to work out the kinks. I'm so excited with how it turned out! 
I created a giant palette shield out of cardboard, insulation foam (for the paint blobs) and paper towel tubes (for the brush). 
 I simply safety pinned it to the back of my dress and there you go! I think it will be so much fun to wear throughout the year to teach about rainbow order and color theory. 
 I let the kids know that on the night of the art show, they were to arrive dressed as a superhero or wearing a t-shirt with their favorite hero on it. We had so many AMAZING little heroes running around! I had the chance to take superhero selfies with so many of my artists...it really was the highlight of my NIGHT/YEAR/DAY/EVERYTHING.
This precious little girl's mom made her superhero costume...isn't it the cutest!? So many homemade costumes made an appearance along with store bought. 
Y'all best stay tuned...much more art show coming your way! Until then...xo! 
 photo signature_zpsd10b3273.png

Thursday, August 3, 2017

In the Art Room: Art Room Rules

Yesterday, some pretty big and exciting news was released: I'll be teaming up with The Art of Education in the creation of Everyday Art Room, a podcast dedicated to all things elementary art teacherin'! I sat down with Tim Bogatz, the co-'caster of Art Ed Radio to share the fun news. You can listen to our chat here and catch my very first podcast next Thursday. I'm super excited! I do hope you'll take a listen. 

In one of the first podcasts, I'll be chatting about how I start my school year, which, as you can imagine, is with rules. My rules have changed...drastically...over the years as I learn and change as I go/grow. Recently, with the reading of The Growth Mindset Coach (you should totally join our book club if you haven't already. Like/follow here to stay tuned), I've been thinking of my art room rules as being more like life rules. Rules to follow to become a happy, compassionate and fulfilled person. With that in mind, I created these three art room rules life goals. I thought I'd share them with you in the form of a free downloadable PDF if you are interested. 


But before we get to that, when I shared these paintings on my Instagram, I got a lotta questions about how I hang things on those unstickable concrete walls. My go-to is usually hot glue but that does have a weight limit. It can also damage walls and artwork. My latest love are these Command Velcro Strips. Y'all. These bad boys can hold up to 16lbs and can be removed without damage. If you are hanging something heavier or from an actual hanger, you might wanna check out Hardwall Hangers by OOX. These hammer easily into concrete walls but are difficult to remove and leave behind some holes. Of course, if you are just hanging posters, Blue Dap (aka sticky tack) works great as well. All of these can be found at your local hardware store. 
Here is the download for the letter A

When writing rules, keep the following in mind:

* Keep Your List of Rules Short. The list of rules should be so short that you can easily memorize them. Any more beyond five rules and you might be confusing your rules with your routines/procedures. 

* Know the Difference Between Rules and Routines. Rules are the broad brush strokes. Routines are the finer details. I have 8 routines in my art room. I'll be covering those in my very first podcast that will launch here next Thursday. Confusion between the two can lead to confusion in the art room.

* Keep in Mind the Take Away. When your students reflect on creating, what do you want them to think? Feel? Be inspired by? Your rules should help you create that environment where they feel safe, inspired, confident, successful and encouraging to others.

With those thoughts in my head, I decided to create three rules, based on the word ART. You are more than welcome to use these in your art room. I've created downloadable PDFs of each letter and rule. Here is the download for the painted letter A.  

If you'd rather paint your own version of your rules, go for it! I had a great time coming up with these and bringing them to life in a colorful and exciting way. I scored the canvas panels, which I used for the letters, at Michael's in a package of either three or four. The long canvases were sold in packs of two. 

I picked up my favorite colors in acrylic paint. I laid out the canvases and quickly painted them. I tried not to overthink it...keeping in mind that one can always just paint over it! 
Once dry, I added some dry brushing of paint where I wanted the letter and rules to go. From there, I added the text, details and designs. The beauty of acrylic paint is that fast dry time! I did manage to mess up my spacing of letters so there was some serious repainting...but it was not a big deal.

Growing up in the 80's, where there was a strong resurgence of 1950's style and fashion, I've got a love for all things kitsch, colorful and tacky. This explains my color palette and design aesthetic clearly, doesn't it?!

Let's be honest: with rules like these, some explaining, modeling and role playing will need to be done. When teaching rules, always expect that your sweet kiddos know nothing. After all, what seems like common sense to you, an adult who has been on this Earth years beyond that wee person you are teaching, is news to the petite peeps. Think of everything as new, exciting and noteworthy...it will make teaching what we might deem "the mundane", the magnificent. 
Not even gonna lie, strong Pee Wee's Playhouse and Bebo influence here! 

Tell me if you do this: when thinking of lessons, plans, arrangements, whatever in your teaching environment, do you put yourself in your student's shoes? I do this...all the time. I often think of what excited me as a kid: seeing my third grade teacher in a silly costume; that teepee my second grade teacher had in her classroom; the parachute we played with in P.E. It's with that in mind that I craft my own teaching environment. I know I'm not alone in this...maybe it's for selfish reasons...but I use what excited me as a student now as a teacher. 

And it usually works! I used to think that the notion of bringing what I loved as a kid to my art room was successful because that joy I experienced was universal. I loved XYZ as a kid, therefore all kids love XYZ! Now I know...it was my passion about XYZ that inspired my students. Staying passionate, whether that be by taping into those childhood loves and/or brining what you love to your art room, is what keeps us excited and excitable as an art teacher.
But that just might be the back-to-school jitters talkin'. Let's talk about how you can print and hang these bad boys in your art room! Simply print out the letters and rules as is or blow them up! I did this with some items I purchased on TpT. I just made them as large as I could and then, once printed, taped them together puzzle style and ran them thru the laminator. You can't tell the difference!
Feel free to print and hang where ever you wanna share the love of art. Remember to tune in next Thursday for my first ever podcast, eep! So excited!
 photo signature_zpsd10b3273.png