Showing posts sorted by date for query art teachers in training. Sort by relevance Show all posts

Thursday, April 6, 2017

DIY: Intro to Needle Felting!

In case you missed it, last night I hosted my first free felting session over on my Facebook page and it was a ton of fun! We had almost 200 folks join me for about an hour of Intro to Needle Felting. If you'd like more details on this free craft night, pop over here. You can still purchase a kit if you'd like to join the fun! Those that participated and used the hashtag #creatingwithcassie on their Twitter and Instagram posts are being featured here today. If I missed your post, my apologies! I'll share it here next week. By the way, you might wanna give these folks a follow as they are creative artsy types just like you. I'll be certain to share their IG handles. This masterpiece was created by @jill_nettels!
Felted masterpiece by @dwade1721.

If you missed last night's session, no worries. It's been archived on my Facebook page. I've also uploaded it to my YouTube channel. So even if you miss me live, you don't miss a thing. 
It's a long one...here you go!
 Isn't this gorgeous? Created by @swshumaker!

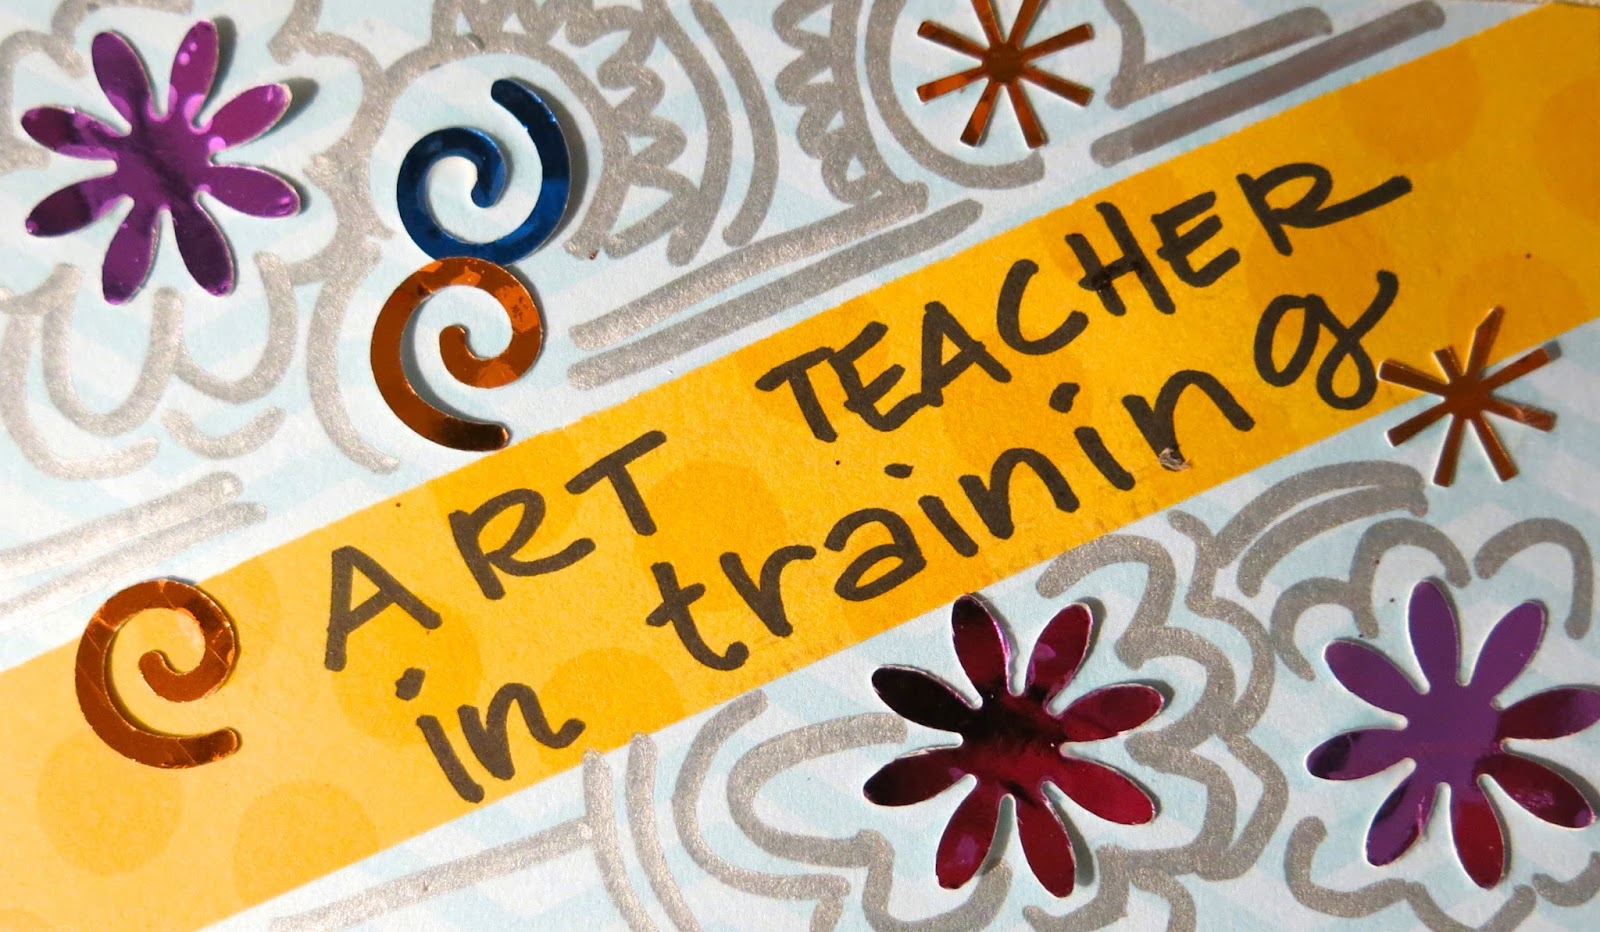
Last night was my second attempt at creating LIVE. If y'all remember I tried it once before with creating my Art Teachers in Training badges...and it was a struggle. I couldn't see the screen to field questions, I couldn't get a good angle for y'all to see...it was not pretty. I was determined to give it another shot and I hope last night was better. But there are some things I learned! 
 A needle felted pouch! So perfect, by @echopaitsel. 

1. I'm not so good at creating and talking. I notice this in teaching too, do you? I'll lose my train of thought, forget what I was saying, end up just making a muck of things...I think it's that whole right brain/left brain thing. At least that's the excuse I'm using for those not-too-pretty examples I created live!
 Aren't these pins going to be so cute?! By @mary5409.


 LOVE this sweater by @mrs.newtonsart!

2. Keep projects open-ended. I really didn't want to tell y'all: this is what we are going to make and this is what yours will look like when you are done. Because...what fun is that? The beauty of needle felting is that there are no "rules", no "right and wrong" ways to do it. I think I succeeded in that...just look at the variety of awesomeness that y'all created! 
 Look at this sweet flower by @artteacher!
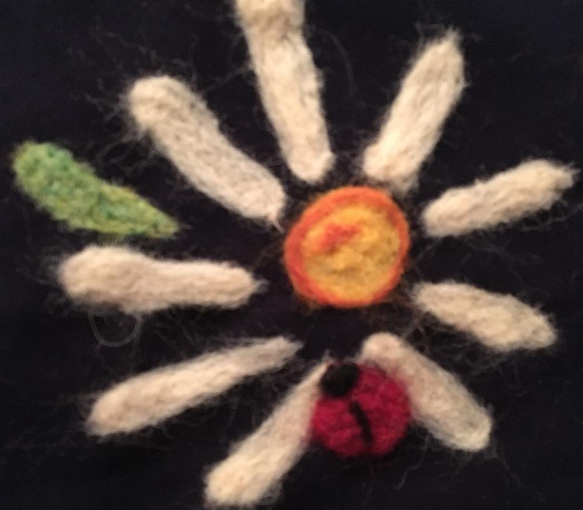
 One question that came up a lot was: what can you needle felt on. Y'all...ANYTHING! Check out this flower felted onto cotton by @ms_kibbe.
 I so loved seeing everyone's set up where they were going to be working. Look at this art room corner! @chapin_schnick, I love it so much, I might be able to forgive the Purdue sign (I.U. grad here, sister, ha!).
 I am loving this ladybug...I think I need to add some bugs to the clutch I am felting! @mrsmillsartfromtheheart, this is fabulous.

3. Y'all are fast learners! When it took me 30 minutes to create a circle and a leaf, y'all were busting out stuff like this. I was just floored when I saw my IG feed. 
 I mean, @emilystuver, for reazzz tho. Beautiful!
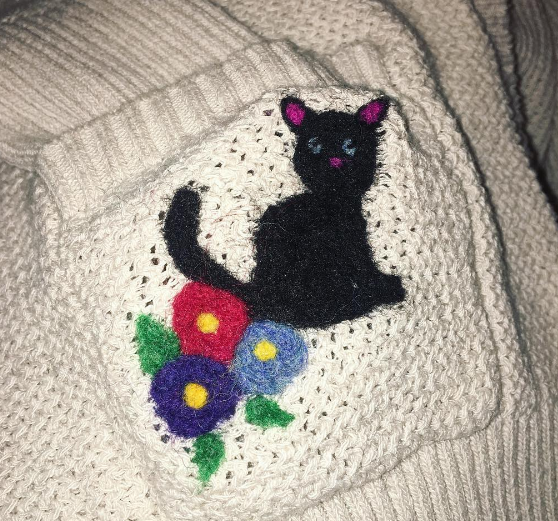
 Anything with a cat gets my seal of approval, y'all. @art.teach.at.the.beach this is so cute!


 4. Y'all are problem solvers...and great at helping each other. When someone asked how to felt on a pocket without felting the pocket closed, the idea of cutting the foam and placing it inside the pocket was shared. I love that the questions I couldn't answer, y'all solved!
 I have one word: wooooaaaahhhhh. @visualpraisestudio, this is amazing.
  I so love that the boyfriend decided to join in on creating with us! How awesome is that @daynabayna?!

 I loved the running cat theme. There's actually a book called Felting with Cat Hair that my mom gave me some time ago. I've yet to take Crazy Cat Lady to THAT level tho. Isn't this adorable by @nachtule?

 I think one thing everyone learned is that needle felting is a labor of love...heavy on the labor. But this sweater by @disneychica1313 is going to be so cute when she is done!

5. You guys are the best recruits! I loved how you involved fam members, boyfriends and pals to join the fun. It really was like a craft night with a ton of buddies. Thank you for making it so worthwhile. 
I love this photo from @jenjencarey...she cracked me up! I do love her C...even if her collar is hiding it. She just needs to flip her collar Rizzo-style! 
 Another beauty from @nachtule!
 Look how pretty this is by @cherishines!
 This one makes me so happy, I love this color combo by @chapin_schnick. 
 What I love most about needle felting is that you can start out small and simple...and grow so much from here. I can't wait to see what @artsygirl1978 creates with this! 


 Those of you who I missed, my apologies! I'll add you in next week's update of our craft nights. Remember if you'd like me to share your photo, simply use the hashtag #creatingwithcassie on your preferred social media outlet. And be sure to join the fun next week as we dive into the waters of wet felting. See you then!
 photo signature_zpsd10b3273.png

Monday, February 13, 2017

In the Art Room: Chalk Prints and Shaving Cream Marbling

In second grade we are working like crazy with our short 30 minute art classes to try our hands at two different paper treatments: floating chalk prints and shaving cream marbling. My goal has been for all of my students to attempt both processes twice before the end of class. It's a go-go-go kind of class but it's a lot of fun. When I shared a couple short videos of my students working on these papers, I got a lot of questions about the process. So I created a video that will walk you through each. I'll also go through the supplies needed in this here post. Here's the how-to video:
Supplies for floating chalk prints:

* Paper. I used 6" X 9" papers. These will be used for the covers of their Rainbow Book. I only order between 80- 90 lbs paper for the art room. 
* Chalk. We used Freart Chalk by Prang. I like this chalk because it's high in pigment and thick like sidewalk chalk.
* Tongue depressors. We used the big ones which you can get cheap at the Dollar Tree.
* Tub of water. I made it so each my students had their own tub to save on time. I see my second graders at the end of the day so this meant I didn't have to hustle to move the tubs for my next class. 
If you watch the video, you'll see just how easy this process is...and how beautiful the results are. 
I have a feeling the kids are going to have a hard time deciding which beautiful papers to use for the covers of their Rainbow Book!
When doing these chalk prints, you can even use stencils to create a really cool look. Check out this blog post where we used star stencils
The best part is, you don't have to "set" these creations as you would normal chalk pieces!
 For shaving cream marbling, you'll need the following:

* Shaving cream. We used cheap dollar store stuff.
* Liquid watercolor.
* Paint brushes.
* Tongue depressors.
* Paper. 
This process required more steps so some of my students would get excited and forget those steps. I made sure to appoint my Art Teachers in Training who did a wonderful job reminding kids of the steps. Yay! 
I did not change out the bins of shaving cream or water. For the floating chalk prints, it was not necessary. For the shaving cream, it just meant that the following prints had more color. 
 Again, so pretty! I can't wait to see these on the covers of their books. Here are the books they are creating:
I have done shaving cream prints before...but never in a closed container. I am never going back, y'all! The mess is contained...like, literally.
Have y'all done these kind of prints before? I'd love to hear about it! I'm also curious to know what you did with your beautiful papers. 
I'll be sure and update you with our completed Rainbow Books!
 photo signature_zpsd10b3273.png

Wednesday, February 8, 2017

Art Teacherin' 101: Episode 30

Don't forget to join the chat tonight, Wednesday, at 8pm CST over on my official Facebook page. We'll be talking about the Art Teacher in Training badges: how we are using them, how they've been working and the rest. We're also sharing our favorite art supplies. AND, lastly, let's chat about that dreaded thing called CLEAN UP. See you then!

Today I thought I'd share with you how I've been using the Art Teacher in Training badges in my art room and how they've been working for me. I LOVE THEM! Check out this episode of Art Teacherin' 101 to find out more. 
I often times will talk myself out of introducing new things to the kids with the mindset that "I'll do it at the beginning of next year". But now my motto is: Why wait?! I actually think it's the perfect time when the kids are starting to get that spring fever. Anytime I introduce something new and present it in an exciting way, the kids are always game. Here's the video that I've been showing them to explain the badges. Feel free to use it in your art room. 
Be sure and check out these other badges created by art teachers and how they are using them too. See y'all tonight! 
 photo signature_zpsd10b3273.png

Sunday, February 5, 2017

In the Art Room: Art Teachers in Training!

Hey, art teacherin' buds! If you joined last week's Facebook LIVE which is archived in the link, then you know I did a feeble attempt at a Make and Take. Those who joined were gentle and kind enough to almost convince me that it wasn't a bust but I knew the truth. I LOVED the idea of a Make and Take and I really wanna make it work in the future...but that will take some work on my part. But let's focus on what we created: Art Teachers Badges!
 In a previous LIVE chat, which we do right here nearly every Wednesday night at 8pm CST (to join the chat, simply "like" my page and I'll pop up in your feed 8-ish), the idea of creating "art teacher apprentice" badges came up. I loved the idea so much, I invited everyone to join in on the makin' and the takin'. What EXACTLY is an Art Teacher Badge?!
I can only tell you how I plan to use mine: I have four tables in my art room. Each table will have what I've dubbed Art Teacher in Training. These kids are responsible for listening extra carefully to directions and answering the questions of their fellow artists at their table only. If they cannot answer the question, they are to seek out another table's "trainee" and ask them. If all else fails, FINE, you can ask me. My goal is to create an environment where I am free to spend more quality time with my students and not repeat myself 5983 times. Ahem.
How will I pick these kids? I plan to let them know that the moment they walk in my door, they are being "interviewed" based on their actions, behaviors and ability to follow our long-established but sometimes forgotten routines. I also created this video to explain to the kids just EXACTLY what the roll of the "trainee" and the rest of the class is. 
Feel free to share this video in your Land of Art Teacherin'. It's general enough that it could probably work in your setting as well. 

MANY of the fine folks that joined the chat sent me their badges and how they plan to use them. I love the creativity of seeing what everyone created and hearing how they plan to use them. I do plan to laminate mine and have them on a lanyard. 

By the way, be sure to follow these art teachers on Instagram. I've added their link if they have an account. We learn so much from one another! 
Margaret McDonald created these fun badges for her kiddos! She says: I teach Art PreK-6 at Herndon Elementary in Herndon, Virginia. My classes come once a week. I have 6 tables. Each week a different table does art room jobs. I plan to allow each weeks table to be the "art room assistants." I plan to talk them up like VIP/backstage passes since I used gold shiny paper! You can find Margaret here: My instagram @missbrightbluehue and 
My Twitter @msmcdonaldart

Darla Kendrick created these cute and colorful badges. She says: here are my Art Teacher assistant badges. I get tired of repeating my directions non-stop, even when they're written on the board!  My plan is to assign one student per group/row/area of the classroom as the Assistant. S/he will be responsible for helping students nearby until I can make my way to them. Hopefully this will eliminate the repetitive, "I wasn't listening" questions.

My art teacher insta is: @art_at_hart_on_a_cart

I teach in Bakersfield, CA. Grades TK-6, SDC and VE

Carissa Parr shared: my class is 3rd-5th grade, so I'm planning on using the Protégé badge with only the 5th graders. They'll be the go-to kids for the younger ones. The Timekeeper will help keep ME on track! The Encourager will help keep things positive, as there are a few kids that compare their work to others and end up frustrated. I teach in a homeschool co-op and we meet once a week, so most of the lessons take two weeks to finish.  The kids will keep their badges for 2 weeks and change/rotate badges at the start of a new lesson.
Amber Click says: I have created my badges, just need to laminate and get lanyards. :) I decided to go with art teacher's sidekick. Kinda like a superhero. :) I teach in Corpus Christi, Texas. Grades Pre-k through 8th grade. I plan to use these badges to cut down on the amount of times I repeat things, like "drying rack." lol I think especially for my younger kids they will love the assistant title and I hope it'll turn out to make them feel special. 
My instagram link is: www.instagram.com/art_teacherlife
Emily Burlingame says: I have 4 tables in my room and each has a rotating (weekly) job to do. One of the jobs was 'Direction Experts' (DE's). This one always seemed to get neglected... until NOW!

We went over all the jobs again and I introduced the new 'DE' badges and a reminder that this job was to be my helpers. They had to know what the directions for the day were, had to know where to get supplies and how to clean up, had to know how to be encouraging and helpful. They basically had to be mini versions of me.

They embraced it with open arms today and knocked it out of the park. Even my 3rd grade 'Bob' rocked it {this is code name for our friends who are sometimes off-task}. Told me he served 6 clients for the day! Ha! Great. And it totally freed me up to wander the room and help where needed.

So each week a different table group of students will have their own chance to help one another out!!! Yessss! Art Teacher win. Think I'll try it with my 1st-5th graders and just put the badges in the table basket that has the DE job for that day.
Emilie Jones says, I used lanyards, painted the paintbrushes with acrylic paint, and used scrapbook paper inside the badge-holder-thingy... they all have the words: TABLE LEADER in sticker letters (former scrapbooker in the house!).

I am NOT an art teacher, I'm just a parent who LOVES art, was upset that the school my son goes to does not offer art (even though the kids have LOTS of free time) so I volunteer and every Wednesday and Thursday.  I go to my son's second grade class and we do art. 

These second graders REALLY need to work on their listening skills and I ❤ed your ideas about going to the art assistant to ask for directions because i was being asked the same question like 15 times (which gets a bit annoying). I have 23 kiddos and 4 tables, so one leader per table. Today I hyped up the table leader's responsibilities and then hit up Hobby Lobby (I currently live in no-where Oklahoma and it was either that or Walmart) got the lanyards, badge holders, and brushes. 
Alexandra McBride says: here are the art expert badges I've been using since before winter break. Kiddos are LOVIN being experts! I usually pick six different kids before I start any explaining and these kids are then who all the other kids go to if they have questions. They are feeling so proud wearing them! The best part?! When I get done with directions and that one kid is like "what do I do!?" Ahhh I just breathe and say "Go find an art expert"! You can find me on Instagram @kidsgetcreative. I work at the elementary level at cherry creek schools in Colorado! 
Carol Sustaire says: I want have one badge for each of my 6 color coded tables. However I probably won't use all 6 every day. Maybe only 3 per class and they wear the badge that corresponds to their tables. 

I teach k-6 in Fort Worth TX. I introduce a lot of new ideas to these kids so I am probably going to let the kids that "catch on" first at each table get picked to be the art teacher apprentice. I may also pick based on who I think needs a boost of pride that day. 
Lindsay Lowery says: I've never done this before but it sounds like fun! I decided to keep them simple using my #artsnacks products I get in the mail each month. I plan to pick someone from each table as soon as I finish giving directions and hopefully it will be something they really enjoy. My instagram is @beakerlinz and I teach in Pflugerville, Texas K-5.

Do y'all use something like this in your art rooms? LOVE to hear how you put it into action! 
 photo signature_zpsd10b3273.png