Well, hello there, strangers! My sincerest apologies for how quiet it has been on this here blog over the last week (let's be honest: you enjoyed the peace) but I've been super duper busy with my buddies Jennifer, Laura and Ginger getting ready for the Tennessee Camp of Art Scouts!
Laura and Ginger arrived in town on Wednesday afternoon from Ohio. Jen and I had just enough time to show them around our favorite place: Franklin, Tennessee. Franklin is a small town with a big history just 15 minutes south of Nashville. The downtown has a lovely Mayberry-esque vibe. After a stroll up and down Main Street, we took them to a local fave, Pucketts Grocery and Restaurant. The food was delish but the best part of the meal was when we walked in, Jen's husband Miguel and two sweet daughters were there. What a happy surprise! It was so fun to pull up a table and chairs to join them.

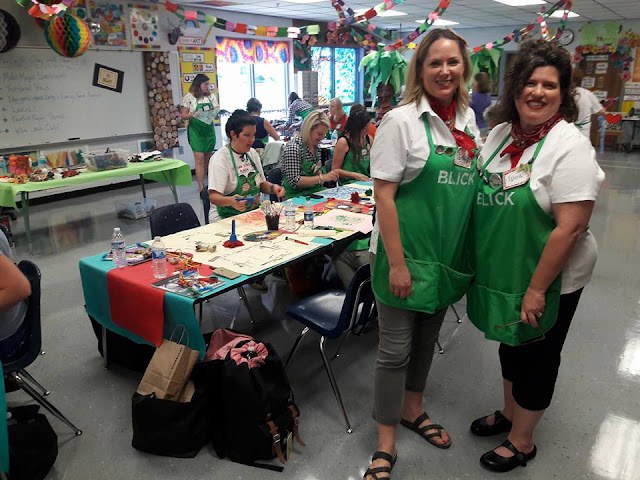
On Thursday morning, bright and early and fueled up on coffee, we began to set up Camp for our Scouts. Thankfully, we had the help of our art teacherin' friends Stephanie Preston and Jennifer Staples to get ready for the next couple of days. Those two girls were our right hand gals during Scouts and we just can't thank them enough for all they did for us and the Troops. Thank you, sweet friends! Also, a big shout out to my buddy Mr. Joe for hanging out with a bunch of wild and crazy art teachers for a couple of days.
Friday morning, folks started to arrive and, after breakfast, chatting and a super secret Art Scout ceremony (sorry, y'all. Must be present to get the scoop), we dove right into the art of making big messes!
I have to tell you, we simply have the nicest folks attend Art Scouts. We had teachers from Michigan, Indiana, Illinois, California, Florida, Alabama, Virginia, the Carolinas, Texas (and I know I'm even forgetting some)...we were blown away! These sweet, kind and dedicated art teachers are a gift to their students, faculty and staff.
Not to mention, some seriously talented (and funny!) artists.
I mean, when is the last time you saw folks having this much fun at a professional development? And we had just as much of a blast hosting them. We were so lucky!
We had a little over 50 Scouts in attendance. Laura and Ginger lead 25 Scouts on their quest to earn their painting and clay badges in my art room. They created over three clay projects and multiple painted paper pieces during their first day with Troop Leaders Laura and Ginger.
Now, y'all know that Laura is the master of all things painted paper and collage. Having the chance to learn her approach is so much fun...and I speak from experience. I had that opportunity at Tennessee Arts Academy last year. We've been friends long before that. I love and respect what she does for her students and the art education community. Not to mention, she's funny as all get out!
I loved the variety of creations that I was able to sneak a peak of when I popped down to my art room.
 Ginger had folks working with Amaco's air dry clays because it has a very similar texture as kiln fire clay. Ginger is such a jack of all trades but, unlike me, she's a master of all. When we were brainstorming ideas on what badges our Scouts would earn and what we'd like to share, Ginger is so versatile, she could teach it all! She did such a fab-o job sharing fun clay projects with our Scouts.
I so wanna do this with my students, I know they would have a blast!
Ginger had folks working with Amaco's air dry clays because it has a very similar texture as kiln fire clay. Ginger is such a jack of all trades but, unlike me, she's a master of all. When we were brainstorming ideas on what badges our Scouts would earn and what we'd like to share, Ginger is so versatile, she could teach it all! She did such a fab-o job sharing fun clay projects with our Scouts.
I so wanna do this with my students, I know they would have a blast!
Ginger is also our Mural Maven (if you've not seen the time lapsed videos of her students painting murals, go here). The Scouts worked on this scene of the Smoky Mountains that Ginger drew. This helped every understand her simply and impactful method of teaching mural painting to children.
I love how the colors pop on that black paper!
Back in our territory, Jen and I shared everything we could pack in on fibers and printmaking. Jennifer shared such a fun assortment of printmaking projects that are not your usual carve-into-block type of thing. What I love about what Jen shares is that she brings her bright and cheery personality to each project. The sunny sun prints and the colorful wax crayon prints are a true reflection of how colorful the projects are which she shares with her students.
Because Jen has 30 minute art classes with her kindergarten through fourth grade kids, she was able to share how she breaks her projects down into bite sized bits. She also enlightened us to some fast and easy clean up tips!
 Marker prints were also thrown into the mix!
We also had a big time exploring Gelli Arts printing plates!
Those printing plates are so versatile and fun. I mean, check out these effects!
These look fabulous just as they are...however the Scouts turned them into beautiful flower collages.
Love this orchid collage by Stephanie.
Marker prints were also thrown into the mix!
We also had a big time exploring Gelli Arts printing plates!
Those printing plates are so versatile and fun. I mean, check out these effects!
These look fabulous just as they are...however the Scouts turned them into beautiful flower collages.
Love this orchid collage by Stephanie.
And this one being cut out is fabulous. I love that the Scouts swapped flowers to add variety to their collages.
Now all y'all know that needle felting is my jam. So when I shared that we'd be taking a stab at it (wink, nudge), the Troops were thrilled. And shocked at just how easy needle felting can be. Check out the cute lil palette hair clips we made!
Because I'm secretly on a mission to have ALL art teachers dress like CRAZY art teachers.
We also learned how to do some of my favorite weaving activities, circle loom and tree weaving, to name just a few.
I always love the variety of paintings created on something as simple as a paper plate.
I mean, I wanna paper my walls in these beauties!
Remember: you can circle loom weave on anything round! Hula Hoops! Embroidery Hoops! CDs! Just make sure you have an odd number of warp threads.
To earn their fibers and painting badges, our Scouts created three printing projects and three weaving and one felting masterpieces. We were busy, y'all.
It's been such fun getting to know these new friends of ours. One of my favorite things was seeing all of the fun images shared on Facebook, Instagram and Twitter. Here's a collection of what was shared by our Scouts.
P.S. THAT PENCIL DRESS!! Beth, you know I love that dress, girl!
I love this collage of art teacherin' fashion that Rina created...so glad I made the cut!
Painted paper fun!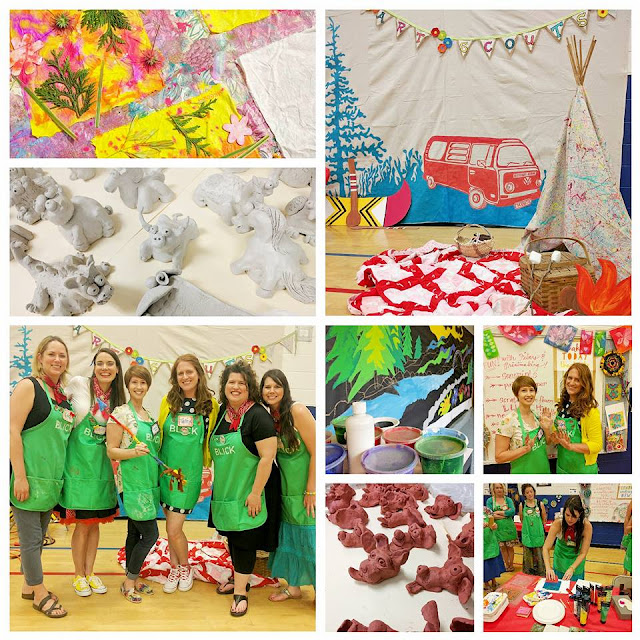 Happy faces, fun projects!
Just one half of the Scouts wearing their needle felting palette hair clips!
Happy faces, fun projects!
Just one half of the Scouts wearing their needle felting palette hair clips!
I love this photo collage created by Scout Brandi!
We had so much fun sharing out passion of making big messes with little people...with our new best friends, the Art Scouts!
 We couldn't have done it without our Ohio friends Ginger and Laura! After our Scouts left Saturday afternoon, we broke down and put our feet up.
Because I live just 4 miles from my school, I had the gang over to my place for some dinner and chill time. We're already brainstorming ideas on plans to bring more Art Scouts Camps to our future Troops...and we couldn't be more excited!
We couldn't have done it without our Ohio friends Ginger and Laura! After our Scouts left Saturday afternoon, we broke down and put our feet up.
Because I live just 4 miles from my school, I had the gang over to my place for some dinner and chill time. We're already brainstorming ideas on plans to bring more Art Scouts Camps to our future Troops...and we couldn't be more excited!
To keep up with us, you can follow us on Instagram! You can also join our Facebook group where you'll find a ton of more images and be able to make inquires and chat with attendees.
Here's to more art making fun!


