Sunday, November 16, 2014

What the Art Teacher Wore #122 and Aw, Alpacas!

Abstract Monday: I'm taking my second graders to The Frist Center next Tuesday to see the Kandinsky exhibit. I wore this here number to chat with the kids about our trip and all that we'd see. Fingers crossed it all goes smoothly and that I don't experience my usual night-before-the-field-trip-nightmares. Anyone else have those?! Kandinsky dress: made by me, DIY heresweater and shoes: thrifted; tights: Target; hair clip: made by me; belt: Pin Up Girl Clothing

Whut's happenin, kids?! Just trying to stay warm and muscle my way through this last week before Thanksgiving Break. We are fortunate in my school district to get the ENTIRE week off for the holiday (don't hate. I DID got back to school at the end of July, remember?) so I've just got five days of schoolin' until 5 days of relaxin. Not that I'm counting down the hours/minutes/seconds or anything. Ahem.

This past week was kinda a wacky one. I had some sort of craziness every evening after school which was fun but wiped me out. So much so that I fell into a 2 hour coma sometime after lunch yesterday. I'm looking forward to a less-thrill/more-chill week before el break-o.

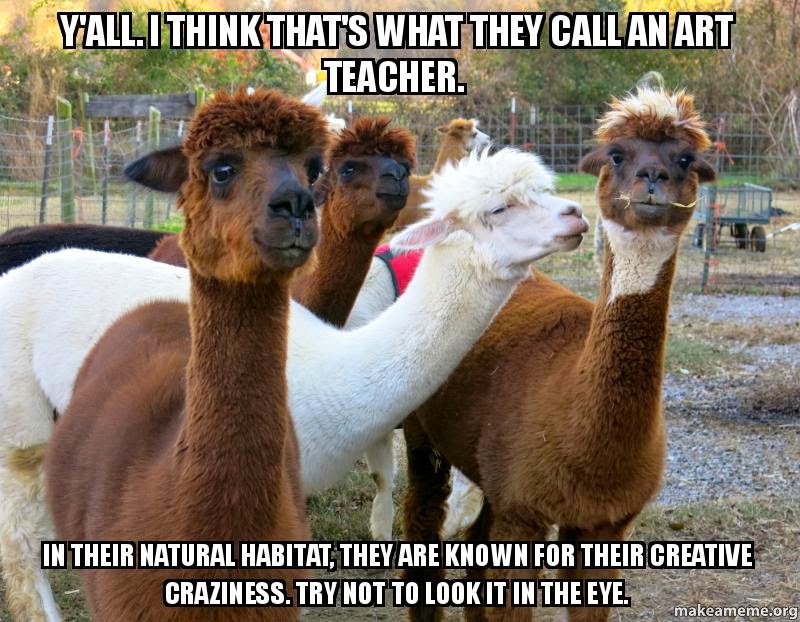
In other news, I had the opportunity to visit an alpaca farm Friday afternoon! I met the owner of the farm at a craft fair and made mention that I'd love to purchase some alpaca roving. Before I knew it, Suzie Conn, the owner of Willow Creek Alpacas, was inviting me out to her place to "meet the animals!". She was kind enough to allow me to snap a million photos and make short videos. I can't wait to share them with the kids before we begin our needle felting unit! In the meantime, I thought you might be interested in meeting these sweet creatures as well.

OH! And before I forget: I'll be holding a GIVEAWAY this week! So be sure to come back on Tuesday for more details, kids. Until then, have a great week!
 Willow Creek Farm is located in College Grove, Tennessee. The owners Suzie and Gary have 14 alpacas and have been raising them for the last 8 years. When I asked Suzie how they got their start, she said she saw an alpaca at a fair and decided she wanted one. After doing her homework, she bought her first one (for $15,000! But that was then. Now they go for about $2000). She now raises them and knits beautiful scarves and hats with their wool. 
The alpacas are very curious creatures. They immediately walked up to me however it was mostly cuz they thought I might have food. They are very skiddish so quick movements kinda freak them out. They're also not fans of being touched which is a total bummer. I was able to touch the wool on the back of one and, y'all. That is some seriously thick fur! I don't think I've ever felt fur that soft, warm and dense.
Tuesday: This was the last day of my after school clay class. I can't wait to show you some of the kids wild and wacky creations. This week, I'll show you how we created ceramic turkeys (or peacocks in some cases) with the help of a fall leaf. Each creation is just as creative and hilarious as the wee artist. dress: vintage, Buffalo Exchange; bow belt: Pin Up Girl Clothing; tights: Target; shoes: Dolls by Nina; necklace: Franklin Farmers Market
Ridiculous amount of cuteness, amirite?!

Windy Wednesday: Y'all, it's, like, winter here or something. And it's really crampin' my style. I just stay in a constant state of three-layers-of-tights/stacked-scarf coldness. I've been outta Indiana too long for this kinda cold, y'all. Where's my 60 degree November weather at, yo?! jacket: For-never21; Monet-wannabe dress: vintage, thrifted; belt: Anthro; boots: old, Seychelles
Y'all. I must apologize. I'm currently ADDICTED to creating memes. This here would be Exhibit A., B. and C.


 OMG, that face, I'm dying. The alpaca don't have top teeth in the front, just bottom. Their upper lip can separate and pick up even the smallest bits of food like tweezers. 
 Thursday-ness: I have to help out with math in fourth grade every so often. Which is RIDICULOUS as I'm THE WORST at math. I did have a funny convo with one student. He got the answer "52" and he said, "that's the age of my dad." To which I replied, "Huh, my mom is 58." And he was all, "whuh?! That means they are only 5 years apart. And I'm only 10! And you are, well, kinda old." After I forgave that "old" business, he asked how old my mom was when I was born. When I told him 17, he replied knowingly, "Ah, a teenage pregnancy. It happens." Bwahaha! dress: Modcloth; pencil sweater: DIY here

Alpaca Farm Friday!: Don't you worry, I didn't wear THIS to the farm although I couldn't resist wearing this skirt to school on Friday. I mean, hello, it has alpacas on it! (okay, so they might be llamas but whateves). I did change into some lovely long johns, leg warmers and a down jacket for the trip to the farm. It was a might bit chilly but so worth the cold to see these sweet guys and gals. sweater: Anthro, thrifted; belt, shirt and skirt: Anthro, not thrifted, unfortunately
This little baby alpaca (only one year old!) was easily my favorite. Thanks for dropping by, guys! 

 photo signature_zpsd10b3273.png

Thursday, November 13, 2014

In the Art Room: Mexican Sun/Moon Weavings

You know, as an art teacher, I just can't seem to teach short and simple lessons. I ain't braggin'. It's a real problem. I mean, what you are looking at here took us 4 weeks of art class to complete (that'd be 4 hours). What with the metal relief, the coloring, the puffy painting, plate painting and weaving, I thought the entire thing would never end. However. Looking through the stacks of these masterpieces and reading the kid's artist statements about their work (as well as the sweet notes that my second grade kids wrote them about their artwork), I like to think it was all worth it. That being said, you had better believe our next project is gonna be, well, less than four weeks. Like, maybe three and a half.
So just how did this whole project come to be? Well, I go the idea for the metal design from Denise Logan in her book and on her website, she shares the lesson of creating a Mexican sun. I love her lesson but decided to take the process one step further by adding the woven edge. This is the same group of fourth graders that created these stitched creations. Their fingers were itching for more fibers arts so I thought, why not give the kids what they want?
The process for the sun/moon plate was much like the one my third grade students created for their dots. To begin the project, on our first day, we reviewed what we new about Mexico with this prezi. Then, I introduced the ceramic work of the artists in Metepec, Mexico with this prezi
After that intro, the kids were given this sketching sheet to hash out some ideas. I set my Time Timer for 7 minutes and told them to meet with me again when the timer went off. 
 By the way, here's a lil shopping list for you:

  • Cheapo Styro Plates. I mean the really cheap kind. Two for each kid.
  • Cheapo Foil.
  • Spray Glue. 3M's my jam.
  • Ink Pens. They work best on styro as they don't cut into it like pencils.
  • Face Template. Hate me if you wanna, we used facial parts to trace for those who didn't feel confident in drawing their own facial pieces.
  • Circle Temple. 

Once the timer went off, we met again to talk about how to make our sketch a reality. First step, cut out two circles. One will be for the face the other, the parts.
Trace template pieces or create your own template pieces on your sketch paper. Cut those out and trace around them. I discouraged the kids from sketching directly on the styro as they couldn't erase those lines.
 Start gluing those pieces in place. By the way, I don't use glue bottles in my art room as they are the Root of All Evil (I remember the moment I saw a child attempt to use the blade of a brand new pair of scissors to unclog a bottle whilst another proceeded to bust off the tip of his pencil lead during his stabbing/unclogging attempt. Forever after that, it's been glue in a cup and paint it on.) 

This was about all we managed on that first day. Each kid was given an envelope to put their pieces in for the following art class.
 During our second art class, the kids finished cutting out and gluing pieces. The kids could decide if they wanted to make a sun, a moon or a combo of both. When they were finished, they came to see me at the Super Amazing Spray Glue Table where I spray glued their work and placed foil atop. IF they wanted a sun/moon, I sprayed their styro face and gave them yarn to lay on top however they wanted it.
Massage the plate but do not use your fingernails. That will tear the foil and make for a super sad art teacher. 
From there, color was added with Sharpie. Now, I did have to make one muy importante rule: The background of the face needs to be ONE color (unless it's a sun/moon). Here's why I did that: I noticed the kids were picking colors at random and they were losing the face completely. I told them that the raised pieces could be any color they wanted but that the background was to be one solid color. No one's creativity appeared to be crushed during the enforcement of that thar rule. 

Once coloring was complete, the kids entered Puffy Paint land. WHICH they loved, according to their artist statements. 
 During our next art class, the kids painted the outer edge of a large Chinet plate (I suppose if you wanted a shorter project, have the kids create smaller faces and use smaller Chinet plates? Just a thought). That only took them 15 minutes which gave them more time to finish their coloring and puffy painting from the previous class. I did have a couple early finishers who began our next project: Ojos de Dios!
 The following class, the paint had dried so the kids cut their plates and started weaving. I gave the kids a template with 19 notches cut into it. They laid the template on their plate, cut the notches and started to weave. I do a weaving project every year with my students so a quick reminder that weaving is over and under and they were off running.
Me: Oh my goodness, I love your sun/moon! Can I ask what's on her lip?

Student: She has one of those sores that I get in the winter.

Me: Um, like, a cold sore? 

Student: Yeah, that's it! I wanted her to have a cold sore.

(OMG, I die.)
Once the kids wrapped up their weaving, they were to write an artist statement. We chatted about how we could either write about the process, the product or something we learned. Once those were complete, they were glued to the back of the weavings. Reading those statements was hilariously enlightening.


So apparently the kids like puffy paint. I did have several kids write about something called "puppy paint". Um, what?! Do they think I'm so cruel that puppies were harmed in the making of said paint?! Guess we need to have a chat. OR I need to do a better job enunciating. 
My school district is joining in on a Be Nice Campaign. The kick off was this week. So I decided to have a weekly Give Nice a Try post in my art room. Sometimes we'll have time to give it a go in the art room...however, often times, I'll be counting on the kids to do this on their own time. This week, it worked out for my sweet second graders to write a nice note to the fourth grade about their finished pieces. 
Here are the second graders writing their nice notes to the fourth grade.
 
I double checked all notes before giving them out to the fourth grade. I wanted to be sure they were nice. This one was especially sweet.

The fourth graders were pretty stoked to get feedback about their artwork. I had them write thank-you notes to their new second grade friends. This note really showed the impact of our letter writing campaign. 
And there you have it! Even though this project took us forever, did involve relief sculpting, Sharpie coloring, painting and weaving (oh, and puppy paint, ha!) all while learning the history of the Metepec suns of Mexico. What's your fave long-winded art project? Please tell me I'm not the only one with million-year art projects, y'all!
 photo signature_zpsd10b3273.png

Tuesday, November 11, 2014

DIY: Super Sparkly -n- Simple Holiday Decor

I dunno how y'all entertain family when they come to visit but I'm guessing you take 'em to see the sights, feed them and do whatever good hostesses do (meanwhile, all I know about Hostess is they make a KILLER Twinkie). As for me, well, I like to put 'em to work. For zample, when my dear ole moms, mom-in-law and her sister (my aunt-in-law? Nah, she's just Aunt Rose to me) came to town, I decided to have them help me create some holiday decor (added bonus, a DIY blog post, yippie!). And I'm so glad I did cuz now I have this super feathery wreath and ultra divine wall hangings (um, scroll down-eth) just in time for Feliz Navidad (er, I guess it's just Navidad in this case, huh?). Here's how the whole process went down, Charlie Brown.


I started by informing each of my charges that they WOULDN'T be fed again UNTIL crafting was complete. At one point, Aunt Rose (seen above in what she dubbed her "White Trash Honey Boo-Boo Apron") said something along the lines of this being like a labor camp to which I replied, "WHY ARE YOU TALKING?! You can't craft while your lips are moving now hush it and get back to glittering!" 

They pretty much behaved after that. Family, I tell ya. They really are just like a class of kindergarteners. 
Oh, you know I'm only (slightly) kidding! We had a great time crafting it up. Even my mom who has crafting-phobia (is there a thing? Hold on, lemme check...um, all I could find was something called "unicorn-a-phobia". Why do I have a feeling this is wrong? On, like, so many levels) was all elbows deep in glitter, glitz and Martha Stewart paint. So just how did I come up with this lil craft?
Well, a coupla weeks back, Anthropologie had it's little "craft get together" (which truly is a labor camp but it's all good. When it's crafts, it's a labor of love. Plus, there's booze. Which washes down the glitter so well) where we did a super similar craft. They had us cutting out feathers, paint them and then glitz them up with glitter and gold leaving. 
I just so happened to have donated to me a wee mountain of different colored card stock. I created a couple of feather templates for the fam which they traced and cut. From there, I busted out the sea foam and sky blue paint which was dry brushed onto the feather. Once those were dry, we added gold paint and/or glitter. 
Of course, where there's this much glitter, one risks Glitter Lung.
It's a chance we dedicated crafters must take. 
Oh, gah, I just hacked up a disco ball.
Now the menfolk opted not to partake in our craft-tastic ness as glitter is kinda like dude kryptonite in case you didn't know (ladies, just dab it behind your ears on those nights that you, well, just aren't in the mood, ya feel me? Works like a charm). Instead, they went hiking and brought back this mountain of turkey feathers. WHICH we promptly covered in glitter. We might have been a little dizzy from all the glitter-induced coughing fits. When hubs walked into our crafting lair (aka the dining room) he was all, "You just ruined all my turkey feathers!" Ruined? Really? It's called Bedazzled and you outta look it up, yo.
 Since my labor force was so motivated by hunger, they created so many feathers, I was able to bust out a couple of these wall hangings too. 
I used old canvas stretches and some AMAZING gold-leafed yarn I scored at JoAnn's. Just dry brushed the stretchers and added the glitter feathers. Cake, y'all.
Glitter Cake. My fave.
Now covering the world in glitter was not the only thing we accomplished. We also made these feather-tastic beauties!

Twas super easy, y'all. This is a similar craft as that Leaf Relief project I shared a while back. With matte board, paper and spray glue, I cut out the feather, sprayed the board with the glue and attached my paper feather. Then I hit the board with glue again and covered in foil. Finally I sprayed the whole thing with the world's cheapest spray paint. 
It's the dollar spray paint from Home Depot. It works the best cuz it sucks the hardest. Trust me on this. 
While you're at The 'pot, don't forget to pick up some ultra fine steel wool. That's what you'll use to burnish off the spray paint. These are my mom's craft-phobic hands. I think she's doing pretty good, don't you?!
And mighty pleased with herself too. As she should be. 
While we were sitting and painting, I noticed how pretty everyone's paper towels where from wiping the paint brushes. So I gave everyone a little 6" canvas square to just dabble and clean their brush on. Today I added mini-feathers to the painting group. Top left is my mom-in-law, right is my mom's, bottom left is Aunt Roses and right is mine. I've got em all signed and dated.
And there you have it! So the next time that fam of yours comes to visit, remember: withhold food and put 'em to craftin' work, y'all! You'll have a Super Sparkly Time, I promise! 


 photo signature_zpsd10b3273.png