A couple of days ago, I shared a wreath drawing/marker painting lesson here. As I continued tinkering with this lesson idea, I thought it would be fun to try marker prints on a pizza pan. If that sentence leaves ya scratching your head, here's my video here:
For this, you'll need:
* A pizza pan, a sheet of foil or any non-porous surface for printing
* Crayons
* Water-based markers (not permanent)
* Spray bottle of water
* Mixed media paper (paper thicker than copy paper works great...but you could totally use copy paper in a pinch)
To add a little dimension to the wreath, I thought I'd add a little pop-up bow demo. I hope you have fun!
Hey, friends! I shared on social media last week that I had some exciting news...with my friends at Prang, you can now purchase ROUND paper!
Here's a little more about how that idea came to be:
If interested in seeing those round Dot Day activities my students did, visit here.
But...I know that there are TONS of art lessons out there that could be based on a round piece of paper! In fact, I would have loved it for my Snow Globe lesson!
Here's a little peek at the paper Prang has for you:
I was concerned that the paper wouldn't be their good quality stuff but it is! In fact, I was able to paint on it to create this wreath project! I created a video for you to use in your art room or at home. Of course, if you don't have round paper, that's no problem! I walk you through an alternative at the start of the video. Here you go:
So, honestly...while creating this video, I wasn't sure if the markers were going to bleed enough to provide color. At first...it seemed nothing was happening. I thought the lesson was just going to be a flop! BUT then I came back an hour later after the paper had dried and it looked AMAZING! So be sure and tell your artists to be patient and let it dry.
Creating a wreath puts me in mind of Christmas! If you have children who are readers...might I recommend my art-themed choose your own direction book Find Your Way. I've had so much positive feedback from parents, homeschool families and teachers alike! You can find it here.
So, incase you didn't know: I have a little bit of a thing for taking Christmas tree skirts and transforming them into lady skirts. I've been doing it For-Eve-Ah. In fact, you can check them out here...
And, I'm sure you can believe this, there's even one more that I didn't document here on my blog! I taught a group of teacher friends years ago in an after-school sewing class how to make one! But...it's been a while. And, since then, I've started creating more video. So I thought it was time for me to update this DIY and create a video how-to! Here ya go:
It's a video that's kinda all over the place so my apologies for that. But it truly is SO EASY. Just remember the following:
* Get a skirt that's 48" and it should be long enough. There are tons on Amazon but...since Christmas is quickly approaching, check those After Christmas sales for tree skirts when they are super marked down!
* Measure your waist and add 2 for the seam allowance.
* Fold the skirt 4 times so you have 8 pieces of fabric folded over.
* Take your waist measurement and divide by 8.
* Using a tape measure, start at the top of the folded skirt and make your way down until you hit that measurement across the top of the triangle (the video shows this best).
* Use a small round plate and chalk to draw the curve onto the fabric and cut.
That's the most important steps to remember as you begin. In the rest of the video, I share how to make a waistband and add a 10" zipper. Although, to be honest, if you need a zipper how-to, I recommend watching another video as I failed to film a portion of that! I swear it hit record! So sorry.
Just remember: no one is gonna get that close and see small stitches that might drive you bonkers. I mean, shoot, even if you skip the zip and use VERY STRONG velcro (we don't want any wardrobe malfunctions!), you'll be fine.
Merry Christmas, friends!
BY THE WAY...I've not officially shared here even though I've been meaning to...did y'all know I wrote another book?! I finally turned my poem Larry the Line into a children's book! I made it longer, illustrated it and...here it is! It's gotten over 80 5-star reviews from teachers and I'm just so thrilled. You can get a copy here, if ya like!
I admit: I have been bitten by the Christmas Bug hard, y'all! I have a Hallmark-movie-loving/kindergarten-teachin' buddy at school to thank for that. She's been chatting way about All Thangies Christmas since, like, Halloween. In fact, I think it was Labor Day she told me her decorating was complete. At first I was all, girl you crazy but then I drank the Christmas Kool Aide (which tastes like peppermint, by the way) and have actually been garland-ing up Casa de Cassie every since. Thanks, Heather! I'll blame you when I'm sick of Christmas by December 1st!
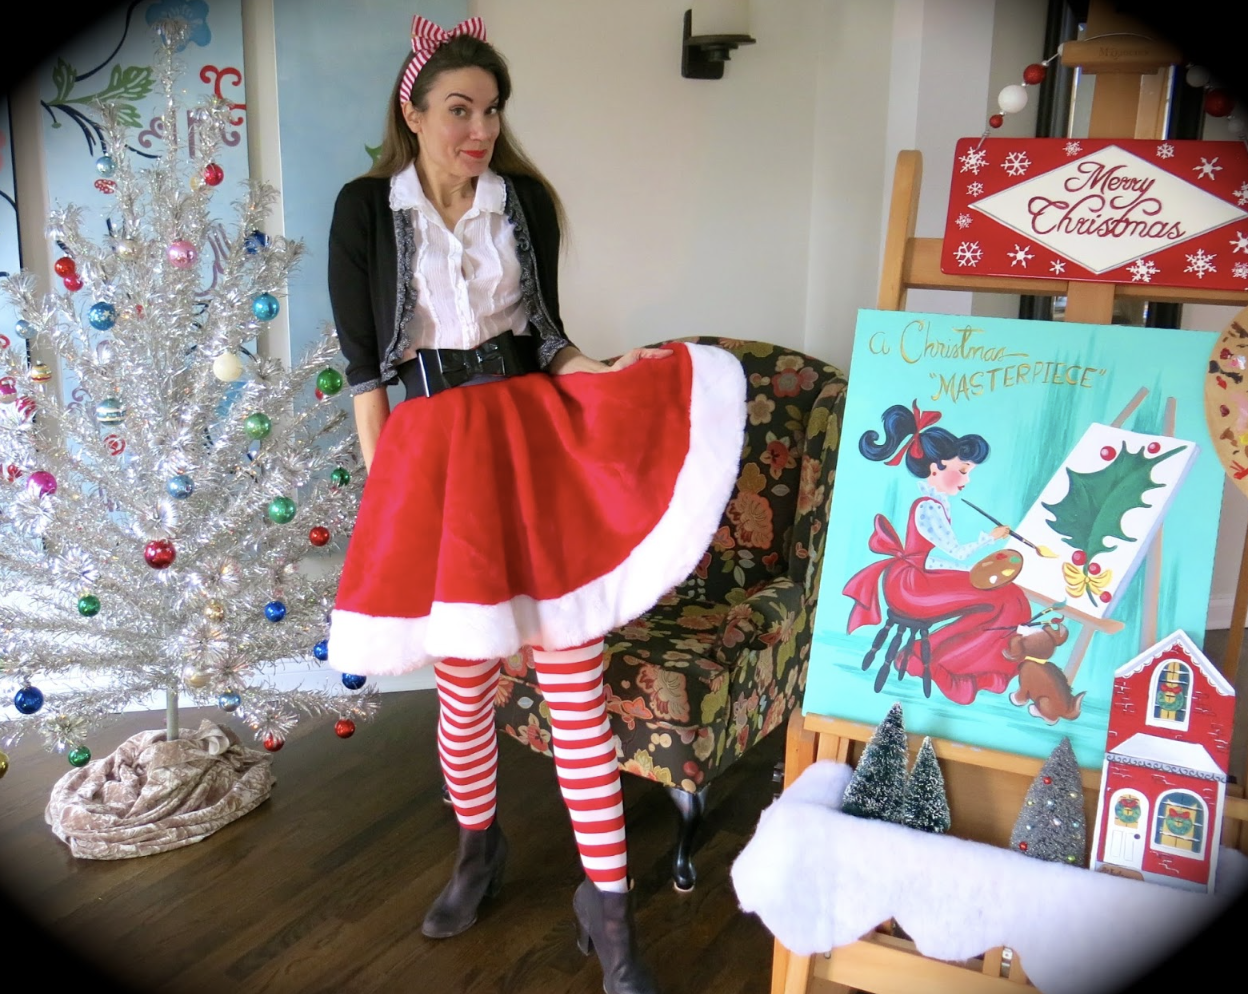
Since my house is all sorts of Sparkly Christmas-land, I thought I'd jazz up el bloggo as well. AND share with y'all my fave DIY's of Christmas past. What better DIY to start with than Christmas Dresses, my personal fave. I created that Christmas dress on the left last year on Christmas eve, y'all! Talking about cutting it close. And that lovely candy cane number was cut from the same pattern with just a wee touch of Santa fur for trim.
These two Christmas dresses were among some of the first I made. My Blue Christmas dress has blue lights sewn in the hem with a remote in the pocket. It's always a kid-favorite. And one year we created German-style cuckoo clocks and I just couldn't stand not making a dress from that clock fabric when I found it!
Of course, y'all know my Christmas wardrobe wouldn't be complete if I wasn't cutting up every tree skirt and creating a Christmas-Tree-Skirt-to-Lady-Skirt like that fuzzy number above!
Of course, I know I should hold vintage tree skirts sacred...but look how crazy fun they are as skirts! I love circle skirts and these are easily my favorites to wear. Follow this link to see just how creepy that Santa is on the skirt on the left. The skirt on the right is the first tree skirt I transformed. Like, it can be done in under 60 minutes, It's so easy to do it's no wonder I'm addicted!
And then, you know, when one runs out of tree skirts, round table clothes can come in just as handy. This one was a buck or three at the thrift store last year. A lil garland was added at the bottom because otherwise that dress wouldn't have been nearly tacky enough for me to wear.
And one's feet simply should be Santa-fied, says me.
Tacky Christmas Sweaters are always a must...but why stop at just a tacky sweater, says me. I needle felted this lil guy over Thanksgiving a coupla years ago.
This photo is actually a whole-lotta DIY in one. There's that sweater, that puffy skirt and those gold-foiled shoes. I was actually wearing this ensemble when a stranger at Starbucks snapped my photo and blasted it out to his friends making fun of me! That's the Christmas spirit, right? Don't you worry, I got him back. You can read the deets in this post.
As a kid, Making Christmas Ornaments was my fave tradition. But, sometimes, you can just use what you have on hand it makes for a unique display. Like the time I decorated a tree with my vintage paper dolls!
Or, last year, when I was on an alpaca kick, I busted out these guys with the help of my mother-in-law.
My fave thing to do over the holidays is host craft nights. I love my super artistic and creative buddies! And we always have a great time creating with each other. Last year we needle felted some lovely holiday-themed pieces. I'll keep you posted what we are creating this year!
Of course, whenever the fam visits, we always do a lil crafting. My mom-in-law is very crafty and my mom, well, she's just kinda dragged into all of the glittering and gluing by default. I put 'em to work on my holiday decor last year!
One of my favorite things to do, other than stitch up dresses, tree skirts, make ornaments and strong arm my family into crafting, is paint from vintage Christmas images!
This cute little wooden house was in my stash forever before I painted it to match the painting seen above.
Of course, who doesn't love this gal? That big fluffily coat, that smart hat, green eyes and those gloves!
Y'all know I had to go and candy cane that canvas edge, right?!
And my very first painting was a copy from my favorite Christmas book. Love Ruddy! I hope y'all enjoyed this waltz down DIY's of Christmas past. I hope there'll be many many more!
Can't take credit for this lovely. It was created by my super talented friend Tamara. Isn't it so stinkin' sweet?
Just so you know, my house only gets cleaned when company is coming. Now, not the entire house, mind you. Just the places I think peeps be seein'. And if Ima gonna go all out and decorate for the holla-daze, then somebody best come around for a visit. For that reason, 'tis the perfect time to host a Christmas Craft Night, says moi.
When I popped in to visit my buddy the other day, I totally stole her little lovely off her tree and promptly placed it on her front door for a photo op. What you can't see is her standing just on the other side of the door asking, "Is it cute? Do you have it on the wreath straight?!" Oh, if these poor blog photos could talk, y'all. The stories they'd tell.
'Kay, so I super duper love having buddies over for crafting. For the occasion, I usually make a big ole pot of soup (minestrone is my fave), have some bread/cheese/wine handy and a dining room table all covered in crafts. As folks trickle in bearing gifts of apps and zerts we usually vent about the day's teacherin' events (as expected, most of my buddies are art teachers) before bucklin' down with a bowl of soup and get to crafting.
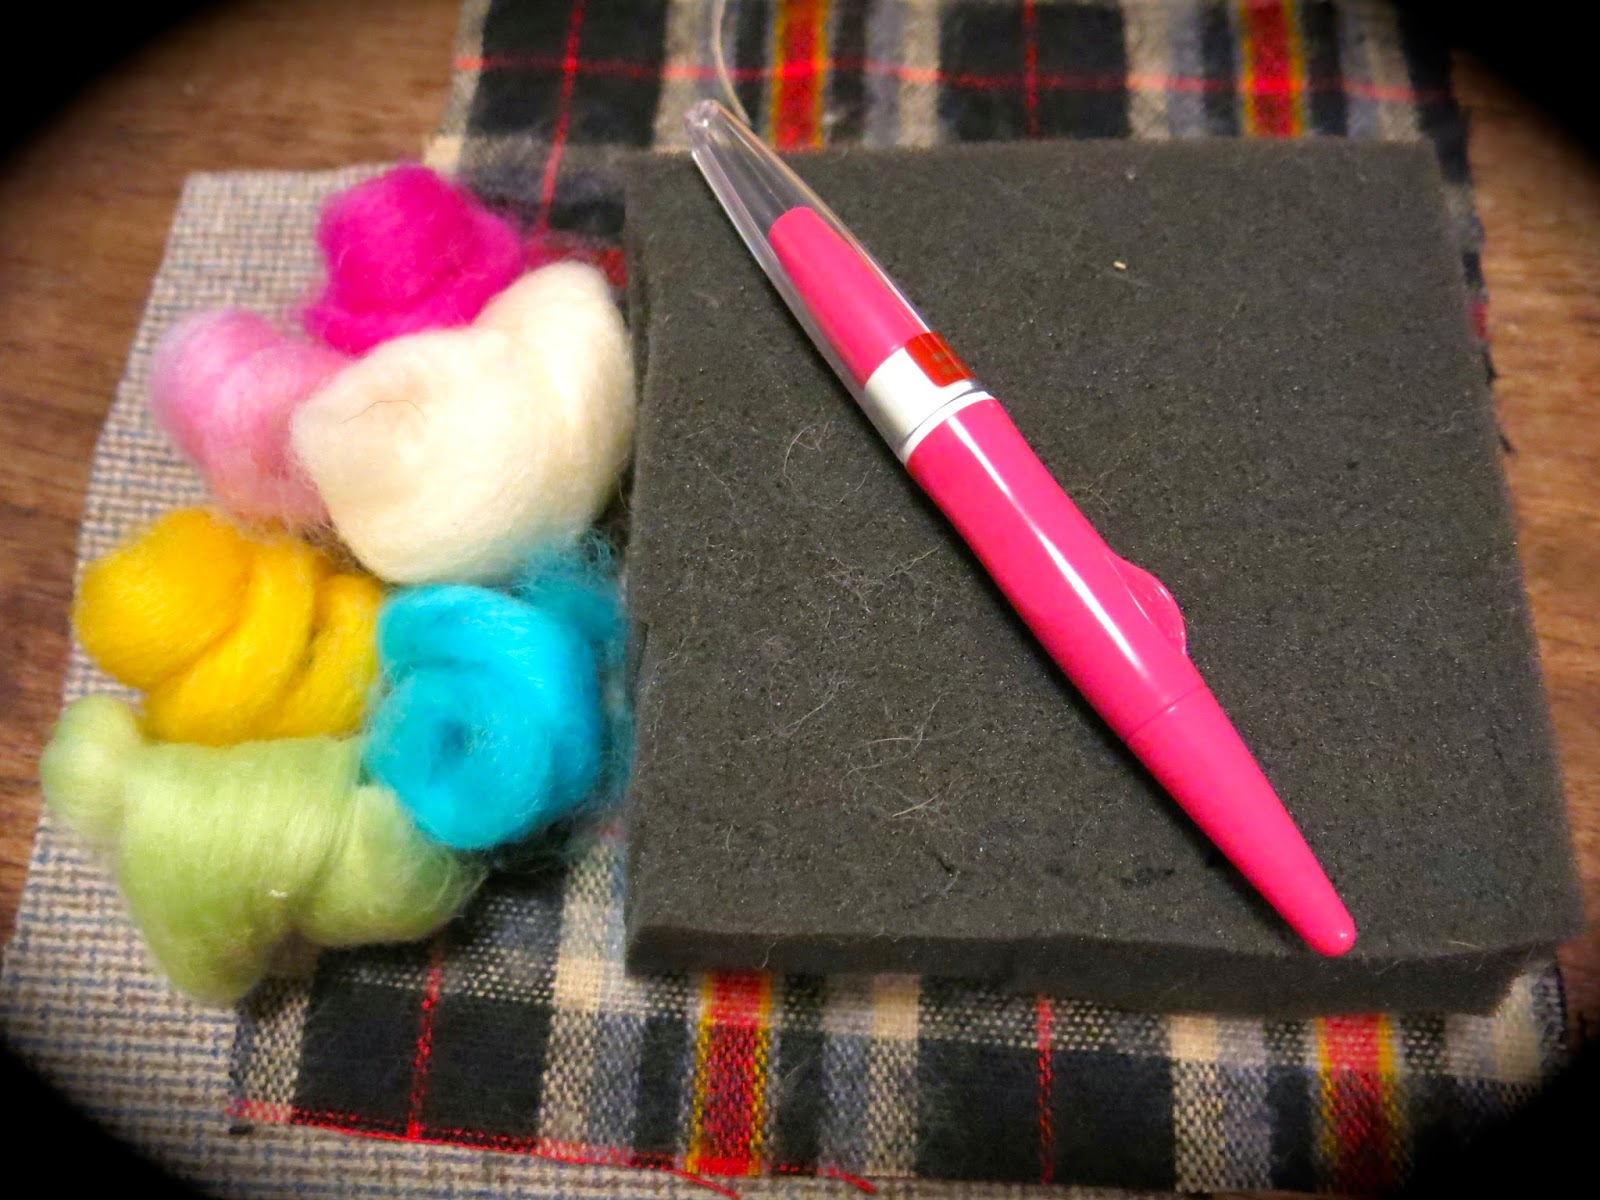
On this particular craft night, we did some needle felting. I thought it'd be fun to just needle felt whatever (like I said, most are art teachers, you give 'em the goods and they'll go to town) and frame it in an embroidery hoop. As for supplies, you can see (from left to right) I had some foam cushions for underneath the felting, wool yarn, wool roving, fabric (not necessarily wool), embroidery hoops and needle felting tools. I loved seeing the variety of what everyone created.
So simple and sweet, right? Meredith outlined her R in wool yarn which really made the letter stand out.
My best gal Mallory made a sweet little "L" for her daughter Lydia Dot who's celebrating her first Christmas this year. You might recall we had a Pee Wee themed baby shower for the arrival of El Dotto.
Here was my lil 'zample that I busted out about 10 minutes before everyone arrived. Mostly cuz I was running around like a crazy person attempting to get my home to look less an-army-of-clown-hobos-live-here-esque.
Now whilst everyone was needling away, I got the notion that the hoops would be super cute wrapped in this amazing gold leafed yarn I picked up at Joann's.
It actually was easy to do and I think looks great. But I think a lotta things look great so what do I know?! To start, use the outer hoop an remove the screw. Hot glue the end of the yarn to the start of the hoop and commence wrapping, you rapper, you.
AND hot glue the other end of the yarn! Now, the yarn will make the hoop so large it won't be able to close with the screw. So we used some jewelry wire and closed the hoop with that. Which was pretty unsightly so we covered that with a lil pompom.
Like so! Totes adorbs, amirate?! By the way, in case you are wondering, that's a fox that has hyper extended his neck.
What that lovely lil dinning room table looked like near night's end. Sadly, I didn't get a pic of everyone's creation. Although, I did manage this gem...
Not only are my friends so exceptionally good looking that it's almost criminal, but they are a super talented crew too. Meredith, top left, is an art teacher and incredible paper flower fabricator whose lovelies you can see here and here. And Aimee, red apron in the middle, sells the most fabulous vintage classes in her art teacherin' spare time. Crystal, who is just to the right of Aimee, creates incredible jewelry with guitar strings from her husband's band Old Crow Medicine Show. All of these ladies are awesomely wonderful, I was simply thrilled to get my Christmas craft on with them.
Which brings me to my most exciting giveaway goodies of them all (mostly because needle felting is my ab fave!). A slightly used needle felting tool and cushion. AND two pieces of lovely fabric and roving! Here's how you can enter to win... 1. I'd love to know...if I shared more DIY video clips on this blog, would you be interested? Would you view them or is that simply not your thing? 2. Please leave your email so I can reach ya! As for yesterday's winner...congrats to Debbie! I'll get those lovely magazines out to you soon.

.jpg)


.jpg)


.jpg)