Showing posts with label art project ideas. Show all posts

Tuesday, October 18, 2016

In the Art Room: Monsters of Creativity

Fall means art teacherin' conference time which I so totally love. What I don't love is prepping and planning for taking those days off. I mean, I gotta create content that's educational and engaging both for the sub and the kids all while using materials that aren't too difficult for someone who just might not have an art background. I recently shared with y'all a bunch of my sub videos. Because I'll be out for the next couple of days attending an art conference in Wisconsin (can't wait, y'all!), I created this lesson and thought I'd share it as well.
 It's been my goal this year to introduce my students to contemporary artists with a focus on street artists. I recently did that with our wings mural project. This go-round I wanted my kids to meet the street artist who goes by the name Phetus.  
I think my students will love his colorful and humorous monsters...and hopefully be inspired to create their own!
 My hope is to display their monsters in a grid-like manner such as this. We're calling our display Monsters of Creativity. This will be showcased right outside the art room. Kinda fitting, no?
 I had so much fun creating my own examples for this project. I just love these!
Tomorrow, in Art Teacherin' 101, I'll be sharing with y'all just how I prepare for being absent and what I believe to be the essentials for a sub. 
Fingers crossed my subbo has a great time and that the kids create monsters...and not behave like them. 
 I'll be certain to share a follow up to this blog post and let y'all know how it all goes. Until then, put that tongue back in your mouth and...
Make something monstrous!
 photo signature_zpsd10b3273.png
Read more »

Tuesday, September 23, 2014

In the Art Room: A Dotted Relief Sculpture

You know those flakey art teacher types that, although they've taught art for something close to 100 years, they still neglect to order art supplies until well into the school year? 

"Good heavens, no!", you say, "I don't know nor would I ever associate with any of those types of art teachers."

Oh, but you do. Hello, my name is Cassie and I am Queen of the Flakey Art Teachers. Seriously. And I've got a glitter-encrusted crayon-crown to prove it (if I could only find the blasted thing).
Why make this announcement in this here Dotted Relief Sculpture post? Because this project was born outta an empty art supply cupboard. In fact, I've rewritten a (disturbingly morbid, go here and read and tell me I'm lyin') children's poem just for the occasion. I've titled it Old Mutha Stephens:

Old Mutha Stephens
Opened her cupboard to be retrievin's
Some paint, colored pencils and glue.
But when she came there
Her cupboard was bare!
And so her students used foil and plates and didn't have a clue
That their art teacher was a Big Crazy Unorganized Flake.

(Okay, so that last bit is a work in profess, you'll have to forgive me).
What's that? You too strive to be just as flakey as me and wish to dupe your student into thinking you just dreamed up the most awesome project on the planet? Oh, well then. You came to the right place. Get yourself to the nearest grocery store and grab the following:


* Super cheapo styrofoam plates. You want the cheap ones because they cut much easier. Each kid will need two so go for the largest supply.

* Spray Glue. I like 3M because it doesn't suck. 

* Cheapo aluminum foil. The thin stuff works great.

* Sharpies in a lotta colors. 

* Glue. You know, like, Elmers or something.


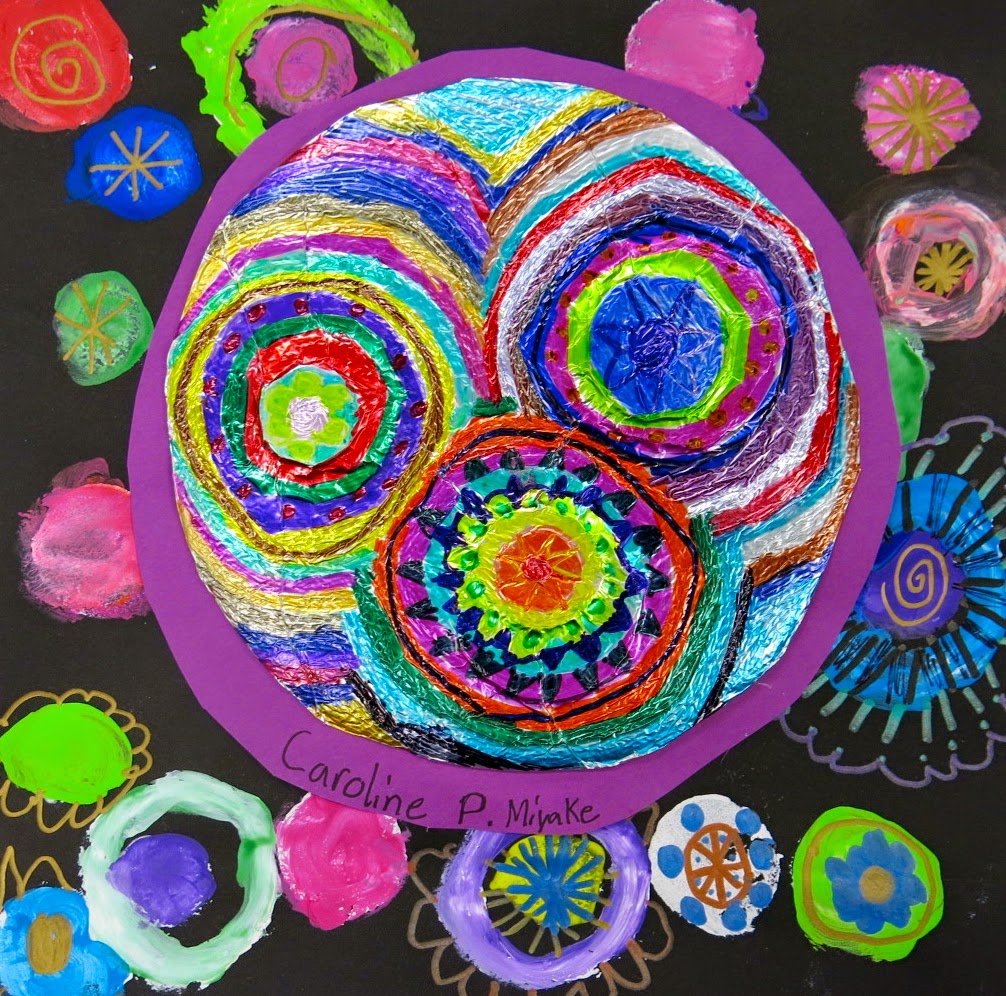
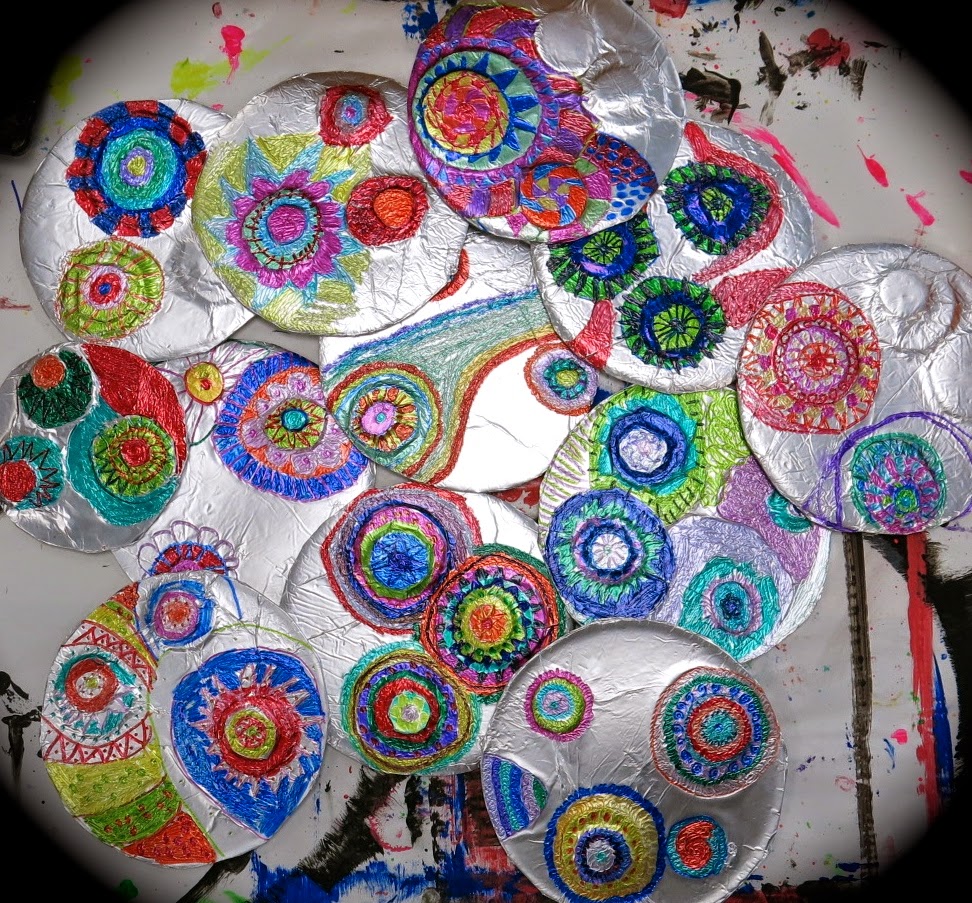
After reading The Dot, the kids traced a circle that was the size of the center of their styro plates. After cutting out two circles, they used one as the base for their relief sculpture. The other circle was used to trace bottle caps and cut out smaller circles. These were glued to the larger circle. After they had a minimum of three smaller circles with a maximum of two stacked on top, they visited me at a separate table where I hit their work with a shot of spray glue and slapped a piece of foil on top. They returned to their seats to "massage" the foil and reveal the circles underneath. The extra foil was cut away from the circle and tucked underneath. Then the fun of coloring designs in sharpies began...


I gave the kids a zen-tangle-meets-circles idea sheet to get the ball, er dot, rolling. I'm a big believer in what we call "idea sheets" as I'm one of those artists that always needs ideas and never just has 'em pop into my lil head. For my wee artists that are the same, I provide idea sheets. The kids know that they are just ideas and they don't have to use them if they don't need 'em.
After the first hour of work, their dots looked a lil like this. I loved 'em so but I just couldn't imagine them being hung like this. So the kids began working on dotted frames to mount them.
Which were stamped with round stamps in white. The kids added color to the white dots with either paint or makers. Once those dried, they embellished their frames with Magical Metallic Markers (which are only "magical" because I told the kids I'd bought 'em just for them and that their nemesis, the fourth graders, had not used 'em yet. This got a lotta yesssss!es from the third grade crowd.)
To mount 'em, the kids chose a colorful piece of paper that they thought enhanced their design. A larger circle was traced and their metal dot was glued atop.
And that was then glued to their super groovy dot-erific frame.
The kids all loved how Peter H. Reynolds signed his name with his middle initial and several of 'em followed suit.
I'd say there's no dot, er doubt about it, these bad boys are dot-alicious (okay, okay, I'll stop. But I'm at the end of my post, just trying to bring it all together for ya!).
Funny story: just this afternoon, my personal hero, our school bookkeeper, announced over my phone, "Mrs. Stephens! It's Christmas in the office, your supply order came in!" and wouldn't you know it, the kids cheered HURRAY! 

Looks like Mutha Stephens just hit the art teacherin' mutha load. Empty cupboards no more, yippie!

 photo signature_zpsd10b3273.png
Read more »

Thursday, August 14, 2014

In the Art Room: Gettin' Outta the Art Room!

Hiya, kids! I thought I'd share with y'all today some excitingness that has me busting outta the art room and hittin' the road. The CliffsNotes version is this:

* On Saturday, September 6th, I'll be leading a workshop at Cheekwood Botanical Gardens in Nashville. The workshop will coincide with Cheekwood's current exhibit of Andy Warhol's Flowers. We'll start the morning with a docent-lead walk through the exhibit and then jump right into printmaking, leaf relief sculpturing and some textile work that will involve my personal favorite: needle felting! The workshop fee is a mere $25 ($20 if you are a member of the Gardens). Spots are limited so if you are interested, go here, click the link and get yourself signed up. I can't hardly wait!

* On Monday, October 6th, I'll be speaking to the art ed students (and any folks who'd like to attend) at Bowling Green State University in Bowling Green, Ohio! Yeah, you heard me right. Here's how the talk is being described: 

A Bloggers Guide to Bringing Art to Life

Cassie Stephens graduated from Indiana University with a BFA in painting and an art education certification.  After student teaching in Ireland, she moved to Nashville, Tennessee where she has been teaching art to kindergarten through fourth grade students for the past 15 years. She is a blogger sharing her passion for bringing art to life.  This might be by dressing like Andy Warhol's Soup Cans or Vincent van Gogh's Starry Night.  She enjoys connecting with art teachers from across the world with her blog and will share examples of art projects that reflect this global outlook.

Wow. Totally freaking the funk out about this one! I'm so excited to chat with art ed students as well as anyone else that would like to attend. The talk will start at 5pm, is open to all and it's free (I'll share the exact location with you soon). Hope to see you there! 
But first, let's chat about this Cheekwood Adventure, shall we? I love Cheekwood, y'all. When I first moved to Nashville, I used to go, hang out in the gardens and attempt to paint. It's always gorgeous, peaceful and inspiring. A fellow art teacher buddy and I visited this summer to check out their current Big Bugs outdoor exhibit (although the million degree summer temps prevented us from lasting too long) the Andy Warhol's Flowers show.
I like Big Bugs and I cannot lie. Actually I freakin hate bugs of any size. This summer, a buncha buddies and I were waiting to eat at a restaurant (which I will not name but I also will not be eating at ever again) when a FREAKIN HUGE cockroach landed on my friend's shoulder. I was the only one that noticed the monster crawling on him and started screaming "Oh my gawd, OH MY GAWD," at the top of my lungs. Meanwhile, everyone else was trying to figure out what I was spazzing over because I was unable to say anything other than, well, oh by gawd. When the others finally noticed La Cucaracha, EVERYONE started screaming and jumping up and down until the poor beast was finally crushed. It was at that point that we noticed the ENTIRE restaurant had stopped and was staring in our direction. Awk. Ward.
See? I done tole you the gardens were beautiful! We'll be using both Andy Warhol's printed flowers as well as Cheekwood's real ones as our printing/sculpturing/felting inspiration.
Now, if y'all can't make it, you can always read all about the process of printing that we'll be doing here. This is actually one of my most visited blog posts and I think it's because the results look so stunning. I did this project with my lil 2nd grade friends and they rocked it. You can check out all the deets here. 

One printing process results in two amazing prints. I'm hoping we can print some flowers while we are at Cheekwood. Although, in the past, I've just used leaves as their flat surface doesn't puncture the gelatin printing plate. But it will be fun to experiment, so we shall see!
For our relief sculpture, we'll be creating these super groovy leaf and flower pieces. I have done this project with my 3rd grade friends and they always look rad. You can read about that project here if you wanna.
 In the afternoon, we'll be needle felting! I'm still toying with the idea of just what we'll be creating...but I'm excited about the possibilities! Of course, we just might have to felt some flowers. You might recognize these from my Felted Fiesta Frock with Ballz.
So! I hope to see y'all there! And my Ohio friends, I hope you'll join us at BGSU. Until next time, I hope you have a super fab week, y'all!

Read more »