Showing posts with label clay projects for children. Show all posts

Wednesday, March 1, 2023

Let's Talk Clay! Part 1

Well hello there, y'all! It's been a minute...and, if you haven't heard, a lot has happened around here. Like, for instance, me stepping away from teaching art in a classroom setting after doing so for 25 years! I KNOW. CRAZY. All the details on THAT very soon but first...a little something that I've been promising on Instagram for quite some time: a big ole post on all things CLAY. 

Let's first cover my supply list of Must-Have's for working with clay:
* TOOTHBRUSHES! I'm so sorry to shout...actually, I'm not. You will thank me later but THIS is what your kids should be using when they slip and score. Buy this set and use them year after year!
* WATER DISHES! This is where we keep our slip. In fact, I use the same set of no-spill cups each year, just add more clay to it. When clay time is over, I let the water evaporate and just leave the dried clay inside. When the new year begins, I just add water and we have insta-slip! Kids dip their brushes here. We also have a set of these just for painting...so I don't have to worry about cleaning them out when we switch from clay to painting!
* DOGGIE DISHES! Okay, so this is an alternative to the no-spill cups. I love these! We use these also when painting. So if the other cups are too much for your budget, try these!
* DOILIES! Since I started shouting, now I just can't stop. I LOVE doilies...in fact, just scroll below and you'll see a ton of my projects features a texture...it's from theses bad boys! You can also find them at your local thrift store and yard sale so be on the look out!
*SKEWERS! I think we all know about using skewers with clay but one thing that really always bothered me was how long they were. I was always thinking someone was gonna lose an eye! Not a happy thought. I discovered these shorter skewers a couple years ago and now...this is all we use. 
*TRAYS! Contain all of that dusty mess with trays. I didn't start using trays until recently and I was like WHERE HAS THIS BEEN MY WHOLE ENTIRE LIFE?! 
* GARLIC PRESSES! Oh man. You can't just get one of these. You're gonna need bunches! I found them here...but I have also found them less expensive at the Dollar Tree and Walmart. 
* REUSEABLE TOWELS! Oh man...I cannot tell you how much this saved the MESS in my room this year. Hear me out: I placed a bin of water on each table with a splash of soap and 2 towels. At the end of each art class, the kids used a towel to both clean their hands and the table. This kept the dust mess down! My custodian friend was so happy. 

The other items you'll find on my list are the air dry clays I've used in the past. I'm also sharing glaze (which is only used on kiln fire clay). I purchase my clay locally from The Clay Lady. She also sells the clay mats I strongly recommend. If you purchase your clay locally, you'll be supporting local businesses. 

And now...on with the show!

Isn't it crazy to think that we are expected to know about all things clay...just cuz we have an art teacherin' degree?! Well, I created a video sharing everything I know about clay. You can catch even more details in this blog post. 

Of course, there are plenty of ways to add beautiful color to ceramics without the hassle of a second fire and of the expense of glaze. I'll share a TON of projects in the second installment of this blog post that do not require glaze...and still look amazing. BUT FIRST...
What is Clay is a video I created several years ago to share with my students on the very first day of working with clay. With my 30 minute classes, we watch the videos and then we spend the rest of class just rolling up our sleeves and getting a little messy. It's a great introduction to clay, no matter what the project. Here's a peak at the video:
And now...a moment from our sponsor. 

Me. I'm the sponsor. 
Many of my projects can also be done with air dry clays, either homemade or store-bought. And if you are kiln-less and would like a little more guidance, I wrote a whole book about it! You can find it here
Okay, y'all. I really thought I could also add all my favorite clay projects also in this blog post BUT...I think I'll save that for the second installment of this series, so stay tuned. Until then, have a good one!

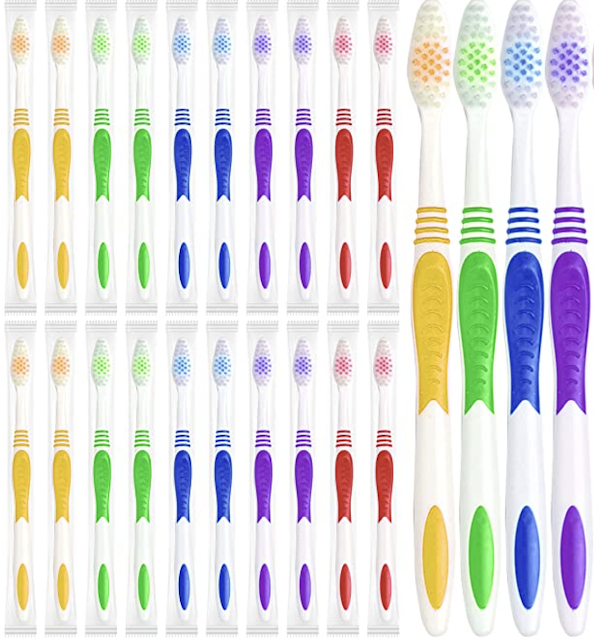

photo signature_zpsd10b3273.png


Read more »

Monday, February 25, 2013

DIY: Ceramic Gnome Homes

A neighborhood of gnome homes.
 My hubs and I've been married for something like a dozen years. Not sure exactly because I lost our marriage certificate long ago. It wasn't a day that stands out in my mind because it was simply a fifteen minute session with the judge at the courthouse. I don't remember much except that I wore this horrible cornflower blue two-piece suit dress from Talbots thus making me look like Barbara Bush. Hawt.

Details of adorableness. You sure you can handle this much cute?

Wait. Where was I going with this? Ah, yes, married life. In the beginning, hubs and I were never apart. And it was lovely cause we didn't wanna be. This changed over time (like six months in) and I began to kinda-sorta freakin' love my alone time. You see, hubs has to go on these occasional work trips and when he does, I likes to party. And by party I mean invite a buncha buddies over for grown-up drinks, laughs and gnome-home making. Exactly what the Beastie Boys were talkin' about during their fight for the right to party.
Textures for clay: lace, crochet bits, burlap and plastic doilies. Although texture possibilities are endless. My personal fave: the bottom of my shoe.
 Let's say you wanna indulge in your own gnome home making merriment. Well, this here clay project is so easy you can still be successful after a grown-up drink or three. Here's what you'll need:
  •  clay (I use a low-fire clay like cone 04-06)
  • rolling pins
  • textures
  • cornstarch (clay can often be too damp and stick to your rolling pin and textures. Cornstarch makes it less sticky without removing too much moisture)
  • old toothbrushes and cups of water
  • wooden skewers (for cutting the clay)
I swear to you my hands are not this skin-removed pink. Although maybe they are. The kids can hardly focus when I demonstrate on the elmo (not the doll, you silly, the piece of electronic equipment). My favorite kid comment of late: (whispering) ewww, did you see her hands?!
 To begin, I create the bottom of my home. Pick a texture and place it on a non-sticky surface. Place your clay on top of that. If your clay is sticky, sprinkle it with cornstarch and set to rollin' wit your pin. Not your homies. Keep you clay at a 1/4" thickness. Any thicker can cause explosions in your kiln while any thinner can be too weak. You gots to get this just right, Goldie Locks.
 Peel your clay off and viola! You've got texture. Now let's roll it up and make it into the base of your home.

 Now you could just roll it up as-is as shown on the left. Or you could cut one end of your rolled slab with an interesting line to jazz of the piece. It's up to you. Whatever you decide, use your old toothbrush to scrub one side thus gluing the connected pieces together.
 For some variety, I opted for a different texture for the roof. Crocheted bits like this can be purchased at your local craft store or pinched from your grannies house. You know, that lady who dresses like Barbara Bush.
 Roll this up waffle cone style. Again, toothbrush before you attach one side of the cone to the other. It might stick while you work but there's a chance that without using the toothbrush and water to attach it might not remain stuck for long.

 Set the roof on your house and pray you made it the right size. And if you didn't then you just messed the whole thing up. Aw, just kidding. But you did kinda mess up. Sorry. Make your waffle smaller/bigger and try to get it right this time, would ya?

My other favorite textures? Stamps! The larger stamps could also be used for the base or the roof.
I decided to use the stamps for details like this little faux wooden door. Clay loves to adhere to stamps so go all cornstarch on it and you'll be fine.
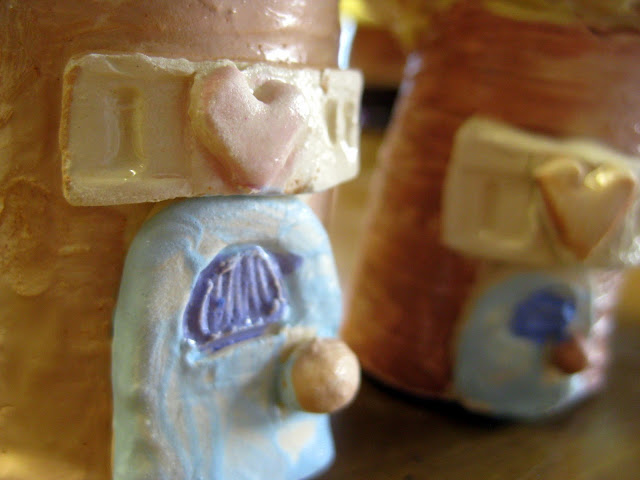
 My fave finishing touches are doors, windows, flowers and hearts. There are endless possibilities. I mean, just take a look at this cuteness:

 Aww! Add a couple hearts to the top for you and that special guy you hope goes out of town. These were done with stamps but you could also use alphabet pasta. Just leave the pasta in and let it fire off in the kiln.
 Sweet little ladder. It's always good to have a fire escape.
 It's so adorable it's burning my eyes. Seriously.
Because I knew I'd have a hard time getting all these ladies back at the same time, I opted to have them make and glaze their houses in one sitting. For that I used The Clay Lady's Clay Paint. Her "paint" is an engobe (which is dried clay with pigment added). This can be painted directly on to wet clay. Once dry, these pieces were dunked in The Clay Lady Glaze. Because I love vibrant colors, I use Mayco's Stroke and Coat with the children.
I'm thinking that the creation of these homes just might have gotten the gnome bug outta my system (as evidenced by this gnome dress, my students gnomies and my own gnome homes). In fact, I think I'll turn to my longtime fashion consultant and ask her opinion. What say you, Barb?
Hey! That's my wedding dress!
Geez, so many caption options with this photo:

"Shhh! You'll wake the gnomes!"

"Smell my finger. Does it smell like Cheetos to you?"

"I know where your marriage certificate is but I'll never tell!"

Wow, Barb. Just, wow.

Merry gnome-home making to you! Until next time, enjoy your week.


Read more »