Showing posts with label clay projects. Show all posts

Sunday, April 12, 2015

What the Art Teacher Wore #136

New Skirt Monday: Nuthin starts a week off better than some new duds, says moi. I got this lovely skirt as a birthday prezzie (thanks, Tamara!) and I was so stoked to wear it now that the weather is as sunny and colorful as it is. jean jacket: Buffalo Exchange; embroidered blouse and bracelets: yard sale; skirt: Flying Tomato; tights: Target; shoes: Anthro

Hello, party people! How are all y'all? After having so many short weeks due to snow, holidays and being in NOLA, this week was like a big fat dose of reality. On Tuesday I thought it was Thursday and by Wednesday, I swore it was Friday. Yeah, that's never a good sign. However, this week I'm totally ready. Our school is hosting chalk artist/street painter Lee Jones for a coupla days. I cannot wait to see what she and my super stoked second graders create. And on Tuesday evening I'll be chatting with Tim Bogatz and Andrew McCormick right here...
I'm so excited! Both of those dudes are incredible art teachers as well as AOE presenters and writers. I'm thrilled to have been asked to chat on AOE Live. It'll all go down on Tuesday, April 14th at 8pm Central and, added bonus, it's free. We'll be talking about finding your own art teacherin' style. For more info, just get yerself here.

So that's my upcoming week...here's a lil taste of what went down in the art room this past week! 
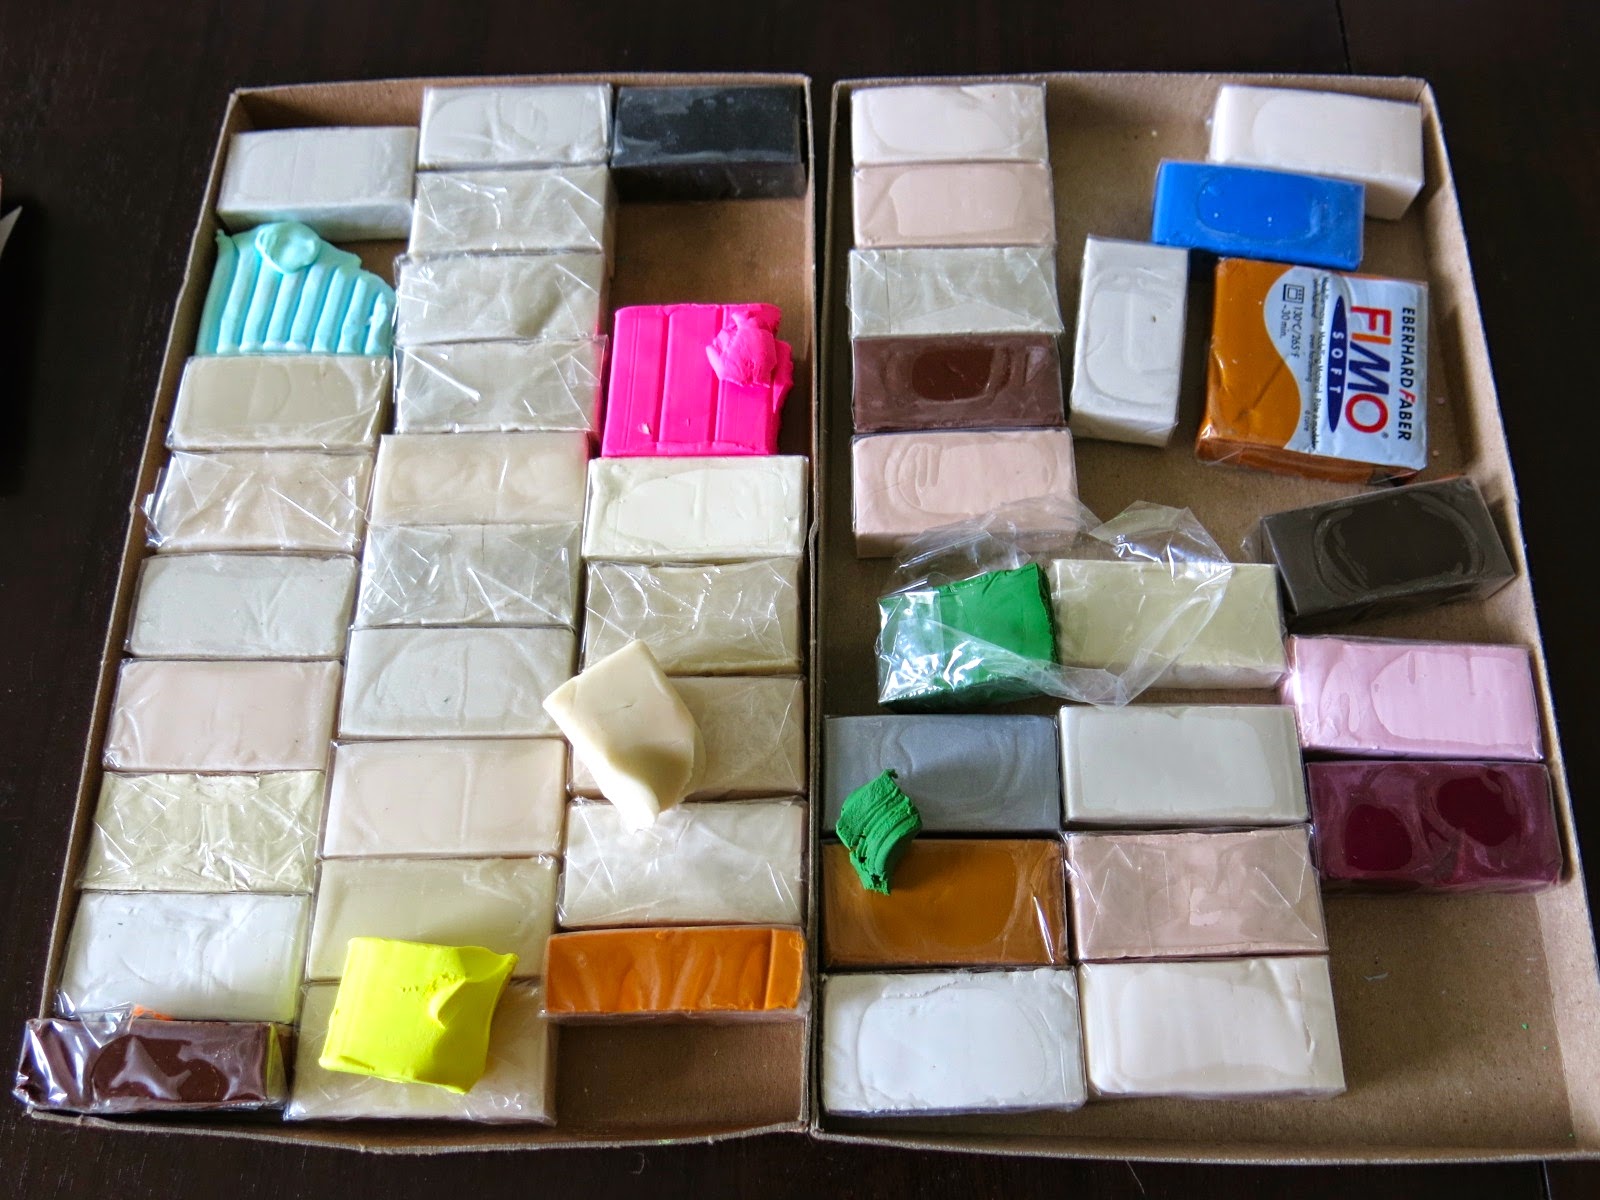
I needed a quick one week self-portrait lesson for my super star first grade artists. They only needed a week before their clay projects would be back to them so this self-portrait proved to be a great project. I'll give ya the complete lesson here soon on the blog. I've purchased those fancy frame papers to insert these bad boys in. I cannot wait to see the result!
I wish you could see this sweet lil girl to know just how accurate that awesome portrait is!
Flowerin' Tuesday: So everyone around here is putting stuff in the ground. But, having lived here for some time, I know that the weather in Tennessee can be 80 one day in the spring and than BAM! we get a hard freeze. And, being the total lazy slob that I am, I always forget to cover my plants and therefore kill 'em all. So I'll be wearing my flowers for a while...and planting them in about a week or two. How 'bout you? Stick anything in the ground lately? sweater and dress: Anthropologie, purchased at Buffalo Exchange; dotted booties: made by me, DIY here
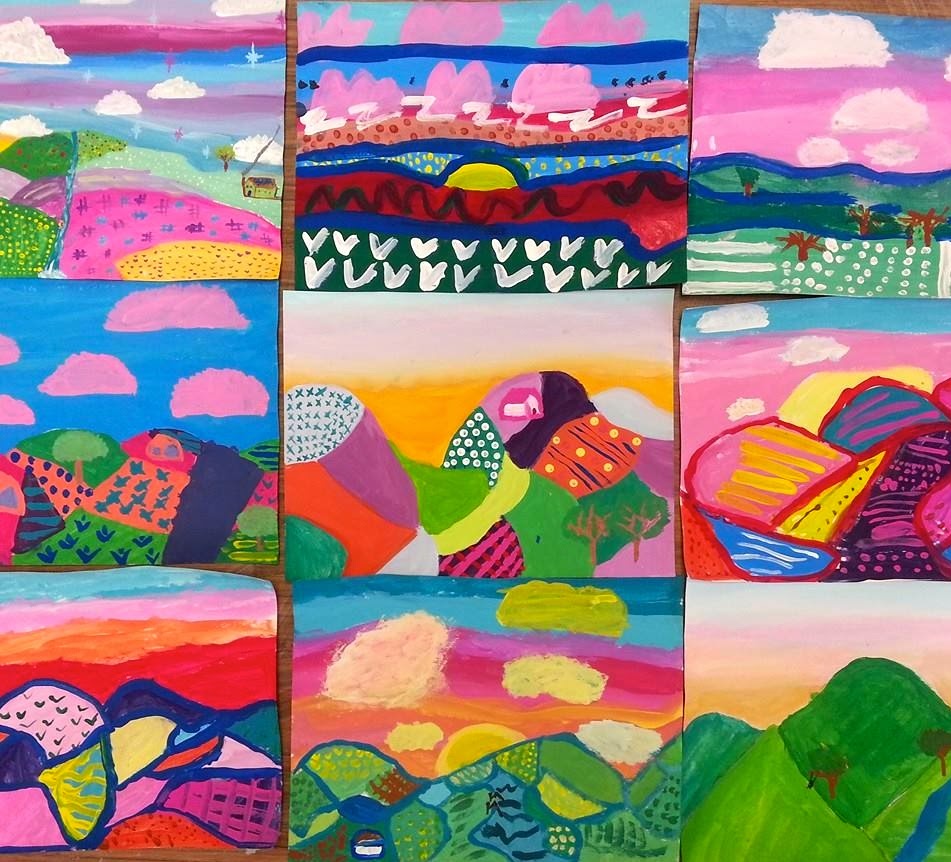
Third grade land is in the midst of creating these chalked landscapes. What you see here is the final-ish stage as most kids are planning to add their desert animals. I love 'em with or without! We chatted about the artist Sushe Felix (you can see my prezies here and here). I'll give you the full details on how we created these lovelies soon.
Painterly Wednesday: So I found this dress in a resale shop in NOLA and I was all, OMG, that thar is an art teacherin dress if I ever saw one! I wore it complete with my paint brush crown, another NOLA score. I tell ya, the shopping there, to die for! dress: Buffalo Exchange; Necklace: The Paper Source
My fourth grade has been on a color-mixing adventure. I loved all of those One Hundred Days of School/Mix One Hundred Colors images I kept seeing pop up on pinterest. I thought my kids could really use that concept in their landscape paintings. So the rule was: you gotta mix all of your own colors. They absolutely loved it! We chatted about he artist Xavier Castellanos (prezi here) and worked on these for a couple of art classes. Again, lesson to come, kids! 
 Color Wheel Thursday: Mixing color means knowing your color wheel! Those fourth graders became champs at reading that wheel. Although it still would crack me up (and some of the other kids) when one kid would say, "I don't have any orange!" to which we'd all reply, "That's because you have to MAKE it!" sweater and tights: Target; dress: Modcloth; palette belt (I know, right?!): vintage, etsy; shoes: Fluevog
Oh, lookie! We're getting closer and closer still to completing our Johnson Elementary Has Heart mural! I couldn't be more excited. I'll be sure to keep y'all posted. 
Soupy Sneakers Friday: My super sweet aunt and uncle sent me these new kicks in the mail. I couldn't wait to wear 'em to school and chat with the kids about them. But guess what proved to be the focal point of my ensemble? That's right, THE PANTS. They just couldn't see past the thought of me in pants to focus on my shoes. Le sigh. sweater and jeans: old, Target: dotted blouse: thrifted; shoes: Converse
Is it just me or are these first grade fish not the biggest crack up? We used the same technique you might have seen in my kindergarten clay post. I cannot wait to share this simple clay lesson with y'all! Until then.
 photo signature_zpsd10b3273.png
Read more »

Thursday, October 16, 2014

In the Art Room: A One Class Clay Project

So I've got this super fun group of kids that hang out in my art room every Tuesday and make stuff outta clay. It's a class of about 15-ish first through fourth grade kids. We have a glorious hour of art makin' together and this here is one project we busted out in one of those classes. It's a project that I used to do all the time with my second grade kids until I just got so tired of it, I couldn't do it anymore. You know what I'm talking about, right? Howevers, it is one of those everybody-loves-it/they-always-turn-out-fab/personalized-and-thusly-awesome project that bears repeating (gah, I do love that saying as it always puts the image of a buncha repeating bears in my head).
This is also one of those fire-it-once type of projects which is always a plus. Most projects I do with the kids usually require both a bisque and a glaze firing. Which is tiresome for a super lazy art teacher like myself. Without sounding like an old lady, does anyone else experience a little back aching from leaning over the kiln whilst loading and unloading? Please tell me it's not just me and my whiny/gripey personality.
So just how were the bad boys completed in under 60 minutes? Well, lemme show ya.
I gave each of the kids a hunk of low fire (Cone O6) clay the size of  a large orange. I have a variety of doilies, pieces of burlap and lace that we use for texture. The kids pick one and place it on their clay mat.
The lump of clay is then dropped onto the doily covered mat and pounded flat. This is usually when my left eye begins to twitch and the onset of a headache begins. A room full of 15 kids pounding the daylights outta clay is just a lil holy-crap-this-is-my-life?! inducing. Thankfully it ends rather quickly as the kids know to stop the pounding when their clay is as thick as a cookie.
The clay is then pealed off the doily and placed right-side-up on the clay mat.
I then gave the kids a variety of templates to trace for their wall hanging. Some are flower shaped, square, round, whateves. When tracing with a skewer, it's key that the stick stand tall and vertical ("like a soldier") so that it can cut all the way through the clay. Otherwise, you'll get that unappealing shark's tooth edge and, like I always tell 'em, it's not Shark Week in the art room.
Then the glazing begins. Now, we used Stroke and Coat by Mayco for this project. Normally, I'd only use that kind of glaze after a bisque fire. However, for this project, the glaze had double duty (OMG, do your kids also loose their sh%% if you say the word "duty"? Make it stooooop, y'all!) by not only acting as a colorant but as glue. 
See? Roll a coil, shape it into your initials, a shape, whatever you like and press it into the wet glaze. 
Most kids opted to also paint their letters and add a lil decoration to the background. I used the back of the paint brushes to create two holes to hang the masterpiece.
When they came outta the kiln, the kids were given a piece of Twisteez wire cut in half and the chance to dig around in my big ole bucket of beads.
So I was gifted this giant stash of beads which is cool because the beads are super unique. There's dolphins and cat beads, flower and sparkle beads. You name it, there's a bead for it. However, I warn you, if you unleash the kids on beads, it's like a piranha attack (P.S. never EVER image search "piranha attack". I can't unsee what the interwebs just showed me, waaaahhhh!). Just place a handful of beads on a couple plates on the tables and step back. I did limit the kids to only 10-ish beads so they could pick the ones that meant the most to them...and save some for the rest of the kids on the planet.
We have a lotta school pride at my school. This dude showcased the school initials and used school colors. 
So often our clay projects take many sessions. With this quick lesson, the kids were thrilled to be able to take their creations home and share them with their families. And who can blame 'em? They're pretty rad.


 photo signature_zpsd10b3273.png
Read more »

Tuesday, July 15, 2014

In the Art Room: Pandas with Personality by Fourth Grade Artists!

Howdy, friends! I trust that most of y'all have been spending your summery days chillaxin' like these two. Sunny day, cold bevvy, fancy umbrelly and a polka dot bikini? Why, don't mind if I do! My genius fourth grade kids created these Pan-duhz with Personality at the end of the year and I'm still chucklin' at their silliness. 
As y'all might recall, I did share with ya's our annual art show where every masterpiece each and every kiddo created throughout the year was hung all over the place. Like, we're talking around 2000 pieces of art. Y'all, we covered every inch of that school...so much so that I was a breath away from hanging some artwork in the bathroom stalls (which reminds me: does anyone else love those stall-ads as much as I do?! Although, I gotta tell ya, I do find the restaurant ads a wee bit disturbing when I'm, well, you know. Droppin and ploppin). When I was out for a coupla days for the amazing NAEA convention in San Diego, my awesome sub had the kids create those Party Panda paintings. This proved to be the perfect jumping-off point for our ceramic endeavors. 
Lemme break down for just how the kids created these cuties: 

Day 1: We created the base. To do this, pounded our Cone 06 clay to a cookie thickness. Then we traced a template for our base shapes with wooden skewers. I provided circles, organic shapes or rounded-edge squares. After those were created, the kids created the basic forms of of the panda's body. After our 30 minutes, the kids wrapped their work in a damp paper towel and stowed it in a labeled ziplock bag.

Day 2: I demoed some ideas on how to make a panda head. We looked at a boat load of examples and thought about our fun drawings. The word of the day was personality. The more your panda had, the better. Once the heads were created, the kids started attaching them to the bodies and kind of playing with just how their panda's body would look. Would he be sunbathing? Chillin with the kids? Strummin' a gee-tar...
whilst wearing shades and sportin a big pink bow?
Or glazing their clay pinch pot, as pandas like to do.
Days 3 and 4: On these days the kids really started thinking about details and an environment for their panda...one that would really reflect their panda-nality.
A coupla of my kids recalled that our local zoo had just hosted a red panda exhibit. With that in mind, this cutie was created.
I love the sweet gaze of the baby panda to it's mama.
Once our friends were fired, we glazed them with 3 coats of Mayco Stroke and Coat. My fourth grade friends have created a masterpiece outta clay every year since kindergarten so they are pretty much like experts at this whole process. Hence this panda-monium. 

Speaking of pandaemonium...
Y'all, this week, I'm currently at the amazing Tennessee Arts Academy and gearing up for this Thursday's online conference with The Art of Education which means my life this week is crazy-happy-fun-busy. So don't ask me why I thought it would be a good idea to start the Artsy Book Club this week. Thereforeness, I've decided to officially begin posting next week...but y'all can start reading Teach like a Pirate by Dave Burgess and/or Printmaking Unleashed by Traci Bautista any ole time, ermkay?! I'll be back soon with a full report on the Arts Academy...and I hope to chat with ya at the AOE conference. Til then, strap on that bikini, slap on that sunscreen and enjoy these summer days while you can!
Read more »

Wednesday, July 9, 2014

In the Art Room: Ceramic Chinese Dragons with Third Grade

 Well, kids, it happened. I got That Note in the mail. You know, the one with the return address from your school.  In the middle of summer that could only mean one of two thangs: it's yer walkin' papers or, worse, a note containing a  listing of "Back to Cruel, er, School" meetings. That's right. Tuesday, July 9th marks the beginning of the end of my summer. Cue loud and obnoxious horror film-esque scream...
Make no mistake, this has left me in a rather fire-breathingly fowl mood. So what better time to share with ya these here Ceramic Chinese Dragons by my Amazingly Awesome Third Grade Artists!
 Since I've been spending my blogging time sharing travel pics and rando Pee-Wee packed posts, I've fallen a pinch behind on my In the Art Room adventures. My apologies. So whatcha see here is a project that I think my third graders would agree was one of their faves. Now, for those of you out there that are kilnless, hang with me as Ima gonna show you how you can create a Chinese dragon with a ceramic clay-ternative. But before we get into all that, lemme tell you how this all came about.
 Because we were learning about all-things-Asian last school year, I settled on the idea of having the kids create Chinese dragons. After a quick search on the interwebs, I found this post by my art teachin' buddy Rina over at K-6 Art. I loved her lesson as she broke it down into baby steps that were just perfect. Now she did her dragons with the younger set (first grade, people and they rocked it!). Since I was doing this with third grade, I knew I'd have to get 'em to step up their dragon makin' game. But first, a lil dragon-y background, emrkay?
Not all dragons are alike, y'all (Y'ALL!! This is off-topic but what else is new: I was recently BUSTED as a Mid-Westerner wearing Southern's clothing {which would be overalls and Crocs, in case you were wondering}. It turns out I've been conjugating "y'all" all wrong! Thank you, kind commenter, for pointing out my Big Fat Hairy Southern Poser mistake. Hopefully my Southern license won't be revoked {penalties include grits restriction and consumption of unsweetened tea}).

WAAAAAAAIT, what were we talking about? Oh, yeah. Dragons. Let's address the Chinese ones first, shall we? They're kinda like Mid-Westerners, after all. They've got a snake-like body with feet like that of an eagle. Which doesn't really make them Mid-Western-esque at all but their affinity for Pabst Blue Ribbon and corn hole does (can somebody please explain that fascination to me?!). Also, they can fly but don't have wings. And they like their possessions deep-fried as is evidenced by the fried pearl (the Chinese dragons are often seen with a pearl which is believed to be their source of power).
 My students were pretty unfamiliar with the characteristics of the Chinese dragon because they're usta seeing this European/Fairy Tale number. The Euro-dragon is much lie a Southerner in that when it says "Bless your heart" it really means "I hate you and wanna breathe fire down your neck". Also, when it's not flying with it's wings, this dragon can be seen wearing copious amounts of seersucker. And loafers without socks. And shirts with GIANT Polo logos. Ahem.
 After that brief chat with the kids, we spent three / thirty-minute art classes crafting these bad boys. On our first day, we began by creating a base for our dragon. For that we pounded our clay onto a texture and into a slab as thick as a cookie. Check out this post to see what I'm talking about. After our texture was in the clay, we cut the clay out with our wood skewers into a choice of base shapes: round, square or flower-like (which was later folded up to create water-y like waves).

With the excess clay cut off from the creation of the base, the kids rolled a thick coil that was about 5" in length. Once that was complete, we draped the base and coil in a damp paper towel, gently placed it into a zip lock bag and wrapped it up until our next 30 minute class.

The following class I gave the kids a rough and rapid idea on how to create their head (see below in just a momento). I don't like to get too detailed because I want them to come up with ideas of their own. I also had loads of Chinese dragon pics available for them to draw ideas from if needed. At the end of that 30, we didn't attach the heads (I had visions of them falling off whilst sealed in the damp bag) but placed them on the base with the coil.

On their third and final day, heads were attached and an environment for the dragon was created. If details like spikes, limbs, horns, fire, you-name-it's were desired, the kids added 'em then. After drying out and being fired (kinda sounds like I'm talking about Lindsay Lohan, donnit?!), the kids spent a coupla days glazing with Mayco's Stroke and Coat. And, viola-ness! Ceramic Chinese Dragons, y'all!


 Now, let's address the kiln less folks in the group, shall we? A similar dragon can be created with one of my fave kiln-free clays: Scupley. Almost every year, my students engage in a Sculpey bead-making project and almost every year, this is all that's left. Lots and lots of white.
 No worries! You can create any color of clay using that white stuff as your base. Case in point, a dragon's head. Just roll the desired shape in white, flatten your color to a paper-thickness, wrap it around your shape and roll smooth.

 Which might look a lil like the left. If you have white spots, fill 'em with some Scupley Band-Aids and roll again.

Now, these are the same rough and rapid directions I have the kids when they were creating their dragon's face. Use that skewer to skewer a mouth. It kinda mashes the shape a bit so you'll have to resculpt that face. But you can do it. 
 I like to use my fingers to create the indentions of eye sockets. Now roll some small spheres (because we don't say "balls" in the art room, ahem) and place them in the sockets. Remember if you are working with ceramic clay, you gotta slip and score. She slips! She scores!
 It's all about the details, y'all. Add some teeth, fire coming outta the mouth, a tongue (although preferably not all three as that's a mouthful. Literally.)
 I created a coil body in the same white-covered-in-green way as the head. Although this time I used two kinds of green and left some of the white areas alone. I was kinda digging the camo look.
 I know, right?
 Attach that head to the coil and shape. Bake in your oven at 275 (I think, check directions. I burn everything on a regular basis so my clay-cooking advice might not be the best) for abouts 15 minutes. And your finished!
 Suriously, yous guise, the kids were so thrilled with their dragons.
 I love watching the kids work with clay. It's a medium that kids who aren't fascinated with 2-dimensional art can really bloom. I mean, this artist was so into his dragon-making, he even created a baby dragon!
 You'll notice that most of the kids included a pearl...and many of them had a story to go along with their dragon. I love the detail in the face on this orange guy.
 And there you have it, y'all! Chinese dragons by the third grade set! Have y'all ever done a project like this before? If so, I'd love to hear what your students created. Special thanks to Rina for the inspirational-lesson!

Chat at Y'ALL soonish!

Read more »