If y'all follow me here, then you've seen the snaps of this Monet dress in progress. It's my second tribute to ole Monet (that was more of my spring line and what you see here is from my summer collection [I'm hoping you read that in your most uppity voice as that's how I typed it]) and it seemed just the thing to stitch up on these 90 degree/boiling-inferno/hotter-than-the-underarm-of-a-construction-worker days we've been having here in lovely Tennessee.
By the way, someone once asked me why I'm so smiley in my DIY photos. It's not so much a smile of happiness as it is surprise. Like, "Holy crap, y'all! Can you believe I made this?! Like, with a sewing machine and not a hot glue gun although, at times, I think that mightah been easier!" Therefore, I smile.
I used my trusty vintage McCall's 6221 (which is available on etsy, y'all! It's a simple dress and so cute. Git yerself here and scoop it up!). This is my third time sewing with this pattern. You can see my other attempts here (OMG, I totes forgot about those cat shoes!) and here (that time I almost burned the house down with...banana bread. Sigh). I even lined this dress because, hey, I was feeling fancy. And the pattern makes it so simple and-and, I feel like a grown up sewer when the flip side of my dress looks as snazzy as the outside. The fabric, sigh, isn't it presh? I picked it up from Joann's a while back. I was just there the other day and they still had some. It's out on their website but I bet if you called their stores they could help ya out.
I did a full 30 seconds of googling in an attempt to find what Monet painting the print was inspired by. The palette is closer to that Cliffs at Amont, 1885 painting on the left although the theme looks more like that dealio on the right. Maybe I should find out zactly before I wear this to school and introduce Monet to los kiddos.
SooooOOOooo, in true Cassie-fashion, I got ALMOST done with this dress and was all, meh. I don't need no stinkin' bows. But I forced myself kicking and screaming to add them. I'm so "almost to the finish line, think I'll break for a Twinkie", it's kinda pathetic. But not this time! And I'm happy I did because, BOWS ARE ADORBS.
Except these bows have this bad habit of tickling the back of my upper arm. They are in a weird place and I'm constantly swatting at myself. Which doesn't warrant weird looks from strangers AT.ALL.
Yeah, pretty much.
I shared with Asha today my new dress as she's my only company. This was the reaction I got. And I wasn't even swatting at myself! Such a harsh critic. Meanwhile, in Asha-land, here's how she pictures herself in a Monet...
Reality is, that crotch-licker would prolly look more like this in a Monet (by the way, if you've not seen 17 Classic Works Improved by a Fat Ginger Cat THEN YOU'VE NOT LIVED, FRIEND).
In other news...I starting filming some short clips for our Skirt Sew Along (you can join here for minute-by-minute updates [I kid. Try weekly.])! I'll be back later this week on how to read your pattern package in order to determine you size and what you need to purchase. I'm so excited about sewing with y'all! Until then!
Okay, y'all. Before you start in on the "OMGahhh, how you get all this sewing stuff done?!" I gotta confess: I started this dress over the summer. 'Twas gonna be apart of my Fall Back-to-Schoolin' 2014 Collection (yes, such a thing actually exists in my wee mind). But when I got just a breath away from being finished (like, we're talking a zip and a hem. You'll notice I never did get to that hem. Ahem.), I up and quit on this here number. I can't even remember why, y'all. But if I were to guess, I'd say something glittery caught my eye and I dropped the dress like an ole stinky non-glittery sock. Howeverness, with my sweet students getting ready to enter into Standardized Testingland, I decided to finish what I've now dubbed my Standardized Dress-ting Ensemble.
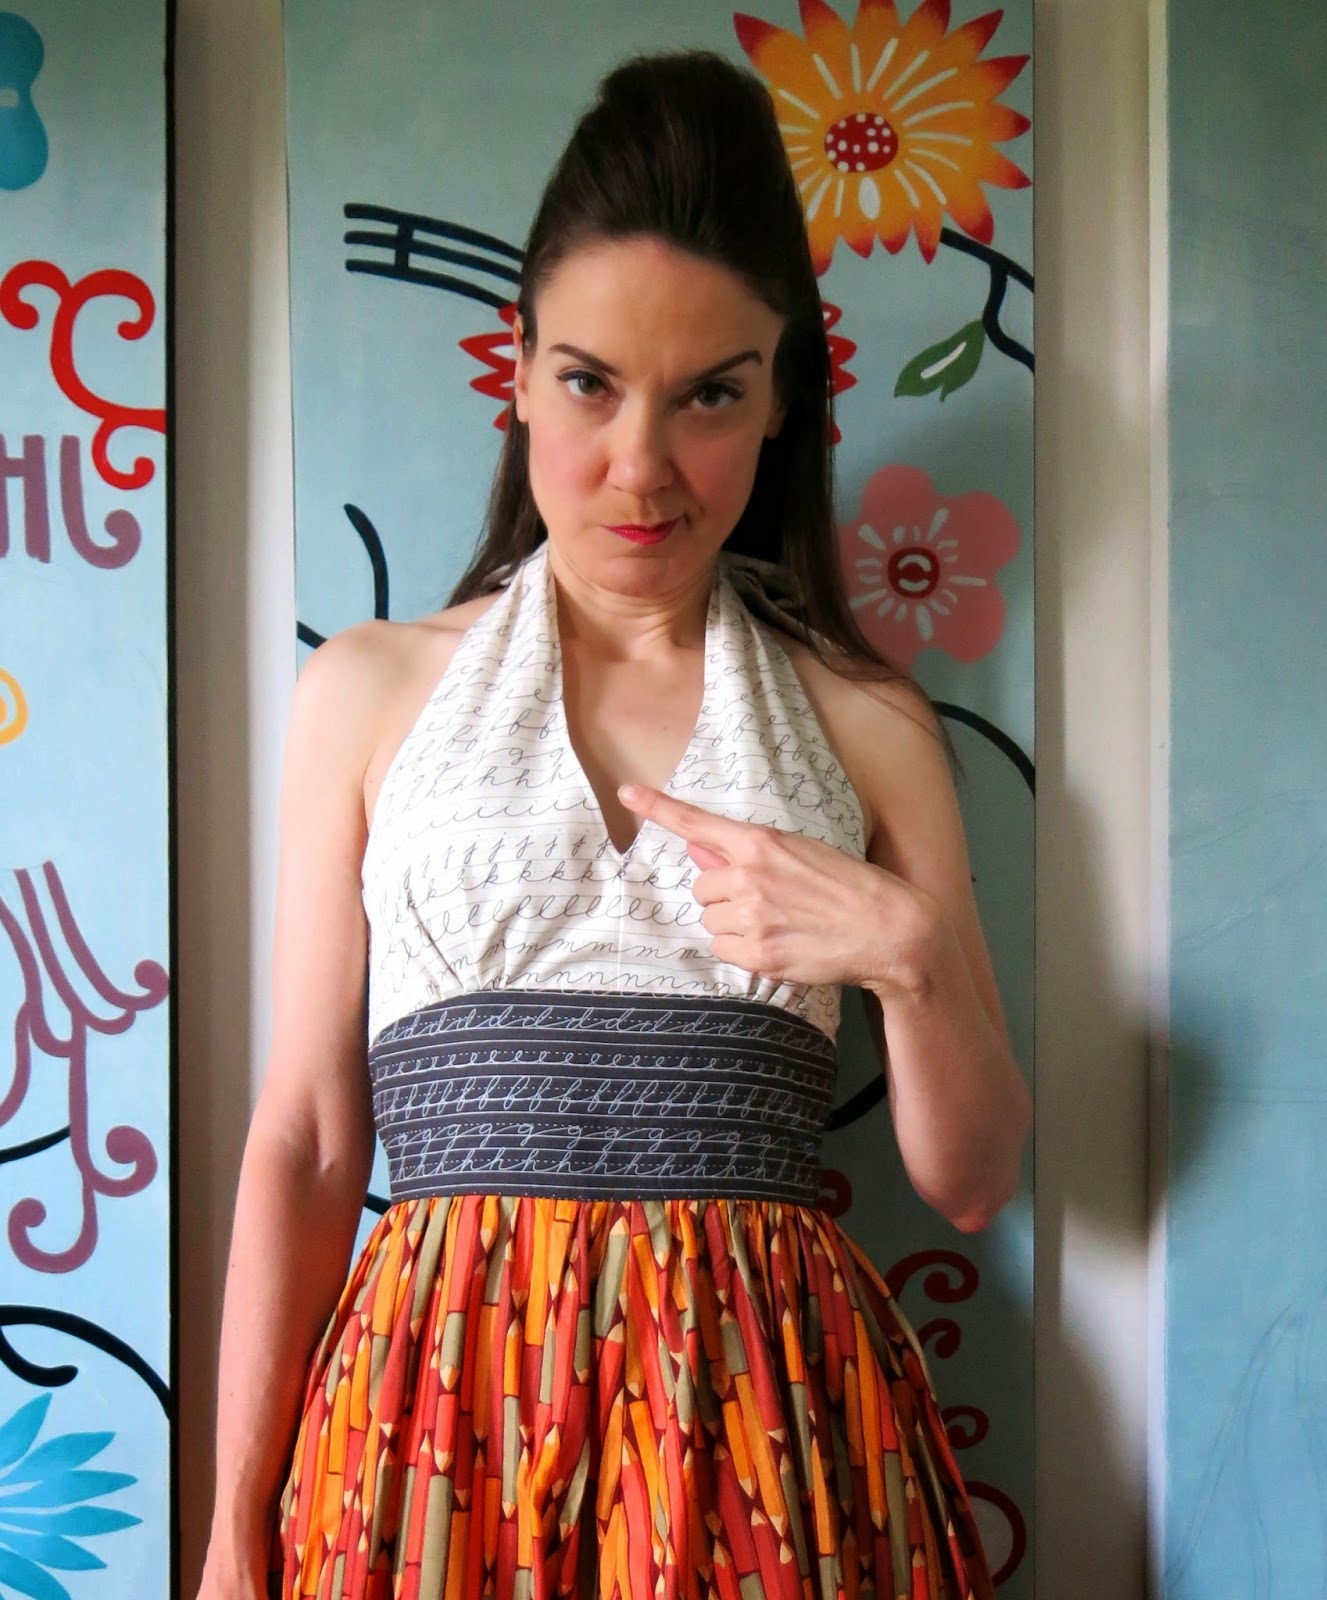
Get those No. 2 pencils (shoes) sharpened, y'all, and try to ignore my inappropriately low neckline. Nothing to see there, folks, move along, move along.
So I got a wild hair at Joann's whilst pattern shopping and scooped up this number. Like, why? I know I just can't/shouldn't do low V-necks. I've never in my life owned a cleavage nor have I ever developed beyond that of a 12 year-old girl in the upper lady lumps department. But I just swooned at the pretties on the pattern package and was sold. Le sigh. Maybe the Boob Fairy will come to visit if I leave my training bra under my pillow. What y'all think?
Let's talk about something I do have plenty of: fabric! So the fabric I used for this dress was from my stash, believe it or not. Which means if you want the same, you gonna have to hit either ebaytown or etsyville. This here pencil fabric is Kaffe Fassett and I love the retro-y color palette. I did find some here for y'all.
I am so totes in lurve with this fabric mostly cuz it really reminds me of elementary school and the one subject I was super good at: Cursive Handwriting. I didn't have art classes growing up so those purple ditto sheets where I practiced my loops and letters made me so stinkin' happy. Of course, these days, cursive writing has been taken out of most curriculums which is a stinkin' shame as research shows that it enhances reading. I was jotting down notes just today while teaching a class and one of my fourth grade students quipped, "I have no idea what you just wrote. I can't read cursive." What a shame! I've decided to introduce cursive writing my last week of art teacherin' this year. How about y'all? Do you write in cursive? Have you ever created a cursive writing lesson or incorporated it somehow?
Oh, pardon moi. Lemme step off my cursive-y, boobless soap box and get on with the post at hand, ermkay? So, like, let's talk about that unfinished hem. I did surge the thang but I wasn't sure about length and I was just to excited to share it with you to wait. But if you look at the photo on el lefto, you'll notice a break in the fabric where my crinoline ends. I think that would be a great length to hem my dress. Whuh bout y'all?
I am glad I gave this pattern a go because I do keep recycling the same pattern. So this was like a learning experience or whatever. I guess.
I am highly aware of my right boob gap. Zup wit dat?! Whateves, let's talk pencil crown, shall we?
For this baby, I used a thick headband and my stash of golf pencils. You know from my (nonexistent) golfing days. I sharpened a bunch of those bad boys (which makes for the best Back-to-School smelling crown everrrrr.)
And just started gluing 'em all over the headband. In a semi-sensical order. I think the kids are gonna totally dig it.
By the way, this is my second year to Dress for the Test. Last year I felted a coupla testy numbers like this top.
And there you have it! A Standardized Dress-ting number for all y'all bubble-fillin', test-takin', rather-be-cursive-writing kids out there. Now if you'll excuse me, I have a freshly sharpened pencil crown I need to sniff, er, I mean, polish. Chao!
I dunno if you've noticed or not but things have gotten quite a bit...stitchy around here. I've moved into week two of Snow Daze (fingers crossed we return tomorrow, y'all) which means I've had extra time for the important things in life: House cleaning? Negative. Dress-Making? Affirmative. It's called priorities, y'all. And I've gots 'em.
By the way, can I make a confession that's not really a confession because I betcha have figured it out already: I'm breathing down the neck of 40 and I still like to play dress up. Is that awkward? Should I seek out a support group? I'm guessing it will be the most superbly dressed support group in all the land, riiiiight? Who's hosting the first meeting, y'all and will there be cookies and grape-flavored adult drank? Count me in.
No, you aren't experiencing deja vu. Yes, you've seen this dress pattern three times. Ahem. Remember when I done tole you last week I was making three dresses outta this pattern? There was this Mondrian number, this colored pencil piece and now whatcha got here. Do I have to tell ya that I totes dig this dress pattern? I mean, it has everything I love in a dress: a form-fittin' bodice, a fat flouncy skirt and, of course, a big ole bow. Puurrr-fectimacation.
So when I shop for fabrics, I usually buy first, think later. My hands move much faster than my brain when it comes to swiping that credit card through the lil reader. My hands are all, "hurry before that sluggish gray mass between her ears finds out we just dropped coin on even more fabric!" I usually walk outta the fabric store like I'm waking up from a dream. "Whuh just happened and who just stuck three yards of marker fabric in my bag?" Meanwhile my hands are all high-fiving each other (which looks quite ridiculous to be standing in the parking lot of a craft store clapping at your confused self, but, such is my life).
I actually scored that sweet marker fabric from here. Sadly, they are all out of the green but do have some lovely orange on super sale. The chevron came from a local shop but I did find a similar one here for you.
If this looks a pinch familiar that's cuz I totally used a gray version in my pencil dress. I just love this print so! You can find this orange goodness here.
After throwing all of these prints together, I realize I look a lil bit like a can of Mountain Dew meets Orange Crush. Which I see no problem with atall. But I am from the South so you know that stuff is our equivalent to water. If you think I'm fibbin', go google yourself "Mountain Dew Mouth" and tell me I'm lying. Go on. I'll wait.
Nuther refill of Dew-Crush anyone? No? How bout just a cuppa sugar with a splash of syrup and drizzle of honey. Something to dip your Moonpie in, y'all.
I'll have you know that this here is the only dress outta the three where I didn't screw up the pleats. And there were only, like 9 pleats, y'all. Le sigh.
To finish off my Dew-Crush-tasticness, I decided to wear this palette hat I felted ages ago. It was just a thrifted find that I gave a lil make over to. That craft was super simple. You can go here for all the gory deets.
In my pics you totes can't see my shoes but here they are! I painted these ages ago and they are starting to show some wear. Mostly cuz I painted them with acrylic and I shoulda gone with some sort of leather paint. You can check these out along with some other wacky painted footwear here.
And there you have it, another freaking dress thanks to my Snow Days/Sew Days. If you aren't a stitcher and have found these posts not your cup of tea, my sincerest apologies. I do hope to be back to art teacherin' sometime this decade. In the meantime, I've got a house to not clean and another dress to complete! Later, y'all!
As I type up this here blog post, I've got my feets up, my hair down and my Brand New Reversible Apron with Ginormous Pockets on. Yay, it's finished! As I was finishing up my apron this past weekend, I was suspiciously surprised by how smoothly everything was going. I mean, my seam ripper was actually collecting dust! I remember looking at it, flipping my hair and thinking, "Humph! I don't need that old thing anymore, I'm BEYOND mistakes," which, of course, was like The Kiss of Sewing Death. As you'll find out in the following clips, it didn't take me but a hot minute to make a big-fat-hairy omg, my apron is practically hanging down to my ankles mistake. But don't you worry, I'll fill you in on the oops-deets so the same won't happen to you.
In this here post, I'll share with ya how to do the following:
* Make your neck strap (which, for some reason, in the vid clip I refer to it as a "necktie". Der.)
* Make your tie ends
* Assemble the neck strap and ties ends to the apron
* Finish off the apron and call it a day!
I'd also like to invite you to share your completed aprons on this here blog!
I mean, you've already been sharing 'em on the Apron Sew-Along Facebook page (which totes makes my day when I see 'em) so why not show 'em off here? I'd love to put 'em all together in one big ole apron-tastic blog post. I know several of you made children's aprons and/or went a totally different apron-sewing route. I think it'd be a blast to see 'em all! To make that happen, I do hafta set a deadline. If you haven't started yet, no worries! You still have plenty of time. Just to give you a deadline, please email me (cassieart75@gmail.com) or share on the Apron Sew-Along page a snapshot of you in your apron by Sunday, September 7th. I'd love a brief description on your fabric choices and where you plan to wear your apron.
But before we can do that, we gotta finish this thing! So, without further ado, let's get to work!
Neck strap and tie ends. Because I like to have a bow in the front of my apron, I decided to make my tie ends 4" X 30". You could adjust that length, of course. You might wanna cut out a couple different lengths with your wrapping paper, pin them to your apron and see how that length suits you before cutting into your fabric.
If you plan to tie your apron in the back, you could use the same pattern piece for your neck strap and tie ends, thus cutting three pieces of fabric from one pattern.
To stitch, pin those right sides together. As I mentioned, I like the ends of my pins to face my sewing needle. I don't wanna chance running over a ball with my sewing machine. No one likes squished balls.
For the neck strap, simply stitch the long edge, flip inside out and iron. I have a tool for flipping fabric but you could just as easily use a safety pin or maybe a pencil. Youtube can help you out with tips and tricks on that.
For the tie ends, you'll not only sew the long end but also one short end. To do that, stitch the length of the long end, stop about 1/2" away from the end, lift the presser foot, rotate the fabric, lower the presser foot and stitch the short end. If that run-on sentence has left you confused, see the gif below.
Make more sense?
To put the apron together, you'll need to pin your neck strap and tie ends on the right side of the apron (it doesn't matter which side). Now, my mistake was pinning everything in and stitching before I tried it on and checked the fit. Go ahead and pin your neck strap on and try the apron on so you can see if adjustments need to be made. Once you've got the fit where you want it, pin the neck strap 5/8" (or whatever your seam allowance is...mine is always 5/8") from the left and right ends (as seen below). For the tie ends, pin them 5/8" from the curve of the apron.
You'll want to pin the tie ends to the apron body just to keep them out of the way as you stitch. Now, lay the other half of your apron on top of this with right sides together. Pin the top, curved side and sides. Stitch everything except the bottom.
Here I've got my right sides together and I'm ready to stitch everything except the bottom edge.
"I lay mah hands on ya apron and you'll be healed!" (said in my sad attempt to impersonate an evangelist. And that apron needed some healin' as you'll find out in that thar clip.
Here I'll talk making adjustments to my mistake and finishing the thing off.
Because my apron straps were too long, I went about fixing it by seam ripping out just the top of the apron, pulling those straps up, repinning and stitching again.
I snipped off the excess before flipping it right side out.
I finished off the bottom of the apron the same way I did the bottom of the pocket from the last apron post. I simply tucked the bottom inside, ironed and stitched.
And, there you have it! There are definitely some things I might do differently on my next apron. I think I'd like the length longer and the pockets less tight. But I'm happy with the outcome and the kids have loved the print. I've been wearing it all week and feel kinda naked without it on when I'm in the art room!