Sunday, December 31, 2017

DIY: How to Recycle an Old Globe!

Happy New Year's Eve! If you are a TOTAL homebody/crafty nerd like me, than that means your evening is much like mine: you are in your pj's, enjoying a cup of hot cocoa (of whatever else pleases ya, I'm not here to judge) and you are writing up your New Years Craft-solutions, er Craft-utions (that's my best effort to combine craft and resolutions, in case you didn't catch my drift). One thing that WON'T be on my list for 2018 is a Painted Globe...as I just narrowly completed it today!
And I was so excited, I had to take it in to school and add it to my It's a Small World area in the art room!
If you follow me on IG, then you've been hangin' with me on this journey to turn this trashed globe into treasure. I found it in the trash at school and had to dig it out immediately. It wasn't until I had it back in my art room and added to my collection of globes (why I have so many, I have no idea...it's just that I cannot seem to let them be thrown away!) that I noticed why it had been trashed: it was busted right across the equator. 
 I took it home and decided to fix it with a large plaster gauze strip...which made it quite unsightly. During my repair stage, I noticed that this globe was pretty dated...and poorly made from plastic. With that in mind, I didn't have much of a problem giving this blog the reboot. I'm a lover of all things vintage and it burns my eyeballs when I see folks "flipping" vintage (i.e. turning treasure into trash, says me). However, this bad boy wasn't very old...just old enough to have countries with incorrect names and a big honkin' crack right through the middle. 
Here you can see my plaster strip repair job. I done tole you it wasn't pretty.
If you've been on pinterest for a hot minute than you know that painted globes are pretty hip. Maybe even past tense hip. But I don't care. After a little bit of searching for ideas, I was so inspired, I decided to paint my globe. I used the same wall paint as I had for the walls at school because 1. I still have a ton; 2. I wanted it to match, color-wise; 3. It was more opaque than any other paint I could find.
I decided to paint each of the seven continents and give each a pattern.
I used the planters I painted a while back as my inspiration. I just picked patterns at random. 
 I love patterns. Like, LOVE-love. Tis the reason you'll rarely find me in a solid color. And if you do, it's paired with a buncha other solid colors thus creating...A PATTERN. 
This was such a fun winter break project for me. I've managed to knock out a couple...but sitting in my craft room and painting is my favorite way to end my day. I've got mountains of pattern-y painting projects just waiting for me in that messy space.
 Texture is also my BFF. I suppose I could have used paint pens to create the patterns on this globe...but I don't know that they would have given me all this thick-ish texture.
 You can kind of see my layers of paint in the photo below.
 Now I do have a "normal" globe in my art room as well...for when we need to examine places other than just continents. But I think this will be a fun addition.
  Brrr! My heat cut off when I was working a little in my art room today and it felt like Antartica! Or at least that's what 62 degrees feels like to me. 
  What projects were you working on this winter break? 
  Thanks for letting me share mine!
We head back this Wednesday for a coupla days of PD and the kids return on Friday. I'm excited to see their happy little faces! Happy New Year, y'all!
 photo signature_zpsd10b3273.png

Thursday, December 28, 2017

In the Art Room: How to Make Seat Sacks!

 I hope all y'all had a wonderful holiday! Ours was super low-key and relaxing. I've been taking time to catch up on projects for the art room...just this week alone, I've managed to start three new projects (and finish zero...no surprise there). While working on my latest project, I decided to film the process and share it with you cuz I'm super stoked: Seat Sacks!
 Heaven on Earth, aka the Dollar Tree, had seat sacks or over the chair storage in their education isle recently and I was so stoked. Currently, when my kiddos finish early and only have a few minutes to spare, they LOVE to go and get a dry erase board. However, I don't love the extra milling around the room when it's so close to clean up. However-however, I never wanna see a kid just SITTING in their seat, even if for a few moments, not creating something, anything. So when I saw these seat sacks, I thought they'd be the perfect solution: I could store dry erase boards in there (or, dry erase board SLEEVES with drawing sheets, YES!! More on those in a moment) and that would prevent extra movin' and confusion during cleanup. 
 Now, as you might know, I'm currently on an art room redo bender and I'm color coordinating EVERYTHING. So, while I was excited about these seat sacks, I was disappointed that the above were my only color options. By the way, you can purchase these in bulk here, if they are not available at your local Dollar Tree. 

So I went on a quest to find another source for the sacks. Y'all. These guys are COSTLY! Then I got the bright idea to SPRAY PAINT the sacks...so I bought one as a test and, um, no. That did not work. Not. At. All. 
The one that was sadly spray painted then became my pattern. I looked at the seat sack closely and realized it's a super simple pattern that requires very few supplies. Here's what I used:

* 2 yards of ripstop fabric. Really, 1.5 yards would have been plenty. I chose that kind of nylon fabric because I thought it would be easier to wipe down.

* 4 packages of bias tape. I am doing 4 sacks per table and this proved to be the right amount of tape. 

* Elastic. I used the wider kind.

Here are the directions:
Like I said in the video, I did this in assembly line fashion so as to get it done faster. I started by cutting everything out and then set to stitching all the red ones first, then the orange...this way I didn't have to keep changing out my thread and bobbin.
 I noticed online that there are a lot of other seat sack tutorials...so be sure to check out your options if you do this. I just went the route I thought was easiest. I don't plan to put anything heavy in these so I'm hoping that they'll be solid enough.
 In case you need those measurements again...
 I don't know if you noticed in the first photo but you'll see the kind of chairs that I have. These seat sacks fit them perfectly. If you decide to make these, you'll def wanna be certain it will work for your chairs!
 Of course I had to add a label! I got these labels made a while back from Dutch Label Shop. It says Art Will Rock You. This is the back
 And this is the front! I'll keep you posted on how these work out in my art room. They'll either be a hit or a miss...there never seems to be gray area in my art room!
 Do y'all use seat sacks? How so? Love to hear more!
My little assembly line of pocket making. Wish me luck!
 photo signature_zpsd10b3273.png

Friday, December 22, 2017

Guest Blogging on Spoonflower!

Today I'm excited to share that I'm guest blogging over on the amazing Spoonflower! If you are not familiar, you really outta be. Spoonflower is the magical place where you can design and print your own fabrics, gift wrap and more. I've not ventured down that avenue (yet) but I have purchased fabric created by other creatives there. Case in point, this fabric from dmitriylo. 
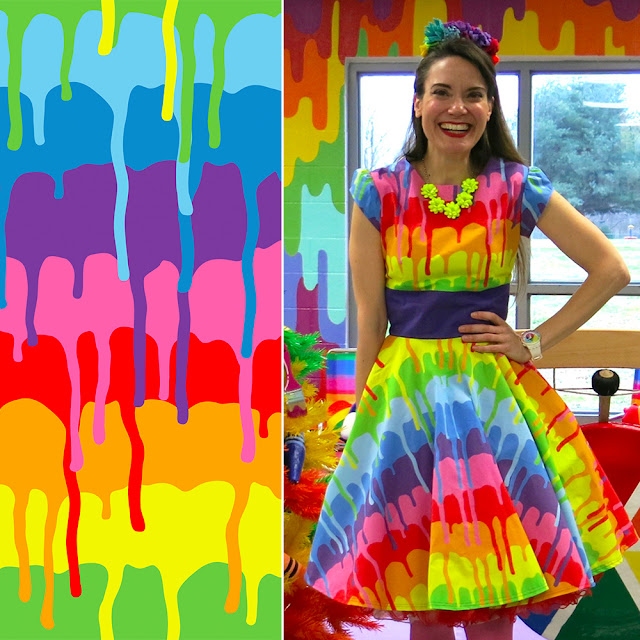
This was another dress I created at the start of the school year with fabric from Spoonflower. This fabric was created by seasonofvictory.
So hop on over to the Spoonflower blog and read more about the making of this dress...and how it helped inspire an entire art room transformation! 
 photo signature_zpsd10b3273.png

Thursday, December 21, 2017

In the Art Room: Color Coded Trash Cans!


As y'all know, I'm revamping and rainbow-izing the art room. NOTHING stands a chance at not getting spray painted (my hands included) and I couldn't be happier. I mean, maybe it's the paint fumes a-talkin' but don't these trash cans look so stinkin' happy?!
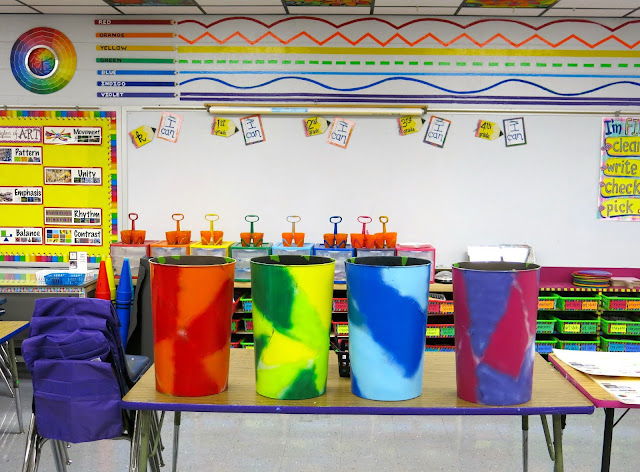
I actually picked these cans up a couple of years ago and was going to use them as planters (say what now?) and then never did. So in my garage they sat. Meanwhile, the art room seriously had ONE little trashcan that overflowed on the daily. So I brought in these bad boys and they are great. I have four color coded connected tables (see last pic) and I love having one trash can at the end of each table. However, what drives me bonkers is how much they seem to move around my room. I find myself constantly bumping in to them and asking "where does THIS can go?!" Now, no more. But first, lemme walk you thru how easy peasy this was!
I started by just taping the cans off. I used a painters tape called Frog as I heard it was the best. I'd had it on hand for painting the murals in my room. That took me about 20 minutes. I didn't have any rhyme or reason, just started taping.
 My tables are red/orange, yellow/green, blue/indigo, purple/magenta. I used that color combo to paint the cans. I did prime them before painting them. 
 After pealing the tape, I did some touch ups with black house paint. I know that seems nit-picky but I just knew those little color bleeds would drive me bonkers. 
 Today was a 2-hour day before winter break...it's been so nice to crank my tunes and get some stuff done! 
 My tables each have a drying rack and now a trash can at the end. 
 Color-coded cuteness!
They look like fun stained glass windows...I'm in love! I hope the kids dig 'em when they return from winter break. 
 photo signature_zpsd10b3273.png

Tuesday, December 19, 2017

In the Art Room: It's a Small World Mural

I'm so excited to share the newest addition to the art room: my Mary Blair-inspired It's a Small World Mural! As y'all know, I'm doing a big ole art room flip. I've been changing so many things up in my art room that each time the kiddos come, they spot something new. I got hooked on painting murals when I tackled this beast a month ago: 
I had a bit of paint leftover after cranking out this mural that I started setting designs on another area of my art room. I've had my Art History Wall up for so long...and while I love it, it just never got used. Once my art room was rearranged because of my document cam, that area of my room was never used for instruction. So the Art History Wall just ended up being an abandoned and faded spot that just didn't make me happy anymore. 
Here's the before: 
Full details on this wall here. Here I am tearing it down and prepping the new space:
It was bitter sweet taking this wall down. I loved the idea of it as a resource but feel like this new area (which will be used for extra art supplies and a fibers space) will be much happier with my new mural. I know it makes me super happy each morning to see it!

 I'm not COMPLETELY done yet...the clock is currently the only 3-D element to the wall but I do plan to add more. My dream is to have little doors that open and moving parts...but for now, I'm calling it kinda-sorta done. Done-ish. Done-lite.
 Because the Art History Wall took up so much space, I had a large area of the room that was unusable for storage. I happened to find this bookcase in another room in my school and it fits PERFECTLY! I've had lots of questions on my IG about those containers with the painted faces...those are for my extra marker storage. They are cat litter containers that I painted faces on and store extra markers in by color. In fact, this entire bookcase is my "overflow" of supplies: markers, color pencils, oil pastels. It needs  A LOT of work (more shelves added would be great) but I'm excited about the idea.
I also cannot wait to use this mural to teach shapes! All the geometric shapes with just a few organic. We can talk about Klee, Blair and so much more...I'm so loving this area. Can you tell? Am I goin' on and on about it enough for ya? 
 That clock was a thrift store score...in it's past life, it was a country-fied clock with a rooster painted on it. I'm thinkin' I did alright.
My love of Mary Blair has been goin' strong for a long time. I created this Mary Blair painted bag several years ago. 
For that I stuck pretty closely to the original. For my art room, I was pretty loose. Painting on those cinder blocks is not easy...especially when you want to paint a straight line, ugh! Don't get me started! I didn't use tape, I just drew everything on the wall in a light color of chalk and just went to down. Everything had to get at least two coats (sometimes more) which was super fun (insert eye roll.)
 Several years ago, I had the AMAZING experience of meeting Richard Sherman of the Sherman brothers. He and his brother wrote the theme to It's a Small World as well as the music for Mary Poppins and so many other Disney classics. It was such a joy to meet him, his sweet wife and hear all about his work at Disney.
I was so star struck!
 I'll be sure to keep you posted on what else I add to my mural...as well as this new area of my art room. 
I've already got my Friendly Loom up (needs a little warping) and plan to place all of our fibers supplies in the Mona Lisa cabinet on the left. The rack is one I found at the thrift store and I think it will be great for holding our yarn!
 I've gotten a lot of questions on what kind of paint I used: Behr wall paint. 
 I've also been asked what my admin has to say about me painting my walls and how I went about getting permission. Permission?! What's that?! I just went at it...I live in the South, we ask for forgiveness, not permission. All kidding aside, they love it! Thank goodness. Thank you so much for letting me share!
 photo signature_zpsd10b3273.png