Showing posts sorted by relevance for query Gallery of gratitude. Sort by date Show all posts

Friday, May 29, 2015

In the Art Room: Top 10 Tips to Putting Together an Amazing Art Show

I've blogged about many of my art shows. You can read about the one from 2012 here and here; 2013 here and here and 2014 here and here

Well, it's that time o' year: ART SHOW TIME! I know for many of you art teachers out there, you've already wrapped up your annual show and I'm sure it was a success. I just finished off my 12th art show and I gotta tell ya, I'm still learning. Fortunately I have learned a thing or ten over the years and I thought I'd share them with you in this here post: The Top 10 Ways to Host a Humongo Art Show! Enjoy, y'all! And please share your tips and tricks in the comments, I'd love to hear from you.
This big ole collaborative piece was created a couple of years ago and still hangs outside my room. Second graders created the Jackson Pollack-inspired papers that frame the piece, while fourth graders created the tissue flowers and third made the brown palette and bristles of the brush. Make big beautiful stuff like this and you have instant and permanent art on your walls!

1. Start organizing early. Bwahahaha!! For those of you that know me, please pick yourself up off the floor and stop laughing. Folks are starting to stare. Y'all. I'm the least organized person On Planet Earth. That should make you feel pretty good about yourself for a coupla reasons: 1. You prolly can find your keys, wallet and phone every morning without a panic attack and 2. You can totally pull off a Humongo Art Show! 

In all cerealness, might I recommend you do the following: 

* Keep all student artwork organized by class. You already do this, I'm sure. I hoard every single thing the kids have made all year long for the art show. I remind the kids of this plan. In the meantime, I attempt to share as much of their work in temporary displays in the halls as well as on Artsonia.
* Matte their work as they complete it. I think everything looks a little nicer with a black frame. If you frame things as they complete them (or have the kids do it if you like that lopsided frame look, ahem), it will be a lot less stressful during art show time.
* Have the kids sign their work. Personally, I don't like labels on art work. I find them distracting. Imagine Mona Lisa with a big ole white label slapped at the bottom. Distracting much? What I do like is seeing an artist's signature. We spend a long time talking about how when an artist signs their work, that's their way of saying, "masterpiece complete". We sign our work either at the top or bottom in black sharpie. I let the kids decide if they'd like to write just their first name or their entire name. 
 Kindergarten artwork hung by one parent volunteer...
 Kindergarten art work hung by another parent volunteer. Notice how differently each parent hung the work. My theory: if it's up, it's good enough for me! By the way, here are some links to those projects seen above: clay birds, snowy landscapes, shape paintings, line paintings, self-portraits

2. Get help. Lots of it. My school has had an art show since before my time ("BC", Before Cassie, was a lot loss crazy I know!) so it's well established. My first couple of years, I hung everything every.single.thing. myself. I spent my spring break hanging. I spent my mornings and late nights hanging. During my third year, my brother was in a terrible car accident (he's a fine now. An English teacher on a reservation. Sup, Kris!), I was unable to hang the art show and something magical happened: parent volunteers came in and HUNG IT ALL. From there on out, I've utilized my parent volunteers to hang the art show. 

Here's how I do it:

* Woo them with donuts. At the start of the school year, I had a meeting during my morning planning for parent volunteers. I called it "Donuts with the Art Teacher". I walked my potential volunteers thru some options: volunteering in the art room during projects, hanging art work, mounting pieces and/or Artsonia help. I scored two dozen emails and kept them mildly busy until the art show. 
* Give them art hanging direction but don't be a micro-manager. Here's my theory: we are hanging EVERYTHING that EVERY KID has created throughout the year. I teach over 400 kids and they make between 5-7 two dimensional pieces. That's a whole lotta art work to hang. I tell the parents just a couple of things: where to hang the work (we hang all artwork outside of the student's classrooms so they can easily find their pieces) and what to hang it with (more on that in a sec) but I leave the aesthetics of hanging the work up to them. Some parents like to hang work by projects and some like to scatter the work as you can see in those pics above. Let them take ownership and enjoyment in hanging the work. That's what will keep 'em coming back.
* No parents? Let's talk alternative routes. Before I tapped into my parent volunteer network, I had the students help me hang the work. We'd walk our stack of pieces out the hall with our balled up pieces of sticky tack on the back and work on hanging. This was very effective with my older students and is something I plan to go back to when we hang smaller displays. Once finished hanging, the students could write criticisms, a-glow-and-a-grow or simply chat about their work. You could also utilize your fellow teachers. I find that bribery works wonders. Bring in some pizza, provide the sticky tac and make an afternoon of it. What would take them an hour would take you thirty. Presented to your colleagues that way just might get them to see your point of view.
 There's nothing worse than spending hours hanging artwork only to see it all on the floors in the morning. This year, my GENIUS bookkeeper came up with a solution! 

And it even works on walls we've never been able to hang on before! Fourth grade project lessons: donuts, landscapes, woven pouches, metal relief work and suns, just follow the link!

3. Nothing sticks to cinderblock. But this works. Oh, cinderblock. I've tried it all: masking tape, nope; blue sticky stuff, sometimes but that's only when the kids don't peel it off the back of the work and do I-don't-wanna-know with it; double-sided sticky tape, yeah, that works. But it's expensive and can tear the art work when it's removed from the walls. And don't even get me started on hot glue. Oh Lawd. I've lost fingernails trying to remove that from walls. 

This year, my bookkeeper suggested we use deer mesh. We taped it to the walls behind the cork strip molding and reinforced it with some push pins. Then artwork was simply paper clipped to the mesh. NOTHING FELL OFF THE WALLS. It was the most amazing experience to not find dozens of pieces of art on the floor each morning. Not only that but the mesh is practically invisible and not distracting. And it was super cheap. We bought 6 rolls for about $100 and only used 4. Many of the classroom teachers even kept their mesh to display class work. If only I'd thought of this years ago!
4. Get the kids excited. Since we've been doing an art show at my school since the beginning of time, the kids know that all of their work throughout the year will be on display. And they're excited by this! We finish off our masterpieces, create big banners and signs (visit here) and we write up lil artist bios so folks can get to know a little about the person behind the work. We write these every year so by the end of their fourth grade year, the kids have a nice collection to look back upon. It's just one of those fun ways to get the kids amped up about the art show.

Here's some other things we've done:

* Create an Art Show Pin. One year, back in my pre-blogging days, our art show fell very close to Mother's Day. So each student in the school created a small ceramic flower that we adhered a pin to. Students then created invitations with the pin inside. It was such a thrill on the night of the art show to see moms comparing their handmade pins. I just might have to do that again this coming year!
* Have the kids create invitations. This year, we simply let parents know via email, newsletter and a phone call about the art show. In years past, the kids have designed and created invitations that they shared with family and teachers. 
* Make posters and banners announcing the show. We did a lot of that this year. We hung them throughout the school and even used the left over paintings as backdrops for the words Think, Imagine, Create, Inspire that now hang in my art room.
5. Invite the big wigs. Your kids have worked hard all year. Your volunteers have busted their tails getting it all up and displayed. You just might have lost countless hours of sleep and reality television show watching time to prepare. INVITE EVERYONE YOU KNOW. You better believe my superintendent and entourage came. You better believe he was tweeting as fast as his fingers would allow. Y'all. Brag on yourself. It's good for the soul.
6. Get a sub the day of the art show. So years ago I was at an NAEA convention listening to some magical art teacher talk about her magical art show. And I was feeling a little peeved because I was all, "I could never pull all that off!" Then she spoke the magical words: GET.A.SUB. Yes! I've been doing it every since. The day of the art show, my art classes are held in an alternative location while I clear my room, set up displays and generally run around like a mad woman until 6pm. I'm fortunate to have a truly understanding and supportive administration. They get it. I bet yours will as well if you tell them what a big event you have in mind. Doesn't hurt to mention that you've invited those aforementioned big wigs!
Second grade artwork on display. Project ideas: circle loom weaving, symmetrical butterflies, collage landscapespenguinsojos de dios, and metal relief still life lessons. 

7. Offer free ice cream and they will come. We usually have between 400-500 folks show for our art show. That's not too shabby with a school of about 400 kids. It's been long established that we also have an ice cream social on that evening which is a big draw. The school provides the ice cream but that's about as much as I know. I never make it out of my art room to get any! We used to also have a book fair on the same evening but this year, it just didn't work out timing wise. I don't do craft tables or make-and-takes for a couple of reasons: 1. I think the artwork speaks for itself. To me, the evening is about the student work. and 2. I'm just not that organized! I love the idea in theory but with our crowds, I think it could get real crazy real fast. I admire those that can pull it off tho!
Special thanks to my buddy Laura over at Painted Paper for the fabulous Mexican art lessons! You can read more about those leaf print banners that first grade created here

8. Make it easy to find art work. There's nothing as unfun as having one million children and their not-so-happy parents come up to you and say "I can't find my artwork!" Well, make it easy for them! I always hang all student artwork outside of their classroom. We try to have everything up a good week or more before the show that way the kids can spend some time finding their work. This also helps me when lil Clementine comes to me and says "hey! I can't find myself portrait hanging up!" Well, Clemmie, that's cuz your crazy art teacher hung it with a different class. Best to get all that cleared up before the big night. 
Same goes with clay display! Have those pieces sorted by class and have the kids create labels to go next to their work. If you are super organized (read: not like me), have the kids create the displays themselves that way they know EXACTLY there their work is. Clay fish and sculpture lesson here.
 9. Create artwork throughout the year and then LEAVE IT UP! Bam! Instant work on the walls! The second grade created those reversible dot paintings at the start of the year for International Art Day. They got such a great response, I just left 'em up! 
Our Gallery of Gratitude still gets a lot of stops and stares. Not to mention it's such a nice warm-fuzzy of a collaborative piece. By the way, signs like the one you see on the left really help folks find artwork.
Also for Dot Day, the first graders created that mural which still looks happy outside my door. And those Kandinsky dots were created with a sub! I love how they brighten up my door. Perma-art is the way to go, y'all!
Third grade desert landscape lesson here.

10. Taking it all down and sending it home. Sniff. Okay, so that's a drag. Here's how I (don't) take down artwork:

* Request super nicely that the classroom teachers do it. Our art show is very near the end of the school year. Which means we teachers are cleaning out and packing up. Many of the teachers have their older students carefully remove the artwork. Others prefer to do it themselves or call in a room mom to do the job. I leave this portion of the art show in their hands. I just kindly remind them that what would take them 45 minutes would take me that times 23. After the work is taken down, the teachers return all my push pins, blue sticky tack and mesh.
* Have portfolios made. The super awesome aides at my school create portfolios for EVERY KID IN THE SCHOOL. It's simply a large sheet of bulletin board paper folded in half and stapled. Many of the teachers have the kids work on decorating those while they take down and pass back artwork.
Third grade ceramic flower lesson here

* Send fragile work home safely. The last couple of years, the day after the art show has been field day. This works out perfectly for me as that means I don't have art class. Instead, I arrange for each and every class to come to my room accompanied by their teacher. The kids sit on the floor and for 10-15 minutes, the classroom teachers and I wrap up clay projects in newspaper, put them in cheapo brown lunch bags and staple the name tag to the top. This insures all clay projects get home safely (except for the random kid who drops their bag and you hear that terrible CRACK sound) and out of your art room! I manage to knock all of that out by noon so I can enjoy a little field day action and room clean up.
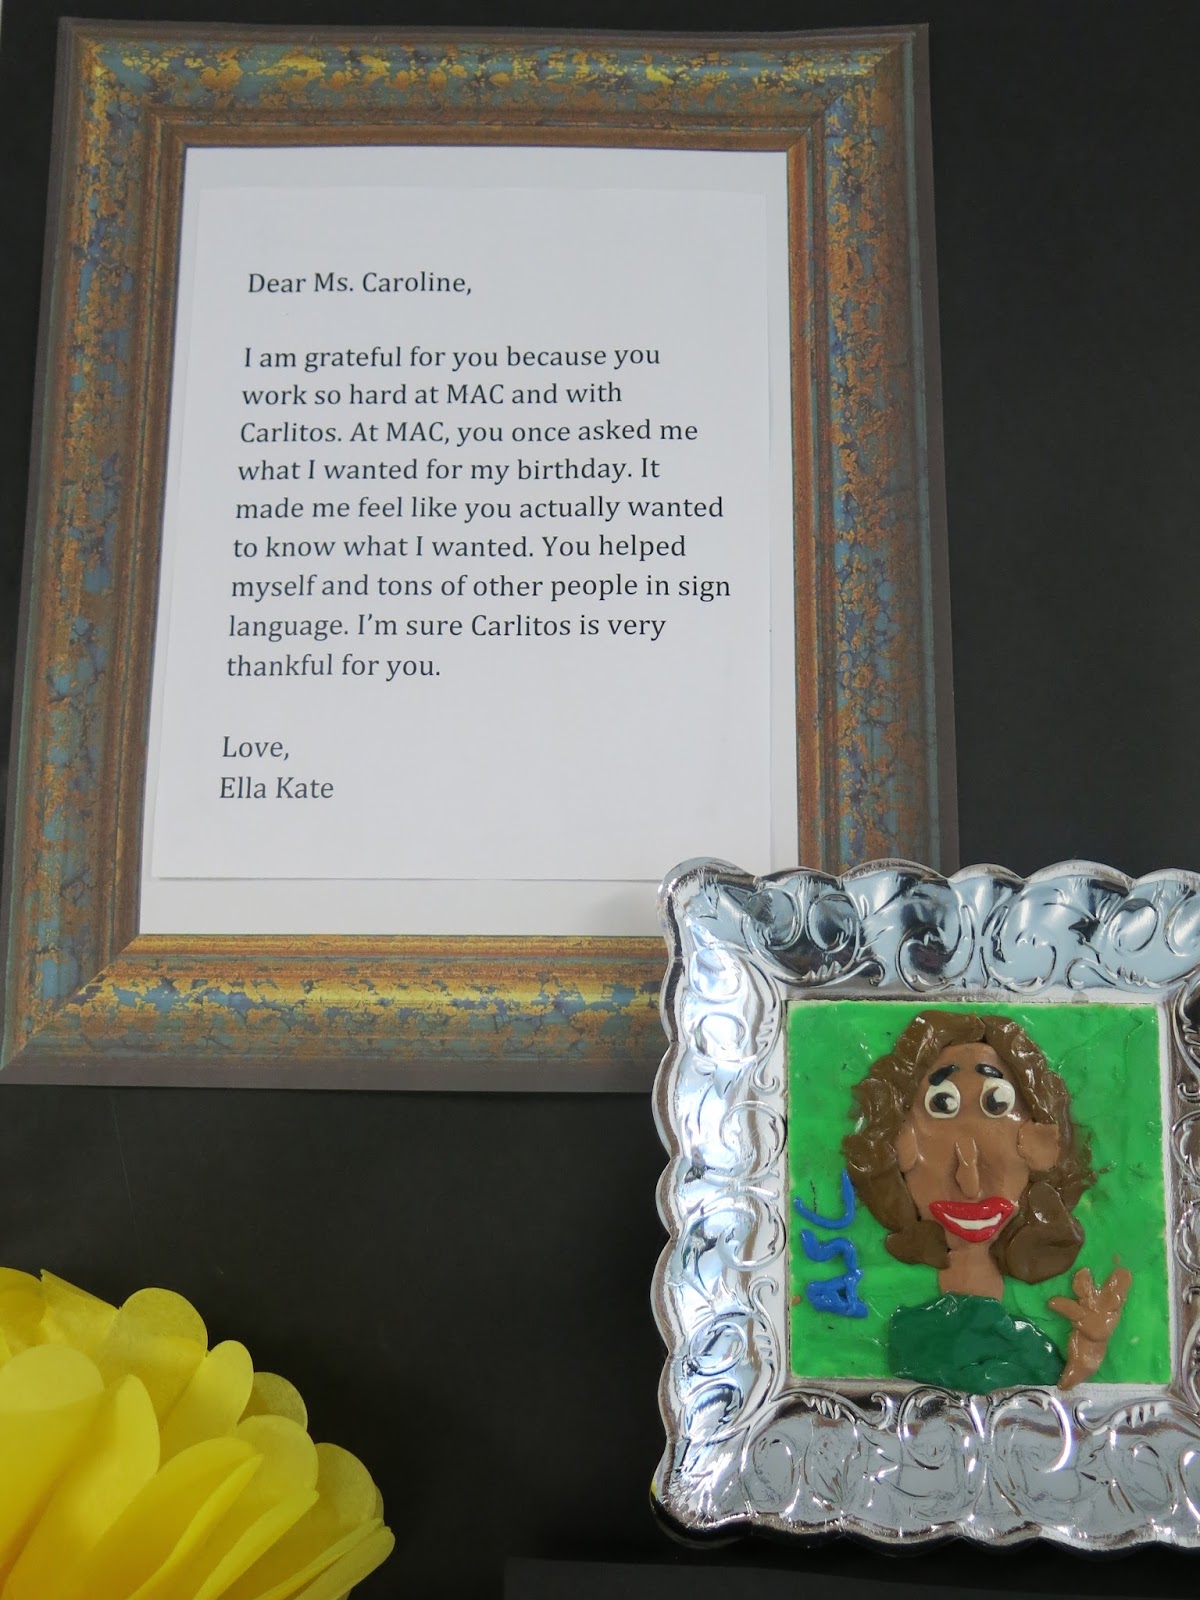
Why do an art show, y'all? Moments like this. 

Whew! Was that enough info for you? I certainly hope so! If you have any questions, please lemme know! And I'd love to hear your art show tips and tricks as there's always a better way, right? Thanks, y'all! 

And special thanks to all the parent volunteers that always make the art show possible year after year. I love y'all!


 photo signature_zpsd10b3273.png

Sunday, May 13, 2018

In the Art Room: Everyday Heroes!

Teacher Appreciation Week was last week and I FINALLY managed to get the fourth grader's portraits of our faculty and staff up just in time. If you recall, we created these some time ago...but I'd been saving them as a surprise for the teachers and staff on Monday of appreciation week. So I sneaked in on Sunday and got 'em all hung. They were a huge hit!

 Our theme for our art show is Superheroes...so I thought that calling this The Everyday Superheroes of Johnson Elementary would be fitting. If you recall, I did a similar project to this a couple of years ago and we called it the Gallery of Gratitude. For that, we simply created drawings. This time around, we used modeling clay. More information here
Here's the video I created for my students (and all y'all) to help them learn the process of creating a portrait with modeling clay:
I got a lot of questions about this project so I'll try to answer them here. 

*How did the kids pick the person they were to create a portrait of?
I had them silently draw the person's name after the video. If they knew the person, then they could go to their seat and get started. If they did not know the person (maybe they are a newer student or perhaps they simply have not had interaction with that person to know them well), then they could stay seated on the floor. After everyone drew a name, they could chat amongst the other kids on the floor and either swap names or do a redraw.
 * What about the people that didn't get their names drawn? Who did their portraits?

I had some kids who I learned were VERY fast at creating these mini portraits. And they loved creating them. So for those early finishers, I'd have them create a second or even a third portrait...or help those who were having trouble with their portraits.
 * What supplies did you use? Does modeling clay dry?

We used modeling clay from the craft stores...I found that some could be hard and some easy to manipulate. If they clay was hard, I simply told the kids to warm it up in their hands (see the video). I really found that all the modeling clay we used worked well. We used matte board cut to 3" squares as our base. Modeling clay NEVER sets so I added a varnish to the top to seal and protect it. For that, I used Crayola's Model Magic Glaze. The "frames" are actually plates from Hobby Lobby!
* How did you do the written portion? 

I didn't...the classroom teacher's handled that for me! I sent them an email letting them know what we were up to and asking if they could help me out. Not only did they talk to the kids about the written portion and have them write it up, they also had them type them! A parent volunteer then added them to the fancy paper frames. 
 * How long will this stay up?

I'd love to leave it up until the start of next school year...but I'm pretty sure I'm going to have to take it down before school's out for the summer. I'll be passing these back to the teachers and staff. 
 I think that about covers the questions I've been asked. My students loved making these so much that I followed their portraits up with a self portrait project of the same nature. They look so adorable for our art show!
 Were there tears on Monday morning? Y'all better believe it! This is one of the most favorite projects that I've done...it means so much to everyone involved!
 I loved reading the kind things our students had to say. Each and every person working in my school is so well loved!
 I'll definitely be doing this project again. I'd love to hear if you've done something similar!
Have a great week, superheroes! 
 photo signature_zpsd10b3273.png

Thursday, December 18, 2014

In the Art Room: A Legacy Mural

Hey, y'all! I'm super excited to share with you a project that my fourth graders started just last week when their certifiably insane art teacher decided that they outta create a present for the principals of our school. I've mentioned before that our school is participating in a Be Nice campaign. In the art room, I've been trying to post a weekly "Give Nice a Try" idea in my room each week. A coupla times, we've actually had the opportunity to make it happen in the art room. You can read about how we wrote Thank You notes to a local art museum after our field trip, created a Gallery of Gratitude for all the faculty and staff in the school and wrote kind notes to each other. This time, our Give Nice a Try was to give a gift (especially during the season when most kids are thinking about receiving). And this here Legacy Mural is the result of their hard work.
I got the idea for this mural at NAEA during a presentation by Janine Campbell (thanks, Janine! If you guys ever have a chance to see her present, do it, she's amazing). She had her middle school students paint on black canvases that she'd taped off the words ART onto. Then, when the kids were finished painting, she simply removed the tape. So smart, right? Well, being the crazy Last Minute Lassie that I am, I didn't bother with the masking bit. I just let the kids start attacking the black canvases with fluorescent paints.
Well, okay, "attacking" is a bit of a stretch. We kinda sorta did the whole circle painting thing. You know, paint circles and more circles and don't paint over anyone's circles but enhance them with more...wait for it...circles. I did give them the chance to enhance the designs with patterns and lines of their choice. I only had a coupla rules: 

1. Don't paint over anyone's design. You can build upon their painting but you cannot cover it up.

2. Paint on dry areas. Painting over wet areas will muddy your colors because they'll become mixed.

3. This is your legacy as the out-going fourth grade! Do your very best to leave your mark behind. 
At the end of four fourth grade classes working on 17 canvases for an hour at a time, we had this. It's like an acid trip on canvas. And I mean that in the best possible way. I'm dying to get my kitten mittens on a black light, y'all. 
 Oh! In case you are wondering, the black canvases came from Blick (are they just "Blick" now? Like, are the "Dick"less? [heehee, sorry, not sorry]) and the paint was by Sax. Because I'm now in love with Sax Versa Temp. It's my jam. 
The amazing bookkeeper at my school worked out the canvas dimensions and was able to scrap together enough dinero to purchase 'em. She also was kind enough to print off the lettering. I originally had the genius idea to have a sign company print the letters. Then I could just slap 'em on top. However, that was gonna cost us well over a hundred smacks. Plan B was to use the printed letters. After the kids had completed the canvases, I traced the letters in yellow chalk and painted them in with India ink. 
Obviously, it woulda been swell to have the kids paint the letters but I was in a time crunch. In fact, these letters were painted just last night. I did notice that the India ink was cracking on the surface in some spots so I sealed it with high gloss ModPodge. The happy accident there was that it gave the letters a great shine.
 This morning, I got to school at the crack of dawn to hang the letters. My BFF the custodian helped out tremendously. Because this was a surprise to be revealed at the end of the day, he and I "wrapped" the present so the principals wouldn't see it until the unveiling.
During the unveiling time, I had all fourth grade classes gather in the lobby. The wrapping paper was removed and the principals were escorted out blindfolded. On the count of three, the blindfolds were removed, the kids shouted Merry Christmas! and the principals saw this.
To hang next to the mural will be this small golden sign. This was wrapped and given to the principals after the unveiling.

It was a super exciting event, albeit a very crazy and noisy one. I don't do well with managing a crowd of over a hundred kids so it was a pinch cray but a happy kinda cray. 

And now on to the winner of yesterday's giveaway...

Yippie, Rachelle! I'll be in touch so I can ship that stash your way!

And now...for today's goodness...
Four whole rolls of paint-splattered duck tape! Here's how you can enter to win:

1. Leave your email in the comments.

2. If you are an art teacher, I wanna know, what's been your fave group project to do with the kids?

3. Not an art teacher? Tell me what you plan to create with this tape stash!

Good luck and I'll see you with another giveaway tomorrow!

 photo signature_zpsd10b3273.png

Tuesday, April 19, 2016

In the Art Room: Another Chalked Ceiling Event!

Hey, y'all! This Friday I will be leading my second grade artists in our (now) annual Chalked Ceiling Tile Event! We did this last year and it was an absolute blast. I had my doubts about teaching an entire grade level a project all at once with such a messy medium as chalk...but it went off without a hitch. I'm only changing it up a pinch this year in that we'll be chalking flowers instead of butterflies as they are no longer in our second grade curriculum. I'm also planning to film the demo process so I don't have to talk over the sound of a grade level of students, parent volunteers, teachers and the noisy multi-purpose room. I'll be certain to share with you what we create! But today I thought I'd bring back photos last year's event.
To read more about it, click yourself here. It was apart of the many legacy projects I've done with the kids over the years. In fact, that's what my summer presentation for AOE was last year! I thought I'd share with you what I presented below (now that nearly a year has past, I can share it with you here!). Are y'all attending this upcoming AOE online conference? You totally should. 
You can find more info about the projects mentioned here:
* Gallery of Gratitude
* Our School has Heart
* Chalked Ceiling Tiles
* Village of Kindness
* Johnson Elementary Legacy Mural
Legacy murals and school-wide collaboratives (aka schollabs) are something that I feel so passionate about that I paired up with Janine Campbell at NAEA and did a lil presentation about it! If you'd like to see our prezi, feel free to check it out here.
Janine is a fabulous educator and speaker! She brought us to tears with her stories of how her schollabs have impacted her students and community. When you attend NAEA conventions and see Janine's name pop up as a presenter, make sure you attend!
Back to those butterflies! I thought it would be fun to add to our butterfly tiles by adding flowers. I can't wait to see what the kids create and just how amazing they look in the ceiling.
But seeing these photos makes me realize just how much prep work I have to do before Friday. Thankfully, I had a wonderful high school student shadow me today who prepared all the plates of chalk (thank you, Chloe!). I'm sure I'll get it all done in my usual Cassie-fashion: last minute, panic-y, sweating-like-a-pig and hyped up on coffee. Yep, that's how I roll.
In other news, I'm also delusional. With less than 30 days left in the school year, I still think I have time for new units of study. I had to take a hard look at my calendar today and come to grips with the fact that I just can't fit it all in. Le sigh.
But the ceiling tiles, that's gonna happen! And I'll be certain to share it with y'all when they are up on the ceiling with the butterflies. Until then!
 photo signature_zpsd10b3273.png