Showing posts sorted by date for query dorky teacher. Sort by relevance Show all posts

Wednesday, August 28, 2013

DIY: Embossed Ceramicness

So I might be having a little bit of a love affair with pale-sky-aqua blue, faded-rose pink and, well,  pastels in general. Proof of such here and here.
Sometimes when people are inclined to talk to me (which I don't recommend to the easily offended, annoyed or grossed out by stories involving pants wetting accidents and pee puddles [which, btw, is up next on this blog post menu]), they ask me stuff. Stuff that leads me to believe that they must read my blog and assume the following:

1. That I make stuff all the freaking time.

2.  That I also dress like a moron all the freaking time.

One of these things is as false as Miley Cyrus virginity rumors. Can you guess which?

If you guessed the first then, ding-ding-ding!, you are correct! Congratulations! You win absolutely nothing but my utter respect at your guessing skillz. Really. I mean, you should consider joining the circus and being one of those weight-guessing people. I hear the pay is incredible. 

Which means the crazy notion that I'm a making-stuff-maniac is totes false, ya'll. Truth be told, I spend entirely too much of my life online googling things like "dorky art teacher clothes" (can you guess whose mug pops up first? Use those expert guessing skills of yours...) and chatting up long lost buddies on Facebook. Which is what I was doing last night when a class photo from elementary school was posted. Next thing I know, it's past midnight and I've been reminiscing about favorite teachers and crazy classmate antics with people I've not spoken to since the 5th grade. Time well spent for sure. Meanwhile, my sewing projects/unglazed ceramic pieces/half finished paintings of nude leprechauns (just seeing if you were paying attention) are left collecting dust. Das my life for realz, ya'll.
I've also got this terrible habit of starting something and then callin' it quits midway through. Sometimes I return to said DIY -n- Ditch but it's often weeks, nay, months later. Case in point: my Embossed Ceramicness. Last November I attended the annual state art conference in the town of Gatlinburg, Tennessee where the allure of the airbrushed t-shirt never dies. I took a course that involved this pretty sweet process of using your printing block as a ceramic embosser. I began by creating the above masterpiece.
And transferring the design to my linoleum block. This was done by scribbling on the back of my drawing, taping the drawing to my block and then going back over my pencil lines. At this point the carving commenced.
This squirrel-tastic block was carved by my awesome art teacher buddy Mallory. One of the things I love about attending these workshops is you get to hang out with your favorite artsy friends. And you make so many new buddies who do a much better job at commiserating about life in the art room than, well, your hubs. Cuz new art teacher friends don't get that glazed-over "is this gonna be another kid peeing themselves story?!" look like that dude who lives in my house and breathes my air. Nay (yeah, I just used that word twice in one post like a boss), new artsy buddies slap you a high five and commend you for your tales of how you turned lemons into lemonade. Or, rather, puddles of pee into a "Pond, kids! Don't step in the pond because you don't want to get wet!" (this actually happened...which was met with a "Yeah, cuz that pond is PEE!" by a dear kindergartener).
One friend I made at an art conference years ago has since become a dear friend of mine. Her name is Debbie and she carved this block which I'm thrilled to say I have a ceramic copy of. I can't wait to get it glazed and out for Halloween. I'll be sure to share it with you soonish.
Okay, where was I? Ah, yes, the carved block. Is it any wonder I don't finish much? I can't even stay focused on one lil blog post! Once the carving was finished, a slab of clay was placed over it. That was either rolled out or run through a slab roller. From there we had the option of turning our embossed piece into a vase, a mug or a slab. I did a little of each.
And that was way the flip back in November. It wasn't until recently that I busted out the glaze and forced myself to finish these pieces. The completed slab in the top photo was mounted onto a wooden flower box.
While these lovelies have found their home at my front door. Finally. After months of hanging out in the Land of Forgotten DIY's, they are now complete. Who woulda ever guessed I'd get 'em done?! Well, you, of course. What with your intuitive guessing skills and all.

Until next time, friends, STAY AWAY FROM YELLOW PUDDLES! 
And have a great holiday weekend.

Monday, August 19, 2013

What the Art Teacher Wore #73

Trip-Takin' Monday: Since we'll be traveling to Asia this year, I decided to break out my Suitcase Skirt for the occasion. Also because, let's fact it, I've got a lot of baggage. skirt: vintage, etsy; blouse: gift from a friend; belt: Pin Up Girl Clothing; shoes: thrifted Crocs (I know, hard to believe)
What's up in your world, ya'll? Dudes, I've got my feets up and an ice cold...water (sadly) so life here is practically perfect. Today marked the first day for my super student teacher to enter the wild world of art teaching and I couldn't be more excited. Stay tuned for next week's outfit posts that will also feature her groovy looks...just don't tell her about it. She doesn't have a clue that I've been snapping her picture whilst pretending to hold the camera in her direction and mutter, "I wonder what this button does." Silly student teacher.

And speaking of teaching, since seeing me in this get-up, my students have now been learning all about the history behind the kimono. It's quite fascinating so I thought I'd share it with ya'll this week. Until next time, have a fantastic-ish week and I'll talk to you sooner than you'd probably like.
So originally "kimono" was the Japanese word for clothing. Of course now we know it to look a little something like this. This style of kimono came about more than a thousand years ago. Their popularity came into play partly because they are so stinkin easy to stitch up. Known as the straight-line-cut method, it involved simply cutting the fabric in straight lines and stitching them together. This method also meant that the kimono is one-size-fits-all and no tailoring is required.
The Great Wave Tuesday: My students are also learning about ole Hokusai who, apparently, changed his name up to 25 times during his life including a Japanese name that translated to "Old Man Crazy about Drawing". Gotta love an artsy fart with the ability to laugh at his craziness. dress: made by this crazy, DIY here; shoes: Payless

Sadly, it seems that kimono making is a dying art. Hundreds of years ago, thousands of Japanese people were in the kimono making business as it was what was worn daily. Currently only a handful of families craft kimonos with many of those craftsman being elderly. It's sad to think that the art of kimono making is literally a dying one.
First Day O' Kindergarten: This year I have my wee friends for 45 minutes at a time and I'm pretty excited. Once we get past that monkeys-on-crack phase I think we'll be good. Ish. I mean, there is something to be said about teaching a roomful of Crack Monkeys...right? skirt: etsy; top: thrifted; crayon shoes: DIY here; primary colored necklaces: thrifted finds

Traditionally crafted kimonos, from the silk cocoon to the final product involve more than 1000 processes carried out by different craftsmen. Each of these artists learned their crafts from the generations before them...which makes it so sad to think of this art as being lost. At one time, kimonos were worn by every class of people from samurai to aristocrats to the working class. When I was in Japan several years ago, it was rare to see anyone wearing a kimono and the thrift shops were filled with these beautiful robes.
Pencil Me in Thursday: I know, dorkiness abounds. But are you really surprised? pencil skirt: DIY here; top and sweater: Target; shoes: Swedish Hasbeens, Anthropologie sale!
Beautiful, right? Many Japanese are very aware of the change of seasons and love to celebrate it. One way of doing so is to have a kimono that showcases each season. I love this idea and have decided to expand my kimono-wardrobe. Cuz that's just what my overcrowded closet needs.
Friday, Where You Been?!: Kay, not gonna lie, the last two weeks have felt pretty stinkin' long. Which is entirely my fault, too many late nights and early risin's. Would love to say Ima gonna work on that but I just can't make any promises. There's just not enough time in a day, ya'll! skirt: etsy (if you type in "Dorky Art Teacher Clothes", you'd be amazed at what you'd find!); blouse: thrifted; shoes: Payless; palette hair clip: made by me
There are many parts to dressing in traditional Japanese attire beyond the kimono. That giant belt is called an obi which, from the front, you would see has a smaller cord belt wrapped around it called an obi-jime. Those wooden-heeled shoes are called geta and are worn with toe-socks called tabi. And if you look closely, you'll see what looks like another kimono under the ones worn by the ladies above. That's actually a collar called a han'eri. Of course the back of the kimonos is worn low across the neckline to showcase the beauty of the neck.


Sunday, December 9, 2012

What the Art Teacher Wore #45

Sausage-Sellin' Monday: When I was in Germany this summer, I picked up this dirndl because I knew the kids would enjoy seeing it during our study of Germany. And because I just love it. Dressing as dorky as I normally do, I didn't think twice about hitting the grocery after work in this getup. That is until the check out lady asked, "Hey, where do you work?" (before I could answer, she continued), "Do you work at the mall sellin' them sausages? What do they call that place?" Luckily the bag-gentleman was able to offer assistance, "It's called Hickory Farms, I think." Check out lady, nodding, "Yeah! That's it! You work at that place?" I hated to disappoint as they both seemed sad and perplexed that I was an art teacher. "But we're learning about Germany! And they do love sausage!" dirndl: Germany; boots: Seychelles; tights: Target
Dunno if you noticed or not, but I took What I Wore this Week off last week. Last week was a rough one that hit full tilt craptasticness on Thursday. I had gotten a late start that morning but just knew I had to wash my beyond-dirty mop of hair. Which made my late start even later. To compensate, I did minimal hair- and make up-doin' and rushed out the door. This I would regret as the following convo happened during my first class:

Kid: Mrs. Stephens, what's wrong with your hair? It's all [making an odd gesture around her head] messy.
Me: Well, um, I washed it today.
Kid: Where? [looking around the art room and then with a horrified expression] In the art room sink?!
Oh, look, it's my summer home in Bavaria, Germany. My fourth grade students are currently learning about Schloss Neuschwanstein (that'd be Neuschwanstein Castle to you English-speakin' folk) so I thought I'd include that in the artsy part of this outfit post. Hubs and I went with his boss and family a couple of winters ago. I'll share some of my photos of that trip too. This image I pulled form pinterest.
Yeah. Nice. Later I overheard a third grader say to another, "Oh, Mrs. Stephens is looking tired today." Defensively, I replied, "I'm not tired!" Looking at me sympathetically, she said, "Oh, maybe it's just your eyes then. [did I mention I had skipped my cat eye make up that day?] They look really tired."
The dashing King Ludwig II was born in 1845 and became king of Bavaria at the young age of 18. He is sometimes called the Swan King, the Fairy Tale King or just Mad King Ludwig. He acquired the first two names because his palace is near Swan Lake and the fairytale-esque castle he had created. And although his brother Otto was considered insane, the last nickname isn't accurate for King Ludwig II. He was definitely an eccentric but not insane.
But the cherry on the Super-Sucky Sundae was when kindergartenland came to my room.

We had thirty minutes to create a clay animal, get it put away, get our tables wiped down and get outta the room for the fourth grade. As you can imagine, we didn't make it. I had a coupla cryers, heads falling off animals, three-legged mutant mammals and one kid pee themself. AND we ran out of baby wipes. Which made for dusty crusty hands all around.

 When I was in the midst of the madness, I looked up at the clock and realized we just weren't gonna make it. In fact, time was already up, fourth grade was waiting at the door. Now, I have to tell you, my fourth graders are simply the best. I asked them to come in, buddy up with the kindergartener that was in their seat and help them get cleaned and lined up. And they did.

As the fourth grade and I sat down to finally begin our lesson and the kindergarteners were walking out the door, I heard one of my fourth graders say, "uh, Mrs. Stephens..." and tilted his head in the direction of a kindergartener. Who was licking the clay off his hands from the bottom of his palm all the way up to his fingertips. Before I could say anything to him, he waved goodbye with his other hand and walked out the door.

Yeah. So. It was a bad day. But I had to share it with you because, thankfully, now it's kinda funny. Except for the clay lickin'. That's just gross.
Cut The Lights! Tuesday: So when each class came to art, I invited them in, dimmed the classroom lights and turned on my dress, much to their delight. The only problem? I had one kindergartener that was obsessed with the light up dress. She kept telling me to "cut the lights!" so we could see the dress again. Eventually we had art in the dark. light up dress: made by me; tights: Target; shoes: dolls by Nina; sweater: thrifted
A view of Neuschwanstein from Hohenschwangau Castle. When you go to Neuschwanstein Castle, you park your car at Hohenschwangau Castle, a fantasy-style castle Ludwig's father had built near the Schwansee (Swan Lake). You can either take a carriage ride up the steep hill to the castle or walk. We opted for the carriage ride.


If this castle looks kinda familiar to you, that might be because Walt Disney used it as his inspiration when creating Sleeping Beauty's Castle in Disneyland.
Light Up Wednesday: When you make one light up dress, the kids expect you to light up all the time. So this outfit was a bit of a disappointment to the kids. sweater and skirt: vintage, thrifted; white blouse: gift; tights: Target; shoes: Clarks
In 1864, King Ludwig II began sketching out his plans for his palace which was intended to be a personal refuge for the very private king. The castle was funded by Ludwig's family fortune and borrowing, not with money from Bavaria. However, now with as many as 6,000 visitors a day in the summer, the palace provides much money for Bavaria.
Growing up a prince, King Ludwig II didn't have much of a childhood. He was constantly working on his studies and future duties of becoming a king. For that reason, he had a fascination with the carefree fantasies and imaginative fairy tales he heard in his childhood. While growing up, he spent a lot of time at his father's beautiful castle Hohenschwangau.
Cat Attack Thursday: My cat loves these shoes. Loves to attack them. So when I wear them, I have to put them on in the car. Either that or deal with runs in my tights and bloody legs. By the way, everything I'm wearing has a touch of DIY: I created the buttons on my sweater from clay, added lace to the bottom of my dress and crated these shoes. dress, sweater, shoes: thrifted; tights: Target
I created these last winter with a pair of t-strap shoes I found at Goodwill. You can read more about that DIY here.
I was so excited to find this Anthropologie sweater at the thrift store. Until I noticed it was missing buttons. I couldn't find any that I liked at the craft store so I created these bad boys out of clay. I pounded the clay onto a doily, cut out the circle shape, added the button holes and glazed them a satin gray.
During the Middle Ages, there were three castles that over looked the villages. One of those was called Schwanstein Castle. In 1832, Ludwig's father King Maximilian II of Bavaria bought the  ruins and replaced them with Hohenschwangau Castle. This is the castle that inspired Ludwig II. The ruins above the family palace later became the site for King Ludwig II's Neuschwanstein. Initially, the plan was to incorporate the older castles into the design of the new one, but for whatever reasons, that didn't work. 
Hubs and I a couple of winters ago. We are standing in front of what was to be a chapel had the interior been completed. Only 15 rooms of the castle were completed before the death of the king at the age of 41. Had the castle been finished, it would have consisted over around 200 rooms and been nearly 65,000 square feet.
Candy Cane Kinda Friday: This is actually a summer dress I scored in Germany...but it just looked so candy-cane-y I had to wear it. sweater: vintage, thrifted; green fishnets: Marshall's?
Sadly, King Ludwig II's creative and eccentric ways were his downfall. Being extremely introverted, the King avoided public functions and his kingly duties. This ticked off his government ministers but not the people of Bavaria. He was known for taking trips across the countryside, chatting with the farmers and people he met.
Even though the King paid for his castle project with his own funds and money borrowed, Bavaria still suffered financially. For this reason, the government ministers decided to get rid of their King. The only way to do it constitutionally was to have the King declared insane. Not long after his removal from the throne, the King died a mysterious death. At the time, it was ruled suicide...but there are theories his enemies shot him and left him to die at Lake Starnberg.
If you've managed to get this far, thank you for indulging me this super long blog post. I have really enjoyed sharing my art history research in these posts as it helps me prepare for my lessons. 

I hope you have a wonderful week!


Monday, August 20, 2012

DIY: The 1970's Dorky Teacher Skirt

Dying for a Double DIY? Here's how to paint your own Pencil Shoes!
 This past weekend's to-do list looked like this:

1. Mow the yard...nope, didn't do it.
2. Clean the house...I danced around with the Swiffer, which counts as cleanin' in my book.
3. Go for a run...naw, no one was chasing me so, why bother?

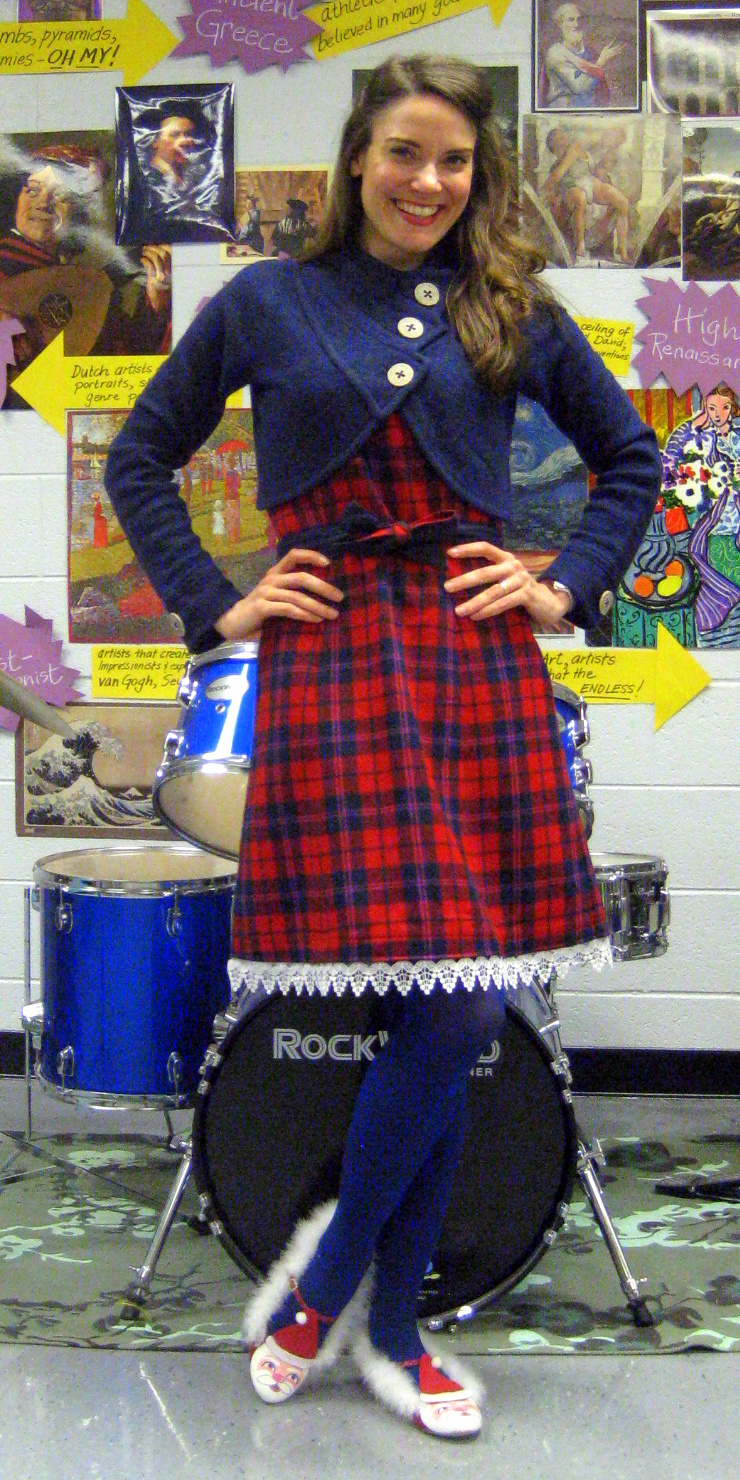
That's all I had to do this weekend. And I didn't even manage to get 50% done. Which kinda makes me sound like a slack-tastic slug. Unless you take into consideration that I did something that wasn't even on my list: I made the World's Dorkiest Teacher Skirt. That's right. I just turned that Slack-tastic into Tacky-tastic. Because it's what I do.
Please try to ignore the dust bunnies that my Swiffer Samba didn't pick up.
It all started with this 1970's wrap skirt I picked up at Goodwill years ago. Yeah, I said years. I don't get rid of anything. In fact, when I start cleaning out, I make huge stacks of things to donate...and then refold them and place them back in my closet. Where they belong. Along with my cassette tapes, my VCR and Richard Simmons workout videos. I'd laugh with you if I wasn't crying.

How I usually go about bringing my goofy ideas to life: I start with a sketch and just dive in. I find that if I spend too much time thinking an idea through, Sane Cassie will usually come to her senses and drop it. However, if I just go at it, Crazy Cassie can sometimes make it happen. Am I really talking about myself in third person? Isn't that what Sybil used to do...?
This skirt was actually inspired by my vintage palette and rainbow wrap skirts that you can see here. I didn't make either of those but I have done my share of applique in the past (check out my Rock Star Apron). You can applique on any ole sewing machine. It's just like collage with the stitching acting as your glue.
For the pencils (because I know you are dying to get your tacky on):

1. Pin your pencil drawing to some yellow fabric (I used a mustard yellow linen) and some facing. Cut it out.
2. Cut out shapes of eraser, the pencil ferrule (what you didn't know that's what the metal thingie was called?), the wooden tip and the lead.
3. Tack shapes down with stitch witchery (non-sewers, that's this magical stuff that will adhere fabric with just the heat of an iron).
4. Set your sewing machine to the zigzag setting. Now each machine is different as far as setting go. So you may have to uproot that manual you never read and give it a peak under "applique stitching". Trust me, your machine can do this. The applique is simply a very tight zigzag stitch.
Oh, look it's The Notebook. By the way, am I the last female on the planet that hasn't seen that movie? Yeah yeah, I get it, they're wearing vintage, it's romantic and (gasp!) Ryan Gosling is in it. But I just can't handle that much sap {shivers}.
The notebook was a snap. I doubled up the white fabric and adding facing to the back. Before adding it to the skirt, I stitched on the lines for the page and the little doodled heart. Once appliqued to the skirt, I added the spiral bound rings and the lines for the sheets of paper.
Before teaching art, I thought all #2 pencils were all alike. Oh contraire mon ami. The Ticonderoga big pencils are my personal fave in the art room.
Once the notebook was attached, I appliqued on the pencils. This part took a pinch longer because I wanted to match the applique thread with the colors of the pencil. Because I'm only detail oriented when it comes to the important things. Like applique. Remembering to drop by the bank, the post office and the grocery? Um, not so much.
I know it looks like a drag, but it really was just a matter of changing the thread out. The key to a clean applique stitch is making sure that your needle zigzags from the edge of your fabric to the inside.
Does it get any dorkier? Me thinks not.
The only thing missing is a pencil hair clip. Or a pencil beret. Perhaps a pencil sombrero? Always an option.
Please tell me this isn't my fate...but if I do get an itch, it's nice to know you can still buy sweaters like this here.

Now when Crazed Cassie was in the midst of whipping up this little number, she (okay, this is weird, I'm switching to first person), ahem, I asked hubs for some advice. He's like the Tasteful to my Tacky. 

So I inquired: On the notebook, do you think I should use black thread or gray thread for the heart doodle?

Hubs: I don't think you should put a doodle on the notebook.

Moi: Well, that wasn't really the question. Black or gray was my question.

Hubs: I have an idea, how about you stitch the alphabet on it? You know, like a capital A and then a lower case a and then a B and a C?

Moi: What?! That would make it look totally tacky!

Hubs: (exasperated "I-think-you've-already-reached-that-level" look).


Really? I don't know, let's do the math:

Two pencils plus one notebook and a heart equals Pretty Stinkin' Dorky.

Add in some pencil shoes and, yep, he's right Totally Tacky.

Well, if anything, at least I'm consistent. Now! Off to make a Pencil Hat!