Showing posts sorted by relevance for query shape. Sort by date Show all posts

Thursday, January 29, 2015

In the Art Room: A Unit on Shape for Kindergarten, Part 1


Hey guys, if you've not entered the UncommonGoods Giveaway yet, scoot yourself over here and do it! The come back for this here post. Thanks!

Hi, y'all! I'm here today to share with you some of the latest kindergarten masterpieces that the wee-est of wee ones have been creating in the art room. Because these lil dudes had never been to art before coming to me, I like to start with the super duper basics. Like the elements of art! Which is why, at the start of the year, I introduce 'em to a big fat hairy unit on line. We create paper line sculptures, paint a variety of lines, create abstract line paintings. Y'all, we are all about lines. And since a line creates a shape, shape is our next unit o' study!
But, before I get to said unit, can we chat about painting with small children for a moment, puh-lease? Let's be honest: they don't come by this kind of loveliness without a whole lotta proper painting how-to's, am I right? Namely, how not to jack up the paint tray (which also translates to "how not to drive your art teacher to drink the paint water"). My kindergarten kids pretty much hit the ground painting. And I've found that with lots of practice and constant reminders of proper painting technique, they can do just about anything. 
So, what do I tell 'em? The same thing every time we paint, from kindergarten all the way on up to fourth grade. It sounds a lil like this:

"Remember! Your paint brush is like a ballerina. She always dances on her tippy-toes. So you only need to put paint on her toes. She never scoots around on her bottom. So we would never smash our brush into our painting. It will ruin your ballerina's toes! And she won't be able to paint you a beautiful masterpiece. "

So, that's Thing One. Thing Two is all about changing colors from one to the next. I don't know what your paint set up is but mine goes a lil sumpthin like this: paint colors distributed in empty egg cartons, two per table of four children (I'm currently a Versa Temp by Sax paint convert. I looove this paint!); tray of water for cleaning and sponges for wiping excess water, two per table of four. And then my lil reminder routine for cleaning goes like this:

"Before you get a new color, your ballerina needs to take a bath. Put your brush in the cup of water and you should hear that paint brush scrub the bottom. It should sound like it's brushing it's teeth! Don't tap your brush on the cup, it will splash on your neighbor's painting! Instead, gently wipe your brush on Dirty Ole Sponge Bob (what we call our filthy painty sponges). Now you're ready for your new color!"

I have found that by making the process of painting and cleaning the brush silly and fun, the kids will do it. Sometimes we'll tell our brushes, "oh! Time to take a bath!" or "Ballerina! Do not scoot on your bottom!" It's hilarious to hear the kids having a full blown convo with their paint brush. But, hey, whatever works, right? So long as the principal doesn't walk in and wanna know why the kids are chatting with animate objects and drag 'em to the guidance counselor. 

Now! On to shapes!
So when I introduce the kids to shapes, I go about it a coupla ways. First we take a gander at this book. I love Lois Ehlert's books, don't you? This book especially is great because the shapes are bold and beautiful and easy for the kids to see. We count them, name them and count their number of sides. Going through this book with the kids helps me gain an understanding of their knowledge of shapes. As does playing a short round of this game.

I usually play this game once when I have a bit of down time with the kids. Again, it helps me gauge their shape knowledge. By this time in the school year, my kindergarten friends have learned quite a bit about shapes. So I like to spice this game up a bit. Instead of just calling out "pink triangle" I might say, "a shape that has three sides that's pink".  But even this simple game doesn't have all the shapes that are in the kinder-curriculum.
Which is why I love this lil handout from guruparents.com. My students are well beyond circles and squares and are now in deep with trapezoids and parallelograms. I used this handout to make flashcards that we run through at the start of our lessons based on shape. We even did a couple vocab games just to get those words stuck in our heads. Here's a lil clip of some of the vocab games we play.
So, what's our first shape-based creation? Well, it's a total rip off our first line-based masterpiece. But the tie-in is just perfect and it only takes one class. Our shape box!
 Now, you can go about creating this shape box a coupla ways. Either have the kids create the box from two strips of black paper (which is great because they'll learn how to make a square but also sucks because it will take them a million years to make said square). OR you can have a glorious parent volunteer bust 'em out in less than 15 minutes. Which is what I opted to do after a class of kinder-kids spent entirely too much time creating a box and not having enough time to create the rest of their shapes. 
 So, let's talk shape making. How'd they make 'em? Well first you start with a strip of paper which is a line. Then ask them..."how can this line become a circle?" Immediately, they'll respond that you need to glue one end to the other. Then show them that if you pinch it once...it's a drop shape! Pinch it twice...you have a crescent! Three times, viola, a triangle. And four, well, perhaps a square or a rectangle, you decide.
Kids found ways to create hearts and even stars. That pretty much made my day. 
What to do after that? Paint shapes, of course! We had many a chat about painting different shapes. The kids were intent on learning to paint stars and hearts. So many demos were given. I also have the tables covered in paper. I always encourage the kids to "practice and paint on the table". This way, once they feel comfortable, they can then paint on their paper. 
By the end of the first day, their paintings looked a little like this. We talked about how to create "rainbow shapes" by outlining the shapes in different colors. 
And one last painting day. It was funny, when some of the kids were finished and put their paintings on the drying rack, they asked if they could work on their shape sculptures again. Ermkay (cue Twilight Zone music).
Now, lest you think we be el finito with this here unit o' shapes, we've got some more work ahead of us. I'm 'bout to introduce organic shapes to these dudes with one of my fave artists, Henri Matisse. Tis time these kids take to creating some scissor-shapes, don't you think? 

Til then!
 photo signature_zpsd10b3273.png

Monday, November 21, 2022

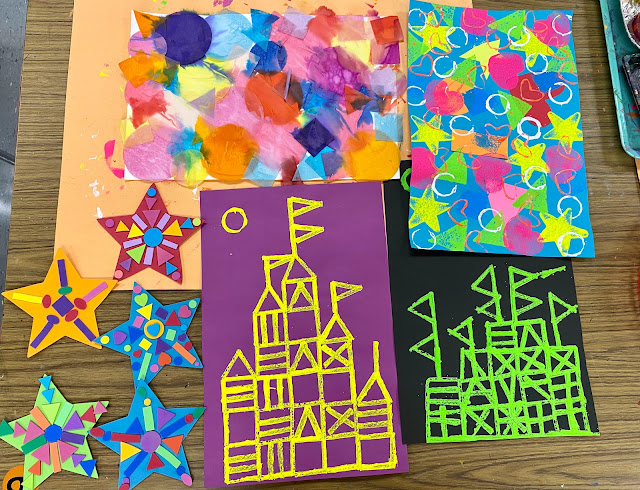
Shape Castles in Paint, Chalk and Oil Pastel Inspired by Paul Klee and Mary Blair


Recently I shared that my students were doing Shape Stations (or centers) in the art room. I did this after the success of both our Dot Day and Line Study stations. I'm loving the exploration the kids are able to do and the kids are loving it...for the same reasons. Not to mention, it's just FUN to try a whole bunch of new ways to create in just a few art classes. Here's a look at our Shape Stations:

And what we did during our Line Study:

And some behind-the-scenes tips on these stations:

Here is a look at the Dot Day stations that started it all:

And since we did two days worth of fun:

Once we finished creating artwork from our line study (lessons which I've yet to share here!), I ventured into shape. Currently, I'm doing shape stations with 2-4th only as kindergarten and first are in the middle of other projects. I do think that these shape stations would work for k-1st except maybe the radial symmetry design. But it's always worth throwing the idea out there to see what the kids come up with, right?

Here's a little look at what the back table in my art room looked like after I began prepping for our shape study. Initially we were going to do some shape stamps (seen in the upper left hand corner) but after giving that a run through with one class, I decided it was too similar to the sponge stamping. We switched to the bleeding tissue paper shapes in the end. 
Now when I'm working through these station ideas, I also gotta start thinking: what are we gonna do with all of these papers and things we create? Here's a little look at what I've come up with...
First grade is currently working on the self portrait in the upper left hand corner. This is a lesson I've done many times, you can check out the lesson here. As for 2-4th, well...I am currently having them all work on those castles! We will all do printing with our stars...and do some embossing too...but as of right now, we are all learning about Mary Blair. Here's the video I created. 

The kids are enjoying working with chalk and oil pastel. I'm excited to give them another opportunity to really explore a variety of supplies. 

Above is my example and below is a class of I think thrid graders examples. I will say this...stations means the kids will often work quickly and not always at a slow and 'careful' pace. I'm fine with that. However, I did have a small handful of students later decide the wanted to redo theirs, knowing it was not their best work. I allowed that too. 

So far, we've gotten the castles chalked in and now we are ready for the oil pastel. 

Our backgrounds will be our bleeding tissue paper. Since winter is coming, we are turning it into a winter wonderland with snow...and a little bit of sparkle on the frame. Oh...and PUFFY PAINT. Everyone's favorite!
photo signature_zpsd10b3273.png

Wednesday, July 9, 2014

In the Art Room: Ceramic Chinese Dragons with Third Grade

 Well, kids, it happened. I got That Note in the mail. You know, the one with the return address from your school.  In the middle of summer that could only mean one of two thangs: it's yer walkin' papers or, worse, a note containing a  listing of "Back to Cruel, er, School" meetings. That's right. Tuesday, July 9th marks the beginning of the end of my summer. Cue loud and obnoxious horror film-esque scream...
Make no mistake, this has left me in a rather fire-breathingly fowl mood. So what better time to share with ya these here Ceramic Chinese Dragons by my Amazingly Awesome Third Grade Artists!
 Since I've been spending my blogging time sharing travel pics and rando Pee-Wee packed posts, I've fallen a pinch behind on my In the Art Room adventures. My apologies. So whatcha see here is a project that I think my third graders would agree was one of their faves. Now, for those of you out there that are kilnless, hang with me as Ima gonna show you how you can create a Chinese dragon with a ceramic clay-ternative. But before we get into all that, lemme tell you how this all came about.
 Because we were learning about all-things-Asian last school year, I settled on the idea of having the kids create Chinese dragons. After a quick search on the interwebs, I found this post by my art teachin' buddy Rina over at K-6 Art. I loved her lesson as she broke it down into baby steps that were just perfect. Now she did her dragons with the younger set (first grade, people and they rocked it!). Since I was doing this with third grade, I knew I'd have to get 'em to step up their dragon makin' game. But first, a lil dragon-y background, emrkay?
Not all dragons are alike, y'all (Y'ALL!! This is off-topic but what else is new: I was recently BUSTED as a Mid-Westerner wearing Southern's clothing {which would be overalls and Crocs, in case you were wondering}. It turns out I've been conjugating "y'all" all wrong! Thank you, kind commenter, for pointing out my Big Fat Hairy Southern Poser mistake. Hopefully my Southern license won't be revoked {penalties include grits restriction and consumption of unsweetened tea}).

WAAAAAAAIT, what were we talking about? Oh, yeah. Dragons. Let's address the Chinese ones first, shall we? They're kinda like Mid-Westerners, after all. They've got a snake-like body with feet like that of an eagle. Which doesn't really make them Mid-Western-esque at all but their affinity for Pabst Blue Ribbon and corn hole does (can somebody please explain that fascination to me?!). Also, they can fly but don't have wings. And they like their possessions deep-fried as is evidenced by the fried pearl (the Chinese dragons are often seen with a pearl which is believed to be their source of power).
 My students were pretty unfamiliar with the characteristics of the Chinese dragon because they're usta seeing this European/Fairy Tale number. The Euro-dragon is much lie a Southerner in that when it says "Bless your heart" it really means "I hate you and wanna breathe fire down your neck". Also, when it's not flying with it's wings, this dragon can be seen wearing copious amounts of seersucker. And loafers without socks. And shirts with GIANT Polo logos. Ahem.
 After that brief chat with the kids, we spent three / thirty-minute art classes crafting these bad boys. On our first day, we began by creating a base for our dragon. For that we pounded our clay onto a texture and into a slab as thick as a cookie. Check out this post to see what I'm talking about. After our texture was in the clay, we cut the clay out with our wood skewers into a choice of base shapes: round, square or flower-like (which was later folded up to create water-y like waves).

With the excess clay cut off from the creation of the base, the kids rolled a thick coil that was about 5" in length. Once that was complete, we draped the base and coil in a damp paper towel, gently placed it into a zip lock bag and wrapped it up until our next 30 minute class.

The following class I gave the kids a rough and rapid idea on how to create their head (see below in just a momento). I don't like to get too detailed because I want them to come up with ideas of their own. I also had loads of Chinese dragon pics available for them to draw ideas from if needed. At the end of that 30, we didn't attach the heads (I had visions of them falling off whilst sealed in the damp bag) but placed them on the base with the coil.

On their third and final day, heads were attached and an environment for the dragon was created. If details like spikes, limbs, horns, fire, you-name-it's were desired, the kids added 'em then. After drying out and being fired (kinda sounds like I'm talking about Lindsay Lohan, donnit?!), the kids spent a coupla days glazing with Mayco's Stroke and Coat. And, viola-ness! Ceramic Chinese Dragons, y'all!


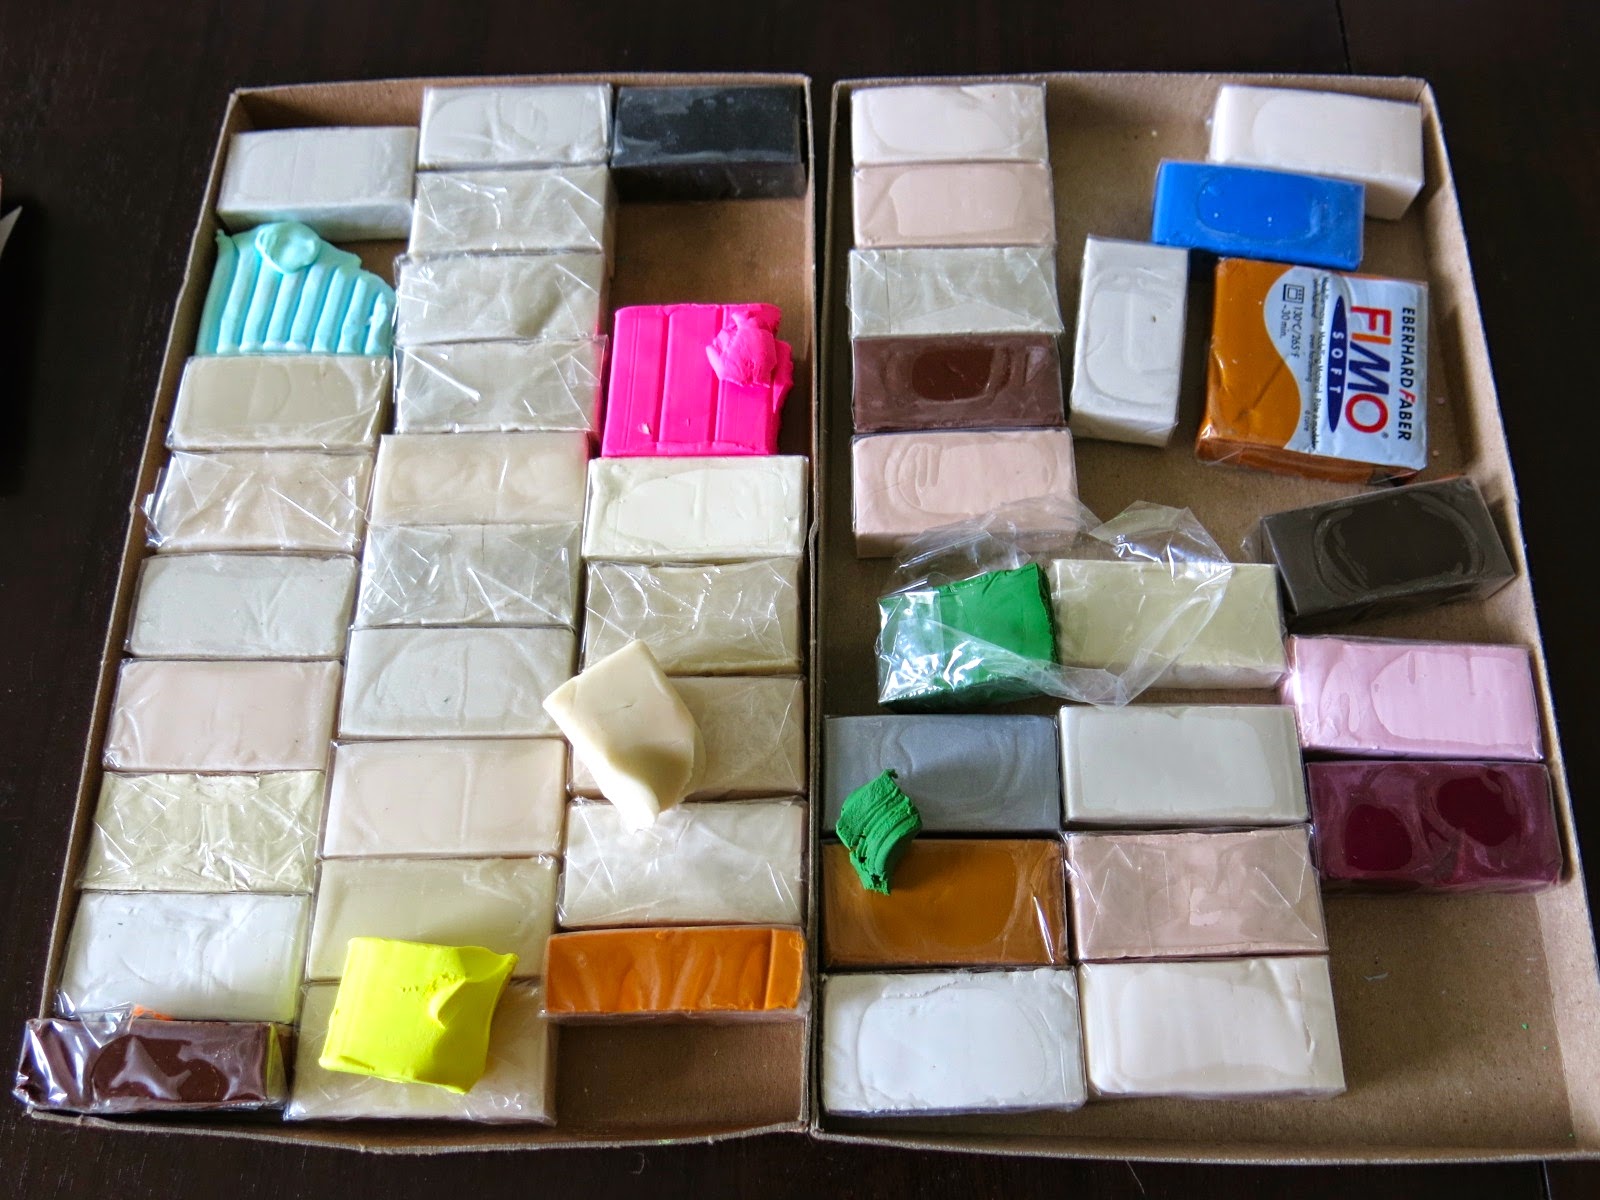
 Now, let's address the kiln less folks in the group, shall we? A similar dragon can be created with one of my fave kiln-free clays: Scupley. Almost every year, my students engage in a Sculpey bead-making project and almost every year, this is all that's left. Lots and lots of white.
 No worries! You can create any color of clay using that white stuff as your base. Case in point, a dragon's head. Just roll the desired shape in white, flatten your color to a paper-thickness, wrap it around your shape and roll smooth.

 Which might look a lil like the left. If you have white spots, fill 'em with some Scupley Band-Aids and roll again.

Now, these are the same rough and rapid directions I have the kids when they were creating their dragon's face. Use that skewer to skewer a mouth. It kinda mashes the shape a bit so you'll have to resculpt that face. But you can do it. 
 I like to use my fingers to create the indentions of eye sockets. Now roll some small spheres (because we don't say "balls" in the art room, ahem) and place them in the sockets. Remember if you are working with ceramic clay, you gotta slip and score. She slips! She scores!
 It's all about the details, y'all. Add some teeth, fire coming outta the mouth, a tongue (although preferably not all three as that's a mouthful. Literally.)
 I created a coil body in the same white-covered-in-green way as the head. Although this time I used two kinds of green and left some of the white areas alone. I was kinda digging the camo look.
 I know, right?
 Attach that head to the coil and shape. Bake in your oven at 275 (I think, check directions. I burn everything on a regular basis so my clay-cooking advice might not be the best) for abouts 15 minutes. And your finished!
 Suriously, yous guise, the kids were so thrilled with their dragons.
 I love watching the kids work with clay. It's a medium that kids who aren't fascinated with 2-dimensional art can really bloom. I mean, this artist was so into his dragon-making, he even created a baby dragon!
 You'll notice that most of the kids included a pearl...and many of them had a story to go along with their dragon. I love the detail in the face on this orange guy.
 And there you have it, y'all! Chinese dragons by the third grade set! Have y'all ever done a project like this before? If so, I'd love to hear what your students created. Special thanks to Rina for the inspirational-lesson!

Chat at Y'ALL soonish!

Tuesday, April 29, 2014

In the Art Room: Ming Vase Still Life with Third Grade

Well, after taking a two week hiatus to create our Chinese-inspired clay dragons (which I'll share with ya as soon as those bad boys are glazed and refired), my artists in third grade land returned to their Ming vase projects and finished 'er off. They were pretty stinkin' proud of themselves and who can blame 'em? They're just about as colorful and amazing as my third graders themselves.
This project, like so many of the ones we do, was a million step process that schooled us on bunches of stuff. Here's how we began this adventure:

Day #1/2 (two 30 minute class periods): We reviewed properly painting with watercolor paint (for details of that kind of chat, go here) and chatted about warm vs. cool colors. The kids were given the choice of painting with either color family. We also chatted about what constitutes an abstract painting (that'd be line, color and shape) and how we might begin that kind of painting. With that, the kids set to work on their 9" X 12" papers.
Day #3/4: Although the kids were painting a Ming-vase inspired kind of design, I wanted to emphasize to 'em that their vase could simply be decorative or tell a story. So I shared with them the Legend of Blue Willow. I'm kinda dorky (duh, like I have to tell you that) in that I really love story telling. So I got all into it in hopes that it would inspire some super vase illustrations. 

After story time, we chatted about what kind of vase or planter shape they might want. Turns out that there are many different Chinese vase shapes that span the history of pottery in China with each signifying a different period in time. The kids learned to fold their papers in half, draw a shape of their choice and cut. Viola! Instant symmetrical vase!

Once that was complete, the kids created their design on their vase. Pencil lines were traced in blue sharpie and color was added with colored pencils. 
Day #5/6: Well...I noticed that when the kids chose to use the cool colors for their backgrounds, their vases blended in. Oops. So to remedy that, and to create a three-dimensional feel to their work, I had the kids create a shadow behind their vase. This was super simple and the kids thought it was like magic. They simply traced their vase onto black paper, cut it out and glued it to the back of their vase, shifting it slightly to cast a shadow. Once the shadow was glued down, the entire thing was adhered to the background paper.

From there, we had a discussion about bonsai and cherry blossom trees. On newsprint, I showed the kids some ideas on how to paint these kinds of trees. I suggested (em, strongly) that they attempt to paint both kinds of trees on practice paper (that'd be newsprint) before painting on their masterpiece.
I am seriously loving both of the backgrounds in these paintings. By the way, when it comes to watercolor paint in the art room, you must use Crayola's Mixing Colors paint. Not the regular Crayola watercolor. This stuff is way better. Look for the box that says "Mixing Colors." It does come with an odd assortment of colors so you might have to supplement with additional pans. But, look at that magenta and turquoise! So pretty!
I love that this artist remembered from our clay lesson that Chinese dragons are often shown with a pearl that is believed to be the source of their strength and power. 
Look out that painting on the right seems to have an almost patterned shadow behind the vase. These third graders are, like, genius.
Day #7: Once their tree of choice was painted into their vase, I gave the kids several choices for finishing off their still life. One was using a variety of green paint and a stubby brush to create a leaf texture for their tree.
Another was using tissue squares to create three dimensional blossoms. I remember doing this in elementary school and thinking it was the best thing ever. You simply wrap a piece of 1" square tissue around the bottom of your pencil, put a touch of glue on it and press/hold it onto your paper. Give it a second, gently lift off and, viola! Blossom! Sometimes, a couple of pieces of tissue were glued together before attaching to the paper.
The final option I gave to the kids was simply painting their blossoms on. I also told them that they could do a combo of all three processes if they wanted. 

I'm so happy these masterpieces are complete. It's just a coupla weeks until our school wide art show so I was happy to scratch this project off the list. Now! Onto glazing dragons, writing artist autobiographies, painting our clay stars...sigh. Fingers crossed we get it all completed in time.

Until next time, ya'll, have a great week!