Tuesday, November 12, 2013

DIY: A Painted Bead Necklace

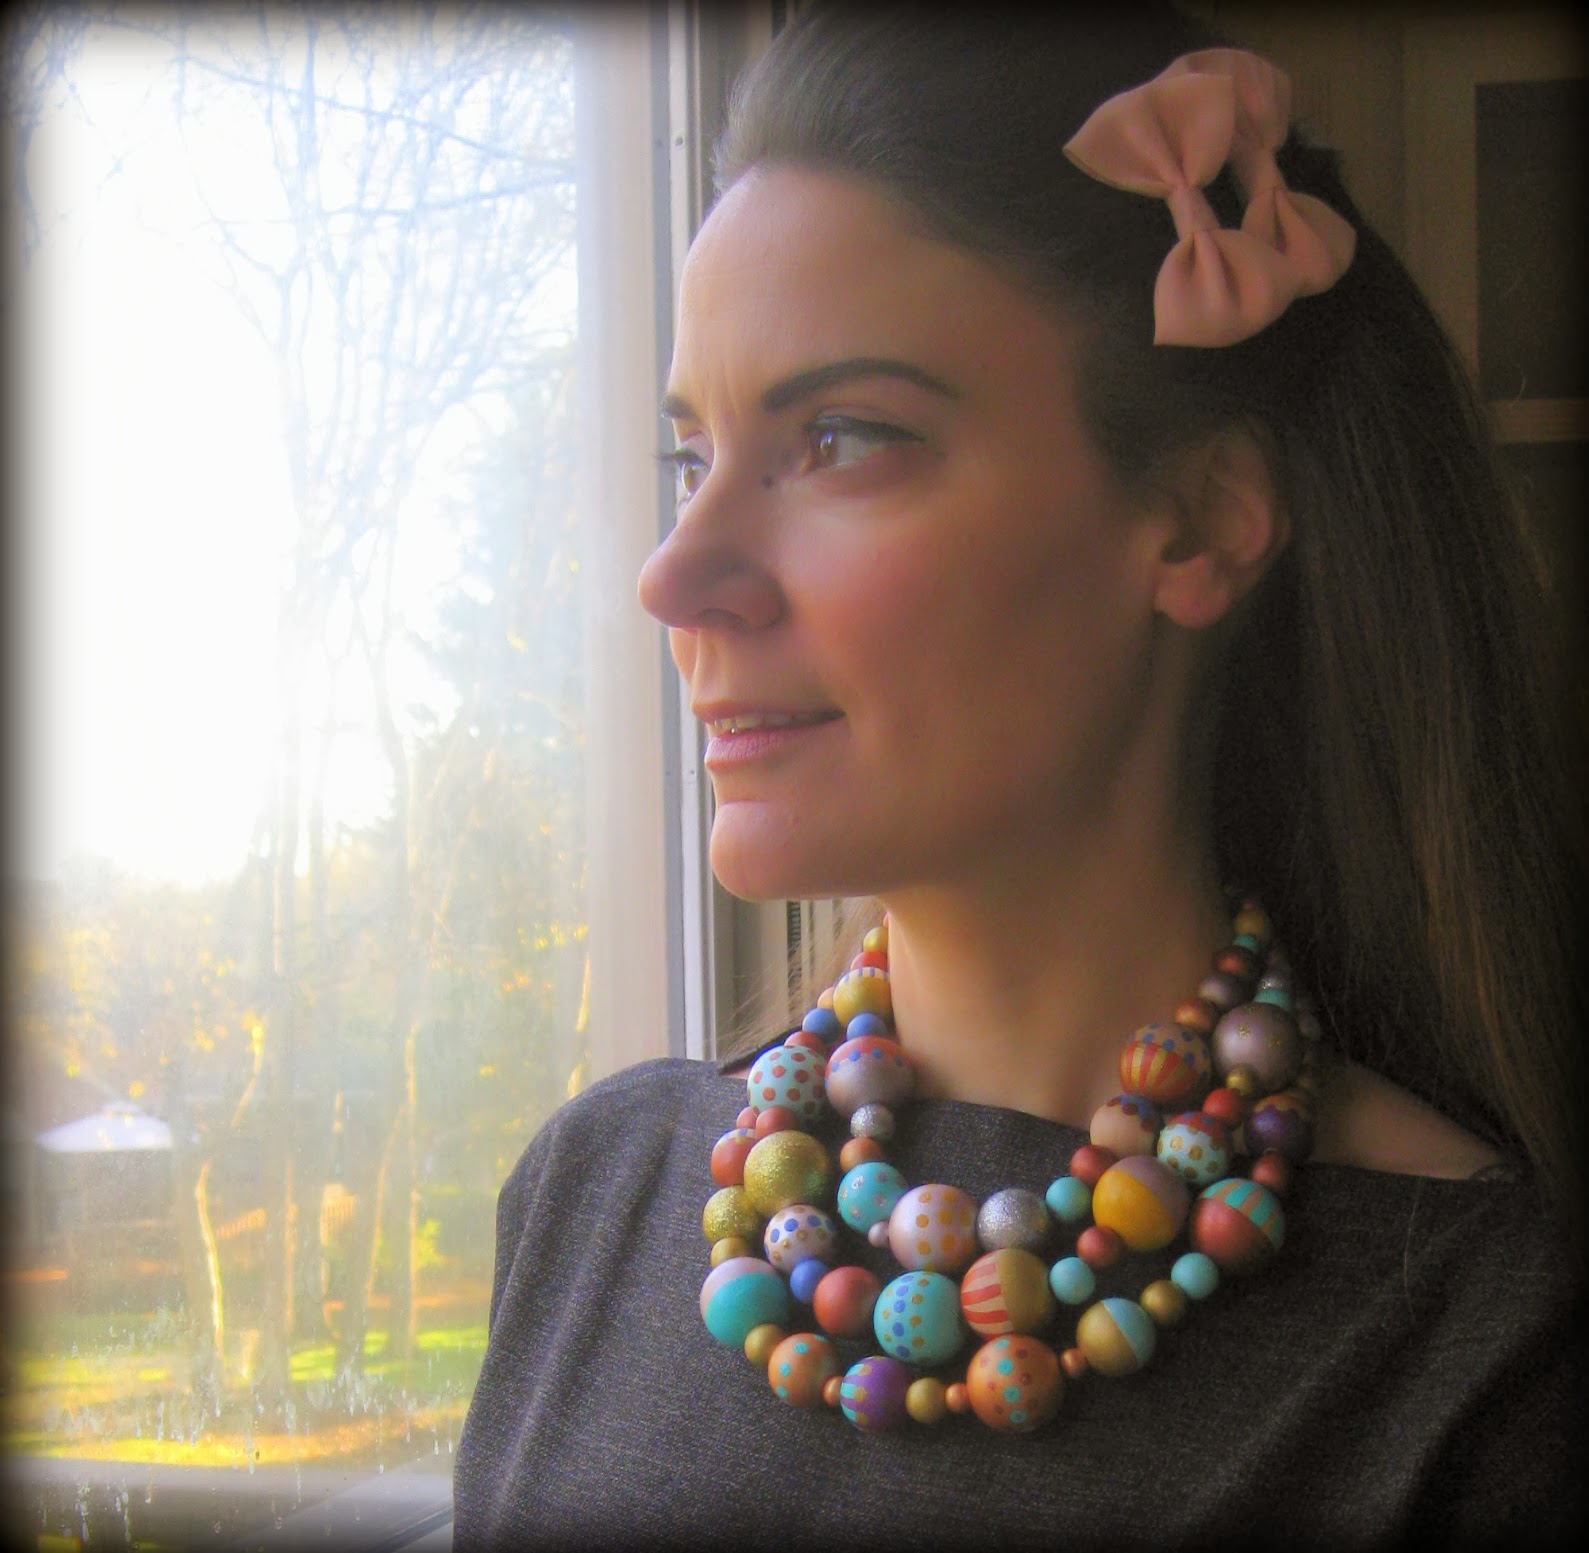
Dude, doesn't this picture look like some sort of 1970's soft focus photo? Like I should have the lyrics to the Carpenter's Rainy Days and Mondays written in swirly cursive script on the window pane. Super cheesy shot, sorry. Next time I serve up this much cheese, I'll be sure to bring the crackers.
I don't know exactly what's gotten into me, but I've suddenly developed a deep love of wooden bead painting. Or, as I like to refer to it, Ball Bedazzling. Which has led to many a bizarro convo with the hubs. You see, our usual evening routine involves me working at the dining room table or in my sewing room while he's in the bedroom reading. Every now and then we'll holler at each other and attempt conversation which is practically impossible because we can't really hear one another. So the other night, our yell-chat sounded like this:

Hubs: What are you doing down there?

Me: Bead painting.

Hubs: What!?

Me: I am PAINTING. BEADS. FOR A NECKLACE.

Hubs: I still can't hear you.

Me: PAINTING MY BALLS!

Hubs: (silence)

I've long been admiring these bauble-y necklaces from Anthropologie but I'm the worst at buying jewelry. Mostly cuz I know there's a pretty good chance I'll take it off at some point during the day, stuff it in a pocket, wash my clothes without checking said pocket and, well, you can guess the rest. Kinda like that time I left a silver crayon in my pocket and everything came out glittey. Which I thought was super cool...but hubs didn't seem to take to his new sparkle shorts. 

Yeah. Lots gets lost in translation at my house. I'm thinking of investing in some walkie talkies for us. Or maybe just a coupla cans and a string. Sounds like a super fun DIY.

Speaking of, this beading painting business is seriously fun and addictive. If you're into painting your balls, that is.
The key to stringing up your necklace it making sure that you have a small bead in between large ones. If not, when you wear the necklace, the two large beads create a small gap and you can see the unsightly elastic.
Now I know my version isn't as classy as Anthro's but I really like the goofy playfulness of it. And I have decided that these are my new favorite colors in the universe. Please note all the sparkles.
At the craft store, I picked up four different sizes of wooden beads and about a dozen of those cheapo bottles of acrylic paint. My local craft joint had Martha Stewart paint which I found to be of much higher quality than the usual generic stuff. I splurged on her metallic colored paints (and by "splurged" I mean, like, $1.75 a tube).
I quickly found that you can't paint these bad boys while holding them in your grubby man hands. So I used the backsides of paint brushes to hold them. For the smaller beads, I used q-tips (that I snipped one end off of) and wooden skewers.
Many of the beads I painted two toned. For this, I would paint the bead all one color (always using the lighter of the two colors as the background) and then paint the other half. Now, I do have a steady hand but I also use a couple of tricks. One is that I hold my painting arm firmly against my body to keep it from shaking. Then I lower my paint brush onto the bead and rotate the paintbrush that is holding the bead with my other hand. This helps me to create an even-ish line.
For the stripes, I used a very small brush and again, used my other hand to rotate. The key here is to rotate that brush evenly so that your stripes are equally spaced. And the great thing is, if you mess up, let that bead dry and paint over it. They are super forgiving. Unlike my husband in his sparkle shorts.
Making polka dots proved to be the easiest. I used a Q-tip and just rotated the bead to get them evenly spaced. Once all the beads were complete and dry, I slathered them with a thin coat of matte Modge Podge to prevent them from chipping.
While visiting family this weekend, I parked myself on the couch and set to work. I decided that I wanted my first necklace to be about the same size as this pie plate. I used it to plan out my design. Once determined, I started stringing my beads on elastic string and double knot tied the ends. Think glorified candy necklace. Cuz that's pretty much what it is.
For the smaller and larger necklace, I simply made them different sizes than the first. Seriously easy, ya'll. If painting all those wee balls didn't cross my eyes, I'd probably be making a bracelet to match.
Instead, bead painting has since morphed into bag painting which I can't wait to share with you. Although, when hubs calls down and asks what I'm up to, I believe I'll just shout back, "Painting my sack!" I'm sure he'll appreciate that in all of his sparkly glittery awesomeness. Until we chat again, go paint some balls, ermkay?    


Sunday, November 10, 2013

DIY: A Magritte Get-Up

Alright, friends, the post you've (not-at-all) been waiting for: the DIY Magritte Get-Up. This outfit is #4 in my Artist of the Month Ensembles after Hokusai's The Great Wave, A Jackson Pollock Splatter-tastic Dress and a Campbell's Soup Dress after Warhol. And I gotta tell you, this outfit was the easiest creation so far.

I started with this little black dress from Target that I'd thrifted years ago. I picked it up because it's one of those basic things that I've heard you're supposed to have in your closet...but I never wore it because it was just too basic for my taste. Cuz, you know, if it's not glitzy, sequins-y, bedazzled or just insanely tacky in some way, I've got no use for it. 

So, whilst cleaning The Clothing Landfill, aka my closet, I decided to move the dress to my Clothing-to-be-Given-a-Makeover Closet. Yes, that's a real place. No, I never get rid of anything. Yes, I realize I have a problem. No, therapy hasn't worked. Yes, I'm willing to try meds, why you got a cheap source...? Hook a girl up, would ya?
The Great Family, 1963

When I settled on Magritte as our next artist, I was influenced by his images of birds filled with clouds. I ordered some cloud-filled fabric from my go-to place: fabric.com. I love this website because they have a crazy huge selection, the prices are awesome and the shipping is lightening fast. As soon as I got my mitts on the fabric, I washed and dried it (always a good idea to wash and dry new fabric to remove the sizing. Just don't ask me what "sizing" is) and set to work.
I started by ironing some interfacing to the wrong side fabric. I did this because if makes for a thicker fabric which I have found to be easier when appliqueing. From there, I sketched out a couple of birds on tissue paper, pinned that to my cloud fabric and cut.
Puh-lease don't judge me by the state of my cutting board. It used to double as a painting station...before I relocated to the dining room table and proceeded to damage that. Which is why we don't have nice things. Story of my life.
The key to applique (which your basic sewing machine can do...just read that highly entertaining thing called a manual) is making sure your needle goes on the outside of the applique piece and then the inside. And go slowly-ish. Especially around pesky corners and hard turns.
Which, as you can see, I have a hard time doing. I was totally stressing over the imperfections of it all until I held it up in the mirror I have on the other side of my sewing room. From a distance, you really can't see those flaws. Besides, ain't nobody gonna get this close to your skirt and if they do...it's not because they're checking out your skirt. And any major errors can always be fixed with a black Sharpie. Because, in my experience I have found one thing to be a solid truth: Sharpies Fix Everything.
Not only did I luck out with already having the dress in my closet, but I also had the blouse and the black jacket. Which left the maroon tie and the apple-faced bowler hat.
The hat was an easy find at the local Halloween costume shop. Unfortunately, it's either a kid's hat or I have an elephant-sized head because that thing was tight. My custodian buddy at school suggested I wear the hat tipped forward which was genius for two reasons: I could actually see beyond the apple and I didn't end up with Hat Headache. And there's nothing worse than that.
To create the apple, I sketched it out on matte board found in my storage closet at school. I knew I had to make the stem really long as that was the part I was going to cut and insert in the brim of the hat.
Once that was finished, I cut this bad boy out with an Exacto. Then I sliced the stem in half and made a small slit in the brim of the hat. I then inserted both the top and bottom of the apple in the brim and hot glued the daylights outta it.
For the tie, I simply used a maroon strip of fabric, sewed it into a tube, turned it and ironed it. The trick was tying the thing, I'd forgotten how! I went through a Dress-Like-a-Dude phase in high school where I routinely wore a tie but sadly the memory of how to tie a tie escaped me. A little help from youtube managed to save the day. I used my gold pin for 15 years of teaching service as my tie tack. I wish I could take credit for those cloud tights but those came from ebay-land. 

And there you have it, folks! I wish I could say I knew exactly who our artist for next month would be but I don't have a firm idea yet. I'm totes open to suggestions, ya'll! So lemme hear 'em if you got 'em. 

Until next time, have a great week!

Tuesday, November 5, 2013

In the Art Room: Trying Something New

The Art Room Foyer...that's right, my room is so big it has it's own entryway. I'm totes spoiled, ya'll. You can learn more about the Smartest Artist Game (seen on the right) here and read about our day-to-day attempts at routines and procedures here.
You ever find yourself watching those amazingly terrible infomercials where you're all, "who would buy that?!" only to get sucked in a little further to discover that the 'mercial is speaking directly to you and that product they're pitching could quite possibly solve all of your life's problems? For example, how about the Better Marriage Blanket which, with it's activated-carbon fabric, a material "used by the military to protect against chemical weapons", can put an end to the silent and deadly problems which reek, er, wreak havoc in otherwise happy marriages? Or what about the Rejuvenique Electrical Facial Mask, which closely resembles Jason's Friday the 13th hockey get-up, but packs a nine-volt battery electrical shock punch to those pesky wrinkles. I just know in my heart of hearts that with 5 easy payments of $39.99, my life would be perfection, right?

Such is kinda the story of my life in the art room. I see a problem, I dream up some incredibly perfect way to fix it and...it either turns out shockingly bad (like my facial mask) or super stinky (shoulda went for the blanket). However, in this here post, I wanted to spare you the stink and share with you the (so-far) successes. So here's a list of some new things I'm trying and enjoying in the art room this year. Enjoy and puh-lease let me know what new things you are giving a go this school year. Shake Weight Paint Brush, perhaps...?

I Can Statements. In my neck of the woods, my students are to be told several times just what it is they are learning and what it is they'll be accomplishing. I'm also supposed to tie that in to the state standards and put it in kid friendly terms. So just to the left of the bulletin board seen in the top photo is this miniature dry erase display of their current I Can's along with the permanent standards. When the children enter my room, they walk along a line I have taped to the floor. When the first student has reached the end of the tape and all have entered the art room, I have the students repeat their daily I Can's after me. This helps us all to focus and puts an end to the question, "What are we doing today?!"
Time Timer. I have Art Teachers Hate Glitter to thank for this. She made mention of using this in her art room and I was excited to try it out. With 30 minutes for art making, I am always watching the clock and I am also always losing track of time. More often than I'd like to admit, one class is cleaning up while I have another class walking in (at which point we play the "Let's Watch the Other Class Clean Up and See How Well They Do" Game...which is a totally boring game and Milton Bradley ain't going to be making a version anytime soon).
My students love this thing. In fact, when they walk in and take a seat on the floor, if one of them notices I've not set the time, they'll ask to do it for me. As time moves on, the red pie gets smaller and finally ends with a loud beep of the alarm. This has become our signal to clean up. What I love about this is that the children have become more aware of time management. You can find the Time Timer here.
See, Think, Wonder. After repeating our I Can statements at the door, I'll often pick a student to "be the teacher." This student will sit in my chair and discuss a work of art I have on my easel. The work of art will often be created by our Artist of the Month. The "teacher" is to ask the children "What do you See?" (note the camera icon) and they are to respond like they would with me, by raising their hand. After speaking with a couple of children the teacher can then move on to "What do you Think?"  (lightbulb) and "What do you Wonder?" (question mark). This game is great because it buys me a little time to get supplies out on tables and it allows me to pre assess students knowledge, thoughts and questions about a work of art.
Also on my board I have my I Can statements posted again for their viewing pleasure. By the way, the display on the right was created with the children's messy mats and a poster from Target.
Good Music. My husband and I love going to theme parks because they are magical. And I want my art room to be a magical place in the school. With all that often goes on in a half an hour, it's hard to stop and make a magical moment happen for the children. So good music helps. This amazing CD has been on constant rotation in the art room. It's calming, quiet, recognizable and, well, magical. Next on my music wishlist is the Star Wars soundtrack.
Choose Your Own Adventure. Did you all read Choose Your Own Adventure books when you were kids? I loved them. If you are not familiar, you read a short chapter and at the conclusion, you can decide, as in the case of this book, if you A. Want to invade a monastery, B. Go on a Viking raid or C. Fight in a Viking battle. From there, the book takes you on a wonderful adventure of your choosing. I've been reading this to my fourth grade students (I've deemed it inappropriate for those younger due to Viking violence) and it has sparked so much creativity with their Viking drawings. As a class, we vote on the adventures we go on. Even in my short 30 minutes, I can manage to read a couple of adventures. There is an enormous library of these books on amazon. In fact, just today I purchased Ninja and Samurai adventure tales. The kids are thrilled.
Snap Snap WOOOSH. I suck at clean up procedures. There. I said it. Mostly cuz we're running late. However, with the Time Timer keeping track, we are getting better. Our new procedure is that when you hear the alarm, you clean. Once your table is clean with everything put in it's correct spot (having a mini trash can on the table as seen on the right in the photo above really helps) and all of the students are standing behind their pushed in chair, they count down at their table and collectively snap their fingers and give me the "Snap! Snap! WHOOSH!" with a wave motion of their arms. They are to only do this once (otherwise they will do it repeatedly and drive me nutz) at which point I'll check their table for neatness. If they are good, I send them to line up. If not, they are asked to continue cleaning and give me the signal again when they are ready. So far...it's working out pretty well.


Art Class Homework. They asked for it, I swear! In fact, they can get pretty grumpy when I don't have anything for them. So once a week, I'm making art homework available for the taking. My plan is to tie it in with our artist of the month and see just what they come up with. Once the art work is returned to me, we look at it and recognize those young artists at the beginning of class. I'm plotting a way to display these hard workers efforts and I'll share it with you soon.
Personally, I think an Ice Cream Dress is a FANTASTIC idea...and has given me lots of food for thought...so to speak.

And there you have it! Okay, you're turn...what are you doing in your art room that works? And if I Act Now! can I please get it for just 3 easy payments of $19.99...? Because that'd be better than a Better Marriage Blanket, ya'll! 


Sunday, November 3, 2013

What the Art Teacher Wore #81

It-Always-Feels-Like-Somebody's-Watching-Me Monday: Not sure what freaked the kids out more, the fact that I was wearing pants or that my pants watched their every move. Best be behavin', ya'll. sweater: Anthro label, bought at Buffalo Exchange; necklace: vintage, gift; pants: originally purchased at Target, DIY-eyes by me; shoes: Miss L Fire
Greetings, ya'll! I do believe when the clock struck 3:30pm on Friday, a collective art teacher sigh rang out through The Universe. Was this The World's Most Wacky Week or what?! In my neck of the woods, not only did this week involve Halloween but I had my first evaluation and it was Spirit Week and our school-wide Fun Run (or, in our case, being the tigers, the Tiger Run. Which I tried to convince the kids that it was called such because tigers would be chasing them...but no one was buying it. Except for kindergarten. And they ran super fast). Needless to say, I've spent this weekend attempting to recover.

These past couple of weeks, I've been a wee bit of a slacker when it came to my weekly outfit posts. This wasn't totally intentional...but something happened recently that turned me off to posting my outfits. Unbeknownst to me, an outfit of mine (go here and see Thursday) was the cause of some debate on pinterest. I admit, that outfit was a stinker, but the couple of negative comments really caught me by surprise (I've noticed that one commenter who called the outfit a "disaster" [it truly is, ya'll] has since removed her remark). However, the kind words of complete strangers (one being an art teacher herself) really made me feel good. So, to those like-minded, crazily-dressed artsy folk, let's ignore the not-so-nice and focus on the positive! Because, really, life is entirely too short not to wear faux-tiger-fur shoes with pocket-watch tights and be a delightful disaster, doncha think?!

Whew! With that mess off my chest, here's what I wore...and some artist love to Rene Magritte...
Rene Magritte was born in Belgium in 1898 and died in 1967. The kids have been absolutely fascinated by his work and have had many great debates on his surreal images. We've chatted about how Magritte liked to take objects that are real but combine them in such a way that they couldn't possibly be real. For their art homework, my third grade students were to combine two real things and make them into something surreal. One girl came back with a drawing of me. I know I'm weird, I didn't know I was surreal. Sur realz, ya'll?
The Human Condition, 1933  You know, in case you weren't confused by his paintings enough, ole Magritte liked to mess with you via his titles as well. After our grand debates, when the kids learn the title, they're all...Mind. Blown.
Monster Mash Tuesday: I only had the chance to wear this outfit twice before packing it up until next fall. And both of those times I was visiting the same doc's office...which means they must think I wear this get-up everyday. In fact, one nurse said, "oh! I remember you from the other day...you were wearing that same dress!" Embarrassing. dress, sweater: DIY, go here; tights: Target; shoes: Crocs, thrifted; belt: Pin Up Girl Clothing
Not to be Reproduced, 1937 I have to share this quote by Magritte describing his paintings:
"visible images which conceal nothing; they evoke mystery and, indeed, when one sees one of my pictures, one asks oneself this simple question, 'What does that mean?'. It does not mean anything, because mystery means nothing either, it is unknowable."

Magritte Wednesday: This here is my fourth Artist of the Month outfit and it was completed just in the nick of time! Official DIY post to come. hat: DIY by me; jacket: Anthro, gift from a friend; blouse: gift from a friend; tie: made by me; tie tack: my 15 years of teaching pin!; dress: thrifted, DIY by me; cloud tights: ebay, just search "cloud tights"; boots: Lucky Brand, Marshalls
The Son of Man, 1964 Perhaps one of Magritte's most recognizable works, this was part of the inspiration behind my outfit. The kids noticed that Magritte repeats certain images in his paintings. The "balcony" appears in several of his paintings, often with a nest resting on it.
The Great Family, 1963 I was inspired my the repeating image of birds filled with clouds for the skirt portion of my dress. That image is also the inspiration for a mural project the third grade is currently working on. I cannot wait to share with you the end piece.
Eye of the Tiger Thursday: As I mentioned, it was Spirit Week and I'd failed to participate...I just couldn't wear my pajamas to work for PJ Day (holey t-shirt and stinky sweats? I think not) and don't have any sports gear for Football Team Day (like, ew) but for Dress Like a Tiger Day, I was set! dress: thrifted vintage; sweater: felted by me, DIY here; tiger tights and tiger ears: Amazon
Spring


Tiger Run Friday: Not long ago, we spent a week in the art room tie-dying our Tiger Run t-shirts our school colors. It's always exciting to see how they turn out (looks like my dying skillz are lacking) and fun to see all 400 plus students, teachers and faculty wearing their shirts. For the occasion, I decided to go all out with my tights...just don't ask me how. That'd be a TMI of epic proportions. shirt: tie-dyed and altered by me; skirt: Anthro, gift from a friend; shoes: Puma; tights: Target

Kissing Magritte, Joe Webb, 2012 So in my search for all things Magritte, I stumbled upon this amazing image, as well as many others, by the contemporary collage artist Joe Webb. This dude used real vintage magazines (no computer/photoshop images) to create his surreal collages. I'm in love. Go here and check out more of his beautiful vintage-y surreal-tastic work.
...AND another annoying plug for my Facebook page. "When will it end?!" you ask? Probs never. Sorry.

Wednesday, October 30, 2013

DIY: Magritte Costume

 I hope your Halloween is a surreal experience! 

An official DIY post about this here get-up is in the very near future...but I'm guessing you now know who our Artist of the Month is!

 I actually wore this on Halloween Eve as it was: A. My day to be evaluated so why not? B. It's Spirit Week at our school, which I love but it was also Pajama Day and I didn't think wearing my pj's would be appropriate for my eval. Because there's just something about smelly sweats and a holey t-shirt that says "unprofessional" in my professional opinion. However, this proved to cause great confusion amongst the wee ones who kept inquiring: "Are those your pajamas?!"

Oh, and a funny side note about my evaluation (I'm in a chatty mood. Can you tell I'm in a chatty mood? Sorry, no one else will talk to me and you look like an easy target): I was observed with a normally chatty class that was creepily well-behaved and quiet. When their teacher came to pick them up, this happened:

Teach: How were they?

Me: Um, amazing! Like, kinda-freaking-me-out good. What did you say to them?!

Teach: Well, I told them that one of the principals would be in your room watching you. When one of the kids asked me if you might get fired if you didn't do a good job, I told them, "Well, that's not my decision to make..."

Bwahaha! It's nice to know the kids like me enough to keep me outta unemployment.

Until I get my official Artist of the Month DIY post together, you can check out my other artists dresses here: the Andy Warhol Soup Can Dress, The Jackson Pollock Splatter Paint Dress and Hokusai's Great Wave Dress.

Oh, and you can now find me on my Facebook page.

Happy Halloween!