Might we please have a lil confession time up in here? Cuz I need to unpack some stuff and I don't mean those boxes that have been in my garage since we moved seven years ago (real talk: those boxes ain't never gonna see the light of day, y'all, let's just be honest). Confession Numero Uno: Not only am I crummy housekeeper, I'm also pretty sucktastic at that whole decorating thingie too. You can't be good at everything, y'all (hair flip). And I most def have a big fat hairy list of items at which I am no bueno: cooking, cleaning, yard maintenance and, you guessed it, decorating. I mean, I can decorate an art room like nobody's biznatch but working on our house has me all...
I just can't even. I don't even know where to start. In fact, we've got this one room that normal folk be calling a bonus room which I've dubbed the BOGUS room. It's just one more space for me to not clean and not decorate. I did attempt bedazzling it when we first moved in and painted up these round paintings which have that lovely early-2000's color palette...
AND that's pretty much all I ever did to that room. In fact, every time I wandered into the bonus room with a lil decorating on my mind, I'd take one look around and be all...
Now I know I sound totes ungrateful as many folk don't have a surplus of space. And lately, I've been working on a Super Top Secret Project (details to come!) in which the bonus room has become a great place to stretch out and work. For that reason, I'm really putting my heart into making this space one that I love to come to and work in. And I decided my first order of business was updating those horrible round painting thingies.
Now if you've been hanging around this here blog for a hawt minute then you know I love all things Mary Blair. I've created paintings inspired by her, made necklaces, you name it. So I decided I wanted to Mary Blair-ize the bonus room! But I wasn't feeling very certain I wanted to invest a ton o' time into it if I wasn't gonna love it. So I uprooted these white and gold plate/frame thingies I found for cheap at TJMaxx several months ago and decided to create some wee needle felted sketches! The above is what my sewing table looked like before...
And then after. Now imagine that as MY ENTIRE HOUSE and you've pretty much got the picture. Say a lil prayer and light a candle for my hubs, would ya?
After a little bit of playing around, I came up with this! I was super pleased. Y'all know I'm a big fan of needle felting as it's just about the most easiest thing in the world. In fact, I always find myself needle felting to excess in the winter months. Check out last week's DIY!
Just a lil closer look.
I wasn't as in love with this one but I figured, eh, it's just a sketch. I'm sure to change it up quite a bit when I design the larger format circle.
I like needle felting on patchworked pieces of fabric. One of my first wall pieces from needle felting was done that way. I like how it adds just another layer to the design.
Even though I still had one more little needle felted sketch to complete, I decided to dive right in to the making of my first large wall hanging. Mostly cuz I knew I'd have the help of this bad boy...
What you see here is not a sewing machine but something far more magical: a needle felting machine! That's right, y'all, like a rare rainbow farting unicorn, they do exist! The hubs got it for me for Christmas for not too much dinero on el Amazons.
I love the thing. All I had to do was just tack some of the roving into place and slide it under the half dozen needles on that machine, hit the pedal and let the machine do the stabbing. It isn't great for detail work so I do resort to my trusty Clover needle felting pen for that.
But it's fab at blocking in large areas for me and look!
One down! Only two more to go!
C'mon, man! How about a lil power of positive thinkerin'?!
Okay, confession numero dos: this is pretty much how I feel. However, I'm determined-ish to follow this through and have at least one room in our house that looks decorated and finished. I'll keep all y'all posted.
As some of y'all might know because I've been talking about it nonstop (I often wonder just how I have acquired so many nice friends that allow me to ramble on and on without complaint. My guess is that they've formed some sort of support group), I've been out of school for several days due to el jury duty-o. You can see what I wore here cuz you know you wanna. Anywho, knowing that I was gonna be out for so long, I knew I'd have to leave some legit sub plans. So I created a couple of videos and was super pleased to see that both the kids and the subs were happy with the result. AND LOOK! Check out what they made whilst I was doin' my civic duty!
This is JUST ONE of the MANY huge banners that the kids created! Each child, kindergarten through fourth, created a quarter of a heart. Students with extra time then worked on making the letters. I was so excited to see them today that I used my planning time to hot glue them into place. To do that, I "borrowed" a roll of bulletin board paper from our work room, unrolled it onto my art room floor and set to work a-gluing. Like I said, this is just one big banner...the kids also created ones with letters that spell out SMILE, HAPPY and PEACE. They'll be going up on a large wall in our school cafeteria. But this one I was so stoked about that I grabbed a couple of teacher friends in the hallway and had them help me slap it up on the wall this afternoon.
Our inspo for this project came from the artist Romero Britto and the art teacher Jenny K! Jenny has a great drawing sheet that features Britto and his designs. Knowing that I was going to be out several days, I really wanted a project that the kids could work on happily and successfully and be something that could brighten up and spread the good word of LOVE throughout our school!
On the first day I was out, I left this video for my sub to share with the students. I've never done video'ed sub plans before but I gotta tell ya, I'm NEVER going back to paper plans! This was fun and easy for both the sub and kids. And a happy sub is one that spreads the good word. I heard from my admin and teacher buds that both of my subs were thrilled to work in my room. Of course, I took the guess work out of it and made their day cake!
Today was my first day back and it's also my busiest of days. You now how it feels when you've been gone for many days, you feel completely out of the loop! I really felt relieved coming back knowing that my room was going to be in order and that my students would continue this project. Here are my kindergarten friends coloring away.
Many of you asked me about the art stix I refer to in the video. My students have a set of these and they are well loved. They are made by Prisma and are essentially the led of a color pencil. The colors are fantastically vibrant and the kids love using them.
My younger students, kindergarten through first, created the bottom of the hearts while my older ones did the top. The reason behind this is that my older students have longer art classes and therefore more time to work on the big spaces. The papers the kids used are 12" squares. My sub and I used templates to create the thick line diagonal line that you see as well as the heart hump line (I know there's prolly a better word then heart hump but you knew what I was talking about, didn't you?!).
So that they could spot their part of the heart later, the student's name was written along the edge of their design.
Once I started laying out the hearts I felt like they needed a little something more. So I flipped some upside down and noticed the diamond negative shape that was created. It was then I got the idea to have the kids create letters for those spaces. That's what this follow up video is all about...
I put the sub in charge of tracing letters and the kids cut them out before decorating them.
This was such a successful sub plan that even though I'm not finished with assembling all of the pieces, I just had to share it with you right away! You know, in case you wanna do something like this for Valentine's Day. It's definitely a no-fuss type of project. Definitely one to consider at the start of the new school year when you want to introduce all of the elements of art and start your year with that WOW! factor. If you are interested in more of my lil videos, you can subscribe to my youtube channel here.
In other fun and exciting news, you can hear my podcast interview with the INCREDIBLE Patty Palmer of Deep Space Sparkle, here! And if you do this lesson, please let me know, I'd love to hear your tips, tricks and see your student's end result!
If you're anything like me (which, if that be the case, the funny farm is gonna be full up soon), then you find that you can do all of your communicating in emojis. They truly say it all. I even turned in my most recent lesson plan completely emoji-fied and it was more comprehensible than most. Turns out there is an emoji for all of the latest edu-buzzwords! Hint: it's the one that looks like a steamy pile o' pooh. In other less stinky news...
THIS blog that you are reading right now when you probably should be doing twenty other way better things, won first place down at the Art of Educations Art Teacherin' Blog o' the Year. Say whuuuut? Thank you so much for all of your encouragement and support! It truly means the world to me, I love all y'all! AND I love the other blogs -n- buddies that won and were nominated, each and everyone has it's own unique and art-mazing voice. If you follow the linky-loo above, it will lead you down a rabbit hole of art blog-tanasticness!
This is my best, "oh gee, thanks, AOE" pose while I greedily snatch that badge outta their hands and slap it on my blog. I didn't want 'em goin' all Steve Harvey on me and pass it along to someone else, y'all!
In other exciting news, I had the AMAZING opportunity to chat with one of my art bloggy besties, Patty Palmer recently! She is the most incredible art teacherin'/entrepreneur there is and I was thrilled when she asked if I'd like to be apart of her podcast. She's had some big stars on her 'cast like The Great Jessica Balsley and The Amazing Heidi Easley. My chat with Patty will go live on her blog on Thursday. You can drop by and listen anytime for free (as well as listen to those past podcasts I mentioned)!
But enough about all that, let's get back to our originally scheduled blog-cast: A Needle Felted Emojis Dress!
I actually wore this bad boy to jury duty today, sans wig. After the nice lecture the judge gave us about how much he appreciated us answering our call of civic duty, I was all, geesh. Now I can't wear my wig, totes guilt-trip! I even toned down my attire yesterday only to have a woman give me the up/down, pat my arm and say, "Oh, honey. You have nothing to worry about. They won't pick you." When she spotted me today, her eyeballs hit the floor. I was all, "But lady! I'm not even wearing my rainbow wig!"
So whilst I was stabbing away at this dress (which is what you do for needle felting. Go here for videos and deets, y'all), I got to thinking. I should make plethora of emojis that express my emotions during one solitary art class. Because, let's face it, even in my thirty minute art classes, I run the gamut of the following emotions, er, emojis...
CRAY EMOJI: This is how the kids usually find me, jacked up on coffee and ready to create! It should come as no surprise that I'm often referred to as "That Crazy Art Teacher" by the kids. My fave thing is when we get a new student. At times, I've found the other kids giving them a warning at the door before I even meet them. Or just giving them a slow reassuring nod when we are seated on the floor. You know, one that says, "We aren't dealing with an adult that knows how to adult. It's okay. We'll be the grown up for the next 30 minutes."
EMBARRASSED EMOJI: Although, there are those times when they manage to even out-crazy we art teachers. Like that time a group of my kindergarteners decided that my Mr. Sketch Markers must taste as good as they smell (word to the wise: NEVER buy the scented markers unless you want kinders slobbering all over them!). Or how 'bout the time another kindergartener (um, do you see a pattern here? It's always the kindergarteners that manage to out cray the cray, amiright?) decided that the best way to solve getting paint on her was to just go topless whilst painting. While a parent volunteer was in the room. I don't think I've EVER referred to the dress code until that day when I said, "WE ARE NOT ALLOWED TO BE WITHOUT OUR SHIRTS IN ART CLASS!"
DORK-MODE EMOJI: You know we all got into this art teacherin' biz cuz we are such dorks for all things art. I love nerding it up, chatting with the kids about art history, technique, whateves. In one convo with, you guessed it, a kindergarten class, I was explaining Roy G. Biv. When I asked the kids what the "V" stood for, they were stumped. I prompted them with, "You know, looks like purple, starts with the letter V?" It was then that one girl shouted out, "VAGENTA!" and my face went straight to THE SCREAM emoji...
All the kids thought she was correct so they ALL started saying "vagenta" and I almost died. Look, I dunno what vagenta is but I'm pretty sure that if you got it, you outta get yourself to the OB-GYN. I bet they make a cream for that.
LOVE EMOJI: But, who am I kidding. From fourth grade all the way down to those crazy kindergarteners, I do love 'em all. And you know we are lurved by them.
SMOOCHES EMOJI: But, let's be honest, there are those times that we do love to see 'em go. BYE Felicias! Smell ya next time!
On a dif note, I gotta tell you a lil secret. That's a wig. I KNOW, TOTES HAD YOU FOOLED (insert wink emoji). I've been toying with the idea of investing in wigs (because they are pricy, y'all!) because I love the thought of being able to change my hairstyle without doing a thing to my hair. I actually suffer from hair-cut-phobia as I've not updated my do in, like, eonzz. I purchased this one here if y'all are interested in being twinzies. Until next time (insert smooches/bye Felicia emoji)!
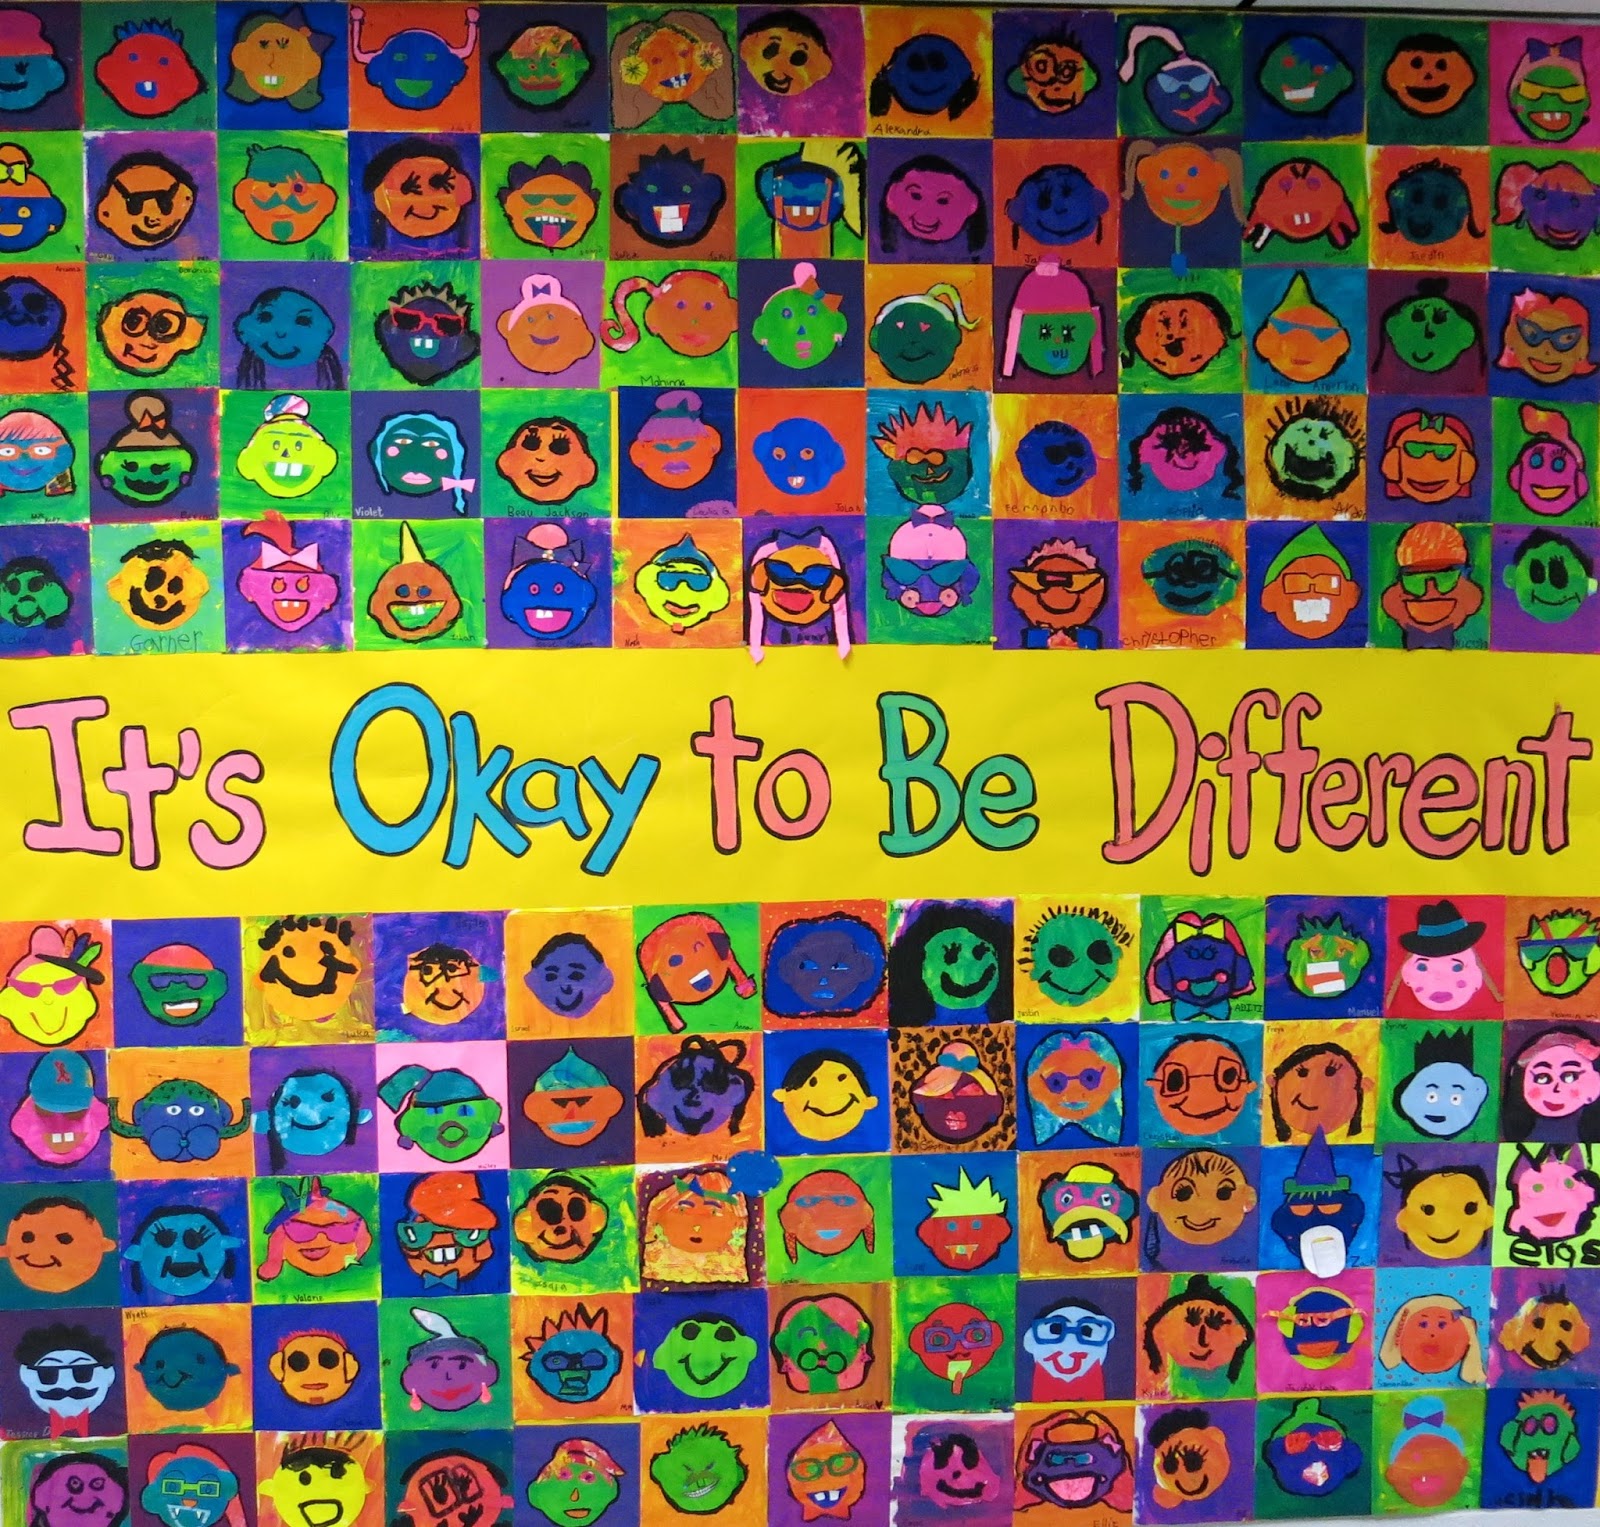
Y'all. I realized recently that I never shared the finished product of our Todd Parr inspired It's Okay to be Different mural. Which wasn't an accident. It's been on my To-Do list to finish this beast (there are still 140 more selfies that will flank the sides of this bad boy) and when I exhaustedly sighed to my buddy the custodian this evening that I really should stick around and do it, he said, "Eh. Go home and put your feet up. Do it tomorrow." He's a super smart dude so I decided to take his advice and work on it later...but share it with y'all today!
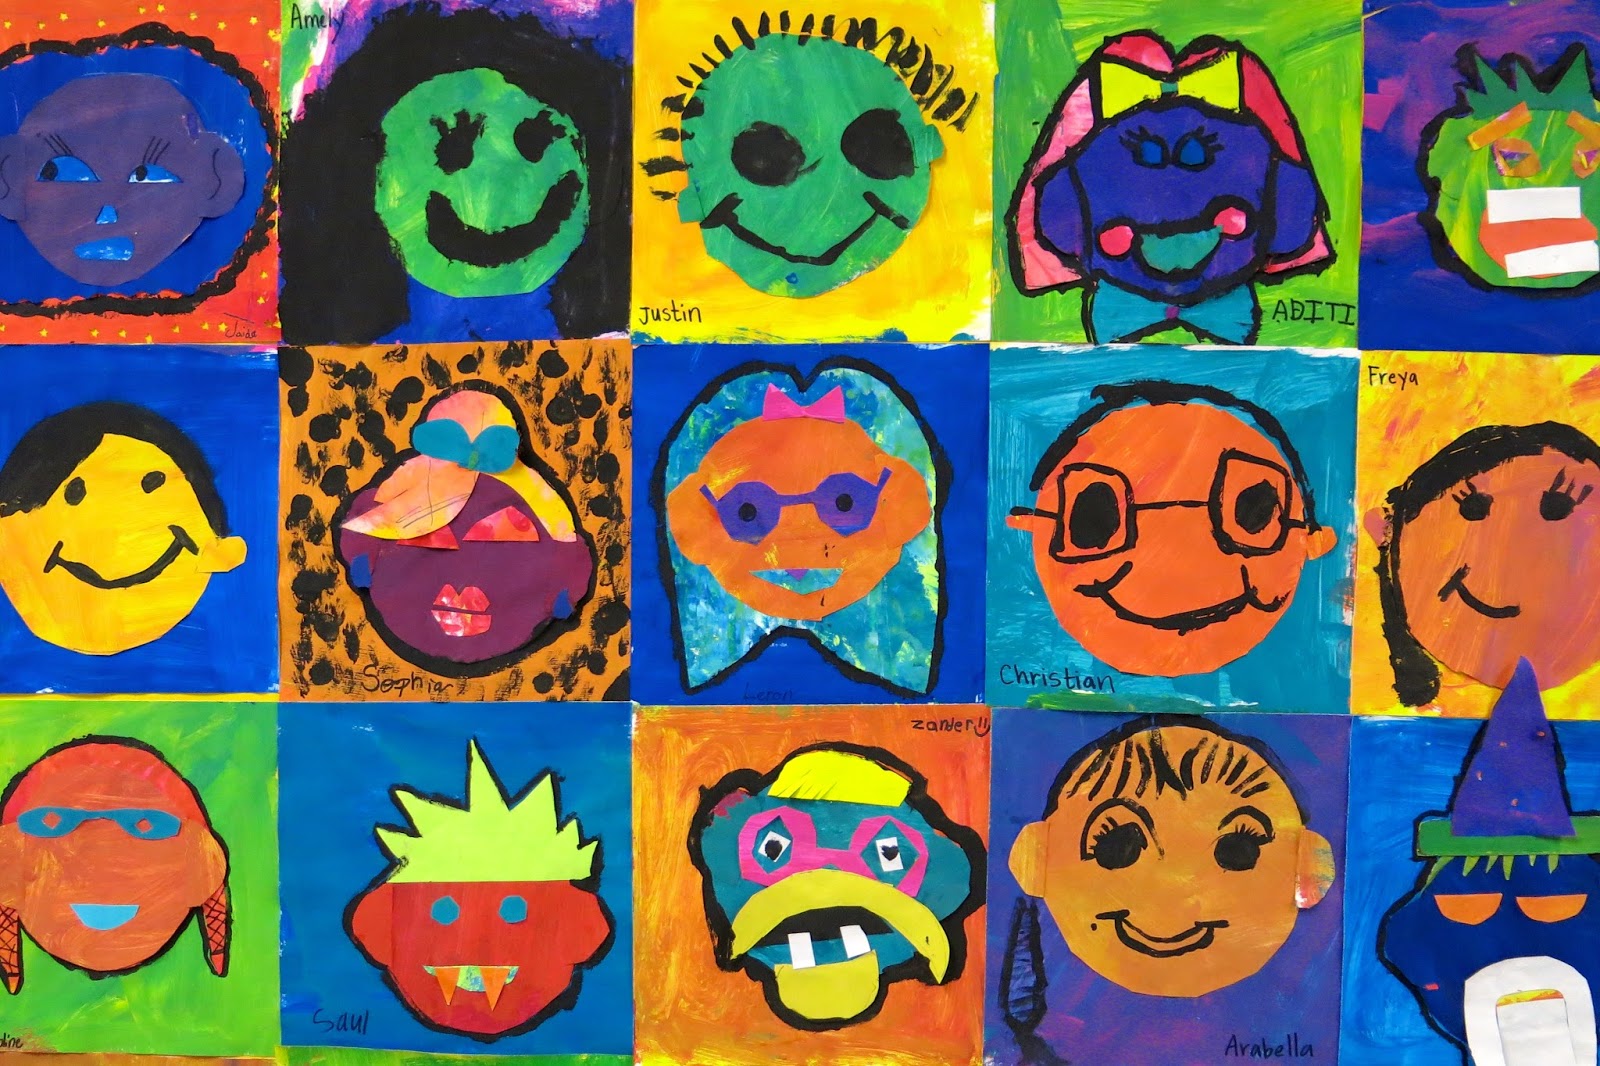
When you walk out of my art room door, this is the first thing you see, these silly, happy and different faces! I went through the process of just how the kids, kindergarten through fourth grade, created these painted and collaged pieces in this post so be sure to take a peak!
Our inspo was this fun and colorful book. This book is short and sweet and perfect for my various age groups. It also packs a powerful message: it's okay to be different! I try my hardest to stress this, self-importance and uniqueness in my art room. All our lives, we are told to fit in, follow along, do whatever it is that Susie is doing that gets her oodles of praise from her teacher. But just how boring would life be if we were all Susies? You're YOU and nobody else...and that's simply wonderful!
Not to mention totes adorbs. As the kids finished off their selfies, I started collecting them and laying them out on a huge roll of paper. We happen to have this 12' wide roll of paper at my school which I've pretty much claimed as Art Room Property. I love using it for murals like these so I can just start hot gluing these guys down.
We've done several murals at my school (full list with links below) and I've been asked by a handful of art teacherin' types if the kids are ever sad that they don't often get their pieces returned to them. I explain to them at the start of the project that their handwork will be enjoyed by many for a long time (this piece will probably stay up until the start of the new school year and possibly beyond. I really love it!). I also snapped photos of them to eventually pop up onto ArtSonia so the kids will have the chance to share with family in their online gallery.
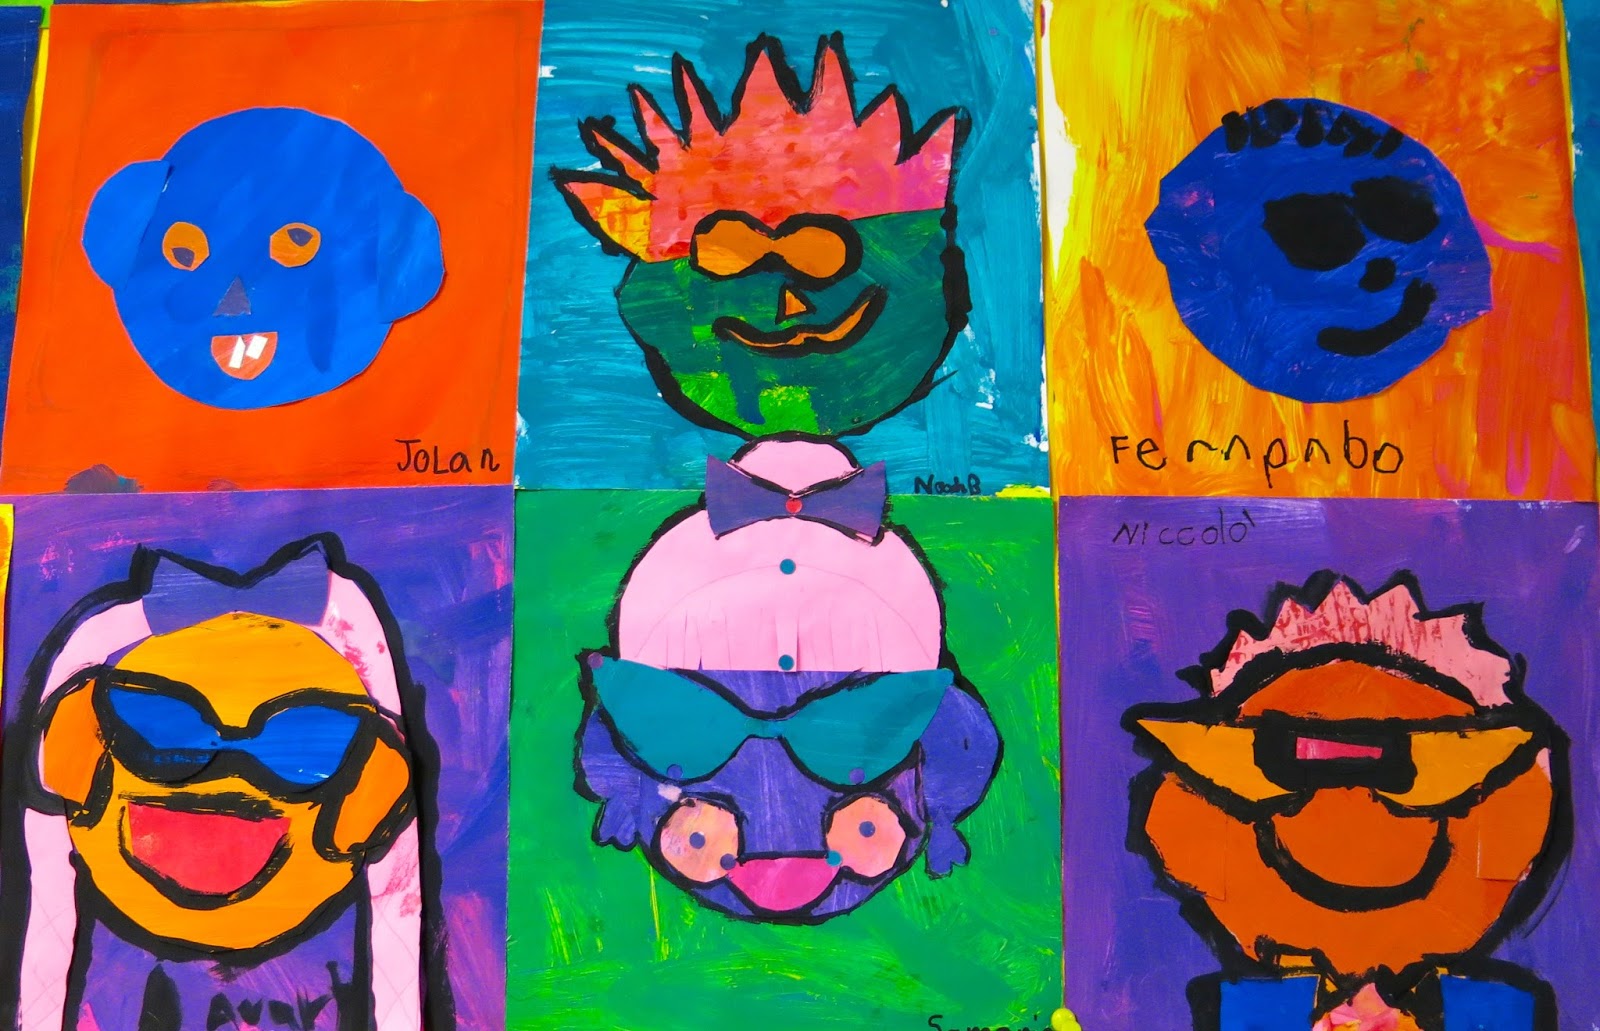
However...I do have this wild and crazy idea. Once I [finally] get all of the pieces hung, I want to snap a couple of high resolution pics and have their work made into fabric on Spoonflower! AND THEN make a dress from it. Oh, but that's a secret. Don't tell los kiddos. Especially not the dude on the top right. He looks like he's having a bad day already.
Big Ole School-Wide Collaboratives and Murals are super fun but, not gonna lie, a whole lotta work. I've shared many of mine in the past. Here's a lil list if you wanna take a look-see:
Whew! And if you just wanna read more about school-wide collaboratives, get yerself here, kids.
And when your done clickin' on all them linky-loos, pop over here, check out these awesome blogs and throw a sympathy vote my way, would ya?
Until next time, just remember, IT'S OKAY TO BE DIFFRENT*, er, DIFFERNT ;) [diffrent: when you pay a different rent then you and your landlord agreed upon. "C'mon, man. I told you the rent was $50 a night, not $45. Don't be pullin' no diffrent action!"]