Hey, y'all! As apart of my mission to get my art teacherin' life together (the never-ending quest, I swear!), I'm trying to manage my Early Finishers. I've chatted many-a-time about my fast friends here and here. However, sometimes, sending my EFers off on a fun and far-away adventure can serve as a distraction to my Pokey Lil Puppies (aka HOW ARE YOU STILL WORKING ON THIS PROJECT WE STARTED IN SEPTEMBER?!). For that reason, I've decided that SOMETIMES, my EFers will work in their sketchbooks. And, instead of just assigning the usual "free draw", I decided to take a page from my friend Kaitlyn's book and create Grab -n- Go Sketchin' Sticks! Here's more:
I mean, after all, what do our kids need to do more? DRAW! What are they usually doing? PLAYIN' ON THEIR MAMA'S PHONE! My kids were thrilled to draw with these...it was like a novelty. I was like, y'all know you can draw anytime, right?!
I just so happen to keep my Grab -n- Go's in a cute container but it's totes not necessary. This ole flower frog finally came in handy! It's from TAG but several years old...so if you really want one, check ebay.
Here are just a few of my drawing prompts. I made them double sided so the artists can pick their favorite idea. If you need more prompts, just google "drawing prompts" and you'll find a never-ending list of fun.
With these sticks, my students have options. They can use my drawing books. I keep them as organized as I can in these color-coded bins. I spray painted the binding to further color code them.
They can also use my still-life drawing objects like my wooden mannequins, plastic dinosaurs, 3-D forms and flower pots. I love the incorporation of the mannequin in this prompt!
Kids also know that they can add color with color pencils, markers, oil pastels and more. Whatever is available on the shelf is fair game. Thanks for letting me share, y'all!
I'll never forget my first year teaching. It was: wonderful, traumatizing, exciting, nerve-wracking and, most of all, a HUGE learning curve! I'll never forget seeing "weaving" in my first grade curriculum and breaking into a sweat. I'd gotten a C in fibers in college (which is so funny as fibers are my favorite thing!) BECAUSE OF MY WEAVING! When warping that big ole loom, I missed a couple of warps. Instead of going back and fixing my mistake, I thought, "eh, that professor will never notice." Little did I know that it'd leave a huge run all the way down the length of my weaving that seemed to scream, "THIS SLACKER DESERVES A C!" And a C I got. I remember introducing weaving to my first graders that year and a boy named Jonathan shouted out, "Weaving's for GIRLS and I ain't doing it!" It was then that I realized I had to make weaving (and teaching in general) fun, silly, wacky and engaging. For all my learners, boys and girls. The thing is, he turned out to be my best weaving and biggest fan of the medium. As most boys do! Introducing kids to weaving is something that I've been doing now for 18 years...and this lesson hasn't changed all that much. I read the same book, show them how to make a loom on the first day and we weave on the next. I know so many teachers struggle with weaving. The key is, introducing them to weaving with a simple paper weaving. Once they understand the concept, they'll take off like a weavin' rocket ship. I thought I'd record my two thirty minute classes. Here's what we did on the very first day: creating our looms!
Here are some must-have visuals that I always use: thrift store weavings and looms; my GIANT paper loom made from laminated paper; my Goat in the Rug book.
I also love having the roving for the kids to see and touch. Normally, I'll pass it around but I had forgotten to check with the nurse for allergies so I held off on this day.
This here is my FAVORITE book on weaving and the kids absolutely love it! After we create our looms, we sign them and await the following day's weaving adventure:
If you'd like more info on paper weaving, you might enjoy this video. It will explain the process more:
Here's how we went about cutting our looms and how I explained it...
I'll keep you posted on just what we are doing with our weavings...I'm really excited and cannot wait to share. I have a TON of weaving projects both on my YouTube channel (just search my Fibers playlist) and right here on my blog. Happy Weaving!
If you follow me on Instagram, then you know that last Wednesday, I had the chance to attend an amazingly fun PD lead by an art teacherin' buddy in my district. Her name is Madison and she shared with us all about yarn bombing! We watched this TED talk about Magda Sayeg who is attributed to "inventing" yarn bombing. It was fun to learn a little about the history of this street art movement.
Yarn bombed things are usually knitted items...at least that's how Magda began the movement. What I loved about Magda's talk is how she never thought of herself as an "artist" per se...but found herself in the middle of an artist movement. Yarn bombed items since have been knitted, crocheted and wrapped...which is what we did. Madison asked that we bring something to wrap. It just so happened that I'd picked up this heart the day before at the Dollar Tree. I didn't even know that I needed it...but when she mentioned bringing something I realized the benefits of being a shopaholic. Here's a video of how I created this heart:
Of course I had to get a little bit tricky with the needle and all...but this heart would have looked just as cute without going that extra step.
The best part about this project is using up random yarn. I always get a TON of yarn donated to the art room. Oftentimes, it's not enough for a project...so it just sits unused. Now I can add it to an Early Finishers center of objects to be yarn bombed! But more on that in a moment.
Lemme just say that yarn bombing, while easy, is a pinch time consuming. Especially if you go the fancy route with sewing in the yarn like I did. The crazy thing is, I bought SEVEN more of these hearts on my last run to the Dollar Tree...I wanna create a whole wall of these lovely hearts!
Cuz I have just a pinch more wall space left in the art room for that sort of thing. Ahem
So, let's talk Early Finishers. Ya'll know that's been my thing this school year...trying to conquer the Early Finisher Beast. I'm trying to add more and more to my early finishers rooster...to allow more open-ended choice in my art room. I'm currently trying to wrap my head around my fibers area...I think yarn bombing would be just thing thing. Add a basket of yarn, some mundane objects that need a little yarn-love and viola! Yarn Bombing!
I know it worked beautifully for me when I was avoiding lesson planning on a recent PD day. A few minutes between lessons and my class broom went from Blah to OHHH-LAAA-LAAA.
I had so much fun yarn bombing my broom that I realized the kids would surely enjoy it just as much. And I could use up those small amounts of yarn that seem to be multiplying in my storage closet (is that why I keep hearing Marvin Gaye's Let's Get It On coming from my closet?!).
Have you kids yarn bombed before? So, what gives? Do you love it as much as me?!
Happy New Year's Eve! If you are a TOTAL homebody/crafty nerd like me, than that means your evening is much like mine: you are in your pj's, enjoying a cup of hot cocoa (of whatever else pleases ya, I'm not here to judge) and you are writing up your New Years Craft-solutions, er Craft-utions (that's my best effort to combine craft and resolutions, in case you didn't catch my drift). One thing that WON'T be on my list for 2018 is a Painted Globe...as I just narrowly completed it today!
If you follow me on IG, then you've been hangin' with me on this journey to turn this trashed globe into treasure. I found it in the trash at school and had to dig it out immediately. It wasn't until I had it back in my art room and added to my collection of globes (why I have so many, I have no idea...it's just that I cannot seem to let them be thrown away!) that I noticed why it had been trashed: it was busted right across the equator.
I took it home and decided to fix it with a large plaster gauze strip...which made it quite unsightly. During my repair stage, I noticed that this globe was pretty dated...and poorly made from plastic. With that in mind, I didn't have much of a problem giving this blog the reboot. I'm a lover of all things vintage and it burns my eyeballs when I see folks "flipping" vintage (i.e. turning treasure into trash, says me). However, this bad boy wasn't very old...just old enough to have countries with incorrect names and a big honkin' crack right through the middle.
Here you can see my plaster strip repair job. I done tole you it wasn't pretty.
If you've been on pinterest for a hot minute than you know that painted globes are pretty hip. Maybe even past tense hip. But I don't care. After a little bit of searching for ideas, I was so inspired, I decided to paint my globe. I used the same wall paint as I had for the walls at school because 1. I still have a ton; 2. I wanted it to match, color-wise; 3. It was more opaque than any other paint I could find.
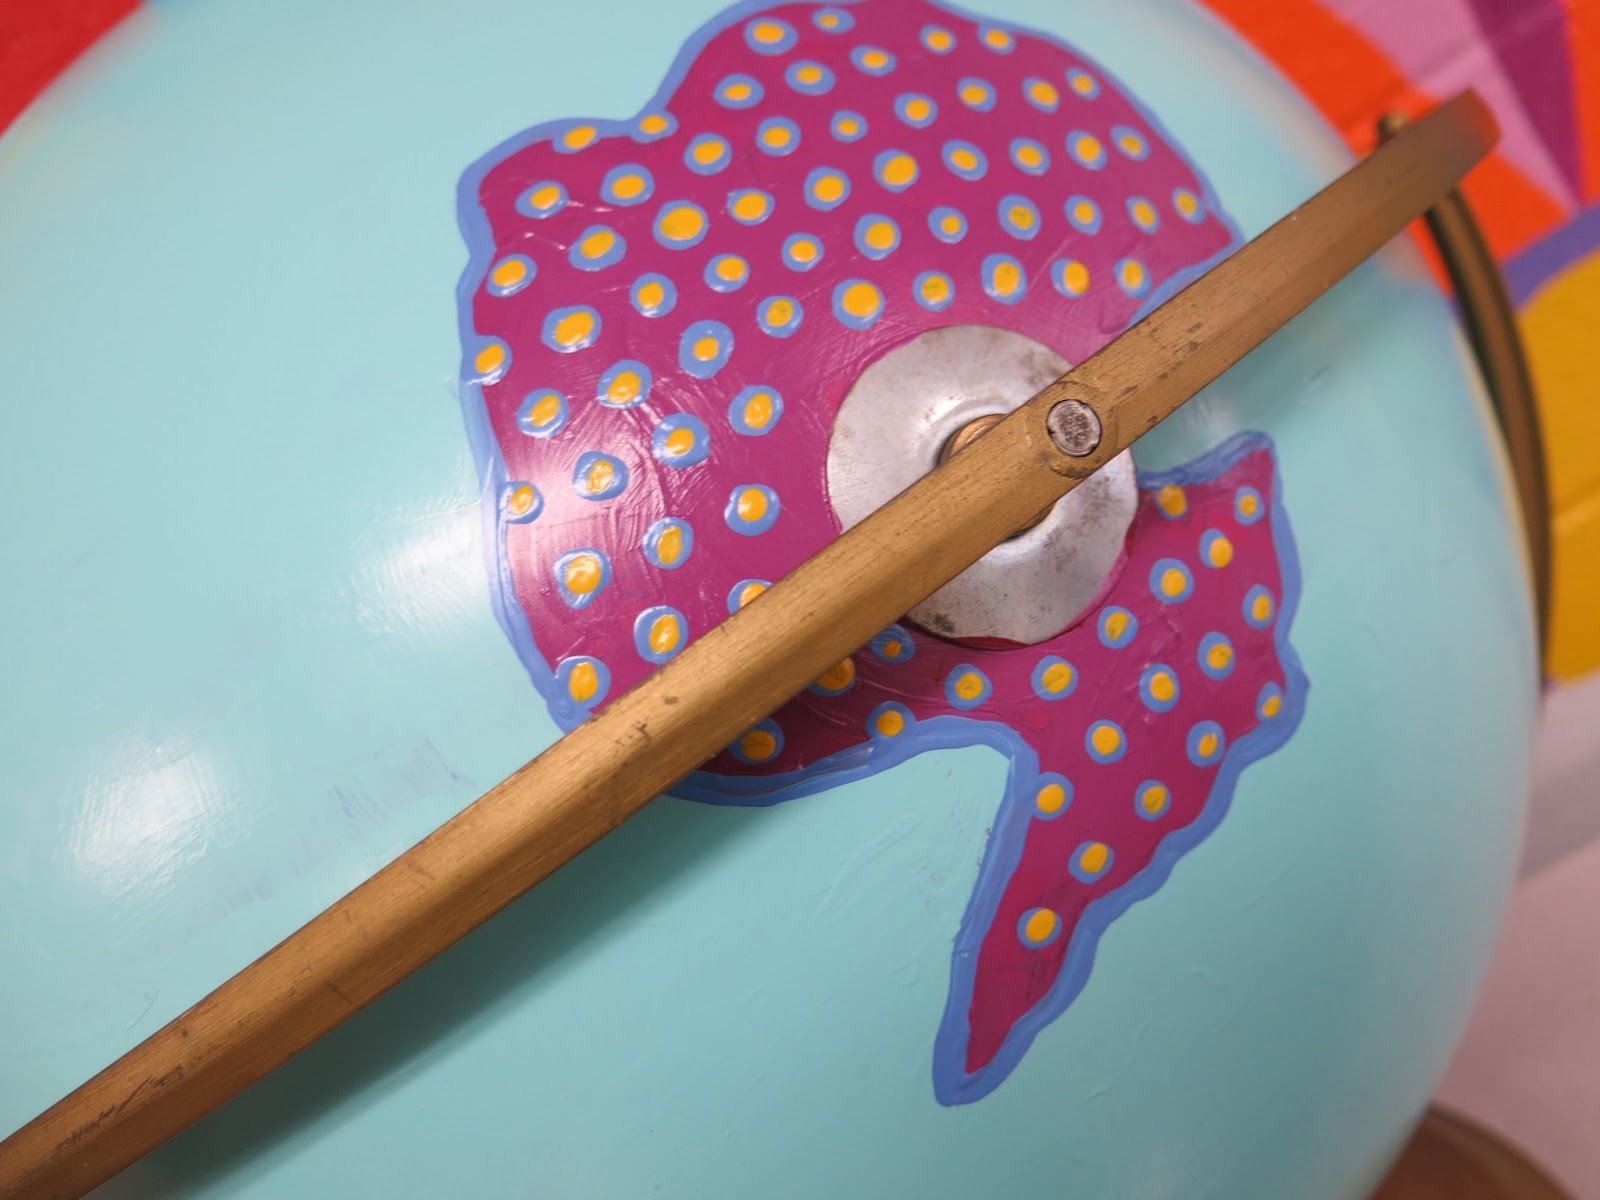
I decided to paint each of the seven continents and give each a pattern.
I used the planters I painted a while back as my inspiration. I just picked patterns at random.
I love patterns. Like, LOVE-love. Tis the reason you'll rarely find me in a solid color. And if you do, it's paired with a buncha other solid colors thus creating...A PATTERN.
This was such a fun winter break project for me. I've managed to knock out a couple...but sitting in my craft room and painting is my favorite way to end my day. I've got mountains of pattern-y painting projects just waiting for me in that messy space.
Texture is also my BFF. I suppose I could have used paint pens to create the patterns on this globe...but I don't know that they would have given me all this thick-ish texture.
You can kind of see my layers of paint in the photo below.
Now I do have a "normal" globe in my art room as well...for when we need to examine places other than just continents. But I think this will be a fun addition.
Brrr! My heat cut off when I was working a little in my art room today and it felt like Antartica! Or at least that's what 62 degrees feels like to me.
What projects were you working on this winter break?
Thanks for letting me share mine!
We head back this Wednesday for a coupla days of PD and the kids return on Friday. I'm excited to see their happy little faces! Happy New Year, y'all!
Today I'm excited to share that I'm guest blogging over on the amazing Spoonflower! If you are not familiar, you really outta be. Spoonflower is the magical place where you can design and print your own fabrics, gift wrap and more. I've not ventured down that avenue (yet) but I have purchased fabric created by other creatives there. Case in point, this fabric from dmitriylo.
This was another dress I created at the start of the school year with fabric from Spoonflower. This fabric was created by seasonofvictory.
So hop on over to the Spoonflower blog and read more about the making of this dress...and how it helped inspire an entire art room transformation!
Why, howdy art teacherin' partners! I hope all y'all are having a relaxing weekend and bracing yourself as this coming week is FULL.MOON.WEEK. The one week a month that I believe we should have off. Call it mental health days. Call it "for the safety of the children" days...cuz the gone be a lil cray...and Ima hafta be a lil crazier. Which isn't all that hard to do, let's be honest. A couple of weeks ago, I shared with y'all a post titled Early Finishers, Part 1. This year, with my larger classes, I have noticed a huge difference between my students' work time. I've got some that finish in no time at all and do a fabulous job...and others that work at a snail's pace. I'm a snail's pace artist myself so I totally feel for those kiddos. I never want to rush them...but I also don't want my other students who are finished to simply have blocks, free draw or dry erase boards as their options. So I spent a LONG time thinking about this and crafting a system that I'm hoping works for me and my students. I'm also hoping this system allows for me to continue to teach the lessons and curriculum I do while allowing the kids time to explore other areas of art. Call it a directed art/choice-based art combo...or just call it doin' what works. Cuz that's what we do all day long. So, how does this work? Well, I created a video to explain it to my students. It's SUPER long-winded (there's so much to cover!) that I will definitely be sharing it in two parts. But, basically, the run down is all spelled out on the poster above (which I HAVE GOT to figure out how to make a downloadable PDF for y'all! I messed up on this post and need to fix it...and want to do the same for this poster. I'll try to have that done this coming week).
It's long...but I ALWAYS have so much to say (story of my LIFE!).
When kids are finished they are #1: NOT YELL OUT "I'M DONE!" Because me no likey. The first thing they have to do is clean their area. I've noticed that many times, when I make things available to the kids who finish early, they just stop, drop and go. Then I'm left being a naggy-nag callin' so-n-so back to their seat to clean their spot. No more. If you fail to clean then, sorry(not sorry), all options are removed and you are left with a dry erase board.
After their spot is cleaned, I'm requesting the kids write an exit slip...which we've only done a handful of times because I.SUCK. Seriously. I will sometimes do what you see above: quiz the kids as we are standing in line and jot down what they've learned. But now, I'm putting the ball back in their court. I'm simply asking for one sentence. That's not too much to ask...right?! (insert wink-y face emoji). By the way, if you wanna see what my room USED to look like before I went bonkers and tore everything off the walls this summer, check out this blog post.
If all of this is sounding vaguely familiar, that might be because I recently chatted about my early finishers in a podcast. BTW, did you know I have a podcast?! I DO! It's called Everyday Art Room and you can take a listen here.
SIDE NOTE: I got new flooring this week! YES, I'm so excited! When I shared the photo on my IG, many folks asked me where the flooring is from...right here. I also was asked how I was able to afford such flooring. Well, first of all, the flooring was about $120 so SUPER reasonable. Much cheaper and more sanitary than a rug. I do have some extra cash because of the fundraiser I do called Artome.
Okay, now that I've explained the first half of my poster, let's talk about the whole "check time and clips" dealio.
Okay...so my biggest struggle with early finishers is that there are some who literally have 2 minutes left of art class and will bust open the blocks, grab a piece of free draw and/or get a dry erase board only for me to be like: DUDE. YOU HAVE 2 MINUTES LEFT. They've got no concept of time based on my wall clock. But they do understand my timer...so I'm hoping this method of having the clocks on the bins works. An incentive for good behaviors is telling them how many clips they must have. I explained my clip system in this blog post and on this podcast. Fewer clips means fewer options.
I decided to limit the blocks/building area to 8 kids because the floor space doesn't comfortably allow for many more kids then that. I also decided to move the drawing supplies to the other side of this cabinet. This way, the kids who wanna draw, aren't stepping over the kids who are building. I'm fortunate that my art room used to be the school library: it's big and has wonderful shelving like this!
(Please try to ignore the bloodshed...I had a red paint bottle EXPLODE this summer and leave behind this mess. And, yeah, I've yet to clean it up. Raise your hand if you're surprised.) So now the kids have LOTS of drawing options: free draw, how to draw books, idea stick, Fashion Plates, stencils and observational stuff. For observation, I've got mannequins, blocks, dinosaurs, mirrors and vases with flowers.
Last option: the light table! My kids REALLY love this. Next up: I will share a follow up post to let you know how all this shakes out. I'm planning to add more: origami, fibers, collage...and maybe build in more time for these areas and not limit it to just early finishers. How do y'all handle those rascally early finishers?! I'd love to hear!