
 |
| Finished weaving, complete with cord and coordinating background. |
Now that your weaving is finished (ahem, you did finish it, right?), let's get to everyone's favorite part: cord weaving. My students as young as second grade absolutely love weaving these cords. They weave mounds of them, fashioning them into necklaces, bracelets and belts.
If you need a refresher course on the woven pouch, you can catch up on that with Weaving, Part 1, Part 2 and Part 3.

For this project, you'll need:
- two colors of yarn, four strands of yarn each, all of them approximately 24" in length.
- thick cardboard
- scissors
- pencil

Begin by cutting out a circle. I traced around an old plastic lid with a 4" diameter.
Make four equally spaced marks on your circle like a compass. We do a short geography lesson in class while marking our loom.
Make four more marks in between your North, South, East and West.

Make eight marks in between each of the aforementioned markings. You should have a total of sixteen equally spaced marks. Cut them.
At this point, I ask the students to bring me their looms and I stab the center of their loom with a pair of pointy-end scissors. While I'm loom stabbing, I send them off shopping (our art room word for supply-gathering) for yarn. Students will need eight strands of yarn, four of one color, four of another.

Have the students tie all eight strands of yarn into an overhand knot like that shown above. Push the knot through the hole in the loom just enough so that only the knot is peaking out from the bottom and the rest of the yarn is on the top of the loom.
 |
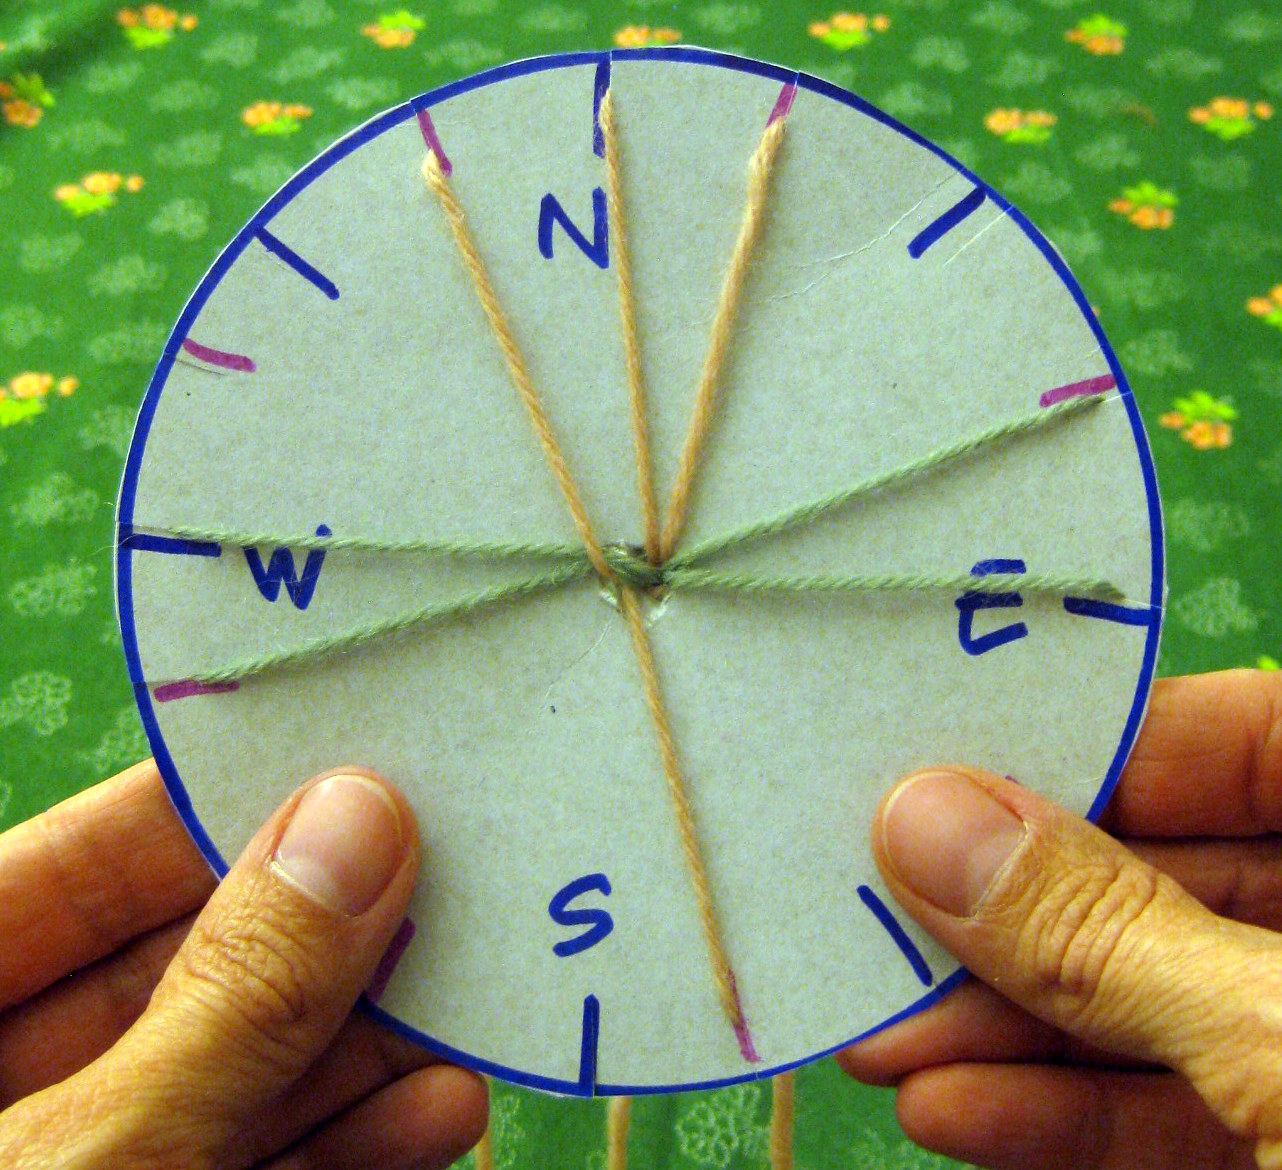
| With those long strands of yarn coming through the hole in the loom, feed them through the cut notches you made. Set your loom up like a compass. There should be a vertical "X" and a horizontal "X" of yarn. |
 | |||
| To weave, you will follow the same three steps over and over. Begin with vertical "X". Using your left hand, remove the bottom left string and place it on the top left side of the loom. Now your "X" should look like a fork. |
See the fork? Easy.

Now using your right hand, begin at the top right side and remove the right string. Place it at the bottom on the right side. Now you should see your "X" again.

It should look exactly as it did a moment ago. If the "X" becomes off-center, do not worry. You can correct that by shifting the strings on your loom if it bothers you.
 | ||
|

Now let's talk trouble shooting. As you are weaving, your cord will come out of the bottom of the loom, shown in the photo below. The long strings around the loom can sometimes become tangled, shown in the photo above. To prevent tangling, I usually have my students stand while weaving. This allows the long strings to hang straight and not tangle. If they do become tangled, pull one strand of yarn out of the tangled mess at a time. Do not run your fingers down all of the yarn in hopes of combing out the tangles. It will only make it worse.

After just five minutes of weaving, you should see your cord coming out from the whole in your loom. Yippie!

More trouble shooting: if your cord keeps popping out of the hole as you weave, as shown above, tug on it gently from underneath the loom to bring it back down, as shown below.

The entire time you are weaving, it's a good idea to tug gently on the cord to keep it from popping up.

How do you know when you are finished? When the shortest of the eight strings is no longer long enough to make it to one of the notches. You can see my peach colored string at the top is now too short.

Taking it off the loom is very easy. Just remove the strings from the notches and pull it through the hole.

Viola! A finished cord! Often the kids will ask if they can use strands of yarn longer than 24" so they can create longer cords. I have found that this causes a lot of tangling so I try to avoid the question by changing the subject, "Oh, look, a unicorn riding a rainbow!"

Depending on the time, I'll either show the kids how to sew in their cord or have one of my awesome mom helpers give us a hand. Simply feed a knotted strand of yarn through both ends of the cord...

And attach with a couple of whip stitches. The students are give the option of having the cords sewn on the side like mine or across. Most boys tend to go for the cord on the side as the across one looks a little too purse-y for them.
 | ||
| And there you have it! Because I've thrown so much at you today, I thought I'd do one final installment of this weaving series. In that, I'll show you how to sew on a button and hide that pesky warping tail. I'd also love to share with you my favorite weaving books and how I manage to get these pouches woven in the 30 minutes of class time that I have. Yeah. 30 minutes. We have Fingers of Fire! Chat with you soon. |


