 |
| Precious first grade friends sharing paint and getting ready to try their (messy) hands at sponge painitng. |
Hello and welcome to The Art Room.
Which, during the week of Painting Processes, could have easily been dubbed The Day the Paint Factory Vomited...or maybe What Happens When You Give Children Double Espressos and Paint Brushes. Although just calling it The Day the Art Teacher Taught a Half Dozen Painting Techniques in a 1/2 Hour Because She's Nutz would probably be the most accurate.
Yet, despite the Big Fat Hairy mess, we had fun, the kids learned tons and their paintings look fantastical. Lemme tell you how it all went down.
 |
| How student teacher Rebecca Tenpenny and I set up the tables for the day. |
I'm a
huge fan of the blog
Painted Paper. If you are an art teacher, you
gotta get yourself over to Laura's blog because it's beyond inspiring. It's aspiring. In fact, it gets me so excited with it's awesomeness, I often find myself
perspiring. Because that's what every blogger wants to hear, right? "Your blog is so amazing it makes me sweat!" I'm sure at this point, if she's reading, Laura is like, "um...thanks?"
Anyway, before this gets awkward (oops, too late), what Laura does at the start of each school year is have students create dozens of painted papers (hence the title of her blog, ya'll). The kids then have these amazing papers to use in their works of art throughout the year. GENIUS, right?! So Rebecca and I decided to totally steal, er, heavily borrow, that idea.
If you wanna give this wild and crazy ride a go, here are the supplies needed per child:
- one 12" X 18" paper, quarter folded
- one large bristle brush and one small bristle brush
- one large sponge and one small sponge
- one texture comb
- one toothbrush and piece of cardboard
- a stencil
- an apron
- no chairs
And here's a student's painted piece to show you the processes covered during that 1/2 hour:
- dry brush painting using a cross hatch pattern (upper left)
- sponge painting using a stencil (bottom left)
- texture combing with paint splatter (right)
As soon as the students entered the room, I had them grab a piece of pre-folded paper from the "store" (you can
go here for more details on how we gather supplies in the art room), take it to their seat, jot down their name and teacher code, throw on an apron and gather around a table for demonstration. Once each student was at the demo table, I demonstrated how each painted process was executed. Because our time is so limited, I told the kids that they'd be working
quickly but not
crazy and that our painting time would be controlled by the toot of my trusty train whistle.
Here's how I explained each process to the children before they set to work:
Dry Brush Painting with Cross-Hatch Pattern: Believe it or not, this was one of the hardest painting processes for the kids to grasp. I found that the best way to explain it to them was like this...how would you describe the texture of a broom? It's dry, right? Well, imagine that this white rectangle is your bedroom and your mom told you to sweep it. Using any color you want, dip your brush but just barely because we want the brush to be dry. Now, using diagonal lines, sweep your brush all the way across your paper. Be sure to sweep your whole rectangle. Imagine how upset your mom would be if she found you only swept one part of your room! Once you are down sweeping with that color, pick a different color and sweep in the opposite direction. See how the lines cross over each other? That's called cross-hatching!

Now the kids didn't actually go to their seats and set to work until after I'd demonstrated all the techniques so the sequence of these photos isn't accurate. Sorry. However, I did want you to see the kids in action. So here's some dry brush painting by one of the experts.
Sponge Printing and Stenciling: Next I demonstrated using the larger sponge, picking one color and sponge printing. I emphasize that it's called printing and not painting because I want the kids to know that they are creating a texture by pressing the sponge down and picking it back up. As opposed to just wiping the sponge all over the paper. Once that rectangle is covered in the color of their choice, I show them how to stencil with a smaller sponge and this collection of holey scraps (which included a brief chat about how sparkly confetti is made!). The key here is to use very little paint. A concept that is akin to rocket science for some.
When we ran out of those little round sponges with the handle, we created these guys with a clothes pin and a cosmetic sponge. We so smart.
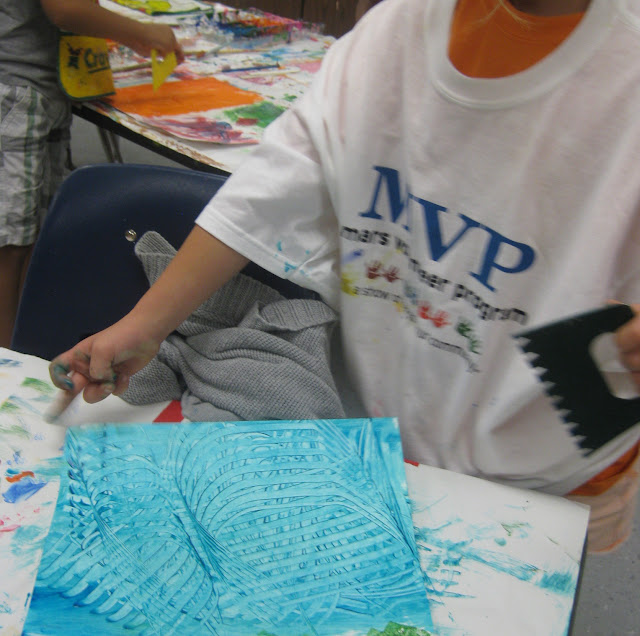
Texture Comb with Paint Splatter: For this, the kids painted the entire half of the paper. I really had to emphasize that for this process, they'd have to work the opposite of the dry brush painting in that their paper needed to be super duper wet with paint. So I told them to paint quickly and thickly but not crazily. I painted with the larger brush and only used one color. I told them that their paper should have a shiny and wet look to it before using the texture comb. Once the texture comb was used, I then showed the correct way to splatter paint. Which, as it turns out, no matter how many times you show them, they are going to attempt many other ways of splatter painting. Ways that might include splattering their face, their neighbor and the floor. Jackson Pollock woulda been proud
Painting quickly and thickly but not crazily.
I picked up these texture combs from Sax after years of cutting them out of cardboard. By the way, I don't believe flipping you the bird was intentional. But I could be wrong.
For splattering, I showed the kids how to dip their toothbrush into any color and scrap the bristles
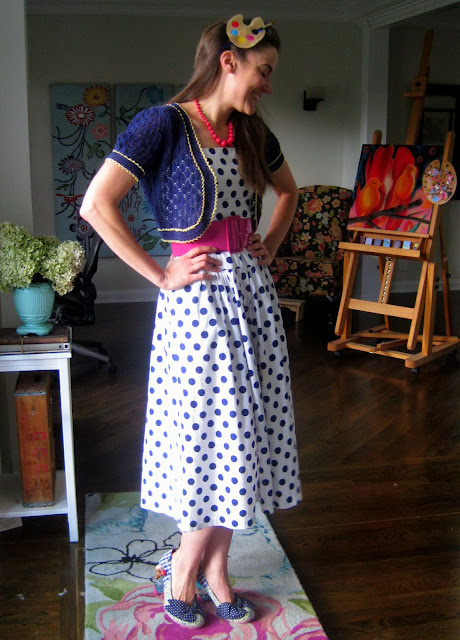
away from themselves and toward their paper. They were allowed to chose as many different colors as they liked. By the way...this technique was part of the inspiration for
this dress.
After the demo, I had the kids do a quick "repeat after me" run through of the processes. From there, they were asked to return to their tables and hold up the small brush for dry brush painting. Once all brushes were in the air, I blew the train whistle which was their signal to begin that process. When the whistle was blown again about 2 minutes later, that was their signal to put all dry brushes down and hold up their large sponge. Again, whistle blows and...begin sponging. This routine was continued until all processes were complete.
 |
| At this point, we were closing in on the end of the 1/2 hour. Quickly the students took their paintings to the drying rack, put their aprons back on their tables and met me at the door to line up and receive a baby wipe ... which did little to nothing for their artsy hands. But we finished! And they loved it. And now we have all of these amazing papers for our upcoming collage projects. I couldn't be more excited. Have you tried any of these painting processes with your students? I'd love to hear more ideas! Rebecca and I are planning a water color painting processes in the near future. I'll be sure to keep you posted. Until then, special thanks to Painted Paper for the inspiration! |
|
|
|


