Showing posts sorted by relevance for query Clay. Sort by date Show all posts

Tuesday, June 27, 2017

In the Art Room: Clay Tacos!

Hey, friends! I thought I'd share with you a fun clay project that you can do with either kiln fire or air dry clay: Clay Tacos! I did this project with my kindergarten kiddos and it was a huge hit. It also taught them a ton: clay can capture texture; how to create a sphere, coil and a slab, the holy trinity of clay sculpture; how to adhere clay with an alternative slip and score method. So here you go: Clay Tacos!
One thing I love when working with clay and kiddos is introducing them to texture and clay. We step on the clay, pound it into textures, you name it, we try it. My favorite thing is to have a variety of lace, doilies and burlap for them to experiment with. 
With a class of 20 kids pounding clay flat, it is going to sound like a crazy roll of thunder (with echoes of lots of laughs from the kids) but I have found it to be the quickest and easiest way to introduce the kids to creating a slab. 
With a beautiful textured piece of clay, the possibilities are endless! In fact, I'll be sharing EIGHT of my favorite air dry clay projects using this method and more at the Art Ed NOW conference
Have y'all signed up? You really should, it's a ton of fun. 
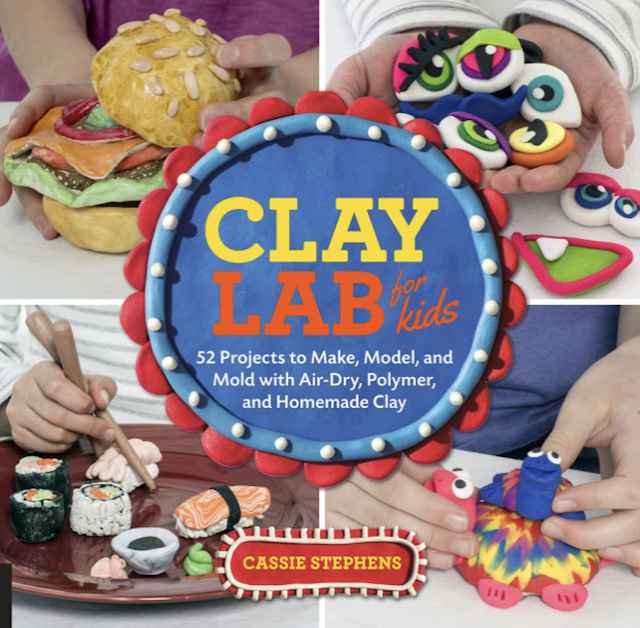
I explored EVERY air dry clay on the market (seriously) when working on my clay book which is now available for sale here! Many of the air dry clays have the look and feel of kiln fire so it's a great way to introduce kids to the magic of clay even if you are kiln-less. So get you some clay and make you a clay taco today! 
 photo signature_zpsd10b3273.png

Wednesday, April 17, 2013

In the Art Room: Pinch Pot Pets

Every time I go into the kiln room and see these little guys staring at me from the shelves, I feel like singing: I always feel like...Somebody's watching me. And I have no privacy, Whooooa, oh-oh (go get you some Rockwell here and be prepared to get your paranoid on).
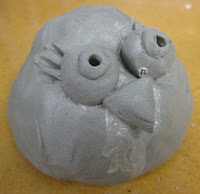
Greetings from the land of Pinch Pot Pets! Last week my younger students completed glazing their clay animals (my older students are still painstakingly working on every minute detail of theirs) and I'm excited about the results. Our theme for this year's clay projects were cats and dogs as our students will be "selling" their work back to their parents for a donation to the local humane society. We're do-gooders like that. The kids love clay and really enjoyed this project. But I'm rambling. Check out this cuteness:
Aw! This looks like a certain orange cat that lives in my house! I wonder if this one plants herself on the table at dinnertime as well.
"Hmmm? Did someone say snack?!" I love the added detail of the collar and hair bow by this first grade student.
So just how did my wee ones complete these clay projects in half an hour art classes, you ask? Well, it wasn't easy. But I've found that breaking the clay construction up into two days helps. And having several parent volunteers on hand. Mostly to keep me in line.

In preparation, here's what's on each table:
  • a clay mat for each child, purchased from The Clay Lady
  • 2 cups of water and 2 toothbrushes
  • 4 skewer sticks
  • 1 piece of clay the size of a small orange per student
Other preparation included:
  • One labeled ziplock bag per student
  • a damp paper towel per student
 For the demonstration, I have the students gather around a table and I show them the steps to creating a pinch pot. Here's what I tell 'em:
  • Roll your clay into a sphere and place it into the palm of your hand.
  • Using your other hand, put your thumb on the top of the sphere and wrap your fingers around the back.
  • Sink your thumb so deep into the clay that it looks like your thumb is wearing a clay afro. But don't go too deep and have your thumb pop out the other end because then you'll end up with a donut. And nobody likes clay donuts.
  • That part they can do no problem. Thumb afros, they got that. It's the pinching-into-a-pot part that some struggle with. I ask them to imagine they are holding a cookie and show me what that would look like. They all hold up their fingers about 1/2" apart. I tell them that their clay should have that same thickness. And then we eat the imaginary cookie with a loud "crunch!" and "mmm!" before proceeding.

  • After showing them a couple of non-examples of pots that are too thick or thin, I show them what a correctly pinched pot should look like. 
  • At this point, the demo is over. I show the kids how to wrap their pot gently in a damp paper towel and place it carefully into the ziplock bag. They are not to seal the bag closed as trapped air inside will dry out the clay. Instead we simply tuck the bag underneath the pot. Like this, their project will stay damp for up to a week. But it might begin to smell a bit if kept longer.
  • The following art class, I tell the kids that they may either create a dog or a cat. I introduce them to the idea that you can make anything out of clay with three things: a sphere, a slab and/or a coil. To illustrate that, I begin by using spheres for the eyes. 
  • Note: all pieces of clay must be attached by using the toothbrush and cup of water. I tell the kids, if you don't brush your teeth, your teeth fall out. If you don't brush your clay, your parts will fall off. It kinda works.
  • I demonstrate using the stick to add the pupils and eyelashes.
  • A sphere pinched into a triangle is used for the nose.
  • Coils for the mouth and skewer-drawn whiskers.
  • I tell the kids that the parts of a face for a dog and cat are about the same. It's the ears that make the difference. Using a slab, or flattened piece of clay, the kids can create dog ears. Cat ears can be created by cutting the slab into a triangle shape.
  • Some finished theirs off with a coil for a tail. 
  • And that concludes the second day of Pinch Pot Pets! As the students finish, the volunteers and I wrote their names and teacher codes on the inside of the pot. Then I set them out over Spring Break to dry completely.
After Spring Break and many firings, their bisque-fired clay animals were ready for glaze. I like to use Mayco's Stroke and Coat. I gave the kids every color in the rainbow (which many saw as an opportunity to go hog wild) and told them my two glazing rules: don't glaze the bottom as the glaze will cause the project to stick to the kiln shelf; don't layer 15 different colors of glaze on top of each other. Because it will look like a rainbow exploded in a really bad way. However, if you want color, do it with patterns.
And suddenly I feel like I'm in San Francisco all over again. Super psychedelic, dude.
These two crack me up. The Eye-Popper-Outter and the Cheshire Cat.

Stripes and spots were a pretty big hit.

And there you have it! Pinch Pot Pets. If you'd like to see what my students created last year out of clay, you can visit here. Be on the look out for more clay posts within the next couple weeks as the kiln just keeps spittin' out these awesome little masterpieces. Until then, enjoy the rest of your week!


Tuesday, April 18, 2017

In the Art Room: Clay Chameleons, Update Part 2

Y'all. When I opened the kiln this morning (which I had no right doing as that big ole lug was still flashing 600 degrees), I let out a squeal. Who snuck into the art room and put a bunch of cute-ified chameleons in my kiln?! I mean, really. Can you even handle...THIS?
 I know I can't. I'm so excited to share these with the kids next week. Their hard work sculpting and glazing paid off. Here's the video that I created to teach my sweet third graders this fun lesson:
The kids have loved this lesson! Having taught art (and clay!) for nearly 20 years, I've learned a thing or two along the way. My biggest tip for those working with kiln-fire clay: LET THE FINISHED PIECES DRY FOR LONGER THAN YOU'D EVER IMAGINE.
I was always led to believe that the reason clay exploded in the kiln (and I've had my share of 'splosions) was because of air bubbles. I call baloney on that theory. The reason there are explosions is: the clay is still WET. I allow my clay projects to dry in the kiln room which is both hot (due to the kiln) and well ventilated (as they should be) for TWO WEEKS. That's right, you heard me. Here's the deal: if there are any water molecules in the clay, as they are heated up in the kiln, they begin to move, faster and faster, until they cause an explosion. However, if you wait...every last one of those water molecules will evaporate and diminish your chance of breakage. One way to test and see if greenware (unfired clay) is ready to be fired? Touch it. If it feels damp, even slightly, it is still holding water and needs to dry.

The problem is...if your students' clay projects are thick (and some of these chameleons were very thick!) there might be water trapped within the clay project that you cannot feel with touch. My suggestion? Fire on the slowest setting possible. This will help air out the clay before ramping up to firing mode. 

In other words: When in doubt, DRY IT OUT. 

Can someone please help me off this firing soap box?! It's hot up here!
Now, when it comes to glazing, that's a whole 'nother story. Glazed pieces can be fired on the fastest setting as they have already been fired once and are not going to explode. In case you are curious, I use Cone 06 clay and glaze. 
 I don't always glaze with my students. After all, two firings is super time consuming. However, I do think that the glazing experience is important for kids to be exposed to at least once. It's truly magical. Imagine: little pieces of glass that are going to transform your dull clay project into a shining, sparkling masterpiece!
My favorite glazes are Mayco's Stroke and Coat. I love their color variety. I did order some of their Jungle Gems to add a bit of spots and sparkle to their projects...and I was a touch disappointed. I don't think I shook the bottles up enough because I don't see too much of the spotted and speckled effect. Perhaps my next crop of chameleons will be more speckled as their glaze is near the bottom of the bottle where all the glass has settled. 
 Oh! And if you follow me here...you might have seen that I received a copy of my book
This lesson is NOT featured in my book...which is why I can share it and the video for free with you here. Many of the project directions from last year's art show were not shared here...because I was under contract with the book publisher. Little known fact: when you are writing a book, they "own" the rights to your ideas! All that to say...all of the lessons I share in the book have not been released here. So 52 NEW art projects for you and your kiddos...that can be used with both no-kiln and kiln-fired clays! 
 ALSO...in case you didn't know, I've been hosting weekly #creatingwithcassie craft nights right here. Currently, we are felting but next month, we are exploring clay! 
If you'd like to join the fun and explore some fun new materials, pick up your clay kit here...no kiln required! 
 Now...this is just the beginning of clay themed posts as I've declared the month of May, the month of CLAY! So brace yourself...lots of clay posts ahead!
Until then!

 photo signature_zpsd10b3273.png

Wednesday, March 1, 2023

Let's Talk Clay! Part 1

Well hello there, y'all! It's been a minute...and, if you haven't heard, a lot has happened around here. Like, for instance, me stepping away from teaching art in a classroom setting after doing so for 25 years! I KNOW. CRAZY. All the details on THAT very soon but first...a little something that I've been promising on Instagram for quite some time: a big ole post on all things CLAY. 

Let's first cover my supply list of Must-Have's for working with clay:
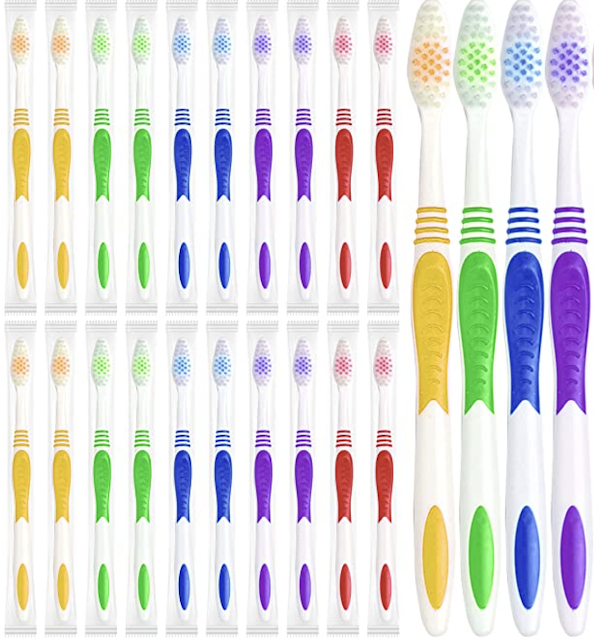
* TOOTHBRUSHES! I'm so sorry to shout...actually, I'm not. You will thank me later but THIS is what your kids should be using when they slip and score. Buy this set and use them year after year!
* WATER DISHES! This is where we keep our slip. In fact, I use the same set of no-spill cups each year, just add more clay to it. When clay time is over, I let the water evaporate and just leave the dried clay inside. When the new year begins, I just add water and we have insta-slip! Kids dip their brushes here. We also have a set of these just for painting...so I don't have to worry about cleaning them out when we switch from clay to painting!
* DOGGIE DISHES! Okay, so this is an alternative to the no-spill cups. I love these! We use these also when painting. So if the other cups are too much for your budget, try these!
* DOILIES! Since I started shouting, now I just can't stop. I LOVE doilies...in fact, just scroll below and you'll see a ton of my projects features a texture...it's from theses bad boys! You can also find them at your local thrift store and yard sale so be on the look out!
*SKEWERS! I think we all know about using skewers with clay but one thing that really always bothered me was how long they were. I was always thinking someone was gonna lose an eye! Not a happy thought. I discovered these shorter skewers a couple years ago and now...this is all we use. 
*TRAYS! Contain all of that dusty mess with trays. I didn't start using trays until recently and I was like WHERE HAS THIS BEEN MY WHOLE ENTIRE LIFE?! 
* GARLIC PRESSES! Oh man. You can't just get one of these. You're gonna need bunches! I found them here...but I have also found them less expensive at the Dollar Tree and Walmart. 
* REUSEABLE TOWELS! Oh man...I cannot tell you how much this saved the MESS in my room this year. Hear me out: I placed a bin of water on each table with a splash of soap and 2 towels. At the end of each art class, the kids used a towel to both clean their hands and the table. This kept the dust mess down! My custodian friend was so happy. 

The other items you'll find on my list are the air dry clays I've used in the past. I'm also sharing glaze (which is only used on kiln fire clay). I purchase my clay locally from The Clay Lady. She also sells the clay mats I strongly recommend. If you purchase your clay locally, you'll be supporting local businesses. 

And now...on with the show!

Isn't it crazy to think that we are expected to know about all things clay...just cuz we have an art teacherin' degree?! Well, I created a video sharing everything I know about clay. You can catch even more details in this blog post. 

Of course, there are plenty of ways to add beautiful color to ceramics without the hassle of a second fire and of the expense of glaze. I'll share a TON of projects in the second installment of this blog post that do not require glaze...and still look amazing. BUT FIRST...
What is Clay is a video I created several years ago to share with my students on the very first day of working with clay. With my 30 minute classes, we watch the videos and then we spend the rest of class just rolling up our sleeves and getting a little messy. It's a great introduction to clay, no matter what the project. Here's a peak at the video:
And now...a moment from our sponsor. 

Me. I'm the sponsor. 
Many of my projects can also be done with air dry clays, either homemade or store-bought. And if you are kiln-less and would like a little more guidance, I wrote a whole book about it! You can find it here
Okay, y'all. I really thought I could also add all my favorite clay projects also in this blog post BUT...I think I'll save that for the second installment of this series, so stay tuned. Until then, have a good one!


photo signature_zpsd10b3273.png