If you follow me here, then you already know that all my kids are currently creating self-portraits for our upcoming winter art show with Artome. I shared what my third graders are up to here (Y'ALL. THEY ARE TURNING OUT SO AMAZING). My second graders are making a variation of this Super Hero Selfie project that I did with my fourth grade last year...I'll be certain to share those with you soon. My firsties are becoming royal with these Royal Self Portraits while kindergarten is doing a variation of Ain't Gonna Paint No More selfies. Because the Artome frames fit 9" X 12" artwork and I usually have my kids work twice that size, I've had to really rethink and adjust some of these projects. I'll be sure to share them with you in the near future. To get the ball rolling, I thought I'd share with you this videoed Romero Britto lesson and the fourth graders' results.
In case you don't know, Romero Britto is a Brazilian neo-pop artist who lives in Miami. I have shared his colorful work with my students when we did this project:
My fourth grade kids are so great at creating colorful designs and patterns that I thought this project would be perfect for them.
But I had to give 'em a little inspo first...
Before diving in to the video:
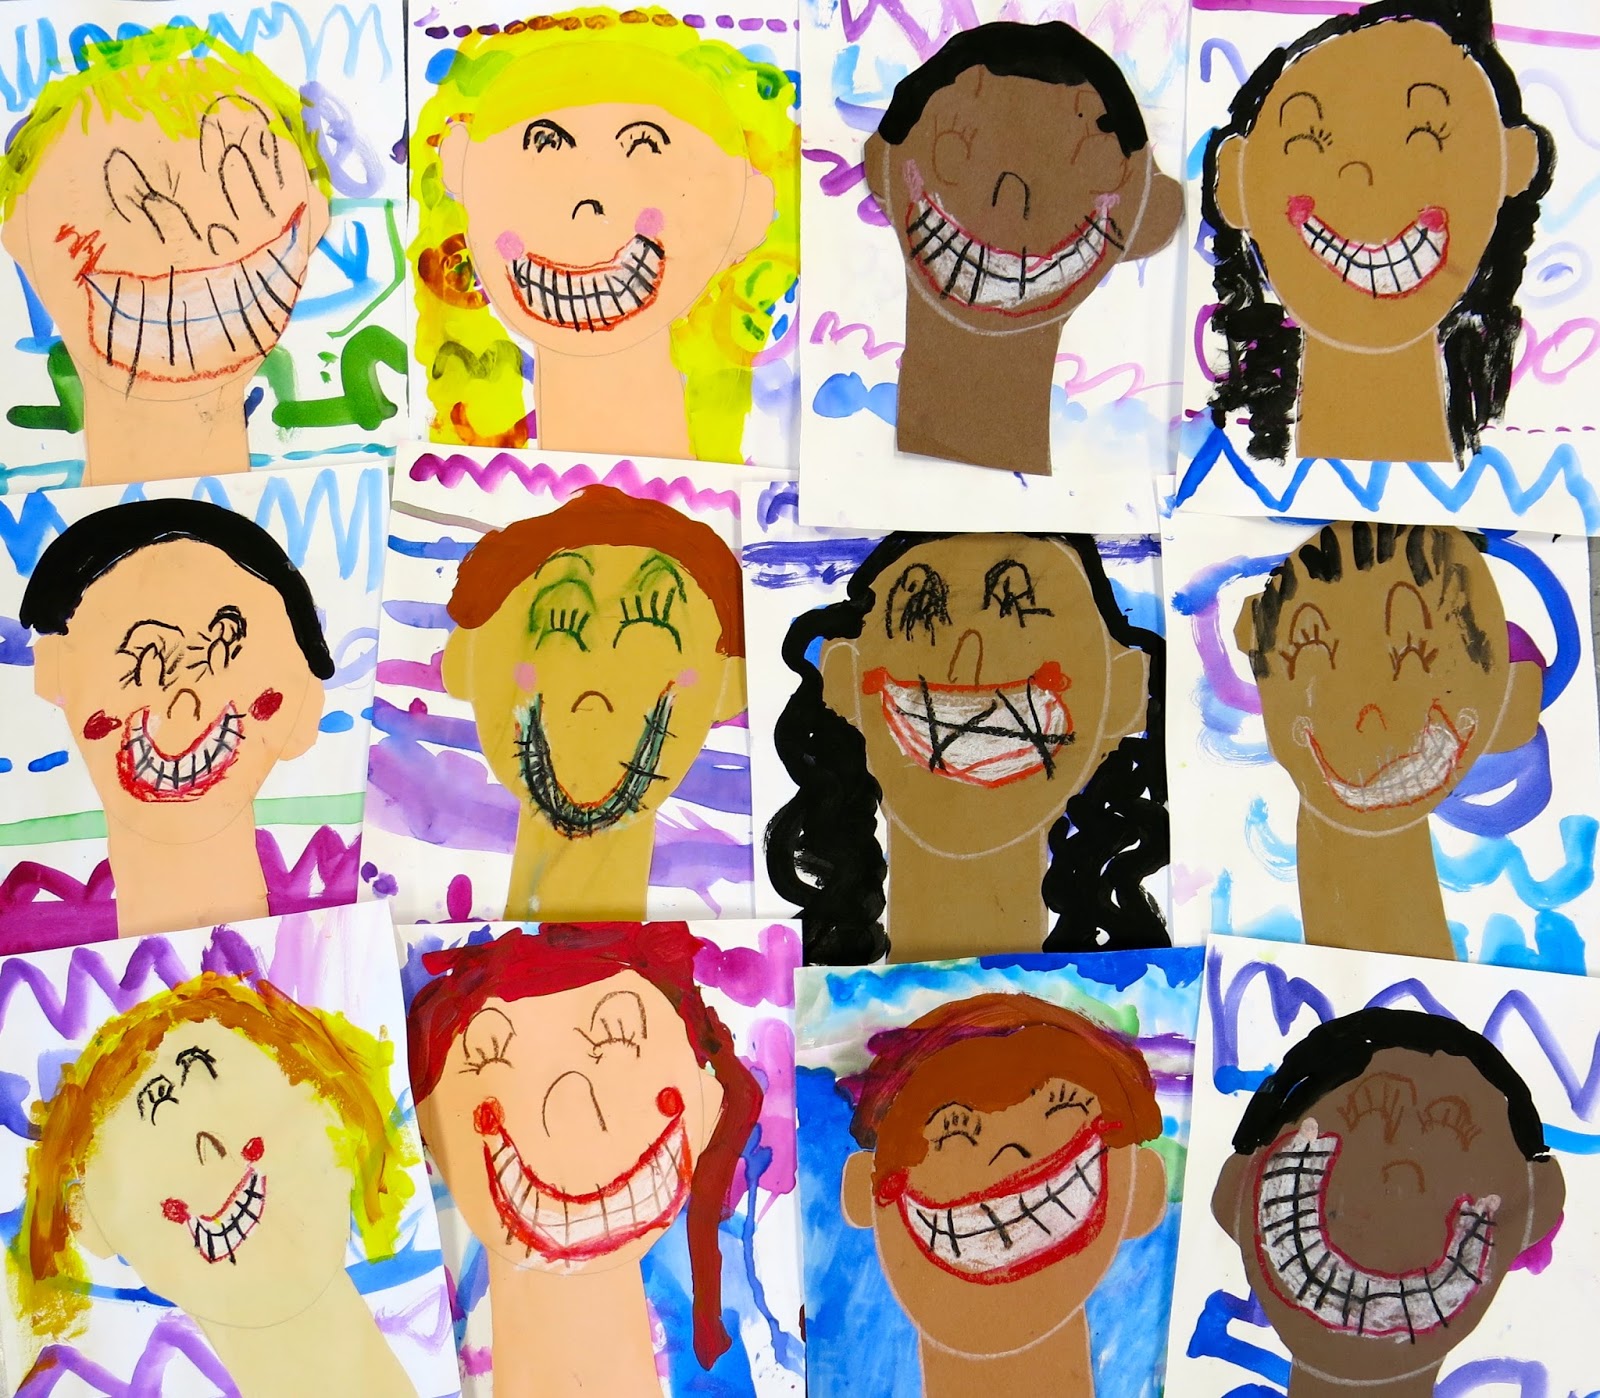
Here's what we cranked out the first day!
They did a bang up job and were pretty stinkin' proud. I teach doubled up fourth grade classes (meaning there are about 35 kids in the room). After doing the first portion of the video independently at our seats, we returned to the floor with clipboards, our papers and pencils to do a guided drawing together. I really liked having them watch the video as there were less interruptions. I did pause it every now and then to reexplain or allow the kids to catch up.
Once we were finished drawing on the floor together, the kids had mirrors at their seats. I told them that the guided drawing was a kind of template for them that they should alter and change once at their seats. I encouraged them to really study their faces, freckles, glasses and details and add them to their selfies. Once completed in pencil, they traced over their lines in Sharpie.
I really thought the kids would get further along than this...but they were so into drawing their likeness that I didn't want to rush them ahead. Next up, I'll provide them with some pattern idea sheets for them to draw their designs before adding color.
I really can't wait to see how these turn out!
I have noticed that teaching self portrait drawing to older kids is pretty tough. Not cuz they can't handle it but because they are so hard on themselves! So I really REALLY discourage any erasing until they are back at their seats. I tell them that it is "just practice" and that they are learning something new...and to go easy on themselves. Only when they return to their seats are they allowed to change and erase...but I don't allow them to get another piece of paper. When I had a students say, "I don't like mine," I asked, "what do you not like?" When she replied with an "everything!" I told her to pick one thing she liked the least and we worked on that. Then we picked the next thing and we worked on that. Within five minutes, she was much happier with her drawing. It's a process with this age group. You gotta do what works without letting them throw in the towel.
Next up, we'll add patterns of things that interest us (I used paint splatters and music notes in mine to give them some ideas) as well as color.
I'll be sure to share our progress! Until then, feel free to use this video and lesson in your art teacherin' world. I'd love to see what your kids create! Shoot me an email if you do.
Ah, yes. Kindergarten. If it's one group of people that have my complete respect, it's the kindergarten teacherin' crowd. K-town comes to us all over the place: some have been in school, others have not; some know how to follow directions, others would rather roll around the floor (I mean, who wouldn't). You get the idea, it's a Big Ole Mixed Bag o' Fun. Ish. Ness. So I thought we could talk about that herd of cats we call Kindergarten in this week's 101. AND I thought I'd give you a sneak peak into a 5 minute chat with a group of 'em:
What works the best for me: Call and Response. I use that trick with EVERY grade level, kindergarten up to fourth. It really works wonders for grabbing attention and getting kids to remember vocabulary, directions and steps to follow. Here's how I introduce it to the kids:
With kindergarten, I really like the happy/sad board. It's an instant visual and it's something easy I can keep up with. Again, I use it with everyone...but I notice I reference it most with the littles. By the time they are older, I hardly use it unless one of them reminds me. And then I'm all, "sure, would you mind keeping track of it for me?" I'm all about the distribution of power (aka, getting someone else to do my job). Here are the deets on that:
Another method I use with the wee ones is palming. I mention this in the video but you can see it in action here:
Because we're chatting about kindergarten in this here post, I thought I'd share my most favorite lessons as well. If you've been around here long enough, you've heard my Larry the Line poem that I start my kindergarten school year with:
Larry the Lines leads us to our very first art project: Line Sculptures. From there we continue with a unit on line. You can find that entire unit here.
I love using books with kindergarten, as I know many of us do, and one of my favorites is Mouse Paint. It's a great way to introduce color theory...and review lines to create shapes like these sweet mice!
When it comes to clay, I LOVE introducing textures into clay creating. Check out these fun birds! We also had a lot of fun creating these clay butterflies. I'd love to hear what some of your favorite kindie lessons are. They are a group that is NEVER short on excitement...and if you can harness that, you've got gold. By the way, I often update my YouTube account before I share here so if you subscribe, you can get the latest, if you like!
Happy Halloween, kids! If you are a parent or a teacher, bless you. You know that this day is just completely a wash as the kids are gonna either be jacked up on sugar or hitting some intense withdraw. Either way, brace yourself. Might I recommend digging the chocolate outta the treat bags and holing up in a dark, quite place for the next five days? Cuz things about to get real.
While you're off in a quiet corner with your Snickers and Reese Pumpkins, how bout getting your crafting on? That's what I did this weekend when I discovered the wonderment that is cheesecloth and starch (wow. Did I really just refer to cheesecloth and starch as "wonderment"? I really need to get out more).
In my previous post, I mentioned that I went on a wee thrift shop bender this week. Don't you judge. It's how I cope with the struggles of being a crazy art teacher. I'd already had it in my head that I wanted to spookify some bottles for Halloween. I'd seen some online tutes featuring cheesecloth and starch that was used to antique bottles. When I was poking around at the thrift, I spotted several items I thought would be fun to cover in cheesecloth (again, not a sentence I thought I would ever say but whateves). And these sweet Made in China figurines were one of 'em.
And Holy Candy Corn! If you don't mind me saying so, look at that transformation!
For this fun craft, all you'll need is over-priced cheesecloth (why you gotta charge $3 for this stuff, craft stores? WHY.) and liquid starch. I prefer Sta-flo because I appreciate their abuse of the English language. Keep that Flo, Sta. You'll also need whatever grubby goods your thrift store can provide and an active imagination. Here, lemme show you:
Like, whuh?! Did you hear how excited I got? I think I mightah said "the possibilities are endless" about a half dozen times. I repeat: I NEED TO GET OUT MORE.
Because we are friends from way back, I ain't even gonna lie to you: covering this thang in el queso-cloth (OMG, I'm totally gonna refer to cheesecloth as that here on out just so you know) was not my most favorite thing in the world as it had a lotta nooks and crannies.
There was a lotta cutting and shoving el queso-cloth into parts unknown. It didn't take long...but the slick surface of the statue made the cloth slide around a bit which was not cool. Once I got it all in place, I set it in front of a fan and it was dry within an hour.
Creep-tastic. By the way, my initial idea was to simply paint the faces of these guys with skulls, a la el dia de los muertos. However, as I was checking out at the thrift store, the gal behind the counter said, "I think you should do the Bride of Frankenstein and Frank" and I was all, "OMG. YOU ARE A GENIUS. YES!" So, shout out to Our Thrift Store and their imaginative staff.
From there, I covered the entire thing in white acrylic paint and plopped it back in front of the fan.
And then the painting commenced. Y'all might remember that I have a thing for The Bride. I really wanted to keep her in a range of gray as a nod to the black and white film. However, I thought Frank deserved a punch of color so I went with a purple and lime green palette for him.
And I kinda love how they turned out! In an unrelated side note: I ALWAYS have Netflix running on my laptop while I'm working. I just finished Sons of Anarchy (late to the party much, Stephens?) and I'm hungry for a similar show. I just started Peaky Blinders which is like the post-WWI sister show. What are y'all watching now that I need check out?
Just a lil detail of the sides. Seriously, this was such fun. The thrift store had a ton of these figurines...I so wish I had another month of October.
I guess I'll just have to find out what el queso-cloth and starch can do for my Christmas decor. Until then, Happy Halloween, y'all!
So by now y'all know that my love for Halloween and Celluclay run strong. I discovered my love for Celluclay this summer when working on that clay book I wrote (stay tuned, we're getting closer each week to being finished with it and I'm so excited!). About a month ago, I used Celluclay and old trick or treat buckets to create these retro-inspired Halloween decorations. Then I went all Zombie-fied and made these Walking Dead Head Planters. This time around, I decided to create a Book of Spells that serves as my treat holder for all the trick or treaters!
And I learned how to make a gif. My apologies in advance.
When the hubs and I were in Orlando last month, we hit The Wizarding World of Harry Potter which is INSANE. Everyone should go there, it should be required by law. It is so incredibly inspiring and wonderful that you just gotta stand back and soak it all in. With a Butter Beer, of course. Now, I've not read any of the Potter books (much to my husband's dismay, he's a HUGE fan) but it's on my To Do. In the meantime, I'm just going to continue to be inspired by the park, the movies and create Halloweenie-themed stuff like this.
So I went to the thrift store on Monday with the intention of scooping up a large hardback book. I already had reservations about the idea because I thought the water in the Celluclay would cause the book cover to warp. But I was all set to cross that bridge when I got there (cuz planning head really isn't my thang).
But what was waiting for me at the thrift turned out to be much better: this old jewelry box! Best part is that I can use it tomorrow to serve up some treats to the neighborhood kids. The jewelry box does have that special old-lady-perfume-smell but I'm pretty sure no kid is gonna turn their nose up at a pack of skittles that smells like The Golden Girls. And if they do, they don't deserve to taste the rainbow anyway.
So just what is Celluclay and how do you work with it? I made a video when creating the pumpkins that walks you thru the simple steps. All you need is the clay (which can be found on Amazon and at your local craft joint) and water.
I did try to air out the old-lady-perfume smell but it really doesn't bother me. Since I wear a lotta vintage, I'm kinda used to smelling like a lil ole lady. Shoot, man. I kinda am one!
Now usually when I go about creating, I start with some sort of plan in mind. This time, I decided to live life dangerously and just start slapping the Cellulclay onto the surface.
Disney's the Haunted Mansion and it's silly/spooky ghouls were what inspired the faces on both the spell book and my potion bottle below.
I worked on this guy a little each night. It took some time to cover the entire book, the sides and the binding. I was worried it wouldn't have enough time to dry so I placed it in front of a fan during the day. Also...the great thing about Celluclay is that you can continue to work on it and add to it even if the other parts are dry. This is totally different than kiln fire clay. I dig that about Celluclay. Also, I made a huge batch of the clay for this project. When I wasn't using it, I just wrapped it in plastic wrap and stored it in the fridge.
Once dry, it got a coat of black acrylic...and from there, I forgot to snap any more photos of the process. Sorry, my bad. However, I used the same dry brush technique that I've used in the other Celluclay projects I've shared.
I had a lotta fun with the details...like this little knob that was on the side of the box that I transformed into a shrunken head.
Please pardon the cat hair, we save it for the magic spells.
So, like I said, I started this on Monday. On Tuesday, I went to a different thrift store (guess who has a shopping problem? GUESS.) with the idea in mind that my book needed some potion bottles. I had seen folks using cheesecloth and liquid starch for projects and I was excited to give that a go for some bottles. However, when I got home, I realized that I had forgotten the cheesecloth at the grocery (anyone else make grocery lists and then LEAVE THEM IN THE CAR?! My life). But I was so excited to get started that I used my left over Celluclay to create a matching bottle for my book.
Boom! Take that grocery-list-lookin-all-smug-sitting-on-my-dashboard.
I started with this funkily shaped bottle (yes, funkily is a word).
After hastily sketching my idea on the bottle, I set to work. This took all of 15 minutes to create. I put it overnight in front of the fan and started to paint it this morning.
This time, with photographic evidence! Try to ignore the pj pants who are making a feature in this photo. I stay in pj's during the weekend. True story.
Painted black. Y'all, I gotta tell you, I am loving this crafting outside thing. The weather is perfect and great for drying.
Dry brushed it with some gold and done! This was one of those crafts that looks complicated (says me) but went off without a hitch. I really would love to do something like this with my students sometime. Sans skull and crossbones, of course.
I love how they look together. Just a coupla goofy guys.
And a weird chick. But you knew that already.
Mitch had the idea of putting some pillow stuffing in the bottle for smoke. He's so clever.
Of course I had to see if it was really poisoned.
It wasn't...but, seriously, what used to be in that bottle?! Yuck!
I actually have TWO more Halloween crafts to share with y'all after this one...so be sure and pop back by soon. I just might have to do a double header tomorrow.