Wednesday, September 4, 2019

School-Wide Collaborative: Positive Four Letter Word to Describe Our School

Every year, I like to start my students with a school-wide collaborative. In fact, you can find a ton of our back to school collaboratives right here, just use that search bar! You can also see my third grader's school wide collaborative here. 
To kick off the school year, on the third day of art, all of my first through fourth grade students began painting. I picked up packs of large paper shapes from IKEA on a recent trip. Any construction paper would work great though. The paper from IKEA was thin so it wasn't the best for painting. It did, however, give us a variety of shapes to paint on. 
If you want  to hear more about my painting setup and how I introduce painting to all of my students, you can check out this blog post. Here's the break down of the lesson (keep in mind, my classes are 30 minutes in length):

Day 1 and 2: Painting! We painted patterns all over our letters. My focus for those two days was introducing my painting procedures.
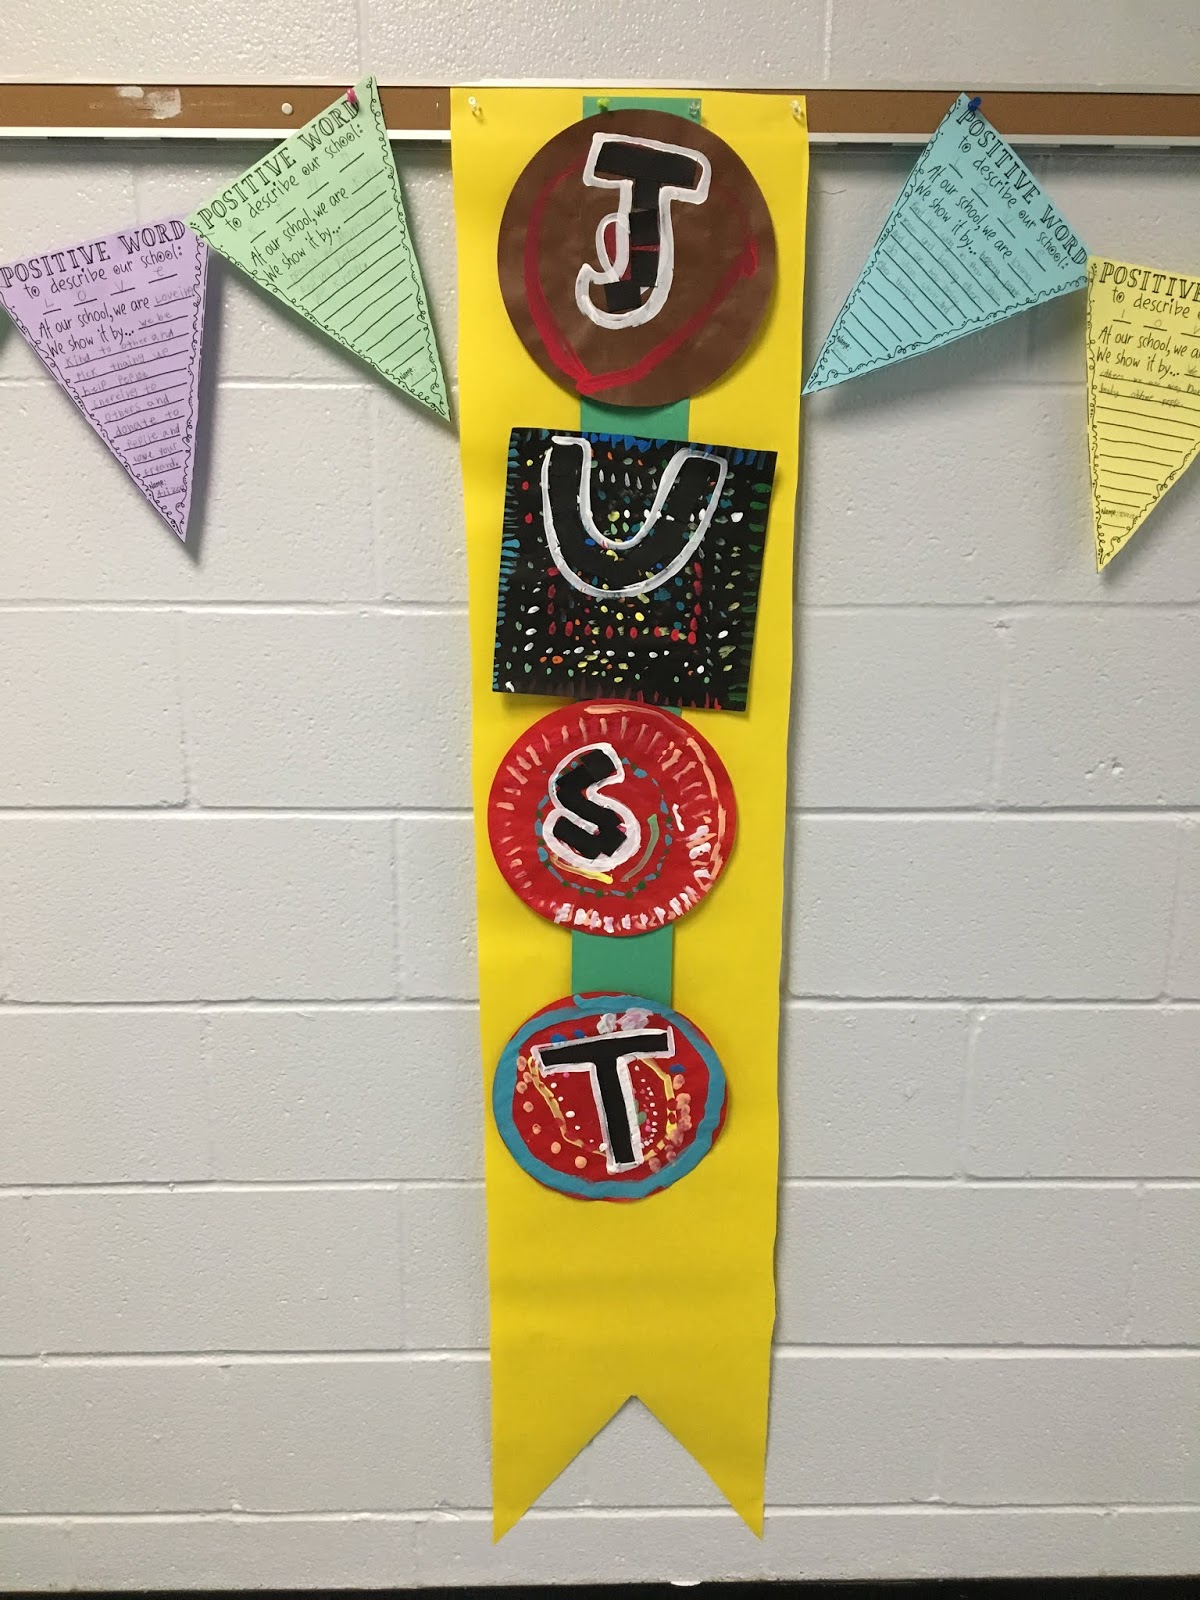
Day 3: Working together in table teams, the teams of four kids had to come up with a positive four letter word to describe our school. Each table team had a dry erase board and had to write down three things: what their word was, who was going to construct what letter and what color of paper they were going to use for the letter. 

The letters were created from strips of paper. Students who finished early helped their teammates. Any tables that had fewer than four kids still had to create a four letter word...they just had the help of early finishers.

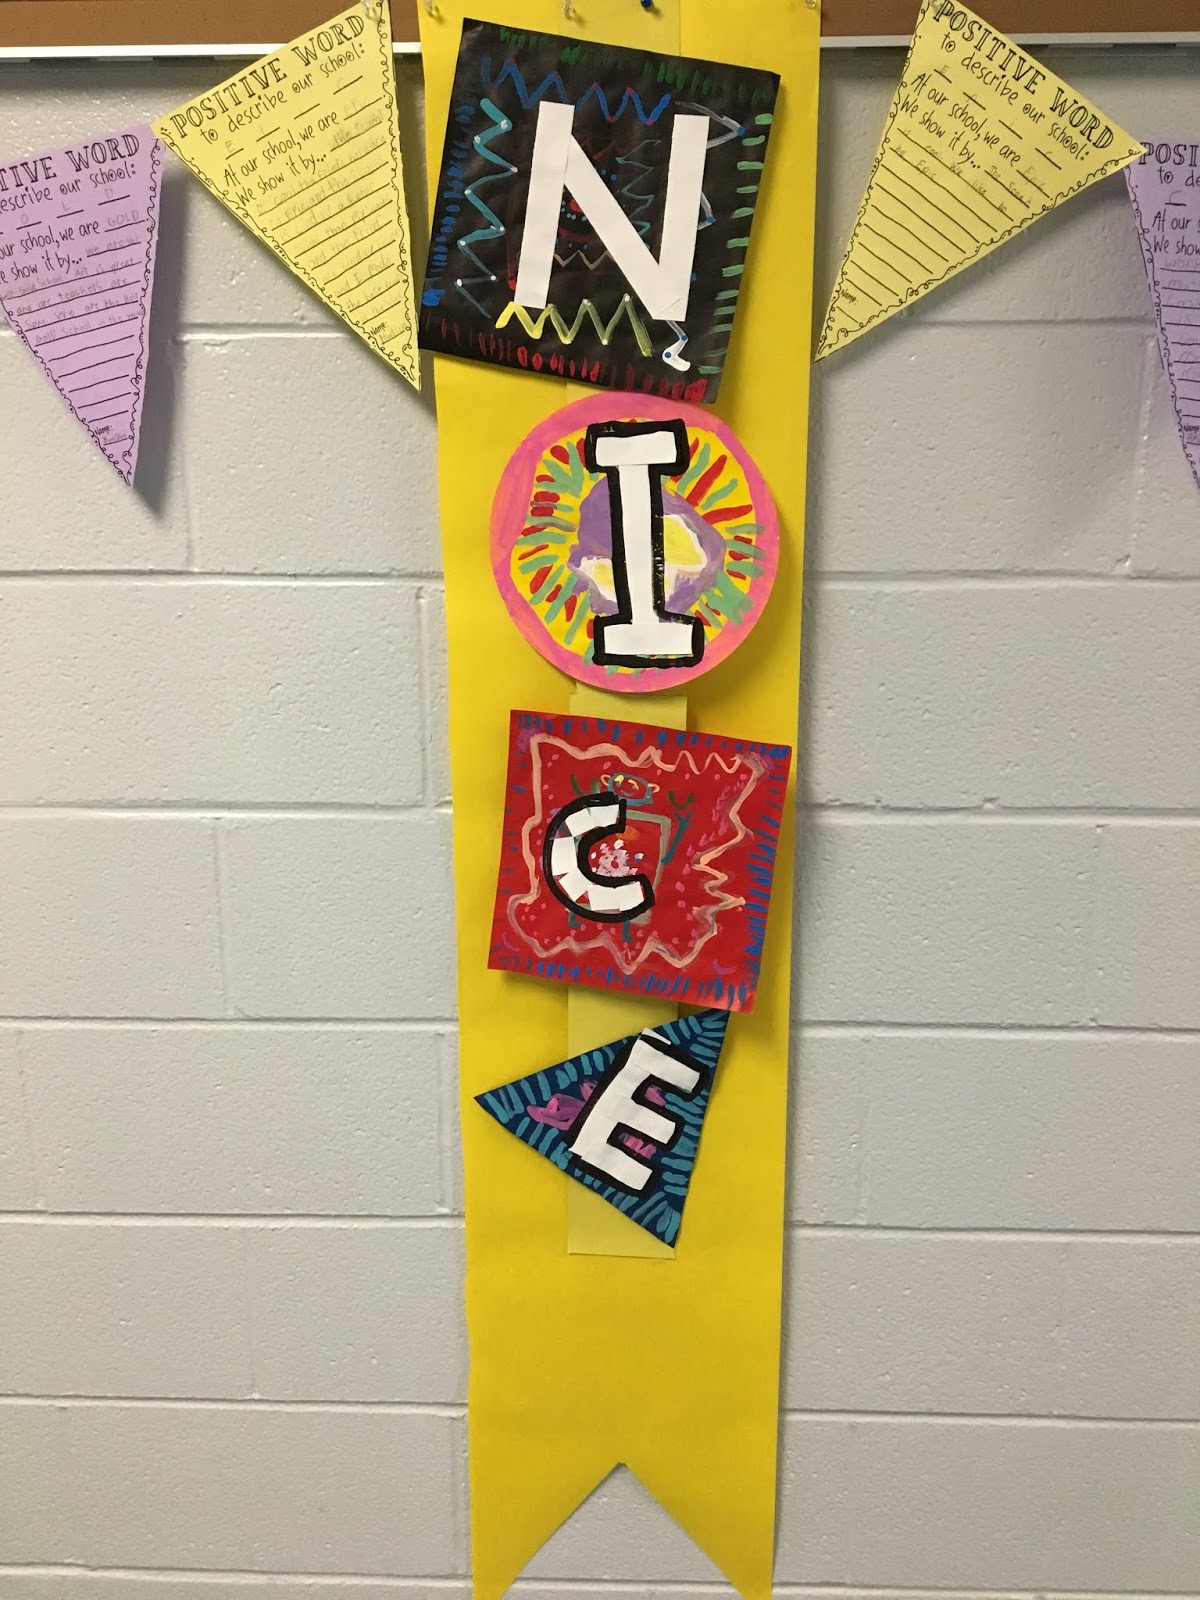
Day 4: Assemble the word! For this, the kids again worked in teams. They had to glue two long strips of cut posterboard together Then they laid out their words and glued it down. This only took a short amount of time. Once complete, they wrote about their chosen word!
 If you are interested in doing this lesson and would like a free copy of this bunting, here you go! 
To display, I stapled four triangles together to create a pattern bunting. 
 The bunting was then hung between the displays.
Because I didn't want their words to get lost on the boring wall colors, I cut out flags to go behind them. Yellow and blue are the colors of our school. Yes, that was time consuming but I really like the look. Also, the bunting and the integration of writing in my art room makes me so happy!
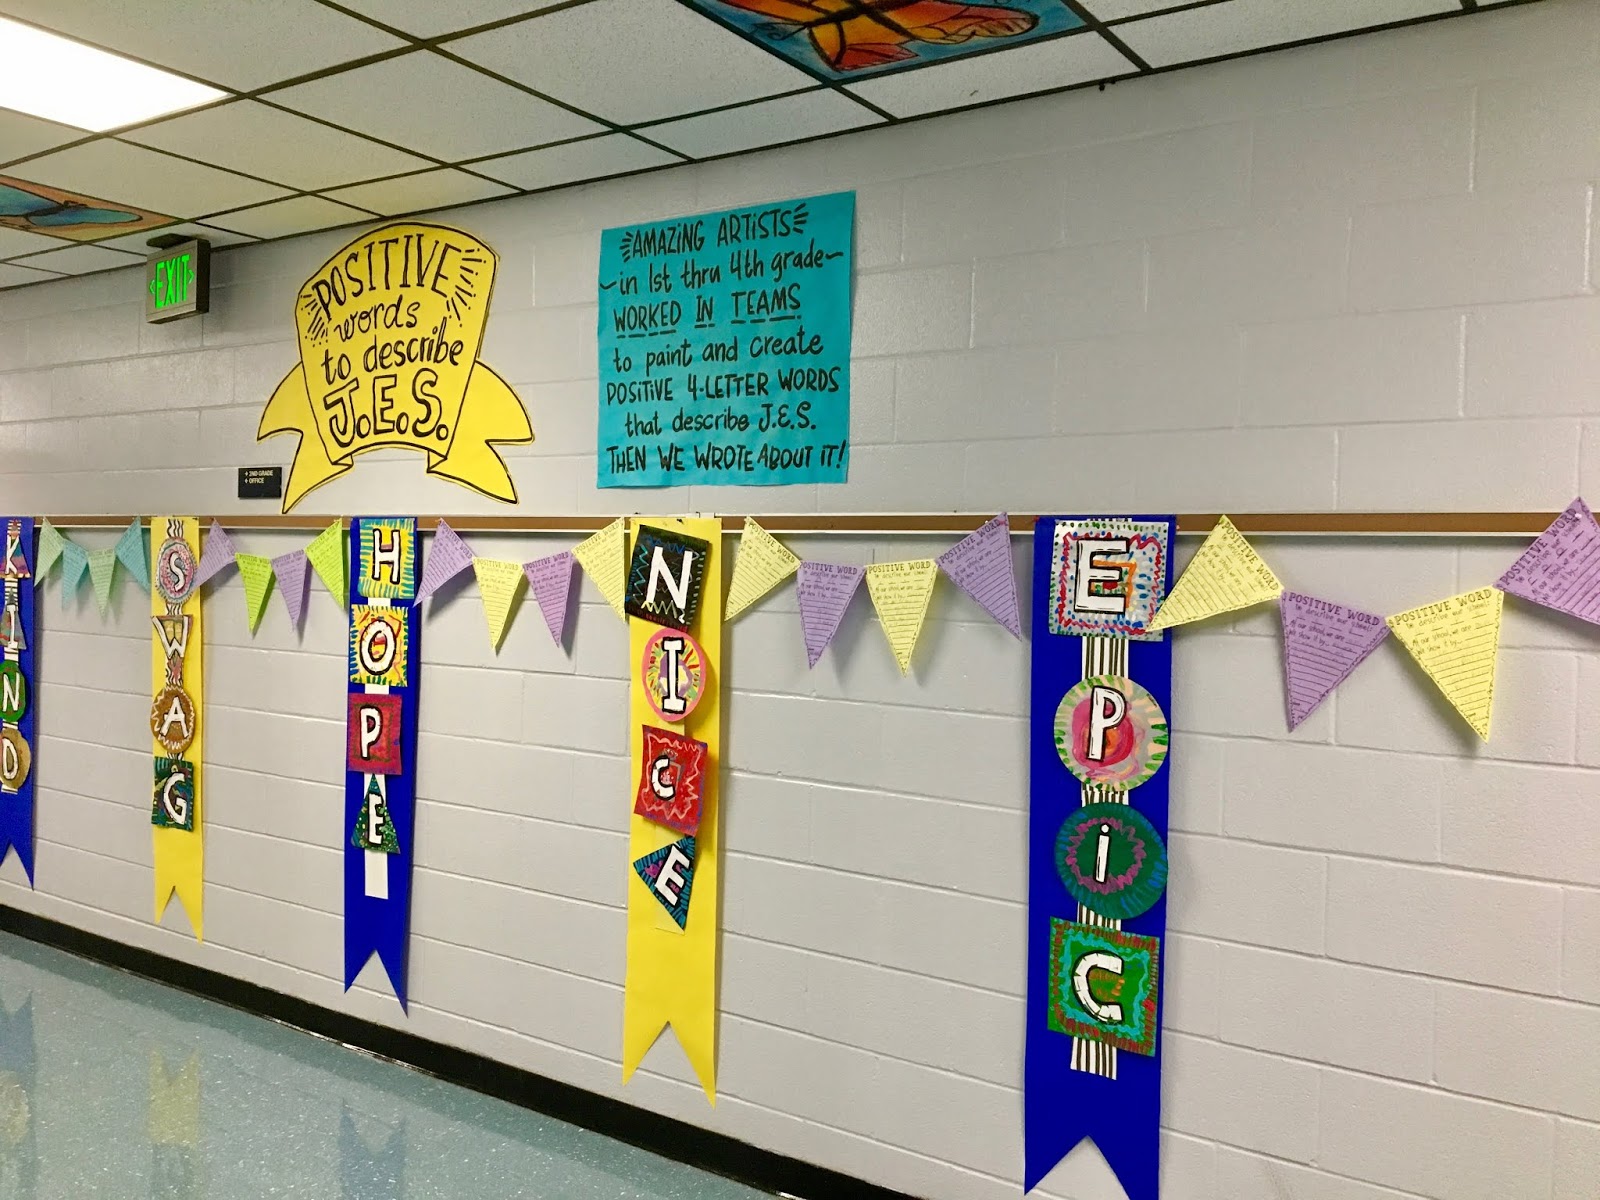
FOR FIRST GRADE: Okay, full disclosure, getting first graders (who are really still kindergarteners) to dream up a word and create it was gonna be super difficult. So, instead, I assigned each class a word that we voted and agreed on. One class did NICE while another did KIND. These were then hung by string in the hallway.
 I was so impressed by the artists during this lesson. The words are now hung throughout our school. The message they send really makes me happy.
 The kids dreamed up so many wonderful words. They did outline the letters in the opposite color of paint once complete. 
 I love the choice of SWAG. I also had one group come up with the word ZANY which I totally hung by the art room door!
 If you do this lesson, I'd love to hear from you! I can think of some things I would change...but for now, they look lovely, especially for our upcoming Open House.
 And it got all of the kids painting nearly right away!
 This would be the perfect project to use up any scraps of paper too. Those papers could be used as the paper for the letter making or the background shapes. 
 And how we have moved on to our sketchbooks. I am loving that lesson too! More to come on that soon.
 The ramp that leads to my room created some difficulty when it came to hanging these. 
 So I made sure to hang them a little higher...and at varying heights so they could be seen. This way of hanging them ended up being my favorite!


Thanks for letting me share this fun lesson with you all!
 photo signature_zpsd10b3273.png

Monday, September 2, 2019

DIY: Spoonflower Student Artwork Dress!

I've had it on my mind to print my students artwork on fabric for a very long time. I've done just about every variation of kid-created fabric for dress-makin' such as having them color IKEA coloring sheet fabric which I then stitched into a dress (more details on that dress here): 
Or the time I found the fabric of picture frames! I had my students draw their self portraits on the fabric before creating that into a dress. Both of these dresses were created with Graffiti fabric markers. They've seen plenty of washing and, while the colors have faded a bit, they still look pretty vibrant. And the kids absolutely love them. More details on that dress here. 
But the idea of creating fabric from student work is one that I've been toying with every since hearing about Spoonflower. In the past, I've ordered fabric from Spoonflower and made a couple of dresses with designs created by artists. 
You can check out the details of this dress and fabric here
And details of this dress can be found here. Having ordered fabric from Spoonflower before, I knew I liked it. The fabric I ordered has a good thick quality which is great for the kind of full dresses that I like to create. So, this past spring, just before I hung some artwork up for our art show, I laid a bunch of it out on the floor and took a couple of snaps with my camera. After the art show, I uploaded the photos to the Spoonflower website and was shocked how stinkin' easy it was to rearrange the works of art to create the desired pattern. 
 In case the artwork on this dress looks a little familiar to you, it's from one of the more popular lessons on my blog: The Chris Uphues Lesson for All! Here's a peak of just a few of the works of art based on that lesson:
Take a look at the work of art above and then the print quality below. Pretty amazing, right?!
 This weekend I decided to cut into this Chris-Uphues inspired, kid-created fabric and create a dress using one of my favorite vintage patterns. Now, I did use a circle skirt pattern for the bottom...so only the bodice was used for this dress. 
Here's a little peak at some of the other fabrics I had made with Spoonflower. I cannot wait to make them into dresses too. 
 Usually I'm all about the big belt but when I tried my big belt on with this dress, it seemed to take away from the print. So I went with a hot pink ribbon for the belt instead. 
 Not wanting to waste even a scrap of this precious fabric, I decided to create a couple bow to be featured at the base of the shoulder straps. 
I'm so excited to wear this dress to school and share it with my students. Big thanks to Spoonflower for working with me on this fabric-making adventure and to Chris Uphues for his constant inspiration. 
 photo signature_zpsd10b3273.png

Monday, August 26, 2019

In the Art Room: Taming the Kindergarten Beast!

 Well, today was my third art class with my kindergarten friends. If you wanna see what my first day looked like, you can visit here.  I always start my school year with kindergarten the very same way: get 'em in my art room, get them to learn the "cmon in and sit down on the floor" procedure and GET THEM TO MAKIN'! On that first day, they are just too young and curious and excited and afraid and ALL THE EMOTIONS (same for their art teacher!) to be learning rules and routines. So we save that for the second week of art. Instead, we begin our line unit with our line sculptures. You can check out our first day here: 
The second day looks very similar but I introduce how to make a zigzag and a spiral line. On the final day, I start learning a little bit more about the class and how they work. I learn the names of the students by the third day and start easing them in to our routines. One of the things I introduce them to are our Quiet Critters. This idea is from my amazing art teacher buddy Mia! Give her a follow! 
You can read more about Quiet Critters here (not my original idea!). They really do work...if you "believe" they work. Meaning, you gotta sell 'em hard to the kids so that they'll believe in them too. I use these with my kindergarten kids but even my first and second graders dig them. Shoot, even my fourth graders ask about them! They are a great way to help me establish the calm and kinda-sorta-quiet classroom I strive to have. I mean, I love for my students to chat with one another...softly. I want them to be engaged in conversation...without shouting. It's a skill that has to be taught and learned. And these wee friends do the trick!
Quiet Critters come in all shapes and sizes. In fact, these little guys are just made from extra large glitter pompoms (found at the craft store), felt for the feet, googly eyes and pipe cleaners. But even a collection of stuffed animals found at the thrift store would do the trick. I mean, really, anything you can hot glue a pair of googly eyes on will work. I'm not kidding! But remember, it's all about how hard you sell it. I also tell my students not to touch them. They are SUPER shy, you see. Because so many of my kids have an Elf on a Shelf at home, they are used to that concept. 

Here's a video of our third day of art. On this day, we are finishing our line sculptures to take them home. We review the word sculpture, the ways we learned to create the lines and were introduced to our Quiet Critters.
Now that we are finished with our introductory art lesson...it's time to start sharing with my small artists the art room rules and procedures. Next up we will be learning how to play the Clean Up Drums and Clean Up Gong! I'm ready for that excitement and so are my students. More to come on that!

 photo signature_zpsd10b3273.png

Tuesday, August 20, 2019

In the Art Room: First Day of Art with Kindergarten!

This week I've had kindergarten for the first time! They are all kinds of wild, crazy, fun and squirrelly! I recorded a class on their first day and thought I'd share it with you. We ALWAYS do these paper sculptures on the very first day. They LOVE it, everyone is successful and it's great fun. Here's a video of me teaching this lesson:
If you want all the details on this project, then be sure and check out this blog post! I go in to great detail on just how I go about teaching this on the very first day. 
Y'all might recall that this is a lesson that I did with everyone last year...but I did it as a Getting to Know You activity. You can read all about that here. 
I have a lot to say about kindergarten as they are the toughest but funnest (says me) group to teach. You can read more about kindergarten in my art room here. 

After two 30 minute art classes on these sculptures, we jump into our LINE unit! You can read all about that right here! 

 photo signature_zpsd10b3273.png

Sunday, August 18, 2019

In the Art Room: Introducing Painting to Children

This week, all of my students in first through fourth grade started painting. It was their third day of art (you can see how we spent our first two days of art here and here). Keep in mind, with 30 minute art classes, cramming is as much as I like is tough. Our focus on this first day was to learn my painting procedures...all while making beautiful art. I won't go too much into it here as I have a big ole podcast episode all about it. Take a listen:
 If you are like me, you wanna see how the lesson is taught. So I recorded myself and I thought I'd share with you. What I always learn when watching myself teach is that I TALK TOO MUCH...but on that first day of teaching painting, there is so much to learn! So here you go:
On my Instagram this week, I've been sharing a lot of my painting set up and supplies. Because I got a lot of feedback about those shares, I thought I'd create a little Art Teacherin' 101 video all about my favorite supplies for painting: 
From here, my students will spend their second painting day doing a lot more painting and with a lot less talking from me. On the second day, I just do a reminder of our procedures and what it is we are working on. By the way, we are painting those shapes you saw in the first image. I bought those packets of precut shapes at IKEA. I initially thought they were just $1.50 a pack but they are actually $7 a pack with about 80 precut papers inside. Not the bargain I had thought it was. 
 We will be using those precut painted papers for a collaborative piece that I hope to share with you soon. If you watch the videos, you'll find out all the details on these LIDDED ice cube trays (where have you BEEN all my LIFE, trays?!). 
 All the heart eyes, people. All of 'em.
And my second favorite art supply for painting with children, these doggie dishes! Like I said, many more details on my painting set up and supplies in both the podcast and the video...so in an effort of not repeating myself, I'll stop yammering and let you take a listen and a looksee. Thanks, y'all!

 photo signature_zpsd10b3273.png