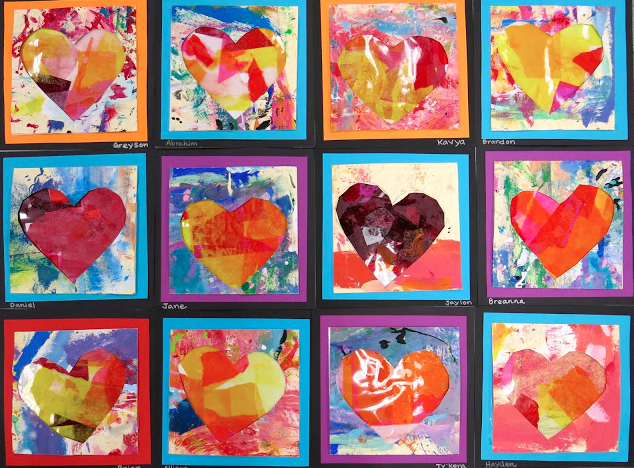
Well, hello lovies! In this blog post, I thought I'd share with you 14 of my very favorite Valentine's Day inspired lessons...perfect for these chilly and cold months. Let's let warm fuzzies abound in the art room!
To find the lessons, just follow the link. Many of them have a video to share with your kids. Also...several of them are sub plan videos! Perfect if you have to take a day. I know I could use one.
First up are these sweet Jim Dine-inspired heart sculptures created by my second graders. We used Celluclay and aluminum foil to make these beauties and the kids loved making them.
Next up are these amazing LOVE prints created by my first graders. We chatted about Robert Indiana before diving into these. We had a whole lotta printmaking fun with this one.
Last year, I did this lesson with my second graders. They were able to choose their own "kind" four letter word (we had: nice, kind, love, glow, hope, good, etc.) and used strips of paper to create the letters. Those turned out so fun.
First grade artists created these huge Romero Britto-inspired hearts last year with bleeding tissue paper and paint sticks. We made these on huge 18" square sheets of paper.
Speaking of first grade, here's a peak at what mine are working on right now...weaving! Heart weavings that we'll put together to create a faux quilt. This is one of my favorite lessons but mostly because I do love to teach weaving.
Chris Uphues is one of my very favorite contemporary artists to share with my kids because 1. he's the nicest and 2. his artwork speaks to them. It's so happy! My students adored this lesson a couple years ago!
If you need a quick one-day lesson that will introduce your kids to a new artist, you might want to try this one on for size. It's inspired by J. Goldcrown and all you need is black paper and chalk for amazing results.
One year, we were inspired by Peter Anton's fake food sculptures to make some box of chocolates of our own. Third grade thought this was the coolest project ever.
If you are like me, you do long art lessons...and then need a shorter one to pick up momentum again. I think my students might be the same way. This lesson is a quicker with beautiful results. Here's what we did with the paper after we cut the hearts how: filled them with a video of tissue paper!
And here's what we did with the hearts we cut out. So cute, right?
This lesson is similar to the first I shared except that there are wings added with plaster. I'm thinking of doing this lesson with my third graders super soon...just need to work out the specifics...but I'm sure they will love it. Video details and more here.
Need a sub plan? I did this Romero Britto inspired collaborative with my kids when I was out on jury duty. Lesson and video right here.
Need something big and happy to spread the love? My kids EACH contributed to the Our School has Heart mural. Visit this post to see what each different grade level created for this mural from embroidery to painting to sculpture and needle felting!
My fourth graders tackled this lesson a couple years ago right after they finished the following sculpture lesson...
Boy did we have a ball with this lesson! A super fun sculpture project for the kiddos.
This lesson I created a little while back for my kindergarten and first graders. We loved the printed hearts and the fun guided drawing animals. Video lessons for each critter.
Looking for a fun way to introduce your kids to four contemporary artists who use hearts in their work? This video lesson just might be for you!
Oh! And if you are looking for something to do with your faculty and staff to bring the love, you might want to check out these our Clay Hearts with Wings...a huge hit with my coworkers. Video too!
Okay, y'all...that was WAY more than 14 projects so have fun!


