Showing posts with label how to draw. Show all posts

Sunday, December 1, 2024

Let's Draw (and Paint!) a Snow Globe

Since Prang came out with their new round paper, I've had so many ideas about what can be created in a round format. Last week I shared this wreath project...and today I thought I'd share a Snow Globe lesson with ya! I even created some free downloads for you to use. All I ask is that you only use them in your creative world and don't copy then and sell them on Teachers Pay Teachers (yes, it happens. A lot.)

Now, this isn't my first Snow Globe lesson...I did a Snow Globe City project with my fourth graders that's a little different. If you'd like to check that out, go here.

Also...stay tuned! I got SO MANY ideas on how to add color the background of these Snow Globes that I have two more videos and lessons coming your way. So...the best thing to do is to subscribe to my YouTube channel. You can do so here. I have three more videos for kids that will be landing there this week!

Now...on to the video:

Yay, so fun!

Tap this link for the free download to the Snow Globe sheet
And...I'm not just sayin' this cuz I work with Prang BUT...their markers, which I never used before working with them, are simply the best! They are heavily pigmented and work really will with this type of painting-without-painting type of project. 


AND...just a reminder, if you'd like any of my books as Christmas presents for teachers, friends or the young artists in your life, might I recommend you purchase them sooner rather than later. This way they will (fingers crossed) arrive in time for the holidays. Chat soon!

Read more »

Monday, October 30, 2023

Let's Draw! Candy Corn...that's also a Vampire!

Let's Draw! A...Vampire Candy Corn because...why not? 

Let me show you how in less than two minutes:


See? Wasn't that super easy and fun?! 

Want to draw more Kooky Candy Corns? Well, just tap the link for a download to this drawing sheet and enjoy!
Read more »

Friday, May 8, 2020

Snacktastic Chefs Week: Salt Dough Pizza and 3-D Cake!

 Alright you snacktastic chefs! Here's a little bit of a round-up of our projects from Wednesday and Thursday. In case you missed, we made Salt Dough Pizza! Here's the list of supplies:
And here's the video:
On Thursday, we made cake!
 All you need are the following supplies:
I'll show you how to draw both of these cakes right here:
Today we are BAKING! It's important to set that butter out about an hour before I go LIVE so it is softened. You can bake cookies with me on Instagram, Facebook or catch me later on YouTube. New videos are uploaded to my channel multiple times a day so you might want to subscribe!

 photo signature_zpsd10b3273.png
Read more »

Thursday, April 30, 2020

Wizard Week: Let's Draw a Wizard's Castle!

What a wizard-y wonderful time we had yesterday when we learned to draw these castles! If you missed out, just grab these supplies:
 And follow along with me right here:
This was such a wonderful review of our elements of art!
And here's what we're creating today! You can follow me LIVE on my Instagram, on Facebook or catch the afterparty on my YouTube channel
 photo signature_zpsd10b3273.png
Read more »

Tuesday, April 21, 2020

Outer Space Week: Astronaut Selfies!

Yesterday we had so much fun drawing ourselves as astronauts! If you missed, don't worry! Here's the supplies we used:
 And here's the how-to video:
I'm really excited about today's art project: Salt Dough Solar System! Here's the supplies I'll be creating with. If you would prefer to use Play-Doh or any other clay you already have, go for it! I'll be sharing how to make the clay at the start of class and then we'll get to creating from there. You can join me LIVE on my Instagram, Facebook or catch the afterparty on my YouTube channel. I'm now adding tons of videos to my channel so you might want to subscribe to create with me. 
See you real soon!
 photo signature_zpsd10b3273.png
Read more »

Saturday, April 11, 2020

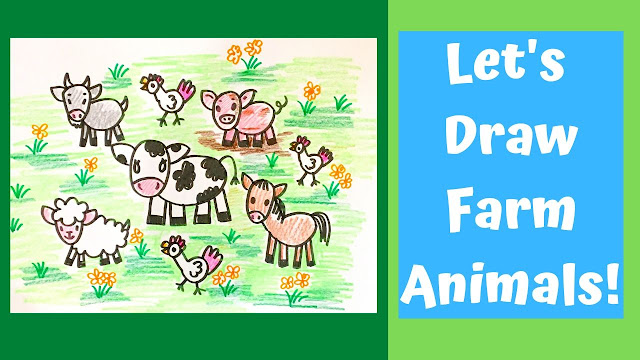
How to Draw Farm Animals!

Want to learn how to draw some seriously cute farm animals! This short video will show you how. So grab your paper, pencil, crayons and markers and let's draw farm animals!
Have fun!

 photo signature_zpsd10b3273.png
Read more »

Sunday, January 21, 2018

In the Art Room: Dean Russo-Inspired School Mascot!

I'm so excited to share this lesson with y'all! My students are loving it, we are learning about a wonderful artist, using new art supplies in unusual ways and making marvelous masterpieces all at the same time!

Our school mascot is the tiger. That was the inspiration behind which animal we created. However, you could do any animal or person for this project. In fact, if you check out the artist Dean Russo, our inspiration, you'll find that his main source of inspiration are animals. Here's the lesson I created for my students...and yours! 
Here are the supplies we used:
Bingo dotters! These are my NEW FAVORITE TOOL in the art room! If you follow me here, you've seen my first graders working with these too. I have had them in my cabinet forever (they come empty) and I initially filled them with tempera paint and water...big mistake. They clogged and didn't work at all. One day, I remembered them and decided to add India ink instead...bingo! (see what I did there?) They work great, are low mess and the kids LOVE them! Check out these HUGE drawings created by my third graders in just 30 minutes!
We did not draw these out first. We had a long chat about Beautiful Oops and just going with the flow...and not getting upset with what we perceive as our "mistakes". Then we just went for it. At the end of the lesson, so the kids could see everyone's work, we all stood on our chairs and took a look around the room. Then we let out a great big tiger's ROAR! 
This week we will be adding color with a fun method: chalk and liquid starch!
Let's first talk about chalk. My absolute favorite is Faber-Castell's chalk. It's bold, bright and works so well with this process.
Please watch the video so you can actually see the magic that is chalk and starch. I learned this trick from my sweet and AMAZING art teacher buddy Jennifer Alvarado. A lot of folks have told me that they have a hard time finding this product. Try Walmart online if you can't find it in the store. 

This will be the second time we've used this method this year. Check out my fourth grader's landscapes...so pretty!
This lesson is super for teaching color theory. These laminated color wheels get a lot of love during this lesson. 
Earlier this school year, I organized my oil pastels in bead containers after seeing a fellow art teacher do this. I will be interested to see just how well my third graders manage to keep these organized without Naggy Stephens having to get on their case. 
 I actually thought the tiger looked good before the pattern. But since that's what Russo is known for, I thought I'd give it a go. I'm so glad I did! I think the kids are going to have so much fun with this part.
As my students make progress on their tigers, I'll be sure and keep you posted. 
 photo signature_zpsd10b3273.png
Read more »

Sunday, October 22, 2017

In the Art Room: Charley Harper-Inspired Fawn Collage

If you follow me on Instagram, then you've seen me share my teacher sample of this Charley Harper-inspired lesson. I filmed the demo a week or more ago...and finally got around to editing it and posting it to my YouTube channel. My plan is to do a series of woodland animal videos inspired by Harper...we'll see how many I manage to complete. I have a tendency to be a pokey lil puppy. 

But enough about that, let's get to the lesson video:
Now, like I said, this is the second in a series of Harper-inspired lessons. In case you missed it, the other lesson is a mash-up of van Gogh's Starry Night and Harper. You can find it here. In this lesson, I'm using the same supplies as I did in the raccoon project. Here's the list:

Faber-Castell Oil Pastels Full disclosure: I work with Faber-Castell frequently and create lessons for them using their supplies. That being said, I do enjoy their oil pastels for a couple of big reasons: they are sturdy. Unlike many other oil pastels I use, they don't break as often. They don't roll! I love that we aren't constantly chasing after them rolling off the tables. AND they are big...some oil pastels are very small and hard to hold for my students. Not to mention, they wear through them quickly. For all those reasons...and the fact that the colors are fabulous...I would definitely recommend these oil pastels.

Brown Watercolor Paint This is for the light wash used on the raccoon.

Texture Rubbing Plates or Burlap Don't have texture plates? Burlap makes for a great rubbing surface!

Construction Paper I love Tru-Ray because the paper doesn't fade and seems stronger than most.

Tempera Paint 

* Tempera Cakes My new favorite discovery: painting with tempera cakes on construction paper. Like, whut?! The colors stay true and I just love it! 

 I just had a GREAT couple of questions thrown my way after sharing this lesson on YouTube:
Fabulous questions, don't you think? Here's my response...
May I have a soapbox moment? I'm aware that there are art teachers who do not like guided drawing instruction. I've grown tired of folks speaking of the right and wrong ways to teach art. I'm also super leery of those who speak as though they have all the art teacherin' answers. Here's a secret: they don't. NONE OF US DO. We're all working with our students everyday, listening to them and trying to figure out how to best teach this amazing creative process to them. There are many different ways to teach art...and it's good to dabble in them all. But it's no good to put the methods of other art teachers down. Okay, soapbox moment over and out.
I will keep you posted on how these Harper-inspired projects progress! Until then...
 photo signature_zpsd10b3273.png
Read more »

Monday, October 16, 2017

In the Art Room: Charley Harper and van Gogh Mash Up!

Hey, friends! I'm excited to share this fun lesson that I've started with my sweet second grade kiddos. Before fall break, I had a couple of classes that were ahead of the pack so I decided to introduce them to Charley Harper (a fave of mine) and a little guided drawing. THEY LOVED IT! They were so excited about their wee raccoons that I decided to create a lesson from their drawings. Feel free to use this lesson in your art teacherin' and creating world...all I ask is that you give me a shout out when you share on your favorite social medial. This helps folks find their way back here to enjoy the lesson as well. 
 For this project, we are using a ton of different media! Here's what we are using:

* Faber-Castell Oil Pastels Full disclosure: I work with Faber-Castell frequently and create lessons for them using their supplies. That being said, I do enjoy their oil pastels for a couple of big reasons: they are sturdy. Unlike many other oil pastels I use, they don't break as often. They don't roll! I love that we aren't constantly chasing after them rolling off the tables. AND they are big...some oil pastels are very small and hard to hold for my students. Not to mention, they wear through them quickly. For all those reasons...and the fact that the colors are fabulous...I would definitely recommend these oil pastels.

* Brown Watercolor Paint This is for the light wash used on the raccoon.

* Texture Rubbing Plates or Burlap Don't have texture plates? Burlap makes for a great rubbing surface!

* Construction Paper I love Tru-Ray because the paper doesn't fade and seems stronger than most.

* Tempera Paint 

* Tempera Cakes My new favorite discovery: painting with tempera cakes on construction paper. Like, whut?! The colors stay true and I just love it! 
I will say this about my latest videos: I'm trying ot make them shorter. For my second grade, I only see them for 30 minutes so I need to keep instructional time brief. 
 Here's a breakdown of the lesson in 30 minute increments: 

Day #1: Drawing the raccoon together. After enjoying some fun Nat Geo videos about raccoons, of course!

Day #2: Light wash over raccoon and paint scrapping for the tree.

Day #3: Creating the sky background. Rubbing and painting with tempera cakes. 

Day #4: Assembling our collage!
 By the way, I am thinking of having each of my four second grade classes create a different woodland animal collage inspired by Harper. So stay tuned for more! I'll be certain to keep you posted on how these beauties turn out. 
 So far, so cute! And what a fun way to review the elements of art. 
 Sharing with the kids information about raccoons also got them inspired to create. I'm telling you, Nat Geo is where it's at!
One of my sweet students did tell me at the end of art class that her raccoon was "not my best work". Bless. The beauty of having a recorded video is that the kids can follow along and make another one the next art class! When drawing together, I very rarely let them start over...it's an important time to teach about a Beautiful Oops! And for them to let go of the notion that their artwork must be perfect. I always tell them that the following art class, if they are still unhappy, they can try again. Often times, they keep their original creation.
Can't wait to see these little bandits complete! 
 photo signature_zpsd10b3273.png
Read more »