Showing posts with label easy art lessons. Show all posts

Monday, January 2, 2023

Favorite Winter Projects for After Winter Break!

Happy New Year! If you are anything like me, you've spent ZERO time thinking about returning to school next week. Like, I mean, my brain has been switched to ANYTHING-BUT-SCHOOL mode. As it should be, I say. Until, that is, the end of break sneaks up on me!
So to put your cute little head at a tiny bit of ease, I thought I'd share my favorite winter lessons here in this blog post. Be sure and tap the highlighted link to each as many feature the full lesson WITH VIDEO. For free, of course. Cuz I'm a giver, y'all. 

Let's start off with some ambitiousness, shall we? If you are feeling up to it, might I recommend this tree weaving lesson? In my book, Stitch and String Lab for Kids I share how to create the evergreen tree weaving but you can also find the details here, just flip the plate upside down!
A lesson that my students love (and everyone who gives this one a shot!) is this Jen Aranyi-inspired winterscape! We create ours on cardboard pizza rounds found at Gordon Food Service (I'm lucky to have one down the road) but they could just as easily be created on white paper! If you are on a cart and want less mess, try doing the sky with the marker/water method, found here!
Want to introduce your students to printmaking? I love this printmaking lesson that could easily be done with kids of all ages. Okay, look, I'm not gonna lie: I often do the same lesson with multiple grade levels. It's much easier with my 30 minute classes that come back to back (with up to 8-9 classes a day). So, go easy on yourself! If that's what you do, just know that I'm right here with you! Lesson details here. 
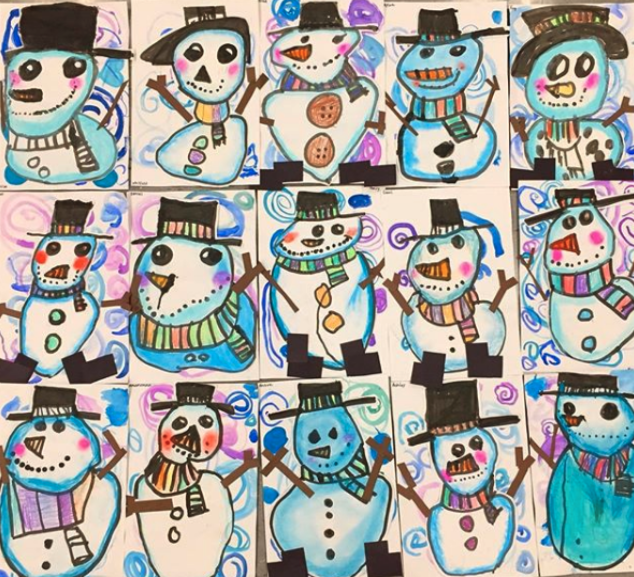
This fun lesson introduces students to a wide variety of media from bingo daubers to chalk to...watercolor! Lesson details with video right here!
I did this project with my first graders and they always love it! We work big, 12X18 paper background but you could definitely work smaller, like even half that size. No bingo daubers? Try Sharpies!
This lesson for my kindergarteners is similar to that of the penguins which leads me to my next idea: do similar lessons! Less supply prep and less worry on your part. This year I have made an effort to clump lessons by supplies. I'm too old to be runnin around like a waitress, y'all. Lesson with video here. 
If you feel like tucking into a long lesson, this one might be for you. You know, there's something to be said for long lessons...it means less planning. You could shorten it, however by just making the snowglobes much smaller! Lesson with video here. 
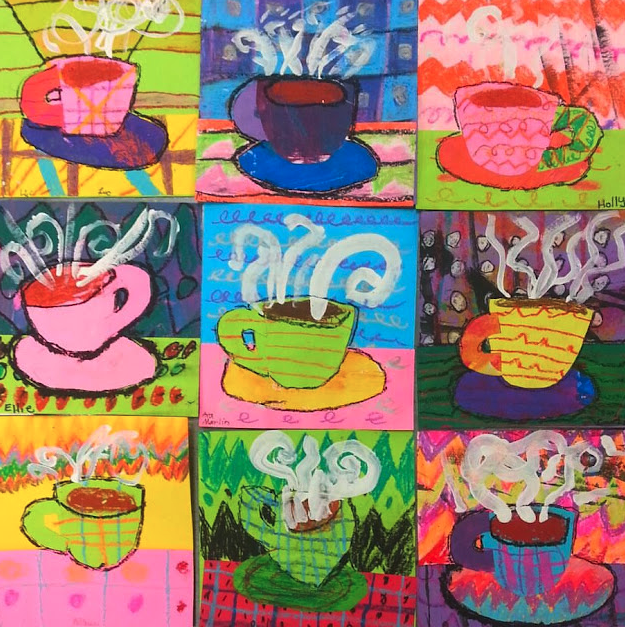
As soon as we return to school, I plan to have my students dive into clay and create clay mugs! Our tradition has been to drink hot chocolate from our mugs once complete. This was inspired by an art lesson we did where we created hot chocolate collages! If you have no kiln, creating these collages and then celebrating with a hot chocolate party may be an idea for you! 
Here's a look at our mugs! Every grade level, except kindergarten, does this every year...so many of them have a collection of mugs at home! We also do another clay project but this one is easily their favorite. Lesson with a couple of videos here.
It's the year of the Rabbit! Did you know? If you need some quick lessons for your younger students, I piled a bunch of them in this blog post, check it out! 
Need even more cuteness? Here's another lesson that your kids WILL LOVE! My students had so much fun with this one and couldn't wait to take their kittens home. Lesson with video right here. 

Okay, need more ideas? Well, I actually have MUCH more! Just visit here where I did a deeper dive into all of the winter-y lessons on my blog. AND if you want to jump ahead and start working on art for Valentine's day, check out this post. See ya soon!


photo signature_zpsd10b3273.png
Read more »

Wednesday, July 8, 2020

Behind My Mask: A Super Kid Self-Portrait!

 Hello, friends!

I have created a lesson for my students and any kiddos who wish to create titled Behind My Mask! When my students return in the fall (and, yes, I said 'when' as I am very hopeful and optimistic), they will be asked to mask-up. We always seem to start out school year with a selfie so I was bummed when I thought of the idea of my students drawing themselves with their best facial feature hidden. And that's where the idea of this surprise drawing came from. Here's a video! Feel free to use and share (with credit given, please and thank you):
I simply used paper, permanent marker, coloring markers and crayons. If I happen to teach virtually this fall, this lesson could also be done by my students at home. 
 This video is a short and simple one...when teaching, I plan to share with my students a variety of self-portraits and talk a lot more about lettering, fonts, skin tones, craftsmanship, good character...the list goes on! As you can see, I'd have a hard time fitting it into a video short enough to capture their attention. So, if you use this video, feel free to add on whatever you wish to include!
No one is excited about wearing a mask but...it's for our safety. And the best thing we can do for our kiddos is to put a positive spin on it, right? I hope to do that with this lesson. Enjoy!
 photo signature_zpsd10b3273.png
Read more »

Friday, May 22, 2020

Let's Draw a Disco Ball!

Got markers? Then you have all you need (well, you'll also need paper, a plate or bowl to trace, a cup of water and a paintbrush too) to create your very own disco ball. Throw some crayons in there and write a little message under your ball as well. This project is fun, easy and SUPER COOL! Let's boogie, y'all!

 photo signature_zpsd10b3273.png
Read more »

Friday, May 8, 2020

Let's Make a Star Pop-Up!

Need a fun project for Mother's Day or any day? For this Glow Gallery star project, I'm using supplies by Pacon. You can shop their entire glow store here for all of your glow art show needs! I am using their Pacon paper and their Creativity Street Tempera Sticks. You can check out the video here:
I did this project years ago as a sub plan, if you can believe that! Here is what we created then and the supplies we used:
You can see more about this project in this blog post. Also, here is the video for this lesson:


Have fun!
 photo signature_zpsd10b3273.png
Read more »

Tuesday, April 21, 2020

Outer Space Week: Astronaut Selfies!

Yesterday we had so much fun drawing ourselves as astronauts! If you missed, don't worry! Here's the supplies we used:
 And here's the how-to video:
I'm really excited about today's art project: Salt Dough Solar System! Here's the supplies I'll be creating with. If you would prefer to use Play-Doh or any other clay you already have, go for it! I'll be sharing how to make the clay at the start of class and then we'll get to creating from there. You can join me LIVE on my Instagram, Facebook or catch the afterparty on my YouTube channel. I'm now adding tons of videos to my channel so you might want to subscribe to create with me. 
See you real soon!
 photo signature_zpsd10b3273.png
Read more »

Wednesday, April 8, 2020

Superhero Week: Onomatopoeia Plaques!

Yesterday was so much fun as we created Onomatopoeia Plaques! And, if you didn't have the supplies to create the clay version, don't you worry. I also shared how to make block letters to create a plaque with paper! Here's the list of suggested supplies:
 And here's yesterday's lesson:
If you want to create with us today, we are making Super Pop Up Cards! The supplies are simple. Below is the list. You can catch me LIVE on my Facebook or on my Instagram at 11am CT. Or you can watch later on YouTube. Be sure and subscribe to my YouTube channel as I'm dropping additional videos to my live art classes. 
See you real soon!
 photo signature_zpsd10b3273.png
Read more »

Wednesday, April 1, 2020

Pirate Week: Pirate Ship Collage

Our pirate-y adventures continued yesterday when we made this fun Pirate Ship Collage!
 If you missed out on the fun, don't you worry! You can watch the video right here. Below is a list of the supplies we used. 
This one is so fun and you can use a lot of recycled materials from around your home! 

If you wish to join us live today, that would be awesome! Below is the list of supplies needed. You can join me on my Facebook page or my Instagram for the live stream. 

Want more art makin' fun? Then you might want to subscribe to my YouTube channel! I'm uploading new videos almost daily. 

 photo signature_zpsd10b3273.png
Read more »

Friday, March 27, 2020

Zany Scientists! Creating a Lab and Making a Magic Potion!

Wowee! Did you join yesterday's Zany Scientist session? Well, it was so fun. I have to say, the science experiment was my favorite one yet! You can grab these supplies:
And then you can follow along and create with me right here:
Today is our very last Zany Scientist day! Can you believe it, the week has flown by! You can create your very own clay with me by gathering up these supplies:
Not sure where to join me LIVE? You can do so on my Facebook or my Instagram. Or you can catch the videos later on my YouTube channel. Be sure and subscribe so you don't miss a single one! 


 photo signature_zpsd10b3273.png
Read more »

Tuesday, December 23, 2014

In the Art Room: 4th Grade Snowflakes

So this lil repousse snowflake by my fourth graders just might be the fastest art project we bust out this year. Not that I'm bragging. I do believe those canvases coulda used a lil more work. However, I needed something short, simple and fun after our super long Mexican Sun/Moon weavings and this did the trick nicely. 
Just like this third grade paper cutting project, we discussed Mexico and the art of papel picado. I stumbled upon a couple of prezies on the art form which was great to share with the kids. I also have several examples of papel picado hanging in the art room so they could get the idea. So our first course of action: Cut some paper designs (I hesitate to call these "snowflakes" as they don't exactly meet the criteria but whateves).
Once the kids' designs were cut, they brought them to me where I placed them on a piece of 5" square matte board that I'd ready cut and doused in spray adhesive. Another hit of spray adhesive and a piece of 7" square aluminum foil was placed atop. The kids were instructed to return to their seats, fold the excess foil to the back and massage the surface with their finger tips only (no nails, y'all) until their design appeared. With the long winded chat and all that work, this took us about an hour.
In preparation for the following class, I'd spray painted each of the boards very lightly with the cheapest spray paint I could find (the dollar a can stuff from Home Depot is my jam). When the kids arrived, they were instructed to use 000 steel wool to burnish off the spray paint. They were thrilled when their design started to appear. That took them no more than 7 minutes. If this process looks vaguely familiar, I've done it with leaves as well. If you follow this link, you'll get a better glimpse at the step by step process. 
From there, the kids were each given a 6" square canvas. They traced the placement of their piece (I showed them an example of a diamond placement or a square. Guess which one was more popular?) and then commenced painting. I limited their palette to the cold colors (these are kinda sorta snowflakes, y'all. So we went with a winter palette for that reason). The only instructions I gave was a reminder to clean that brush between color switching and to keep the painting abstract (lines, shapes and color). The last 30 minutes of the second art class were spent quietly painting these canvases. Once dry, I added a touch of hot glue to the back of the repousse and attached. Boom! Done! Ready for hall display.
And now, on to the giveaway! Check out this huge pile of packages that I took to the post today. I hope y'all have been enjoying this giveaway as much as I have. It's been super fun. And, to be honest, what I've loved the most is reading all of your comments. So often, it's hard to leave comments on a blog or, quiet honestly, it's just easier not to (I'm very guilty of this so I totally get it). Which means, at times, I feel like I'm talking to myself because I don't often hear from y'all. So having this exchange with you has really meant a lot to me, thank you so very much for playing along. 

So, what's up for grabbies today...?
All sorts of glorious vintage goodness! Two lovely vintage alteration booklets, two packets of vintage buttons, a little needle booklet and an iron-on embroidery pattern set. So many pretties in one giveaway, ya'll! Vintage-lovers, this is right up your alley!

Here's how you can enter to win...

1. So, it turns out that A LOT of y'all want that needle felting kit! My question to you is...if I were to sell them, would you be interested? Would there be any other artsy kits you'd be interested in?

2. Don't forget to add that email address, kids. Tomorrow is THE LAST of the giveaway goodness, eeee!

And the winner of that needle felting kit?! Tracy Evans! Congrats, buddy!

 photo signature_zpsd10b3273.png
Read more »

Saturday, December 20, 2014

In the Art Room: How to Draw Penguins!

Ask any teacher, "What's the worst time of year to teach children?"

And, if you can get that biggie-sized glass of grape-flavored adult bevvy out of his/her hands long enough for 'em to answer, they're likely to say, "The time before a break. Particularly winter break. NOW GIVE ME BACK THAT SOLO CUP!"

So, what's an art teacher before winter break to do, you ask? Come up with something that is 1. Not so taxing. Judge if you wanna, Judge-y Pants but, c'mon. I mean, a teacher's got presents to wrap (oh, what am I saying, s/he's not even started shopping yet!), a room to tidy (as if that ever happens) and countless Tacky Christmas Sweater parties to attend. Not only that but there's a classroom of chillins to keep entertained which brings me to 2. Something that will hold the kids' attention until the bitter end. 

Friends, look no further, I do believe I have just the solution for you. Enter first and second grade penguins! 
Hurray! Originally this lessons was just for my first grade kids. I only saw them for one more art class this week. They're actually in the middle of another project where the next phase is painting. But, c'mon. If I prep all that paint, it's simply going to dry out before we return and can use it again. So I decided a lil one-day guided drawing thing might just be what the doctor ordered (really? A doctor ordered a penguin? Is this doctor even certified?!) 
Now, as stated, this lesson was meant for my first grade friendies. However, when my second grade class waltzed in and spotted these bad boys, they were all, "When are we making that?!" and "Why didn't we make those last year?!" After I explained to 'em that I only do the fun lessons with the classes I like (heehee, yes I say that. After a beat, they always give me a "hey, wait a minute!"), I asked them if they'd like to draw a penguin too. And after a resounding "yes!" we did just that. 
So here's a lil visual of the directions we followed to make our variety of penguins. I went over the steps to drawing a Cool Dude/Dudette Penguin, one with ear muffs and one wearing a bow. While the kids enjoy guided drawing, they really love having choices thrown in the mix. 
After we finished our drawings, we laid them all out on the floor for a little chat. The kids are always so pleased with themselves and their drawings that they naturally wanna show them off. We take turns saying something nice about each work of art. 
Like how this cool snowboarding dude has a rad patterny scarf that matches hit rad patterny snowboard.
Or how this sweet pony-tailed penguin appears to be twirling in the air.
Or this sweet sleepy penguin just snoozing in the snow.

You'll have to lemme know if you give this penguin project a try. I assure you, your lil friends will love it!

And now, for today's giveaway...
This doll and some super fab artsy fabric! I've had this doll forever with the idea that I'd make an artist doll out of her/him. And yet, I never did. So, now I challenge you to do it! Here's how you can enter to win this stash:

1. Tell me what you'd make with him/her and how you'd use it in your classroom (I just might have to steal the idea and make one myself!).

2. Leave your email in the comments. Some of you are forgetting that lil step and I can't consider you without it! Sadly, it's my only way to contact the winner. So don't forget, friends.

As for the winner of yesterday's giveaway...congrats to Victoria Smith! Yippie! I'll get that vintage book out to you soon! 

 photo signature_zpsd10b3273.png
Read more »