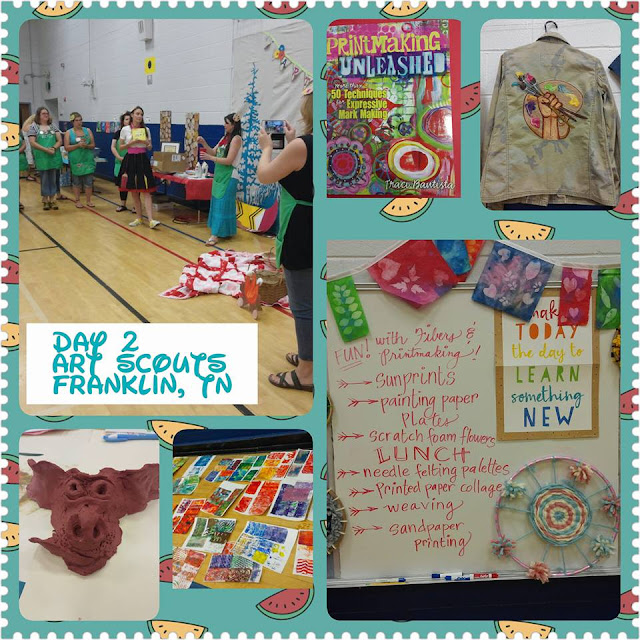
Showing posts with label printmaking. Show all posts

Monday, September 26, 2016

In the Art Room: Andy Warhol Inspired Flower Prints

Today my second grade friends started a new printmaking project that I thought I'd share with y'all. In our 30 minute session together, they were able to watch the first half of the video, discover a little about Andy Warhol, learn some new vocabulary, work with printmaking tools and complete about two sets of prints (one positive and one negative). Whew! Next time, we'll print again to insure that we have enough crisp prints to pick from to create our own Andy Warhol Flower-inspired collage. Lemme show you how we are creating these pop art beauties:
Here's what you'll need:

* Colorful copy paper. I found mine super cheap in the Back to School section of Walmart a while back.

* Fake flowers. I tried real sunflowers in my experimenting and found that the petals kept falling out onto the printing plate. Fake flowers from the Dollar Tree were my best find. 

* Acrylic paint. I tried using tempra and it didn't work on the Gelli Arts printing plate. 

* Brayers

* Printing plate. I used Gelli Arts but you could also use this recipe to create your own gelatin plates

* Scissors and glue

* Those two little words that get everyone excited: PUFFY.PAINT.
After the kids have created their prints, we'll proceed on to the collage and puffy painting portion of the video. I'll keep you posted in a follow up on just how these colorful beauties turn out. 

In other news, I kinda sorta totally wanna wallpaper my entire house in these. Who's up for a flower printing weekend?! Party at my house, you bring the flowers, I'll bring the brayers. I'm telling you, this project is so fun, just ask Andy...
I mean, doesn't he look thrilled?! Ha! Love that wonderful Warhol, y'all. 
This lesson is going to be followed up by a flower painting project by our next artist inspo: Vincent van Gogh. I thought printing the sunflowers would give the kids a good opportunity to see them up close, check out those textures and better prepare them to recreate them in paint. I'll keep you posted. 
Until then, have a super happy and colorful week, kids! 
 photo signature_zpsd10b3273.png
Read more »

Sunday, September 18, 2016

In the Art Room: Printmaking Made Easy!

Hey, y'all! I'm in the middle of lesson planning for some upcoming fall-themed projects in the art room. Since my third graders are getting ready to embark on the above printed leaves project, I thought I'd share the lesson video with you as well as my fave printing projects. By the way, I often update my YouTube channel before sharing here. So if you wanna see some art teacherin' videos as soon as they launch, you might want to subscribe here
Every since I learned about marker prints from my art teacherin' buddy Don over at Shine Brite Zamorano, I have been in love. The technique is so simple and yet so impactful. I think my third graders will have so much fun creating their leaf collages. We are going to be tying in science by discussing just why leaves change colors. The background will be a lesson in glue resist and watercolor techniques. I'll be sure to share the complete lesson when we are finished. Until then, here are some of my very fave printing projects!
Last year, my first graders explored printmaking with these LOVE collages. They did both marker and ink prints and had a great time doing so. 
In this video, I share with you some more tips on marker prints as well as printing with ink. When I first started teaching, printmaking was a daunting teaching task for me. Over the years, I've come up with some things that work for me...maybe you'll find 'em helpful as well.
I love the powerful impact of these positive and negative leaf prints. The amount of prep time needed to make these printing surfaces is well work the results they produce. 
Last year, third grade got their toes wet with this printmaking project that explored cityscapes, depth and watercolor techniques. I created a couple of videos to walk the kids through the processes.
By the way, I create these videos for the following reasons: 1. my sanity; 2. so that all of my students can see my demos and 3. for anyone else who wants to use them! Seriously, feel free to play my videos in your art room. It's the reason I share them on my YouTube channel.

Last year, I was super smart and did printmaking with all grade levels at once. That meant all supplies were out and ready for the entire day. No switching visuals, supplies, etc. It really made printmaking a snap for me. Second grade worked on these sweet printed winter selfies
Fourth grade created these amazing Egyptian god portraits a couple of years ago. So much in one project: drawing, printing, metal tooling! 
A fun variation on traditional printing are floating chalk prints. If you've not tried this, I highly recommend it, so fun, easy and beautiful!
Why not print on fabric? My third graders not only enjoyed the printing process but also stitching their fabric pieces together. 
Making your mark with untraditional materials like cardboard is fun too. My third graders learned about the history of the Eiffel Tower while creating these beauties
And, of course, I've been sharing these fun radial prints that my fourth graders just wrapped up. 
Kids love printmaking because it's good, messy fun. I love teaching printmaking because it is a wonderful medium that allows the kids to see that art is not just a one-n-done. But it is all about trying over and again to create something awesome. 
I'm always looking for fun printmaking projects for my students as well as helpful tips and tricks. If you've got 'em, please share 'em in the comments below! 
 photo signature_zpsd10b3273.png
Read more »

Thursday, September 1, 2016

In the Art Room: Radial Design Printmaking

I love art teachers because they have the best ideas and are super sweet about sharing them. This idea comes courtesy of art teacher Jeanna Pena (who you can follow on Facebook and Twitter for all of her art adventures). When she shared this lesson in the Art Teachers Facebook group, I immediately decided to scrap the lesson I had planned for my fourth grader's Dot Day project and go with this one. And I'm so glad I did. It was such a smash hit of a lesson (with still one more round to go as we'll be covering these printing plates and burnishing them next week, a la this project) that I just can't thank Jeanna enough for sharing. So, with her permission, I'm sharing my version of her lesson here!

But first, a word about Jeanna. She's pretty stinkin' awesome. I noticed from a wee bit of Facebook stalking that she seemed to be quite the adventurer. Here's what she had to say: I came up with this idea after I traveled to Cuba last fall. I was attempting to translate the radial tile patterns that I saw in some amazing old buildings.

I applied for the Grosvenor Teacher Fellowship with National Geographic and Lindblad Expeditions and it has been a whirlwind! They are sending me to Antarctica in December. They brought our group together in DC and we had photography lessons at NatGeo HQ, naturalist updates, and classes with the Google Educational Engagement folks. I'm the only art teacher. They're looking for adversity in content areas! I highly recommend it!

How awesome is Jeanna?! If you have a moment to show her some love in the comments for this awesome lesson, please do so. AND if you have any questions about her travels, you can find her on those social media links above.
Now, let's talk about this project. It was our first for the new school year, right after we wrapped the Escape Game and the Monochromatic Selfies. Jeanna had mentioned she did this project with her older students...so I wasn't sure how my kids would do being brand new fourth graders and all. But they knocked it out of the park! Here is the video they viewed on the first day.
Supplies:

* Cardboard. We used cardboard rounds because of our Dot Day focus which were purchased from Amazon. However, any cardboard or mat board would work. 
* Foam Sheets and/or Shapes with Adhesive Back. I found that Michael's had the best selection where Joann's fell short. I did purchase foam sheets because I knew some kids would want to explore creating their own shapes. Some foam sheets were not adhesive backed so the kids glued them on. Those we found did not stick super well when it came to printmaking. When they came off, I just had the kids bring their board to me and I hot glued them back on.
If you follow me on Insta then you've seen our progress. I had my early finishers recreate their design on scratch paper (also purchased via Amazon) and write about what they learned. 
The following art class, we printed! And, with about 35 fourth graders in the room it was, well, busy. We'll just call it busy.
* Printing Ink. Y'all. ALWAYS buy water soluble Speedball. I have had the same jars of ink forever. I just keep adding water, stirring and it still works great. Unlike the "house" brands that the art supply vendors sell which harden in the tube. 

* Inking Trays. You can purchase these through your art supply vendor. However, with this many kids, I did run out so I simply cut my Gelli Arts plastic containers in half and used those. I'm sure something could be found at the Dollar Tree for this item.

* Paint. We used tempra paint for rolling on texture/color on the background.

* Brayers. I happened to have one per kid so there was no wait time. 

* Paper. We  used 14" squares that I had cut down from large paper. 
Day two's video: honest speaking, I didn't show the entire start of the video to my second group of fourth graders. Knowing that they are a group that likes to move, I knew I'd need to get them working right away. So I started the video just before the demo portion. 
And then they went to work! They had a BLAST.
And the prints turned out so colorful and fun just like the artists. 
A little "before" action. Don't ask me what the aftermath looked like. I've blocked it out.
I had a couple of kids double stack their shapes which I wasn't sure just how that was going to turn out...but I really dig it. Check out the triangles. 
I can really see so much potential with this printing project: a lesson on architecture, a portrait project, floral creations...the possibilities are endless!
Yeah, ya did.
For now I'm just gonna keep taking them off the drying rack and saying Ooooooh and Aaaaaah. Stay tuned for what happens next with these beauties.
 photo signature_zpsd10b3273.png
Read more »

Sunday, July 10, 2016

Art Scouts, Tennessee Camp 2016

Well, hello there, strangers! My sincerest apologies for how quiet it has been on this here blog over the last week (let's be honest: you enjoyed the peace) but I've been super duper busy with my buddies Jennifer, Laura and Ginger getting ready for the Tennessee Camp of Art Scouts
Laura and Ginger arrived in town on Wednesday afternoon from Ohio. Jen and I  had just enough time to show them around our favorite place: Franklin, Tennessee. Franklin is a small town with a big history just 15 minutes south of Nashville. The downtown has a lovely Mayberry-esque vibe. After a stroll up and down Main Street, we took them to a local fave, Pucketts Grocery and Restaurant. The food was delish but the best part of the meal was when we walked in, Jen's husband Miguel and two sweet daughters were there. What a happy surprise! It was so fun to pull up a table and chairs to join them.
On Thursday morning, bright and early and fueled up on coffee, we began to set up Camp for our Scouts. Thankfully, we had the help of our art teacherin' friends Stephanie Preston and Jennifer Staples to get ready for the next couple of days. Those two girls were our right hand gals during Scouts and we just can't thank them enough for all they did for us and the Troops. Thank you, sweet friends! Also, a big shout out to my buddy Mr. Joe for hanging out with a bunch of wild and crazy art teachers for a couple of days. 
Friday morning, folks started to arrive and, after breakfast, chatting and a super secret Art Scout ceremony (sorry, y'all. Must be present to get the scoop), we dove right into the art of making big messes!
I have to tell you, we simply have the nicest folks attend Art Scouts. We had teachers from Michigan, Indiana, Illinois, California, Florida, Alabama, Virginia, the Carolinas, Texas (and I know I'm even forgetting some)...we were blown away! These sweet, kind and dedicated art teachers are a gift to their students, faculty and staff. 
 Not to mention, some seriously talented (and funny!) artists.
I mean, when is the last time you saw folks having this much fun at a professional development? And we had just as much of a blast hosting them. We were so lucky!
We had a little over 50 Scouts in attendance. Laura and Ginger lead 25 Scouts on their quest to earn their painting and clay badges in my art room. They created over three clay projects and multiple painted paper pieces during their first day with Troop Leaders Laura and Ginger. 
Now, y'all know that Laura is the master of all things painted paper and collage. Having the chance to learn her approach is so much fun...and I speak from experience. I had that opportunity at Tennessee Arts Academy last year. We've been friends long before that. I love and respect what she does for her students and the art education community. Not to mention, she's funny as all get out! 
 
 I loved the variety of creations that I was able to sneak a peak of when I popped down to my art room.

Ginger had folks working with Amaco's air dry clays because it has a very similar texture as kiln fire clay. Ginger is such a jack of all trades but, unlike me, she's a master of all. When we were brainstorming ideas on what badges our Scouts would earn and what we'd like to share, Ginger is so versatile, she could teach it all!  She did such a fab-o job sharing fun clay projects with our Scouts.
I so wanna do this with my students, I know they would have a blast!
Ginger is also our Mural Maven (if you've not seen the time lapsed videos of her students painting murals, go here). The Scouts worked on this scene of the Smoky Mountains that Ginger drew. This helped every understand her simply and impactful method of teaching mural painting to children.
I love how the colors pop on that black paper!
Back in our territory, Jen and I shared everything we could pack in on fibers and printmaking. Jennifer shared such a fun assortment of printmaking projects that are not your usual carve-into-block type of thing. What I love about what Jen shares is that she brings her bright and cheery personality to each project. The sunny sun prints and the colorful wax crayon prints are a true reflection of how colorful the projects are which she shares with her students. 
Because Jen has 30 minute art classes with her kindergarten through fourth grade kids, she was able to share how she breaks her projects down into bite sized bits. She also enlightened us to some fast and easy clean up tips!

 Marker prints were also thrown into the mix!
 We also had a big time exploring Gelli Arts printing plates!
Those printing plates are so versatile and fun. I mean, check out these effects!
These look fabulous just as they are...however the Scouts turned them into beautiful flower collages.
 Love this orchid collage by Stephanie.
And this one being cut out is fabulous. I love that the Scouts swapped flowers to add variety to their collages. 
Now all y'all know that needle felting is my jam. So when I shared that we'd be taking a stab at it (wink, nudge), the Troops were thrilled. And shocked at just how easy needle felting can be. Check out the cute lil palette hair clips we made!
Because I'm secretly on a mission to have ALL art teachers dress like CRAZY art teachers. 
 We also learned how to do some of my favorite weaving activities, circle loom and tree weaving, to name just a few. 
I always love the variety of paintings created on something as simple as a paper plate.
I mean, I wanna paper my walls in these beauties!
Remember: you can circle loom weave on anything round! Hula Hoops! Embroidery Hoops! CDs! Just make sure you have an odd number of warp threads. 
To earn their fibers and painting badges, our Scouts created three printing projects and three weaving and one felting masterpieces. We were busy, y'all.
 It's been such fun getting to know these new friends of ours. One of my favorite things was seeing all of the fun images shared on Facebook, Instagram and Twitter. Here's a collection of what was shared by our Scouts.
P.S. THAT PENCIL DRESS!! Beth, you know I love that dress, girl!
I love this collage of art teacherin' fashion that Rina created...so glad I made the cut! 
 Painted paper fun!
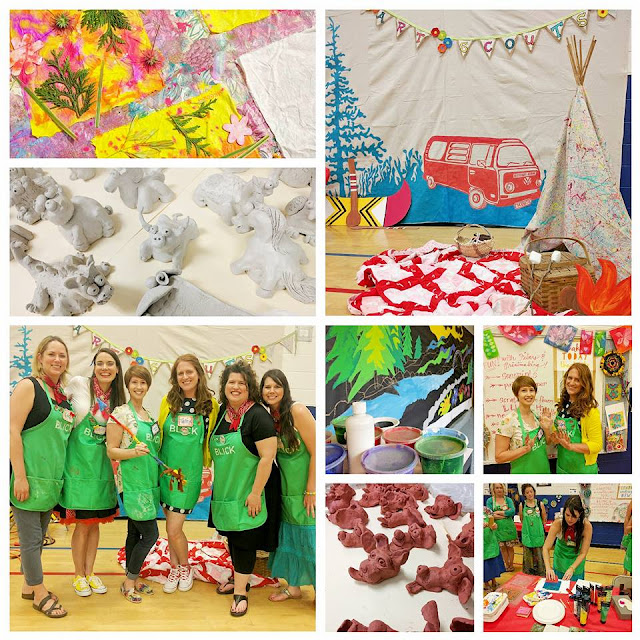
Happy faces, fun projects!
Just one half of the Scouts wearing their needle felting palette hair clips!
I love this photo collage created by Scout Brandi!
We had so much fun sharing out passion of making big messes with little people...with our new best friends, the Art Scouts!
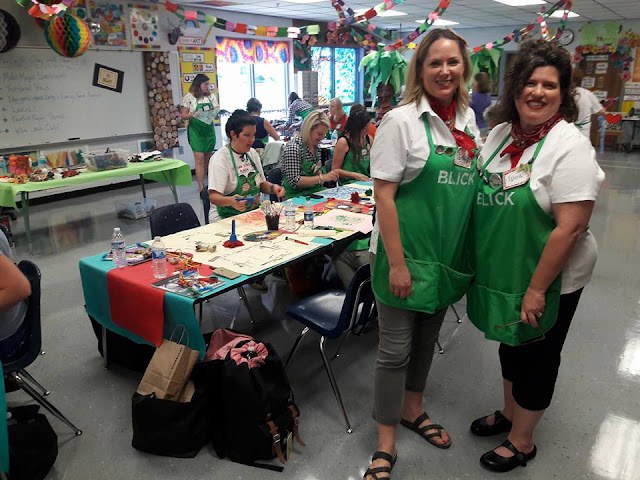
We couldn't have done it without our Ohio friends Ginger and Laura! After our Scouts left Saturday afternoon, we broke down and put our feet up. 
 Because I live just 4 miles from my school, I had the gang over to my place for some dinner and chill time. We're already brainstorming ideas on plans to bring more Art Scouts Camps to our future Troops...and we couldn't be more excited! 
To keep up with us, you can follow us on Instagram! You can also join our Facebook group where you'll find a ton of more images and be able to make inquires and chat with attendees. 

Here's to more art making fun! 


Read more »