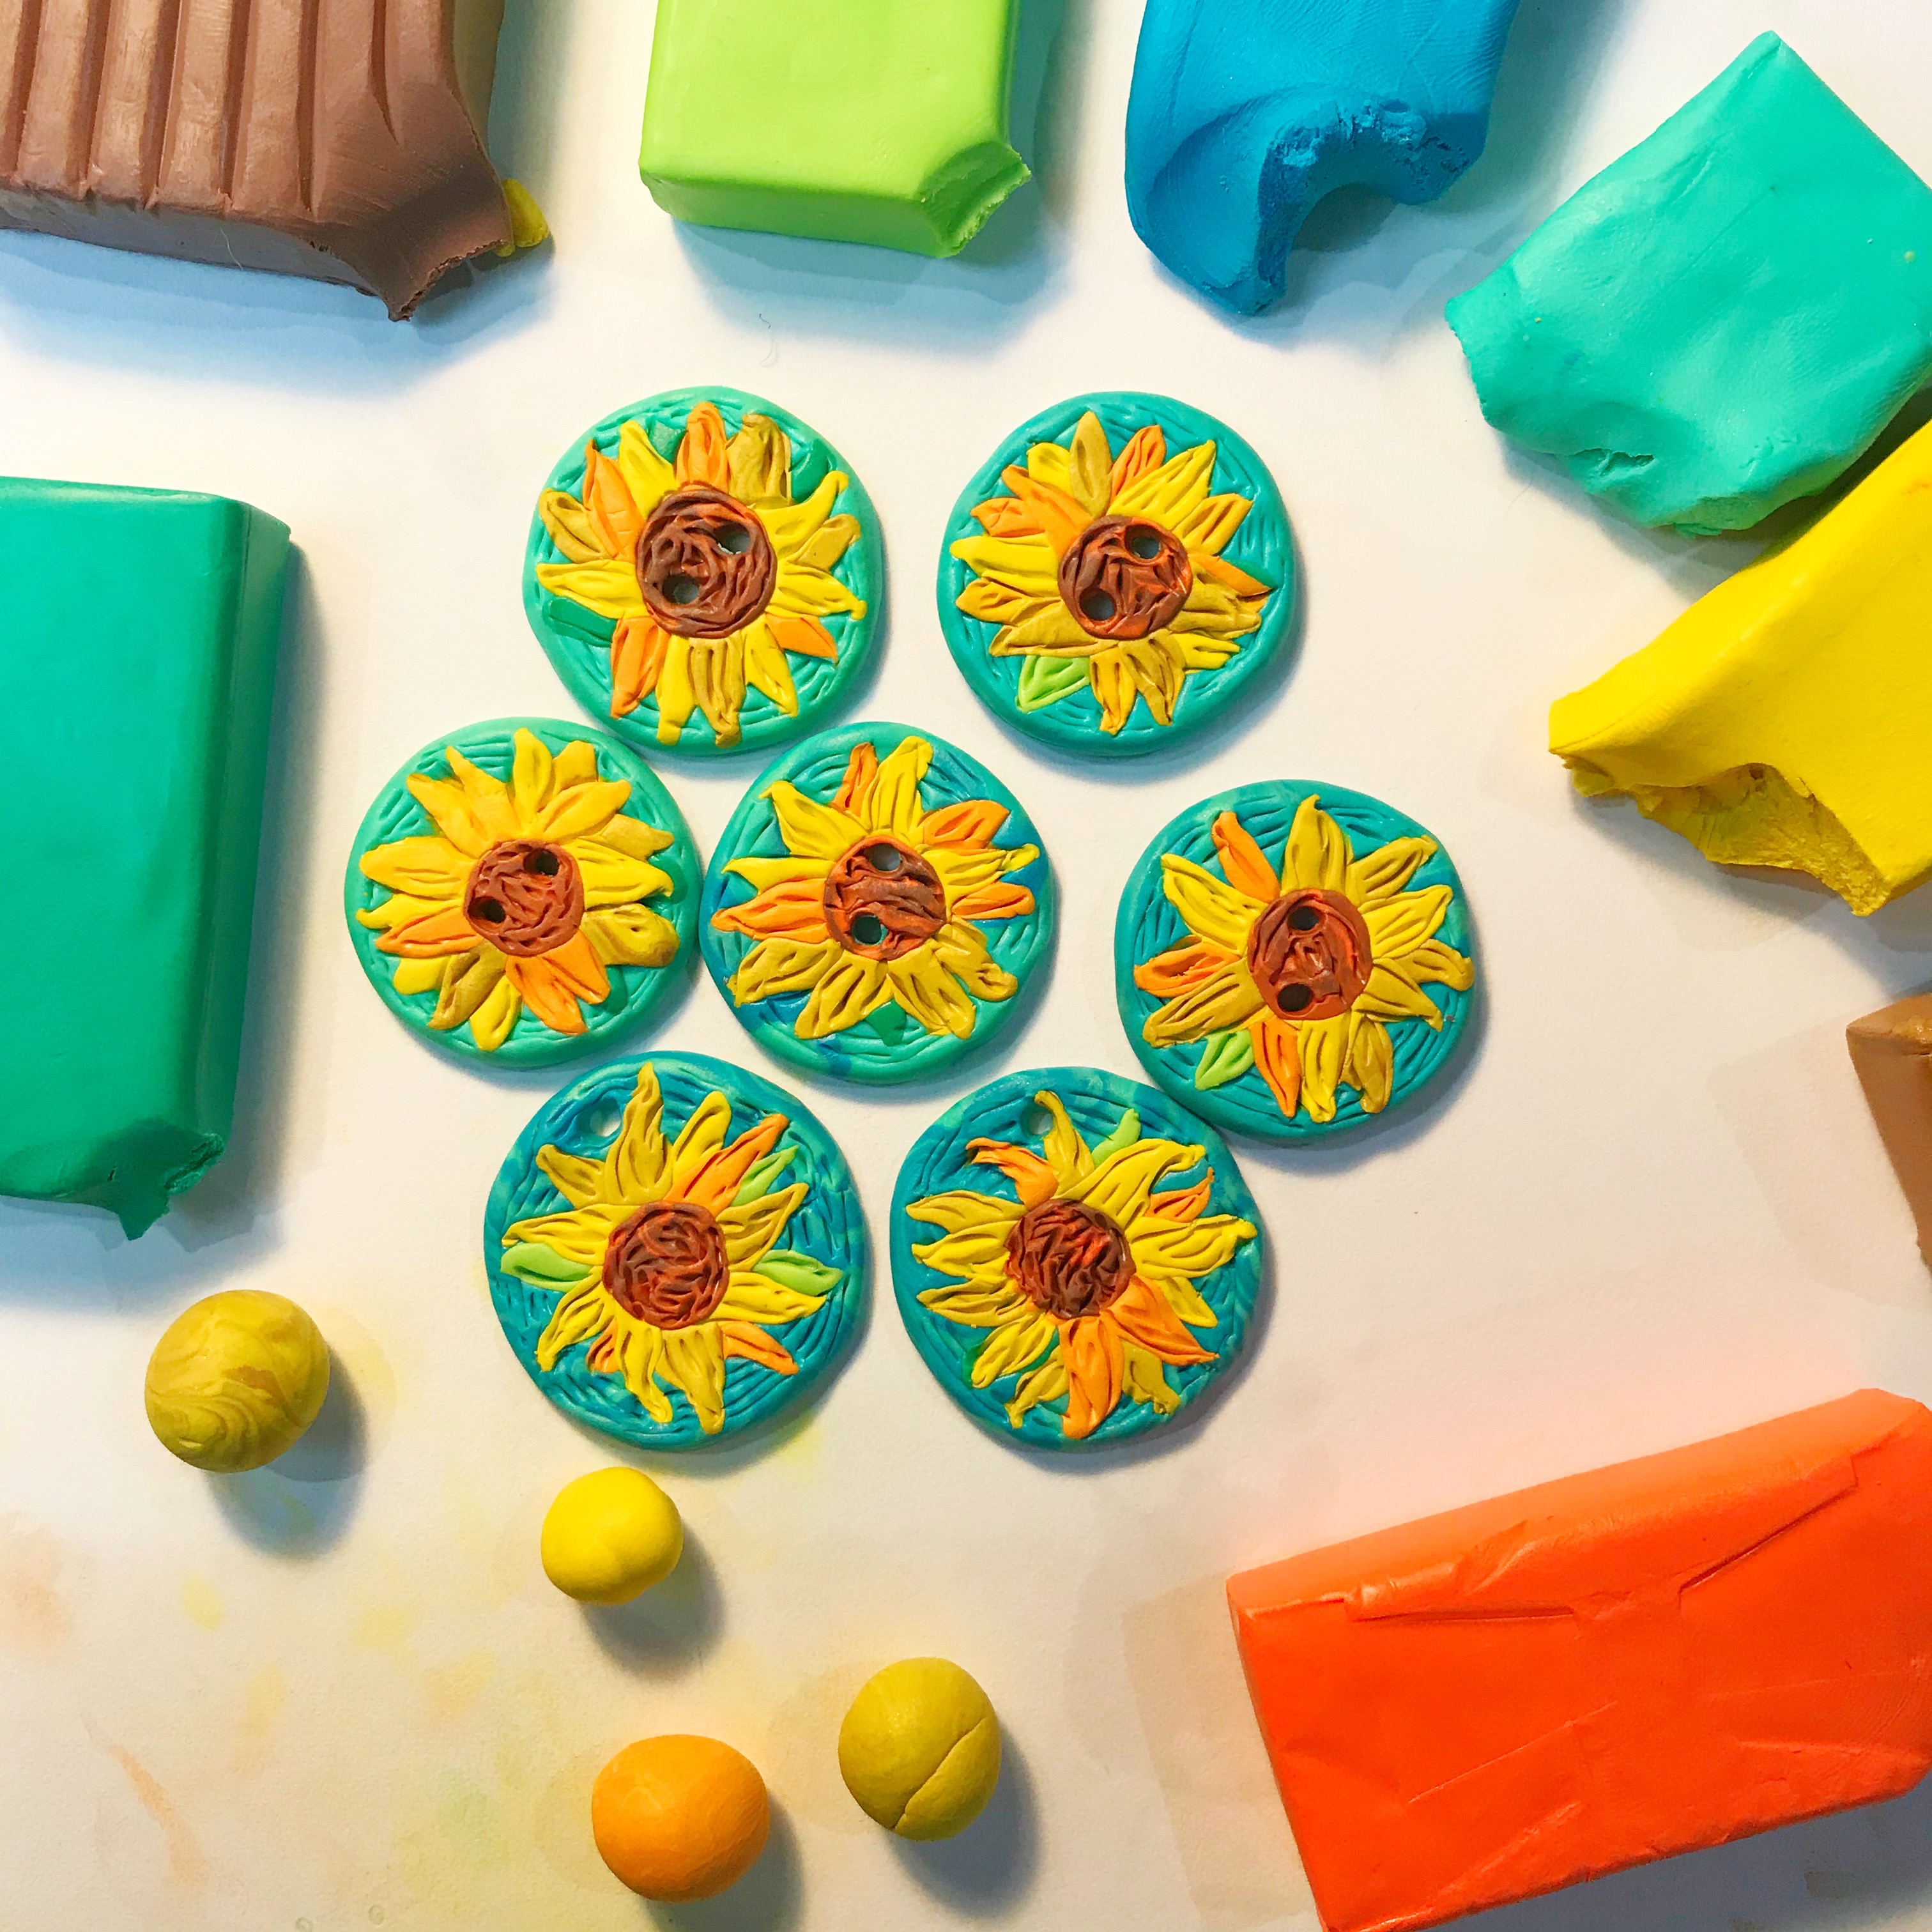
Hi! I scored this amazing sweater recently and while I absolutely loved it, I hated the obnoxious plastic white buttons that were on the sweater. They just stuck out like a sore thumb! So I picked up some polymer clay at the craft store with the idea to create my own. Normally, I buy the 'name brand' polymer clay but this time, I was feeling cheap and decided to give the house brand a try. It was half the price and I have to say...despite the fact that the yellow clay stained my hands a pinch, it worked great! I'm used to stained hands so, no big deal!
I went about creating these factory style and it went pretty quickly. I made a video to share the process in case you need some van Gogh bling in your life. Like, duh. Of course you do.
So easy, right?
Once complete, I just stitched these onto my sweater and added some jump rings and a French hook to the earrings and I was all set in my new upgraded van Gogh sweater!
Not only that but this craft was just the creativity thirst quencher I needed this weekend. Thanks for letting me share, y'all!
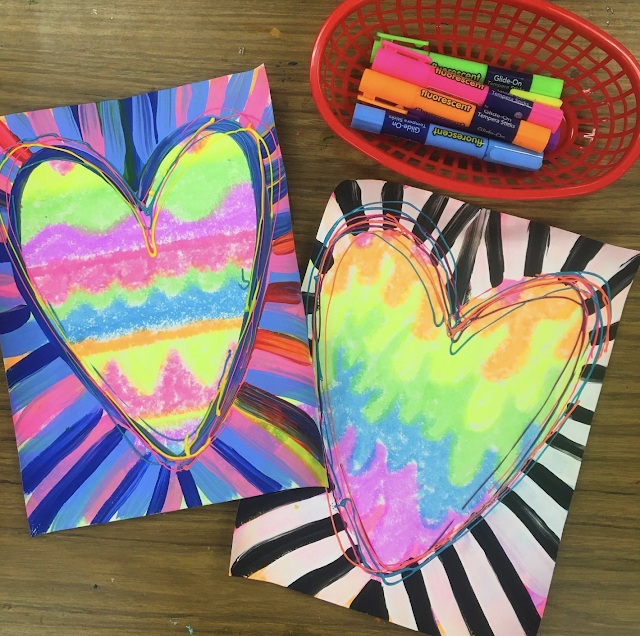
Need a fast and fun lesson for Valentine's Day (or anytime, really) inspired by the artist Jen Stark? I created this one for my students and they started it last week. Some are working BIG on 12" X 18" paper while others are using it as an early finisher project and worked on paper half the size. I am also giving my students the option of using black and white, all warm or all cool colors (as seen on the left).
ONE CHANGE I'M MAKING: for my students using black and white, I'm going to have them paint the entire background white and then add the black paint stripes once that dries.
Since my art classes are 30 minutes long, we've been doing the drips in one art class, painting in the next and wrapping it up and adding the puffy paint on the last class.
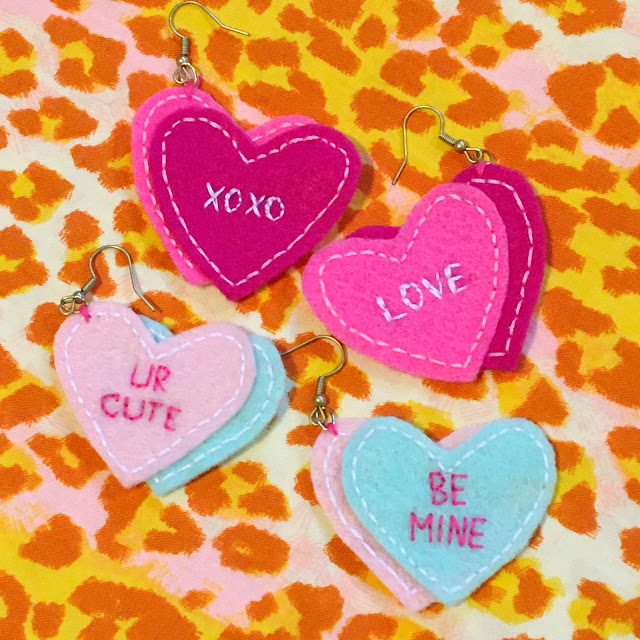
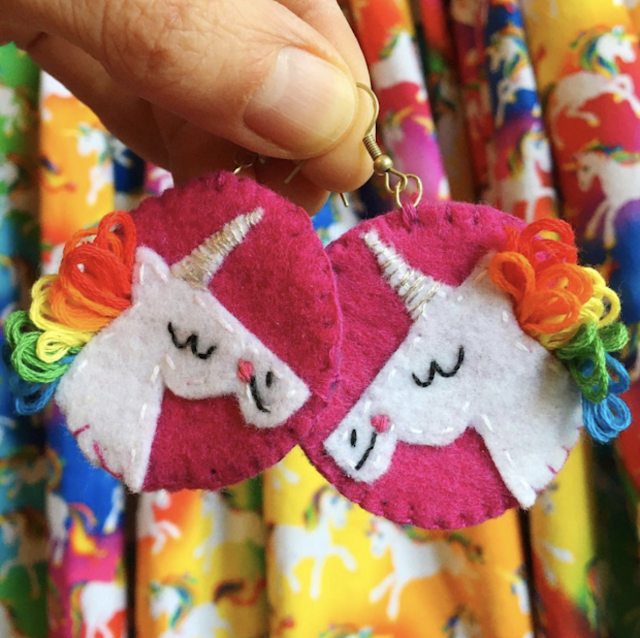
I love embroidered earrings! They are lightweight to wear, simple to make and a fast craft. So I made some for Valentines and I thought I'd show you how! Here are the supplies you'll need:
* Felt
* Embroidery floss
* A Chenille needle or an embroidery needle (big eye, sharp point)
* Jump rings
* French hooks
* Scissors
Here you go!
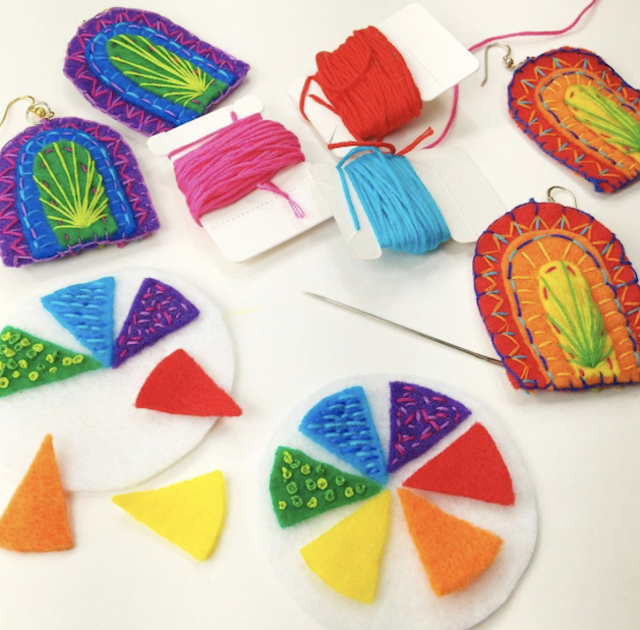
And here are some other tutorials I've made for earrings. Just tap the link to view the blog post and video!
Check out to make these rainbow and color wheel earrings right here.
I need a project that is big, energetic, colorful and fun for my students right now. They have the wiggles big time and I think that lack of recess due to the weather is playing a big part. So I thought we'd use up some of our paint in our trays, use some of this large yellow construction paper I had in my closet and go crazy with some printing and painting. Here's the video lesson, if you are interested!
Here lately I've been in a bit of a creative funk and I've not felt excited or interested in pursuing my usual creative outlets. I love to sew funky clothing to wear and have an endless amount of projects in various stages in my sewing room but each time I go in there, I just look around and feel...exhausted. Is it that time of the year? Although, if I'm being honest, this feeling of disinterest has been going on for a while (gee, I wonder why) and it's starting to affect my teaching as well. Yep, I just said that out loud.
I know it's not a good place to be so I'm trying to do something about it. I learned a long time ago that beating myself up and shaming myself about things just doesn't work. It only makes me feel worse. So instead of feeling badly about not sewing, I decided to dry something totally different: painting.
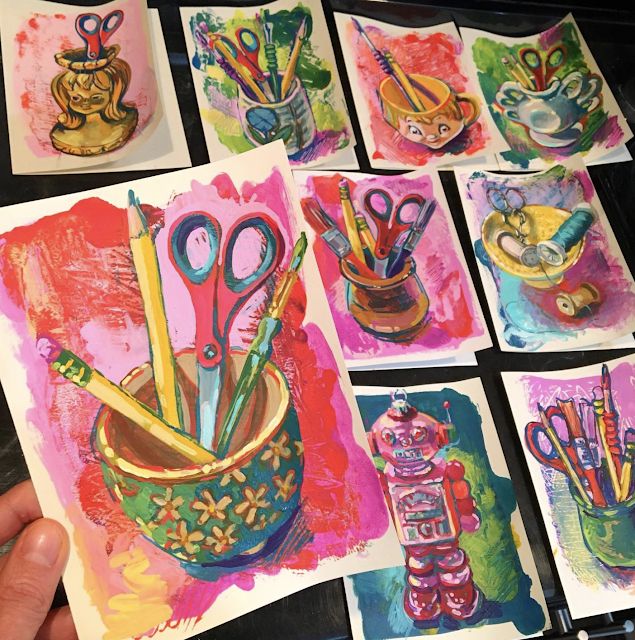
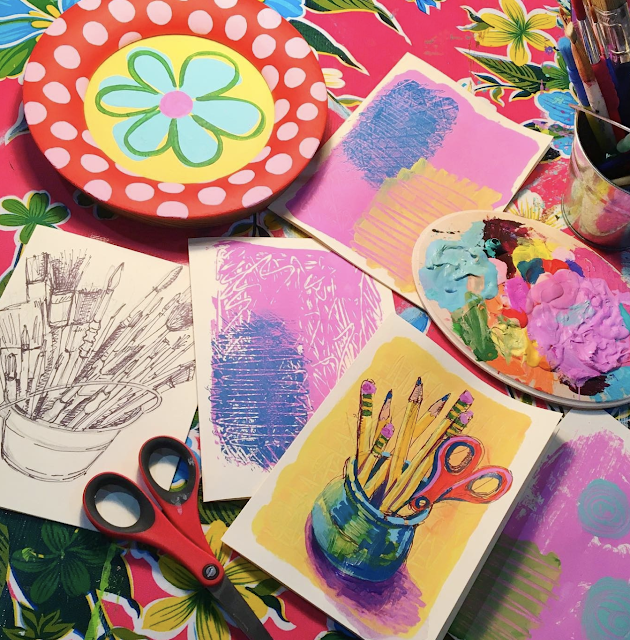
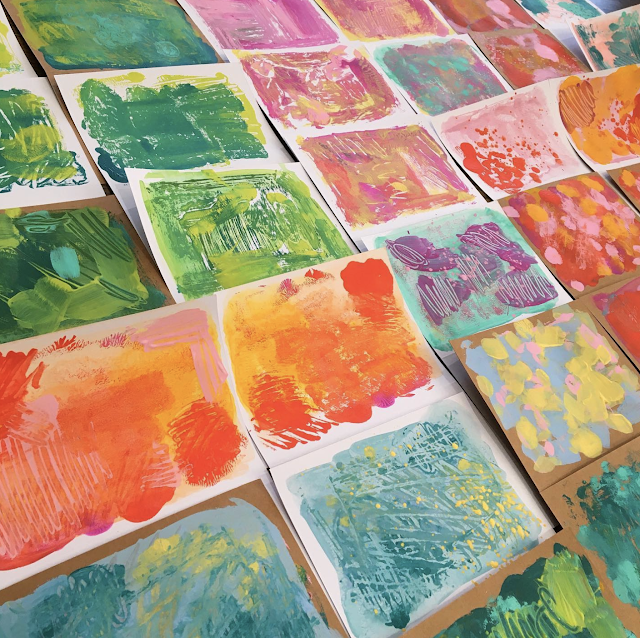
I got out an old round frame found at the thrift store from my stash as well as some blank cards. I painted a dotted and flowery design on the frame just for fun...but then I had a lot of paint left over on my palette. So I kinda went nuts and started painting and printing on the cards. I got really excited about all of the colors and textures I created. Then I set up a little still life and drew and painted it on one of the cards.
I thought I'd just start creating one painting an evening before bed. I've been keeping them quick so I enjoy the process but...some of them I've slowed down and taken my time on.
I've been sharing the process on both TikTok and Instagram but got some requests for a longer video of the process. I also had someone mention wanting to share a video with her high school students. So I hope the one I created helps. For me, the key has been just enjoying the process, keeping the paintings small so I can do them in one sitting, using colors I like and creating a simple still life.
I have a lot of random things from the thrift store that have been fun to paint.
I'm not gonna say I feel so much better now or that I'm cured of my funk...I'm not. But at least I can say that I did at least one thing I'm proud of at the end of the day. Taking the time to create is something we creative types must do. Sharing my quick videos seems to have gotten some other folks creating too and that makes me so happy.
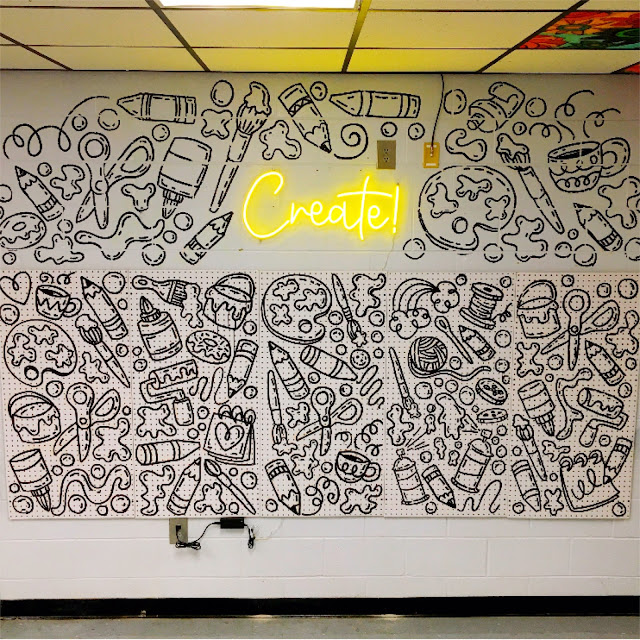
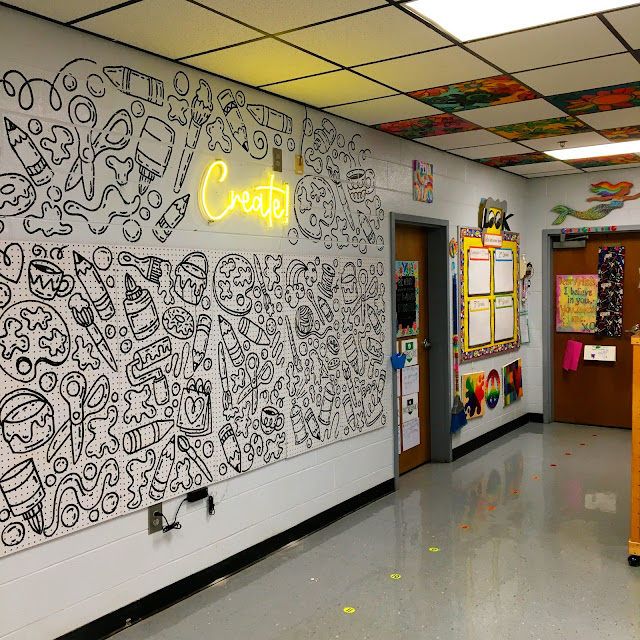
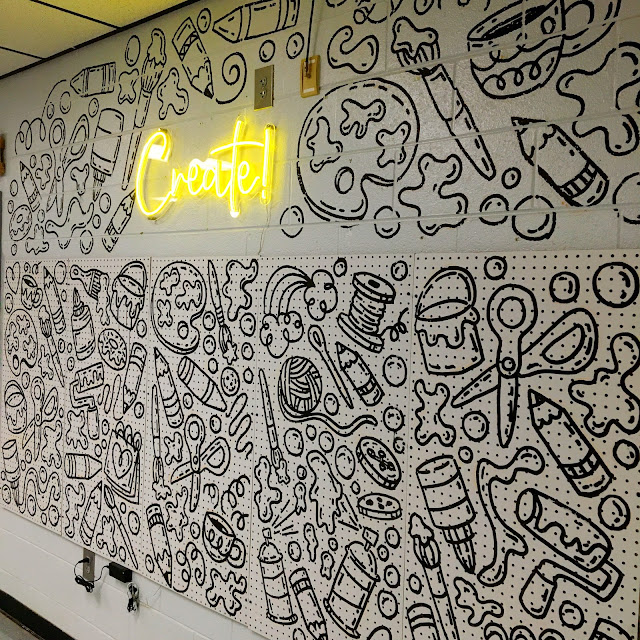
Last fall, my instructional space was relocated. The area you see above was my teaching space for many years as that's where maintenance decided to place my television which I use with my document cam. I never understood the location: it was close to my entranceway; it was a small space and it was far away from the view of my students if there were at their desks.
Because that space was too small for children to sit with one another due to social distancing, I requested my TV be relocated to a more centralized spot in the art room. It feels SO MUCH better to have it there (like, it makes so much sense, you can see it here). However, this once-beloved area soon became forgotten and, well, sad. So, over the summer I asked my dad, who was visiting from out of town, to help me hang some pegboard.
It was easy! We had to purchase concrete drill bits and screws and I say it was easy cuz he did it all. We only bought three pegboards but I decided I wanted the whole space covered. So I bought more and my custodial friend Mr. Joe hung the rest.
And then it sat blank and unused for the start of the school year.
In October, I finally figured out what I wanted to do with it: make it a black and white doodle drawing! I have A LOT of rainbow action in my art room but I like to balance it with black and white. So I used my handy dandy bingo dauber and went to town. Here's the video:
I work on things VERY SLOWLY meaning that I'll do a little here, there, take a massive month-long break...and then finish it off. That's kinda my thing.
On Amazon you can create your own neon signs, did you know that? It was a splurge but I spend more time in my art room than I do my actual home...so I figured, why not? I love it. Yellow is my fave color and it really seemed to pop. The photos do not do it justice!
So...what's gonna go on the pegboard? Aprons for sure. Dustpans for messes. And everyday supplies that my "store" (the large table where kids go to collect supplies) can't hold like Sharpies, pencils, etc. Not sure! I'll be certain to keep you posted. Thanks for letting me share!
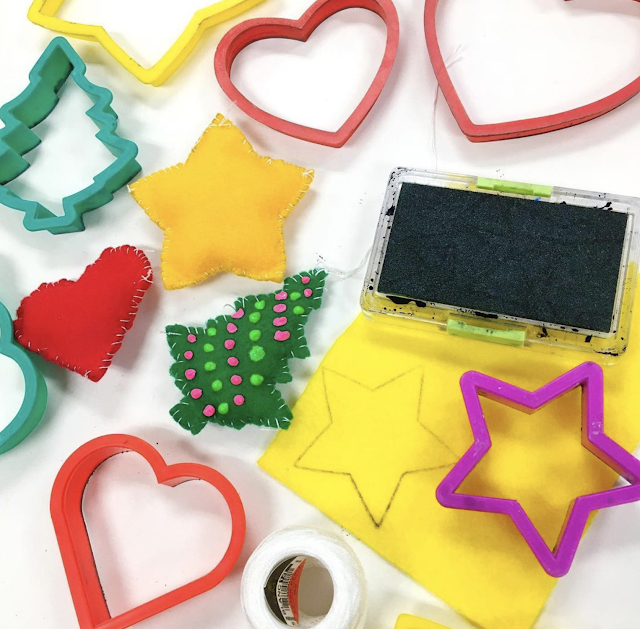
Last week, my fourth graders were wrapping up their pillow sewing project (we were doing the Faux Shibori project that you can find in my book Stitch and String Lab for Kids). I discovered that with my HUGE cookie cutter collection, I could give my students the opportunity to continue sewing if they wished. All you need for this project are the following:
*Cookie Cutters
*Felt
*Chenille Needles (they are my favorite as they have a sharp point and a large eye)
*Thread
*Pins
*Stuffing or shredded paper or grocery bags for stuffing
My students were able to create these in my 30 minute art classes, if you can believe it! This is after their previous sewing project so by now, they are experts. If you want to make your own, I created a video for you! Here you go:
And if you are new to sewing and wish for a slower tutorial, here you go:
Let's weave some cute little houses! Here is a project I'm currently doing with my second grade students and they are loving. I will say, I have VERY small second grade classes that make helping these new weavers easy. If I had larger classes with little weaving experience, this would be perfect for fourth grade. But my second graders have been weaving since first and had experience with this lesson.
Supplies we used:
* 6" X 7" cardboard
* 72" warping yarn (easy! Hold the end of the yarn between your fingers. Wrap from your fingers around your elbow three times and BOOM! you have the right amount...here, watch this:
* Yarn monsters for weaving
* 6" Plastic needles
* Small folded paper for a 'hotdog bun'
Here is a wee video that I created for my students and YOU! My apologies for the audio about half way through. I'll try to fix but until then...feel free to share in your art teacherin' world:
I can't wait to share with you my students' finished weavings. Until then, have fun! If you need more weaving ideas, try searching my playlist titled Fibers on my YouTube channel. Have fun!
While you are out doing your holiday shopping this week, you might want to snag some of those small ornaments you spot. I think they are meant of small trees but in my mind, when I spotted them, I saw nothin' but EARRINGS!
To make your own, you'll need the following:
* Small ornaments with a loop at the top.
* Jump rings (the metal circles with an opening)
* French hook earrings
* Jewelry's tools or a pair of pliers
It's that easy! A fun craft you can do with small humans. Here's a quick video to show you how:
Currently all of my first grade students are paper weaving. We are working large this year with 12"X18" pieces of paper as our looms and I wasn't sure how it would go. Normally, we work half that size but they did great! This isn't the end of what these weavings will ultimately look like. However, when I shared on Instagram, I got a lot of questions about the process. Did I cut the looms? If not, how did I teach it so they could cut them easily? I have a LOT of weaving videos on my YouTube channel. However, I thought I'd create an updated video on this current project. So...here you go!
I hope you find this helpful! I've been teaching paper weaving to my first graders this way for years.
Stay tuned, I'll be sharing all of my favorite weaving projects soon!
My fourth graders are getting ready for a new sewing adventure! Last year, they stitched these pizza pillows. Next up, we are dying our own fabric and creating a kind of faux-Shibori dyed pillow (see below).
I love teaching sewing (and all things fibers) to my students. If you are interested but don't know where to start, I share all of my tips and tricks in my book Stitch and String Lab for Kids!
I'll be sharing my favorite fibers projects in an upcoming post but if you just can't wait, you can hop over to my YouTube channel and visit my "Fibers" playlist! Be sure and subscribe, I'm currently adding a lot of video content!
I decided to create a video to walk my students through sewing basics. I played it today on our first day of stitching and it was a hit! I didn't have to thread a single needle and only tied one knot. If you'd like to view it, here you go:
Feel free to use it in your art teacherin' world!
There are a lot of things I've learned about teaching children to stitch over the years. Many of my tips you'll see in the video. However, I plan to share much more in upcoming Art Teacherin' 101 videos.
Just a preview: fourth graders opened their dyed fabric, pinned it and began stitching in 30 minutes! When they are interested, it's amazing how fast they can work.
Here's where we're heading. Again, this is a project from my book and always a hit. Happy stitching!
My third graders are wrapping up a lesson that we've loved! So I thought I'd share the process and the video with you. Here you go!
If you cannot view the video here on this blog post, hop on over to my YouTube channel to see it there. Feel free to use this video in your art makin' world! Be sure and subscribe, new videos are added all the time!
At my school, we are the tigers so this was the reason behind our animal choice. At the start of the school year, our focus was on what makes us special and unique. Now we are moving on to how we fit into our school community and what makes our school special! All students are currently creating mascots. It's been so much fun!
My third graders usually do a black glue and chalked piece inspired by Sandra Silberzwig. It's a popular lesson and you can find it and the video here.
It was fun to try something new and the kids rocked it. Have fun!
I know paper isn't the most riveting thing we could be chatting about as art teachers BUT I feel it's so important. Which is why I currently have a wee series of paper chats currently on my YouTube channel!
Last week I spoke about how to find the best kind of paper for your art room. In case you missed it, here was the video:
Now let's chat about watercolor paper! There's a lot to know there too. Here's more:
If you've ever flipped through an art supply catalog, you may have been confused by all of the paper that end with the word "board": tag board, rail board, matte board, posterboard, foam core board, SO MANY BOARDS! Here's what I feel you need and what you don't in your art room:
I'm not sure if you've been experiencing it in your art teacherin' world but of late I've noticed that my students are on the squirrely side of life. It's hard for them to sit still, focus and contain their level of excitement. I can usually manage to ride that wave in 30 minute art classes as we get up and move round, do a little dance, do a whole lot of call and response and stay very busy. However, recently I decided to try something new (for me) and that was create some art-makin' centers for my students on the Friday before Halloween.
It's hard to do new things, especially if you've been at this art teacherin' thing for closing in on 25 years. However, pushing yourself out of your comfort zone is what keeps us fresh and keeps our students excited and intrigued. That's what I noticed when I created this center-formated art day.
Here's a little of what that looked like:
If you cannot view the above video, than try viewing this blog post from a laptop. Or just tap this link.
I've done open centers in my room before, most notably on our Field Day. You can read all about that here. I will say, it's a lot of work on the front end when I set up for Field Day. What I found in this most recent experience is that it doesn't have to be. Kids make the most of each center regardless of what is offered. In fact, limiting the supplies seemed to force them to really stretch their imagination.
Some of my take-aways:
* Limit the centers. Too many seem to overwhelm the kids. Instead, start with just 3-4.
* Introduce "greatest hits" as well as 1-2 new centers. At the start of art class, you will need to run through the centers to let the kids know what's in store. Too many new centers means too much time spent explaining and confusion. So maybe share ones you know the kids are familiar with (for me that was the large pumpkin coloring sheets and blocks) and introduce the new ones.
* Limit the amount of kids per center. I limited mine to 2-4 kids per center, depending on the center. I had a sign on each that let the kids know how many kids could create in one space.
* Dismiss kids to center one at a time. After explaining, I asked each student individually where they wanted to start and dismissed from there. Allowing each student to hop up at once and make a mad dash is not how you want to start your class!
* Allow students to switch centers at a designated time. With 30 minute art class, I set my alarm each 7 minutes. This allowed kids to hear my alarm and know that if they wanted to switch, they could. My rule was they had to tidy their space before leaving it. This prevented kids from center-hopping from one place to the next without digging in.
* Hold kids to your rules and routines. Sometimes when we do something different, the kids think that rules and routines go out the window. Let them know that the routines you've established for clean up, working together and noise levels still apply.
* Pay attention to what they respond to. It might surprise you! And it might give you ideas for future centers.