Ah, yes. Kindergarten. If it's one group of people that have my complete respect, it's the kindergarten teacherin' crowd. K-town comes to us all over the place: some have been in school, others have not; some know how to follow directions, others would rather roll around the floor (I mean, who wouldn't). You get the idea, it's a Big Ole Mixed Bag o' Fun. Ish. Ness. So I thought we could talk about that herd of cats we call Kindergarten in this week's 101. AND I thought I'd give you a sneak peak into a 5 minute chat with a group of 'em:
What works the best for me: Call and Response. I use that trick with EVERY grade level, kindergarten up to fourth. It really works wonders for grabbing attention and getting kids to remember vocabulary, directions and steps to follow. Here's how I introduce it to the kids:
With kindergarten, I really like the happy/sad board. It's an instant visual and it's something easy I can keep up with. Again, I use it with everyone...but I notice I reference it most with the littles. By the time they are older, I hardly use it unless one of them reminds me. And then I'm all, "sure, would you mind keeping track of it for me?" I'm all about the distribution of power (aka, getting someone else to do my job). Here are the deets on that:
Another method I use with the wee ones is palming. I mention this in the video but you can see it in action here:
Because we're chatting about kindergarten in this here post, I thought I'd share my most favorite lessons as well. If you've been around here long enough, you've heard my Larry the Line poem that I start my kindergarten school year with:
Larry the Lines leads us to our very first art project: Line Sculptures. From there we continue with a unit on line. You can find that entire unit here.
I love using books with kindergarten, as I know many of us do, and one of my favorites is Mouse Paint. It's a great way to introduce color theory...and review lines to create shapes like these sweet mice!
When it comes to clay, I LOVE introducing textures into clay creating. Check out these fun birds! We also had a lot of fun creating these clay butterflies. I'd love to hear what some of your favorite kindie lessons are. They are a group that is NEVER short on excitement...and if you can harness that, you've got gold. By the way, I often update my YouTube account before I share here so if you subscribe, you can get the latest, if you like!
Aw, Lawd, y'all. If you've not listened to this week's podcast, I PROMISE you, you won't wanna miss it. The tale I tell at the start is my VERY favorite art teacherin' story. It's also one that I was surprised that AOE was okay to let air. It's a gem...enjoy! You can find the complete podcast right here.
Teaching kindergarten is ALWAYS an interesting ride. I thought I'd share the transcript from the podcast here. I also recently recorded myself teaching kindergarten. Here is our first day of art together...
And here is a recording of our class this week.
We have a lot of fun together! You can find an entire unit on LINE with kindergarten projects here. Also, if you search my blog for "kindergarten" you'll get a little bit of everything from clay lessons, painting units and more! Now, on with the transcript:
Is it just me or does every really good story in the art room always begin with Kindergarten? I mean it never really seems funny or humorous at the time, let’s be honest, but they do make for really good stories. So I’ve got one for you. I had Kindergarten in my room and we were talking about ROYGBIV, and chatting about how letter in ROYGBIV stands for a color in the rainbow. But the kids were stumped on the letter V. So I gave them a clue. I said, “Okay guys. It looks like purple but starts with a V.” And this really bright girl, very artistic, her hand shot up. I could see a light bulb went off and I just knew this one had the answer. So I called on her. And here’s what she said. “Vagenta.”
I paused just like that with my jaw dropped. And in that moment, because of my pause, I guess the other children assumed that that yes, indeed was the correct answer and the next thing I know I’ve got 20 five year old said saying the word vagenta. Yo, I don’t know what vagenta is. I don’t even think I want to know. And I understand how she combined the two words, violet and magenta, very clever but never a word I want to hear spoken in my art room again. Ah Kindergarten. Today we’re going to talk about how to tame that wild beast. This is Everyday Art Room. And I’m Cassie Stephens.
I don’t think any amount of art education prepares you for the beast that is Kindergarten. Every year when they come trampling into my art room it’s like I have forgotten, once again, just how wild and crazy these wee ones can be. If you do it right, they can end up being your most favorite classes to teach. After all they are a bundle of excitement, questions, interest, and curiosity. The perfect specimen for the art room. If you can tame that beast. So today I’m going to share with you my four tips to getting you kindergarten class to the most amazing level that you possibly can.
Now you’re going to have to bear with me. It’s going to be a bumpy ride. This is a beast after all, but like I said one of the best kind to have in your art room. So let’s start with number one. My first tip for taming that Kindergarten beast, is out crazying the crazy. I mean let’s face it, they’re pretty wild. If you can get them in your art room and really ramp it up over and above their expectations you will immediately have captured their attention. And isn’t that what you need to do first? No amount of, “Please sit quiet. Please put your hands in your lap. Please make sure you’re sitting on your bottom,” none of that is going to capture all of their attention. You’re going to end up fighting a battle of the stop, quits, don’ts, and I promise you Kindergarten will win each and every time.
For those first couple of days in art class, you got to be even more wild and crazy than the kids are to really capture their attention. Here’s what I do. I start the very first day of art with my Kindergarten students, with the Larry the Lion poem. Once everybody’s seated, I show them how to hold their arms in a specific way to make a snake. Try it with me. Take your left arm, and hold it horizontally under your chest. Take your right arm and hold it vertically underneath the fingertips of your left arm. You’re essentially making a big L. The vertical line, that’s your snake. So with your hand, create a puppet mouth. And, get ready, repeat after me.
I teach them real fast that whenever they hear me clear my throat that means they’re about to repeat after me. “Larry, the lion, is a friend of mine.” In which case our Larry nods his head gives us a smooch on the cheek. “He can make three straight lines for me. Vertical,” in which case we’re holding our arm up and down. Then tilt it a little bit. “Diagonal.” Now have it lay on top of your left arm horizontally. “Horizontal. Any curve, he can learn with a twist and a turn. When he’s out of his tangle, he makes great angle. Any line, he can make. After all, he’s a snake.” Now I have a video of myself doing these motions so you can actually see the hand motions that I teach my students. It’s on my YouTube channel. You’re more than welcome to take this back to your own art teachering world. I promise you your Kindergarten friends will love it.
We do that poem about two or three times getting louder and more crazy every time. Then I really out crazy the crazy. I bring out a stuffed snake. With my stuffed snake I form different lines and review the names of the lines we just talked about. Now you want to talk about being wild and crazy and having everybody’s attention, all you got to do is pull out a stuffed snake with Kindergartners and you’ve got them hooked. So that’s tip number on. Out the crazy the crazy.
Another tip is this. If you notice, after you’re covering your rules and routines, because let’s be honest, you have to do that with your Kindergarten kids of course. In a more abbreviated manner. You might notice that they’re a little bit squirrely. And like I said, you don’t want to get into a battle of the stop, quit, don’ts because they will win. Instead, sometimes you got to go with my second tip which is ride the wave. Don’t fight it. In fact whenever I have a classroom of Kindergarten kids or any of my classes in fact, and I can tell there’s an excitement in the room that I am not going to be able to fight, it’s just present and I’m going to have to ride that wave because you can not fight it.
And if you find yourself in that kind of predicament, here’s what I always do. This works great for all of my students, but especially my Kindergarteners. I’ll say, “Okay, everybody stand up.” Once everybody’s standing, myself included, I’ll clear my throat and we do a little dance. I’ll say, “Clap your hands,” and we do it. “Clap your hands,” and they do it. “Clap them just like me.” Then, “Shake your bottom,” and I demonstrate. “Shake your bottom,” I do it again. “Shake it just like me.” We go through the twist, the mash potato, the swim, I keep on going until I feel like they’ve gotten the giggles and wiggles out. When that’s the case, we end it with “Take a deep breath, let it out. Relax just like me.” And I really turn down the tone and the speed of my voice, and I say, “Let’s see who’s sitting so nicely in the first row with their hands in their lap.”
Once you get the giggles and the wiggles out, and they’re seated on the floor you’ll notice, especially if you change the way that you’re speaking like I’ve changed mine, you’ll notice that the temperature in the room, the mood is a lot calmer. You rode the wave, you rode it out. Mission accomplished. Now granted, that’s just being silly and dancing. If you want to make it educational, why not do that? I once learned from an art teacher, have all of your kids stand up and do this. Have their arms out side-by-side and say, “Horizontal,” please forgive my singing, “Horizontal. Side to side. Side to side.” My hands are sweating because I feel so stressed singing in front of you guys. My apologies. Have their arms go up and down. “Vertical goes up and down. Vertical goes up and down.” Then have the kids lean. “Diagonal. Diagonal.” Another great way to ride the wave, wiggles and giggles begone. And it’s educational.
Now sometimes you are going to need to calm those friends down which brings me to number three. In episode four I chatted about being calm and bringing a calmness to your art room. One way to do that, I mentioned, is something called palming. Now I won’t go through palming all over again in this episode, but if you go back to episode four I share with you how to do palming. Y’all, if you have kids that you are trying to calm down, palming is the best way to do it. I can’t recommend it enough. And like I said, using your voice, the diction of your voice, and your breath is really impactful when you’re trying to relax and calm children. Kindergarteners are little mirrors of you. If you’re excited, they’re excited. If you start to bring the level down, most of them will eventually catch on and do the same.
All right. So this brings me to number four. You remember the show ER? Of course we all remember that show. And I just remember in every episode of ER they were always shouting, “We’re losing them. We’re losing them,” in which case they would bring out those paddles and give them electric shock. I every now and then have that running through my mind when my Kindergartners are either walking around, they’re painting, it’s getting a little bit dangerously close to chaos and I just think, “We’re losing them. I’m losing them,” And I want to bust out those paddles and just give them a jolt to bring them all back together.
So one way, if you notice that your bag of tricks is empty and you’re starting to lose them, here are some last resorts. One thing my students in Kindergarten and other grades as well, really respond to are videos. Especially really great singy songy videos. My favorite are created by Scratch Garden, and they can be found on YouTube. There’s a great one about lines, and colors, and shapes. We watch it enough in my room, that the children have the song memorized. So that way as soon as I turn it on, I notice that the kids are starting to clean up or they’re in different phases of creating, and some of them are coming to the floor to come back for circle time.
I just press play, and and the whole room kind of gets very calm as they all start singing the line song, or the color song. So I’d really recommend having that in your bag of kindergarten tricks. One more tip, I love the books called Look. Or Look again by Tana Hoben. These are picture books and all they are are photographic images that she’s zoomed in very close and what I do is I share that book with my students when they start to trickle to the floor, my early finishers. And we look at the blown up images and try to guess what they are pictures of.
It creates a great calming game. We bring in a lot of the element of art like line and texture. And it’s an awesome book just to have on hand when you have a couple of minutes to spare. Something for your bag of Kindergarten tricks.
All right guys. So remember, you can tame this awesome Kindergarten beast. I hate to even use that word, because they really are amazing creatures and they want to be in your room so bad. They’re so enthusiastic and absolutely delightful if you can get them tamed. This is Cassie Stephens. And this is Every Day Art Room.
Tim Bogatz: I hope you’re enjoying this episode of Every Day Art Room. I love all things Kindergarten, and if you are the same way I want to recommend the Art of Ed’s Rethinking Kindergarten online graduate course. It is a great way to give your Kindergartners the teaching that fits their developmental needs. You will study the Reggio Amelia approach, exploring your role as an educator, and the role of the arts in our young student’s education. Rethinking Kindergarten is a two credit hour course that runs for four weeks. New sections will be starting in October, November, and December, and you can see more about the course or register at the ArtofEd.com/courses. Now let’s hear what Cassie has to say as she dips into the mailbag and finishes the show.
Cassie Stephens: All right. Let’s take a little dip into the mailbag. This question I actually get a lot, and it comes from Lauren. She asks, “What program do you use to record and edit your videos for the kiddos?” Great question Lauren. Let me just start by saying that you can use what you already have. Please don’t break the budget to create videos. Just either grab your phone, grab and iPad, and try using that. I like to create videos on my iPad. It’s probably my favorite way to do it because it’s the fastest. On your phone, or your iPad, you can download the iMovie device.
Now if you have an Android phone, which is what I’ve had in the past, you can not put iMovie on there. But there are a lot of other easy movie editing apps that you could add to your Android. I just don’t happen to know what they are. So for me, I record short clips with my iPad then I open up iMovie and I just start adding those short clips into iMovie. My favorite thing to do is to silence the clip and speed up the clip. And I do that for two reasons. I like to do voiceovers so I don’t have to think on my feet when I am recording. And I also am trying really hard to make my videos shorter. So speeding them up really helps with that.
iMovie is super fun and easy to use. I can’t really tell you how to use it here, simply because you need a visual. So for that I would strongly recommend you hop on over to YouTube. You can totally find all of your answers there. And by the way, if you ever want to use any of the videos I’ve created in my art room, you can find them on my channel, which is under my name, Cassie Stephens. You’re more than welcome to use those in your art teachering world. That’s precisely why I share.
Now if you’re going to make your videos maybe a little bit more pro looking, you could record them with your camera. I would definitely invest in a tripod. You don’t have to get a fancy one, just hop on over to your big box store and pick one up. Once you’ve gotten your clips filmed on your camera, then you can upload them to your laptop and edit that way. Doing it that way adds another layer of work. However, the laptop version of iMovie has a lot more things that you can do than you can do on your iPad. So those are my tips. My strongest recommendation would to be just do it. Dive right in, grab your phone, prop your phone up on a couple of books, press record. Why not? You don’t even have to edit it. Just share that with your kids, see what works. See what doesn’t work. Go for it.
If you have any questions for me, please feel free to send them my way at EverDayArtRoom@theartofed.com. It’s been so much fun chatting with you guys about the amazing creatures known as Kindergarten. Remember my four tips. Maybe they’ll help you out. You got to out crazy the crazy. Bring the excitement, that way they aren’t as distracted by other things or each other in your room. Shine a light on yourself, and you’ll have their attention. Also remember, don’t try to fight the wave. Ride the wave. Just go with it. If they’re excited, do something exciting. Make sure to ride that wave, otherwise you’ll just fall into a battle of the stop, quit, and do nots, and let’s face it. They going to win y’all. Always and forever. You can of course bring them back down with your calm voice, slow pace, and deep breathing.
Remember to check out episode four, and listen to how to do palming for calming with your students. And last but not least, if you feel like you’re losing them, make sure you have a couple of things in your bag of tricks. Grab some favorite books. Also don’t forget about the power of some awesome videos with song. It’s been so much fun chatting with you guys about the awesomeness that is Kindergarten. Talk to you soon.
The weather here in Tennessee has been hinting that spring is on the horizon! Of course, if we all wait a good 15 minutes, then that will change but, for now, I'm embracing the notion of spring! And, with that in mind, I thought I would put together a blog post of my very favorite art lessons for this time of the year.
Be sure and tap the link I've created for these lessons. Many of the lessons contain free hand-outs and/or kid-friendly videos. I know this time of year, before spring break, is exhausting. I do hope to help you out a little bit!
Okay, let's get started...
This first lesson is one I loved doing with my second grade students in the spring. We used HUGE pieces of paper, ink-filled bingo daubers and were inspired by the contemporary artist Heather Galler. Once our drawings were complete, we added color with liquid watercolor.
Seeing these large and colorful beauties in the hallways always brightened our days!
Of course, what better way to celebrate spring than with CLAY! My third graders spent a couple of 30-minute art classes creating these. This lesson was posted to my blog before I created video content...so that lets you know it's an oldie! But I do share step-by-step photos...which would be perfect to print out and provide for students.
This lesson could also be done with air dry clay! I shared that in my book Clay Lab for Kids which is FULL of 52 clay projects for those who do not have a kiln!
If you do have a kiln...I've got a lotta videos and blog posts all about clay. If working with clay frightens you a bit (trust me, I get it. I melted down a kiln once at the expense of $500...so, I GET IT), you might want to start here.
Since we are on the topic of clay, another fun lesson for spring would be these clay butterflies!
Not only are these super fun to create but also super fast! My kindergarten students created these butterflies in just one 30 minute class period!
If you are looking for more kindergarten clay lessons, check out this blog post where I put 'em all in one place!
Since we are on the topic of butterflies...check out these created by kindergarten! My other students were so interested in this lesson (and loved the printing process) so much that I ended up doing it with multiple grade levels.
A couple years before that, I did a similar lesson with second graders but used chalk for the wings. I thought they turned out so pretty! Lesson with video here.
The trees are already starting to blossom here so that means it's the perfect time for THIS lesson! I did this one with second graders when we were learning about Japan and each turned out so beautiful!
Got teachers asking for lessons for Mother's Day? This is one that my kindergarten students created that they loved! You can find the lesson video here.
In the mood for printmaking? My students LOVED creating these Warhol-inspired prints. We used sunflowers I found at Dollar Tree but real flowers would be fun to use too. Of course, when I busted out the Puffy Paint, that's when the real party started! Full lesson with video here.
Each printing plate yields two of these gorgeous prints!
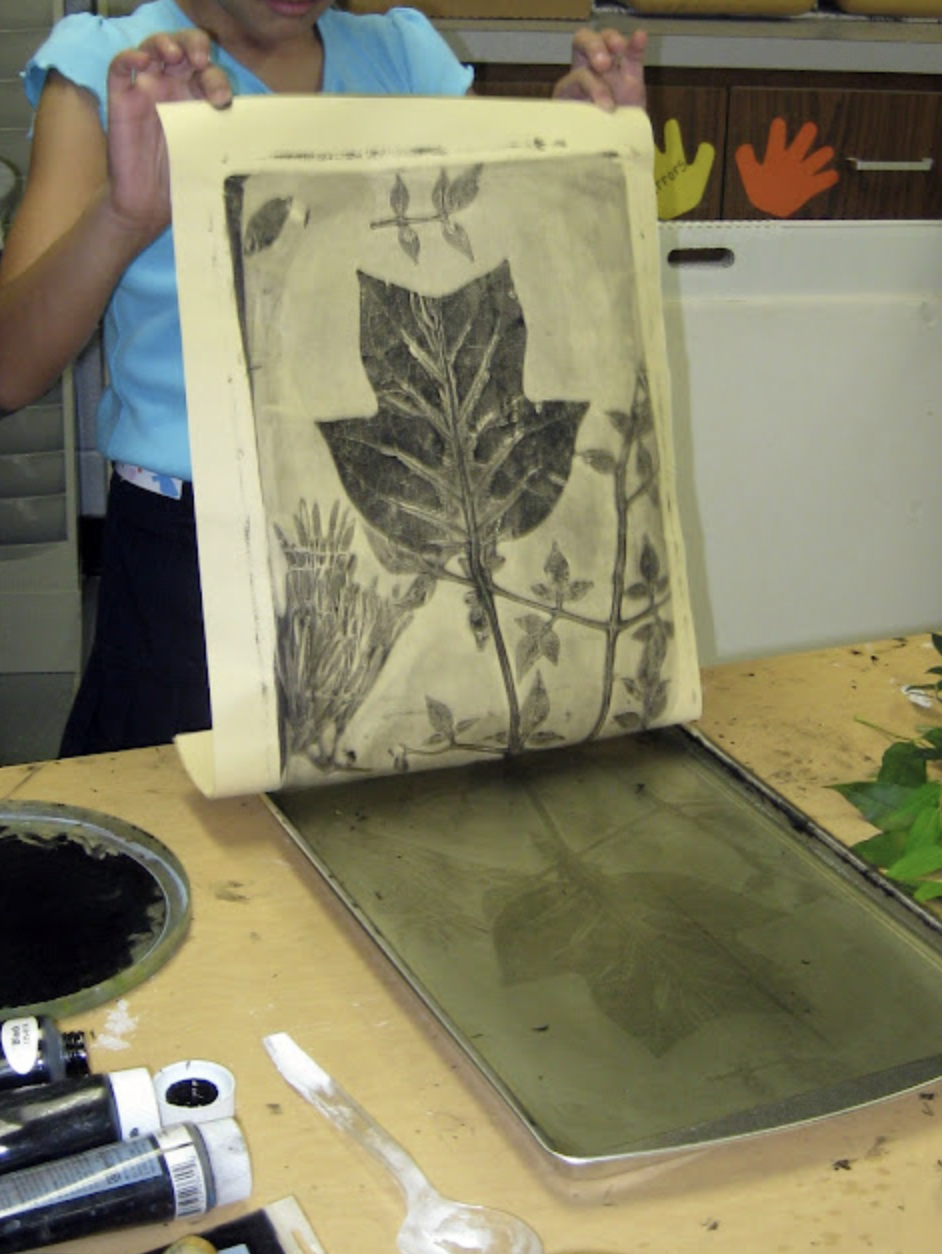
Bringing nature inside is always fun! I've done so many variations of this leaf relief lesson and it's always a hit! You can find all of the details here.
I love this one with the watered acrylic painted on top!
Bright and cheery landscapes are always fun this time of year! A great way to review color mixing and mark making too. This was a hit with my fourth graders.
My third graders really knocked it outta the park with this lesson! They loved creating the details on the vases. I loved watching them explore warm and cool colors for their backgrounds. This lesson can be found in detail here.
In the mood for some fibers lessons? I'm not gonna lie: this project took A LONG TIME. So if you need something to carry you through to spring break...this might be it!
I promise this lesson won't take nearly as long...and the kids will love it! Especially once they get the hang of weaving. Video lesson here.
So...this lesson is labor intensive because you do have to put the mural together...but when I do large murals like this, they stay up for as long as the walls will hold 'em! This was hung at the start of the school year and left up until the end! Full details here.
Of course, the idea for that mural came from this one! I created this spring-y mural for Dot Day but I think it would also be fitting for spring. All the details here.
And there you have it! Over 20 art lessons for spring. I hope you find something here that you can use or are inspired by!
In case ya missed it...I wrote a children's book! Larry the Line can be found right here. This 48-page rhyming book for kindergarten up to second grade (and beyond!) will introduce all lines to students in a fun and engaging way. I promise, you'll love it!
AND...I've not told anyone this yet so...STAY TUNED! This is a series of books on the Elements of Art and the next installment is coming SOON (I'm so excited!).
If you've not checked out my other book Art Teacherin' 101, you might wanna! You can find the details here, just scroll down.
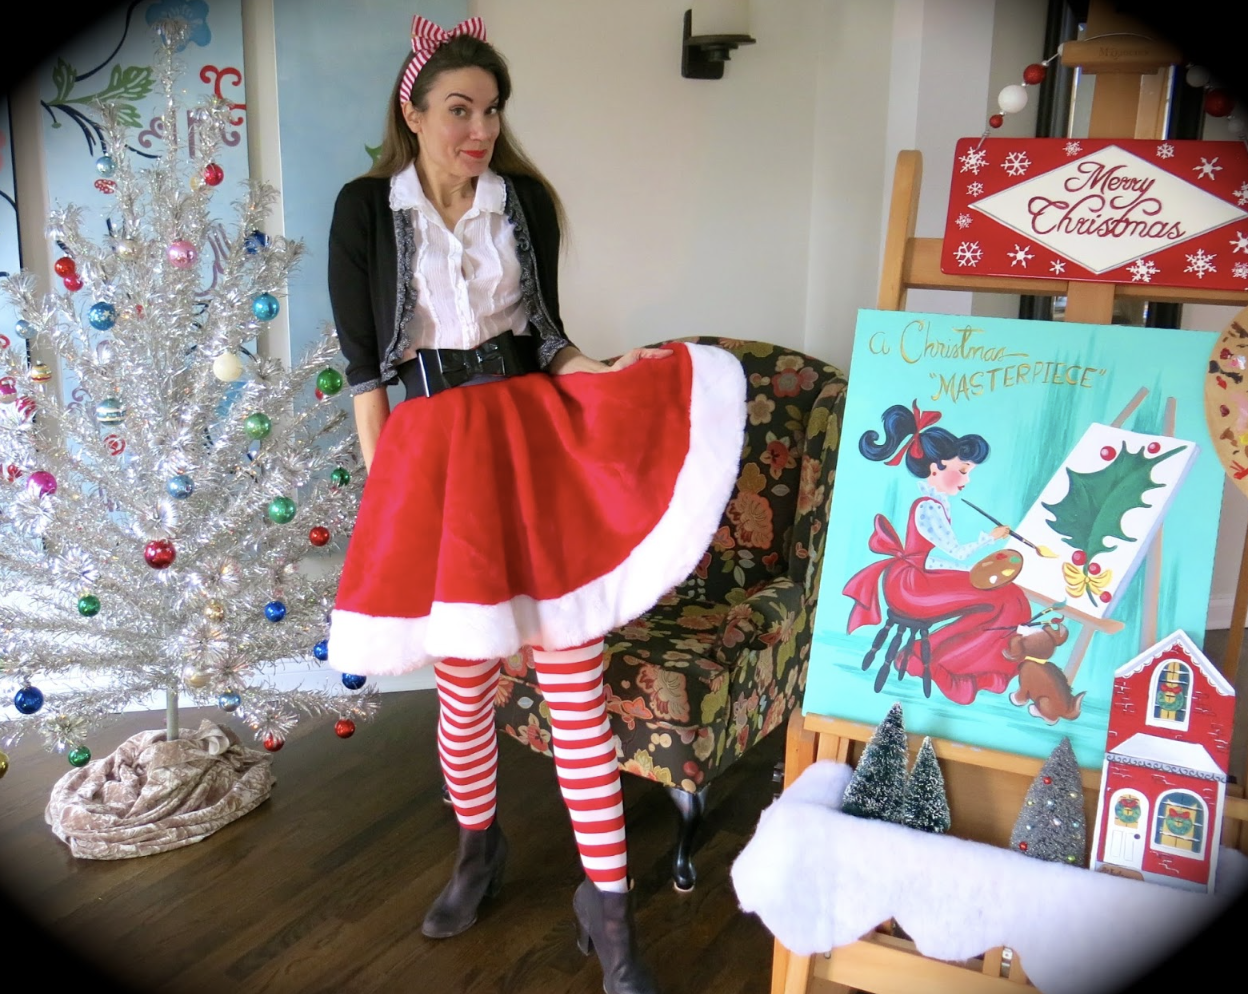
So, incase you didn't know: I have a little bit of a thing for taking Christmas tree skirts and transforming them into lady skirts. I've been doing it For-Eve-Ah. In fact, you can check them out here...
And, I'm sure you can believe this, there's even one more that I didn't document here on my blog! I taught a group of teacher friends years ago in an after-school sewing class how to make one! But...it's been a while. And, since then, I've started creating more video. So I thought it was time for me to update this DIY and create a video how-to! Here ya go:
It's a video that's kinda all over the place so my apologies for that. But it truly is SO EASY. Just remember the following:
* Get a skirt that's 48" and it should be long enough. There are tons on Amazon but...since Christmas is quickly approaching, check those After Christmas sales for tree skirts when they are super marked down!
* Measure your waist and add 2 for the seam allowance.
* Fold the skirt 4 times so you have 8 pieces of fabric folded over.
* Take your waist measurement and divide by 8.
* Using a tape measure, start at the top of the folded skirt and make your way down until you hit that measurement across the top of the triangle (the video shows this best).
* Use a small round plate and chalk to draw the curve onto the fabric and cut.
That's the most important steps to remember as you begin. In the rest of the video, I share how to make a waistband and add a 10" zipper. Although, to be honest, if you need a zipper how-to, I recommend watching another video as I failed to film a portion of that! I swear it hit record! So sorry.
Just remember: no one is gonna get that close and see small stitches that might drive you bonkers. I mean, shoot, even if you skip the zip and use VERY STRONG velcro (we don't want any wardrobe malfunctions!), you'll be fine.
Merry Christmas, friends!
BY THE WAY...I've not officially shared here even though I've been meaning to...did y'all know I wrote another book?! I finally turned my poem Larry the Line into a children's book! I made it longer, illustrated it and...here it is! It's gotten over 80 5-star reviews from teachers and I'm just so thrilled. You can get a copy here, if ya like!
I know many of you are coming off of Spring Break which means you are officially in the home stretch. That is...unless you teach until the end of June. Then, well, all I can say is...I'm sorry.
BUT I do have some fun Earth Day lessons for you! Nearly all of them are video format which means you can just hit play. I created them during 2020 so most are just simple supplies. I hope you enjoy and find something here that will help you and your students celebrate Earthy Day which is on April 22nd.
Have you ever made Salt Dough Clay? This would be so fun to do with a small group of students. Perfect for an after school activity, homeschool, scouts, you name it. Using cardboard means you can recycle which is always great for Earth Day. Here's the lesson and video!
So you want to paint with kids buty ou don't wanna get out the paint? I hear ya! My students always love the marker-meets-water trick! Try it out with this lesson!
Of course, not every Earth Day lesson has to be Earth-art focused. You could simply use it as a jumping point for landscape projects! Here's a fast one that helps students understand the difference between foreground, middle and background.
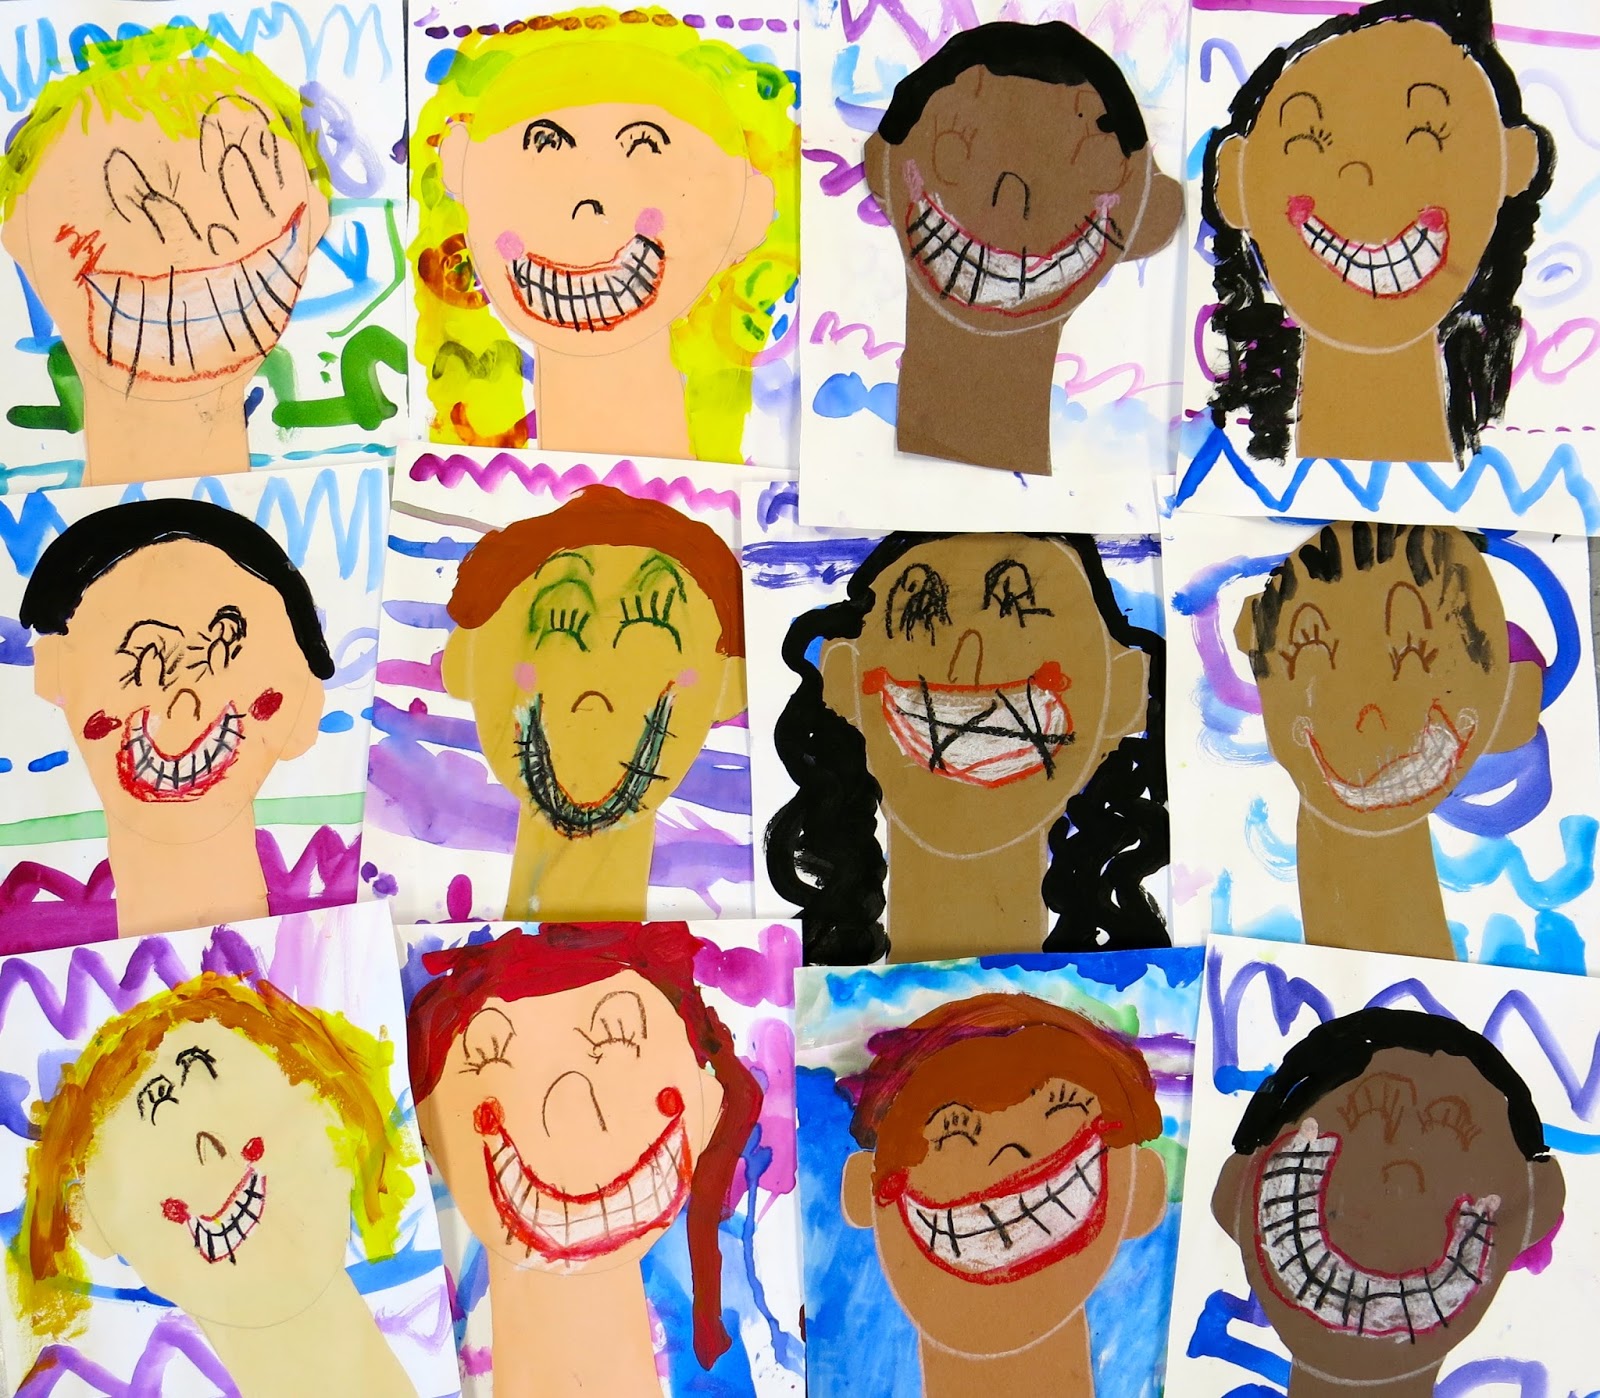
If you'd like a project that includes the whole school, you may want to try making a map of the Earth with self-portraits! You can find details on this lesson here.
If you are looking for a fun and happy kindergarten Earth Day (or any day!) lesson, look no further than here!
And what better way to celebrate Earth Day than a mural dedicated to it? We made this huge mural based on the song What a Wonderful World and it stayed up all year.
That's right! I just launched my new book Alfred the Ape Knows His Shapes last week and I'm so excited! I'm working on a series of Elements of Art books as I always wished there was something like that. I did a limited print run and I'm currently...signing all books as they head out the door. So! If you'd like a copy, you can check it out here!


.jpg)