Showing posts sorted by relevance for query leaf printmaking. Sort by date Show all posts

Sunday, September 18, 2016

In the Art Room: Printmaking Made Easy!

Hey, y'all! I'm in the middle of lesson planning for some upcoming fall-themed projects in the art room. Since my third graders are getting ready to embark on the above printed leaves project, I thought I'd share the lesson video with you as well as my fave printing projects. By the way, I often update my YouTube channel before sharing here. So if you wanna see some art teacherin' videos as soon as they launch, you might want to subscribe here
Every since I learned about marker prints from my art teacherin' buddy Don over at Shine Brite Zamorano, I have been in love. The technique is so simple and yet so impactful. I think my third graders will have so much fun creating their leaf collages. We are going to be tying in science by discussing just why leaves change colors. The background will be a lesson in glue resist and watercolor techniques. I'll be sure to share the complete lesson when we are finished. Until then, here are some of my very fave printing projects!
Last year, my first graders explored printmaking with these LOVE collages. They did both marker and ink prints and had a great time doing so. 
In this video, I share with you some more tips on marker prints as well as printing with ink. When I first started teaching, printmaking was a daunting teaching task for me. Over the years, I've come up with some things that work for me...maybe you'll find 'em helpful as well.
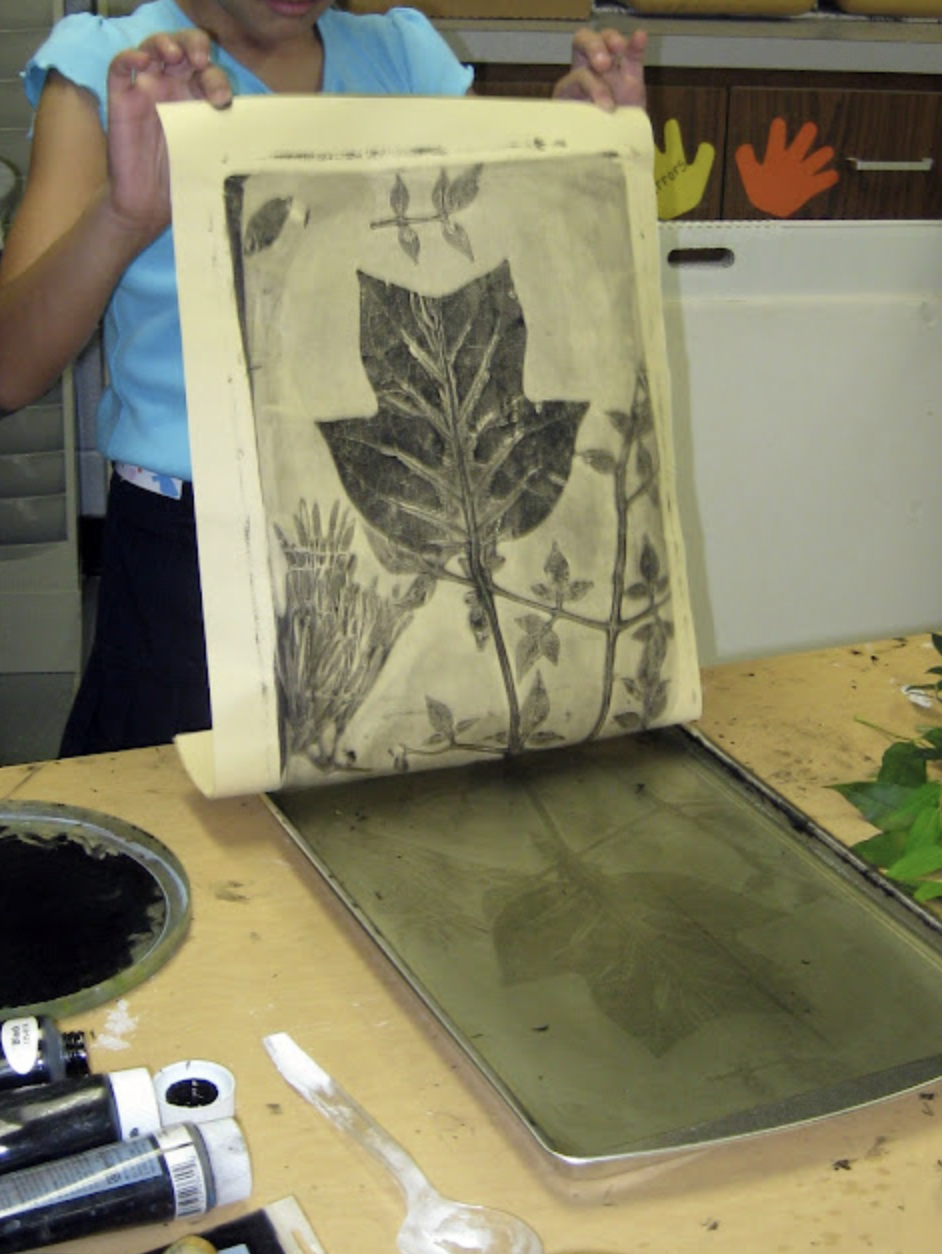
I love the powerful impact of these positive and negative leaf prints. The amount of prep time needed to make these printing surfaces is well work the results they produce. 
Last year, third grade got their toes wet with this printmaking project that explored cityscapes, depth and watercolor techniques. I created a couple of videos to walk the kids through the processes.
By the way, I create these videos for the following reasons: 1. my sanity; 2. so that all of my students can see my demos and 3. for anyone else who wants to use them! Seriously, feel free to play my videos in your art room. It's the reason I share them on my YouTube channel.

Last year, I was super smart and did printmaking with all grade levels at once. That meant all supplies were out and ready for the entire day. No switching visuals, supplies, etc. It really made printmaking a snap for me. Second grade worked on these sweet printed winter selfies
Fourth grade created these amazing Egyptian god portraits a couple of years ago. So much in one project: drawing, printing, metal tooling! 
A fun variation on traditional printing are floating chalk prints. If you've not tried this, I highly recommend it, so fun, easy and beautiful!
Why not print on fabric? My third graders not only enjoyed the printing process but also stitching their fabric pieces together. 
Making your mark with untraditional materials like cardboard is fun too. My third graders learned about the history of the Eiffel Tower while creating these beauties
And, of course, I've been sharing these fun radial prints that my fourth graders just wrapped up. 
Kids love printmaking because it's good, messy fun. I love teaching printmaking because it is a wonderful medium that allows the kids to see that art is not just a one-n-done. But it is all about trying over and again to create something awesome. 
I'm always looking for fun printmaking projects for my students as well as helpful tips and tricks. If you've got 'em, please share 'em in the comments below! 
 photo signature_zpsd10b3273.png

Sunday, February 26, 2012

In the Art Room: Leafy Spring Prints

Negative leaf print by one of my second grade students earlier this year.
 Hey, guys! This post has been very popular on my blog...if you are interested in other leaf-y projects, look at my Leaf Relief project and my Pressed Leaf Project as well. Thanks!

I don't know what it's like where you live, but here in Tennessee, we are experiencing spring-like weather. For the most part. I mean it did snow the last two Saturdays (and, in Tennessee, "snow" means just a few flakes and a couple of inches) but the other day it was 78 degrees. Crazy, right?

For that reason, I've got touch of spring fever. You too? Well then you might enjoy this leafy printmaking project I did at the beginning of the year with my second graders. It's simple, scientific, beautiful and fun...okay, enough talking about me (!), on with the lesson.

For this project, you'll need the following:
  • gelatin, not Jell-o. Most grocery stores carry a brand called Knox which sells in boxes of 16 pouches.
  • cookie sheets
  • printmaking brayer, sold at most craft stores
  • printing ink
  • variety of leaves
  • paper
Print pulled from the same printing tray, this time the positive version.
The night before you begin, you'll need to prepare your sheets of gelatin. To do that, bring about 3-4 cups of water to a boil. Once boiling, whisked one pouch of gelatin into the pot. You don't want any clumps of gelatin, so whisk like there's no tomorrow. You'll end up adding about 12-15 pouches of gelatin into that one pot. Sorry, I'm not into exact measurements. Which could explain a lot about my cooking. If there are any remaining unwhiskable clumps, remove them with a spoon.

Pour mixture into a cookie sheet filling it about 1". Leave uncovered over night. If you see any bubbles in the cookie sheet, pop them or remove with a spoon. For my class of 20 students, I made three trays.

Pulling the first print always managed to get oohhhh's and aahhhh's aplenty.
The following day, we were ready to print. The surface of the gelatin was squishy yet very firm, perfect for holding our printing ink. I think I can explain this best in steps, so here you go:
  1. Using a brayer and printing ink, cover surface of gelatin in ink.
  2. Place leaves onto the ink-covered cookie sheet with the veiny side down. I don't recommend using anything with pine needles because that will puncture the gelatin. But experiment, you never know!
  3. Once leaves are in place, lay paper on top of cookie sheet and rub (er, we call it  "massage") the paper. 
  4. Pull paper off, as you see in the above photo, and viola! You have your first print!
Notice how clear the gelatin looks. All of the ink that was once on the tray is now on the paper.
I love her dainty fingers pulling up the second print. So sweet.
Now for the second print:
  1. Gently remove all of the leaves from the tray. It's best to pull them out by the end of the stem.
  2. Place a new sheet of paper over the now-empty cookie sheet and rub.
  3. Pull second print which will be a positive image of the first.
Looks like a black and white photo, don't you think?
Once both prints have been pulled, re-ink the tray and begin the process all over again. With a class of 20 students and 3 pans of gelatin, about 10 kids were able to print per half an hour class. The pans of gelatin can last about two days with an endless amount of printing. I tried to cover the gelatin and keep it for a little longer, but condensation droplets created strange little craters on the surface. If left uncovered for too many days, it begins to dry and crack. For that reason, if you plan to do this project for longer than a couple of days, you'll just need to prepare more gelatin pans the night before.
Our second go-round of printing involved using white ink on black paper. Just as pretty.
This project is so easy and the results so stunning that everyone is successful. I've now had a couple of craft get-togethers and this is always a hit. Once those leaves start growing in your neck of the woods, I do hope you'll give it a shot!
I love the photo negative quality of this print.

Thursday, August 14, 2014

In the Art Room: Gettin' Outta the Art Room!

Hiya, kids! I thought I'd share with y'all today some excitingness that has me busting outta the art room and hittin' the road. The CliffsNotes version is this:

* On Saturday, September 6th, I'll be leading a workshop at Cheekwood Botanical Gardens in Nashville. The workshop will coincide with Cheekwood's current exhibit of Andy Warhol's Flowers. We'll start the morning with a docent-lead walk through the exhibit and then jump right into printmaking, leaf relief sculpturing and some textile work that will involve my personal favorite: needle felting! The workshop fee is a mere $25 ($20 if you are a member of the Gardens). Spots are limited so if you are interested, go here, click the link and get yourself signed up. I can't hardly wait!

* On Monday, October 6th, I'll be speaking to the art ed students (and any folks who'd like to attend) at Bowling Green State University in Bowling Green, Ohio! Yeah, you heard me right. Here's how the talk is being described: 

A Bloggers Guide to Bringing Art to Life

Cassie Stephens graduated from Indiana University with a BFA in painting and an art education certification.  After student teaching in Ireland, she moved to Nashville, Tennessee where she has been teaching art to kindergarten through fourth grade students for the past 15 years. She is a blogger sharing her passion for bringing art to life.  This might be by dressing like Andy Warhol's Soup Cans or Vincent van Gogh's Starry Night.  She enjoys connecting with art teachers from across the world with her blog and will share examples of art projects that reflect this global outlook.

Wow. Totally freaking the funk out about this one! I'm so excited to chat with art ed students as well as anyone else that would like to attend. The talk will start at 5pm, is open to all and it's free (I'll share the exact location with you soon). Hope to see you there! 
But first, let's chat about this Cheekwood Adventure, shall we? I love Cheekwood, y'all. When I first moved to Nashville, I used to go, hang out in the gardens and attempt to paint. It's always gorgeous, peaceful and inspiring. A fellow art teacher buddy and I visited this summer to check out their current Big Bugs outdoor exhibit (although the million degree summer temps prevented us from lasting too long) the Andy Warhol's Flowers show.
I like Big Bugs and I cannot lie. Actually I freakin hate bugs of any size. This summer, a buncha buddies and I were waiting to eat at a restaurant (which I will not name but I also will not be eating at ever again) when a FREAKIN HUGE cockroach landed on my friend's shoulder. I was the only one that noticed the monster crawling on him and started screaming "Oh my gawd, OH MY GAWD," at the top of my lungs. Meanwhile, everyone else was trying to figure out what I was spazzing over because I was unable to say anything other than, well, oh by gawd. When the others finally noticed La Cucaracha, EVERYONE started screaming and jumping up and down until the poor beast was finally crushed. It was at that point that we noticed the ENTIRE restaurant had stopped and was staring in our direction. Awk. Ward.
See? I done tole you the gardens were beautiful! We'll be using both Andy Warhol's printed flowers as well as Cheekwood's real ones as our printing/sculpturing/felting inspiration.
Now, if y'all can't make it, you can always read all about the process of printing that we'll be doing here. This is actually one of my most visited blog posts and I think it's because the results look so stunning. I did this project with my lil 2nd grade friends and they rocked it. You can check out all the deets here. 

One printing process results in two amazing prints. I'm hoping we can print some flowers while we are at Cheekwood. Although, in the past, I've just used leaves as their flat surface doesn't puncture the gelatin printing plate. But it will be fun to experiment, so we shall see!
For our relief sculpture, we'll be creating these super groovy leaf and flower pieces. I have done this project with my 3rd grade friends and they always look rad. You can read about that project here if you wanna.
 In the afternoon, we'll be needle felting! I'm still toying with the idea of just what we'll be creating...but I'm excited about the possibilities! Of course, we just might have to felt some flowers. You might recognize these from my Felted Fiesta Frock with Ballz.
So! I hope to see y'all there! And my Ohio friends, I hope you'll join us at BGSU. Until next time, I hope you have a super fab week, y'all!

Sunday, March 3, 2024

Favorite Art Lessons for Spring!


The weather here in Tennessee has been hinting that spring is on the horizon! Of course, if we all wait a good 15 minutes, then that will change but, for now, I'm embracing the notion of spring! And, with that in mind, I thought I would put together a blog post of my very favorite art lessons for this time of the year. 

Be sure and tap the link I've created for these lessons. Many of the lessons contain free hand-outs and/or kid-friendly videos. I know this time of year, before spring break, is exhausting. I do hope to help you out a little bit! 

Okay, let's get started...
This first lesson is one I loved doing with my second grade students in the spring. We used HUGE pieces of paper, ink-filled bingo daubers and were inspired by the contemporary artist Heather Galler. Once our drawings were complete, we added color with liquid watercolor. 

Seeing these large and colorful beauties in the hallways always brightened our days!
Of course, what better way to celebrate spring than with CLAY! My third graders spent a couple of 30-minute art classes creating these. This lesson was posted to my blog before I created video content...so that lets you know it's an oldie! But I do share step-by-step photos...which would be perfect to print out and provide for students. 

Lesson can be found here. 
This lesson could also be done with air dry clay! I shared that in my book Clay Lab for Kids which is FULL of 52 clay projects for those who do not have a kiln!
If you do have a kiln...I've got a lotta videos and blog posts all about clay. If working with clay frightens you a bit (trust me, I get it. I melted down a kiln once at the expense of $500...so, I GET IT), you might want to start here. 
Since we are on the topic of clay, another fun lesson for spring would be these clay butterflies!
Not only are these super fun to create but also super fast! My kindergarten students created these butterflies in just one 30 minute class period! 

All the details here. 
If you are looking for more kindergarten clay lessons, check out this blog post where I put 'em all in one place! 
Since we are on the topic of butterflies...check out these created by kindergarten! My other students were so interested in this lesson (and loved the printing process) so much that I ended up doing it with multiple grade levels. 

I created a video for students to follow along here. 
A couple years before that, I did a similar lesson with second graders but used chalk for the wings. I thought they turned out so pretty! Lesson with video here. 
The trees are already starting to blossom here so that means it's the perfect time for THIS lesson! I did this one with second graders when we were learning about Japan and each turned out so beautiful!
Vincent van Gogh's cherry blossom tree paintings are always so beautiful and they inspired this lesson here!
Got teachers asking for lessons for Mother's Day? This is one that my kindergarten students created that they loved! You can find the lesson video here. 
In the mood for printmaking? My students LOVED creating these Warhol-inspired prints. We used sunflowers I found at Dollar Tree but real flowers would be fun to use too. Of course, when I busted out the Puffy Paint, that's when the real party started! Full lesson with video here. 
When I shared this printmaking lesson many years ago, GelliPlates were not a thing. I made my own plates! However, I wouldn't recommend it as it's not vegan friendly nor does it last long. Also, who has time to make them?! So if you have GelliPlates or something similar, you will LOVE this lesson!
Each printing plate yields two of these gorgeous prints!
Bringing nature inside is always fun! I've done so many variations of this leaf relief lesson and it's always a hit! You can find all of the details here. 
I love this one with the watered acrylic painted on top!
Bright and cheery landscapes are always fun this time of year! A great way to review color mixing and mark making too. This was a hit with my fourth graders. 

And just look how pretty! Full blog post here. 
Got a million-trillion popsicle sticks?! Behold! A lesson that is super fun and uses 'em all up! Lesson details with video can be found here.
My third graders really knocked it outta the park with this lesson! They loved creating the details on the vases. I loved watching them explore warm and cool colors for their backgrounds. This lesson can be found in detail here. 

If you've never tried using liquid starch with chalk and seeing the AMAZING results...consider this your sign! This lesson comes with a full video created for fourth grade students. They will love it!

In the mood for some fibers lessons? I'm not gonna lie: this project took A LONG TIME. So if you need something to carry you through to spring break...this might be it! 

I promise this lesson won't take nearly as long...and the kids will love it! Especially once they get the hang of weaving. Video lesson here. 

If you are looking for even more fibers lessons, you might want to check out my book Stitch and String Lab for Kids!
So...this lesson is labor intensive because you do have to put the mural together...but when I do large murals like this, they stay up for as long as the walls will hold 'em! This was hung at the start of the school year and left up until the end! Full details here. 
Of course, the idea for that mural came from this one! I created this spring-y mural for Dot Day but I think it would also be fitting for spring. All the details here. 

And there you have it! Over 20 art lessons for spring. I hope you find something here that you can use or are inspired by!
In case ya missed it...I wrote a children's book! Larry the Line can be found right here. This 48-page rhyming book for kindergarten up to second grade (and beyond!) will introduce all lines to students in a fun and engaging way. I promise, you'll love it!

AND...I've not told anyone this yet so...STAY TUNED! This is a series of books on the Elements of Art and the next installment is coming SOON (I'm so excited!). 

If you've not checked out my other book Art Teacherin' 101, you might wanna! You can find the details here, just scroll down.


photo signature_zpsd10b3273.png