Sunday, April 19, 2015

What the Art Teacher Wore #137

 Chalk Artist Monday: On this day, I introduced the school to our visiting artist Lee Jones. To ensure that every class had a chance to hear her speak and see her work, we paraded each grade level in for an assembly. Y'all. Assembly days, even ones where I'm not doing the speaking, wear me the funk out! painted dress: DIY, here; dotted booties: DIY, here; paint drippy scarf: flea market; tights: Target; head piece: from the family of a sweet student

Friends, Romans, Countrymen...how the heck are all y'all?! Ima doin' fabuloso on this one-minute-rainy-next-minute-sunny weekend o' mine. It was a crazy week in art teacherin' land but I wouldn't have had it any other way. Monday and Tuesday, as those five of you that read my blog know, my school hosted a visiting artist. And on Tuesday, my superstar second graders tried their hand at the fun. You know you can catch a glimpse here.  

Tuesday evening, I had so much fun chatting it up with Tim Bogatz and Andrew McCormick on AOE Live! Those two dudes are fantastic interviewers and I loved every minute. We laughed, we cried, I convinced them that they needed more bedazzly-goodness in their lives, it was great. If you missed, no worries! You can catch the whole thing here

I dunno if you noticed or not...but you've not seen too many DIY's on this here blog from me of late. That's because I've been working on a super secret and exciting project that I just wrapped up this Saturday. I am so looking forward to sharing the deets with you in the near future. Howeverness, now that it's done, I can resume spending some much needed time with my Brother. Sewing machine that is (sorry, Kristopher Stephens!). 

Stay tuned this week as I hope (fingers crossed) to have a new stitched DIY for you as well as a new lesson complete with video clips. Chat soon, y'all! 
 I'm currently addicted to headpieces, y'all. You see, I've run out of crazy-dressin' real estate everywhere else so it seems the top of my head is just about the only thing left. I'm taking a hat-making class this coming Saturday with a bunch of art teacherin' friends which I'm totes excited about. Hat-tastic blog post to come!
 The AOE Live interview was such a blast. Tim and Andrew are excellent hosts, as y'all that watched prolly figured out. If you didn't have a chance to catch the interview, you can view the whole thing here. We had entirely too much fun cuttin' up. And, what these boys don't know (cuz, c'mon, are they really gonna read a "What the Art Teacher Wore" post?!) is that I wasn't kidding about bedazzlin' their duds...heeheehee. 
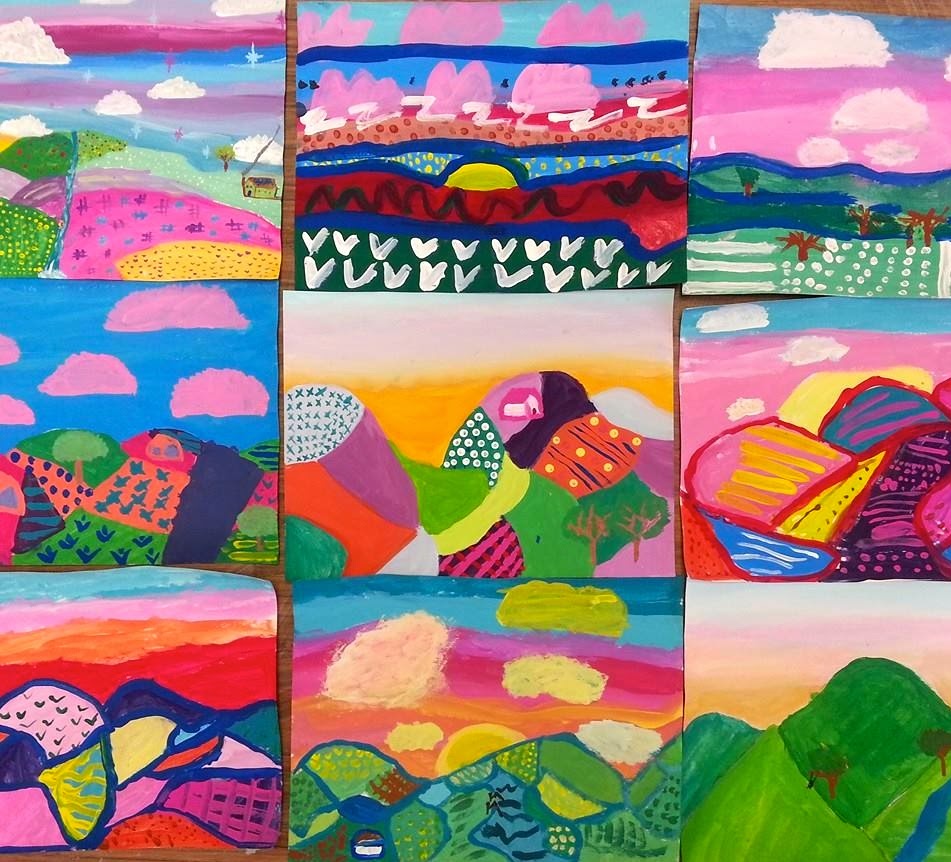
 Butterflyin' Tuesday: 'Kay, 'member that time I said that watching a school-wide assembly all day was exhausting. Well, I lied. Teaching 80 2nd graders for two hours how to chalk is exhausting. But they totally loved it AND completely nailed it. They gave me butterflies! butterfly blouse: ebay; butterfly skirt after Warhol: Anthro found on ebay; tights: Target; butterfly hair pieces: something found in the floral section of JoAnn's; shoes: ugh. Just some ugly flats that my feet are currently in love with. 
 Here's a snap of Lee's tiger up in the ceiling. Isn't it fab? When the custodian was putting them up the following morning, he had a big crowd of kids, teachers and parents surrounding him. When he was done, there was a huge round of applause. We are in love with our new ceiling tiger! Details here. 
 Dots and Leopard Wednesday: So the weather here has been super rainy which means I'm in a constant state of chilly. So wearing these scarf deals in the spring seems totally natural. Specially when it's a leopard print scarf cuz you can't go wrong there, says moi. dress: thrifted. I added the leopard to the bottom years ago to give it some length; tights: Target; belt: Amazon; scarf: gift from a student. My kids have the best taste, y'all.
 I know, you just saw 'em. But I love 'em so! I'm so happy that they hang in the hallway outside of my art room so I can enjoy them all the time. Even if everyone walks around like a crazy person with their head flipped backwards.
 Big Ole Skirt Thursday: Ya know. Big enough for me to hide all my tots in. In the AOE Live interview, the dudes asked me if I ever had days when I just didn't feel "on" (um, more than I'd like to admit). I told them that on those days, I walk into my closet, close my eyes and grab three things...and try to create an outfit from that. This gets my sense of play and creativity going. It's also EXACTLY what I did on this day. As if you couldn't tell, riiiiight? sweater: ebay find, years ago; top: garage sale; skirt: antique store; belt and bangles: Mexican market in L.A.
 I just had to share a couple of these seriously precious notes a class of second grade students wrote me after our chalking event. During their art time, while they were weaving away, I read each of the student's notes out loud. I did have a lil moment over the sweetness of their words. 
 Le sigh. 
Hello, Friday!: Have I ever told y'all my Friday schedule? It goes a lil sumpin like this: 2 second grade classes and 2 first grade classes back to back for 30 minutes. Then, lunch (hahahahahaha, what's that?! You call it "lunch" I call it "crap, I have so much stuff to prep for the afternoooooon"). THEN 3 45-minute kindergarten classes back to back. Yeppers. Friday is my kind of par-tay, y'all. Hence the party clothes. dress: Modcloth; sweater and tights: Target; crayon clip: moi; belt: etsy; "artsy" necklace: gift from Phyl
 photo signature_zpsd10b3273.png

Wednesday, April 15, 2015

In the Art Room: A Chalked Ceiling Event

For months I'd planned on having street painter Lee Jones visit my school, chat with my students and have them participate in their very first street painting event. Juz to give you a lil back history on street painting, aka sidewalk chalk art, it surprisingly goes back to sixteenth century Italy. The Madonnaro were homeless artists who created lavish images of the Madonna, their namesake, in front of cathedrals in hopes of earning spare change from passerby. From this, Madonnari, or street painting events, evolved all over Italy. Twenty years ago, street painting made it’s debut right here in the U.S. and it’s been growing into a movement of performance-meets-fine-arts since.

 In preparation for the happenin', my super amazing bookkeeper (love you, Julie!) helped me track down the best deal on KOSS chalk (great stuff, man. Check it), foam brushes and mountains upon mountains of baby wipes. I'd prepped the kids by introducing them to what they'd be creating (like, der, butterflies) with that intro lesson I shared last week. We were beyond ready to get our street paintin' action on.

And then, the forecast: RAIN. Lots of it. With some thunder and lightening thrown in for good measure. Gee, thanks, Muthah Nature. You's the bestest.

So, like, whuuuut to dooooo?!
 
Okay, I don't like to brag or anything (hair flip), but every once in a while, I have super good idea. And, by "every once in a while", I mean, this one time. Right here. I decided on the fly that instead of us working outside, we could work inside on a texture that was similar to that of a sidewalk: ceiling tiles. My principal has been asking me all year if I'd have the kids create masterpieces for the ceiling and this seemed like the perfect opportunity. And, I have to tell ya: it worked out great! Added benefit: we now have permanent art on display at our school not temporary street art. So, take that Muthah Nature! I found me a silver lining and I made lemonade from your stinky lemons. 
 Just how did the whole thing go down? Well, lemme first start by telling you the supplies we used:

* KOSS brand chalk. We also had some Prang and Crayola thrown in for good measure.
* Ceiling tiles. Ours are 24" squares. A parent volunteer divided each square with a vertical and horizontal line right thru the middle which allowed the kids to try their hand at the grid method. This is one means by which street painters work. By the way, we used the back of the tiles as the texture was better suited.
* Foam brushes for blending.
*MILLIONS OF BABY WIPES.
* Cheapo hairspray (that Aqua Net we used in junior high? It's still around and good for sumpin) for setting the chalk.

We held the event in our school's multipurpose room. With the help of volunteers, we laid out sheets of bulletin board paper to protect the floors. Each kid had their own board, foam brush and light peach chalk to initially sketch their design. In the photo above you can see my teaching set up. I was teaching 80 second grade kids at once which was a total trip. I staggered my teaching so as not to overwhelm them with instruction. So for the first step, I gave them guided drawing instructions on sketching their butterfly outline. This was a snap for them as they remembered our butterflies from last week. You can see my drawings on the white paper in the photo above. 
Next up: block in your butterfly. I told the kids that every time they heard me ring a bell, they were to stop, drop and come to the floor for the next set of directions. If they hadn't finished sketching, that was okay, they could resume once I was done speaking. The kids had the choice of using all warm or all cool colors for their butterfly. They blended the colors in small circles so as not to lose the vibrancy of their color.
 Second grade, y'all. Like, wow.
Loving every minute of it! Since we were on the floor it did give the same feeling as street painting.
Upon our third on-the-floor chat, we talked about the background. This time they had to use the opposite color family of what the chose earlier. Block it in and blend, kids. 
By the way, we use the chalk horizontally as that covered the most amount of surface.
Lee was working just as hard as the kids right alongside them. That was a wonderful experience for the kids. As they roamed the room gathering their chalk, they would plop down and chat with her or just watch her chalk.
 The background came together so nicely with the butterflies!
At our last chat, we talked about using the black chalk. They sketched in the three parts of the butterflies body as well as outlining and any pattern making they wanted to do. Last thing: sign it. Lee told the children that when they signed their work that was it, no going back. 
Lee's work is made up of 6 ceiling tiles taped together. The next morning my AMAZING custodian set to work hanging the pieces in the ceiling...
I love our school mascot the tiger here!
And the beautiful butterflies fluttering down the hall. There were many a folk walking with their head looking upward down the hall today!
 Now the kids are asking: what ELSE can we make for the ceiling!
For now, we'll just stick with these beauties! 

 photo signature_zpsd10b3273.png

Sunday, April 12, 2015

What the Art Teacher Wore #136

New Skirt Monday: Nuthin starts a week off better than some new duds, says moi. I got this lovely skirt as a birthday prezzie (thanks, Tamara!) and I was so stoked to wear it now that the weather is as sunny and colorful as it is. jean jacket: Buffalo Exchange; embroidered blouse and bracelets: yard sale; skirt: Flying Tomato; tights: Target; shoes: Anthro

Hello, party people! How are all y'all? After having so many short weeks due to snow, holidays and being in NOLA, this week was like a big fat dose of reality. On Tuesday I thought it was Thursday and by Wednesday, I swore it was Friday. Yeah, that's never a good sign. However, this week I'm totally ready. Our school is hosting chalk artist/street painter Lee Jones for a coupla days. I cannot wait to see what she and my super stoked second graders create. And on Tuesday evening I'll be chatting with Tim Bogatz and Andrew McCormick right here...
I'm so excited! Both of those dudes are incredible art teachers as well as AOE presenters and writers. I'm thrilled to have been asked to chat on AOE Live. It'll all go down on Tuesday, April 14th at 8pm Central and, added bonus, it's free. We'll be talking about finding your own art teacherin' style. For more info, just get yerself here.

So that's my upcoming week...here's a lil taste of what went down in the art room this past week! 
I needed a quick one week self-portrait lesson for my super star first grade artists. They only needed a week before their clay projects would be back to them so this self-portrait proved to be a great project. I'll give ya the complete lesson here soon on the blog. I've purchased those fancy frame papers to insert these bad boys in. I cannot wait to see the result!
I wish you could see this sweet lil girl to know just how accurate that awesome portrait is!
Flowerin' Tuesday: So everyone around here is putting stuff in the ground. But, having lived here for some time, I know that the weather in Tennessee can be 80 one day in the spring and than BAM! we get a hard freeze. And, being the total lazy slob that I am, I always forget to cover my plants and therefore kill 'em all. So I'll be wearing my flowers for a while...and planting them in about a week or two. How 'bout you? Stick anything in the ground lately? sweater and dress: Anthropologie, purchased at Buffalo Exchange; dotted booties: made by me, DIY here
Third grade land is in the midst of creating these chalked landscapes. What you see here is the final-ish stage as most kids are planning to add their desert animals. I love 'em with or without! We chatted about the artist Sushe Felix (you can see my prezies here and here). I'll give you the full details on how we created these lovelies soon.
Painterly Wednesday: So I found this dress in a resale shop in NOLA and I was all, OMG, that thar is an art teacherin dress if I ever saw one! I wore it complete with my paint brush crown, another NOLA score. I tell ya, the shopping there, to die for! dress: Buffalo Exchange; Necklace: The Paper Source
My fourth grade has been on a color-mixing adventure. I loved all of those One Hundred Days of School/Mix One Hundred Colors images I kept seeing pop up on pinterest. I thought my kids could really use that concept in their landscape paintings. So the rule was: you gotta mix all of your own colors. They absolutely loved it! We chatted about he artist Xavier Castellanos (prezi here) and worked on these for a couple of art classes. Again, lesson to come, kids! 
 Color Wheel Thursday: Mixing color means knowing your color wheel! Those fourth graders became champs at reading that wheel. Although it still would crack me up (and some of the other kids) when one kid would say, "I don't have any orange!" to which we'd all reply, "That's because you have to MAKE it!" sweater and tights: Target; dress: Modcloth; palette belt (I know, right?!): vintage, etsy; shoes: Fluevog
Oh, lookie! We're getting closer and closer still to completing our Johnson Elementary Has Heart mural! I couldn't be more excited. I'll be sure to keep y'all posted. 
Soupy Sneakers Friday: My super sweet aunt and uncle sent me these new kicks in the mail. I couldn't wait to wear 'em to school and chat with the kids about them. But guess what proved to be the focal point of my ensemble? That's right, THE PANTS. They just couldn't see past the thought of me in pants to focus on my shoes. Le sigh. sweater and jeans: old, Target: dotted blouse: thrifted; shoes: Converse
Is it just me or are these first grade fish not the biggest crack up? We used the same technique you might have seen in my kindergarten clay post. I cannot wait to share this simple clay lesson with y'all! Until then.
 photo signature_zpsd10b3273.png

Thursday, April 9, 2015

In the Art Room: Kindergarten Clay Birds

Well, hey there, bird legs! It looks like you are getting a two-fer this week as I'm sharing yet another "In the Art Room" with y'all! That's partly because I've not had two seconds to do any sort of creating of my own (which is making my right eye twitch a lil) so no DIY-ness this week. And also because what the kids have been busting out in the art room lately has been so stinkin' sweet I just had to share. For zample, check out these kindergarten clay birds!
 Like, riiiight?! The kids created these birds in just under 45 minutes and they couldn't have been more proud of themselves. They were all created during our school-wide Clay Week (aka Cray Week). I'll be sharing what each grade level created in upcoming posts. But just had to start with these as they're currently my fave. 

Supplies:
* Low fire (cone 06) clay. Okay, so we don't all have a kiln. For that, I'm so sorry! Working with kids and clay is one of my fave things in the universe. I've already decided that next year, we're gonna have two separate clay events just so me and the kids have more clay time! 
* No clay? How about Model Magic? Or another air dry substitute?
* Sargent brand fluorescent oil pastels. Any oil pastels would work...but I personally loved the vibrancy of the fluorescents. 
* Watered down India Ink. Like, real watered down. I use a cup of water to a splash of India ink.
* Big brushes or...a bucket to simply dunk the birds into.
* Pipe cleaners and beads.
Since y'all seemed to like the butterfly video (despite the lackluster quality) I decided to film another clip for y'all. Once again you're sitting on a stack of miscellaneous art room stuffs. Next time, I promise I'll bring my tripod! AND not pound on the table during a taped demo. Der. 
Once the clay projects were complete, they dried over spring break (and then some. I'm a firm believer in a good two week dry out period. But only for clay. Ahem.). From there they were bisque fired. I then decided to have the kids do this lil pastel resist trick on 'em because it looked so groovy on these butterflies last year. And because I like to reserve my glaze (and that super fun second round of kiln firing) for my 2nd thru 4th grade kidz. 
Now I've gone about the painting portion two dif ways and I think I've found a winner. Normally, I give the kids a big moppy brush and let them have at it. The prob with that is that there are always white spots. Which means I gotta tell 'em one million times to go back and repaint. So today, for sanity and time-savin's sake, I had the kids gather round while I dunked each bird in a watered down bucket o' India ink. Which they though was like the bestest thing everrr. I then handed the birds to them on a plate (they're only drippy for a moment as the bisque absorbs the paint rapidly) and the kids set to work on the next step (which I briefly explained in the clip until my camera decided to shut me up).
 So what my lil clip didn't give me time to say was that once the feet were complete, the kids had the option to add beads. I did limit their bead intake to no more than 5 beads per foot. You'll notice that one lil bird in this post didn't quite get the memo. Que sera. 
 
Once the feet were created, the kids simply inserted the top of the pipe cleaner through the hole, bent it around and twisted. And I say "simply" but it's kindergarten. So it wasn't quite that simple. But those that did get it were great teaching buddies to their friends. And in the end, they all were complete.
Just to make sure the birds didn't lose their feet, I did add a touch of hot glue to the back. I also added the pipe cleaner hanger and hit that with glue as well. 
And there you have it, some super cute kindergarten clay birds! Have fun, y'all!
 photo signature_zpsd10b3273.png