Showing posts with label art teacher. Show all posts

Monday, June 4, 2018

DIY: National Donut Day Dress, Part 2

This past Friday was National Donut Day! Because I'm pretty much a crazy person, I decided to create not one but TWO dresses for the occasion (the extremes I will go to to avoid cleaning my house HAS NO BOUNDS, PEOPLE). The first dress I made was an ode to Krispie Kreme. This here dress was dedicated to all the other fabulous donut joints out there! 
I decided to pair my dress with the Donut Hat (er, fascinator?) that I created a couple of years ago at a workshop. I started the dress at about 11:30pm on Thursday night. I'm a total night owl and it gets really out of hand during my summer vacation time!
 I used my easiest dress pattern that I've repeated both here and here. I love this dress pattern because it really just involves to pattern pieces (not including the two straps): the bodice and the skirt! It's a vintage Vogue pattern, number 8571. When looking for vintage patterns, your best bet is eBay or etsy. Using the sewing pattern number makes the search a lot easier. 
I decided to opt out of the waist tie (I did that here) and just wear my big ole pink belt. I did go with a circle skirt (like I did here) which took me a bit longer. I didn't have enough fabric so I had to do some "tasteful additions" to one of the back panels. I'm not telling you which one, I'll let you see if you can figure it out! 
 With the pattern pieces cut the night before, I got up at 7am and started sewing. This dress took me until 11am to complete...not bad, I don't think! Adding pockets and hemming that beast of a circle skirt did slow me down some but I was happy with my time. Then I had to bust it to wear both dresses to all my donut stops!
After hitting Krispie Kreme in my KK dress, where I picked up donuts for our school's custodial staff (and any other takers in the building!), I did a quick change into this number. These photos were shot by me with my self-timer right outside my art room door. Then I was off to Dunkin'!
So it turns out that Dunkin wasn't giving away free donuts...you had to buy a drink before you got a freebie. I bought a dozen donuts from there to take to my school's central office where the big wigs work. I work in a very small school district of just 8 schools and we're like family. It just so happens that they are less than a half mile down the road from Dunkin so it totally worked out. Everyone was so excited to get a donut and see my wild ensemble that it totally made my day. But they didn't eat all the donuts, I still had half a dozen left!
I remembered I had some banking to do which is also just down the road. I popped in there and delivered donuts to those hard workin' folks at the bank. Our bank is next door to our post office, right in downtown Franklin, so I popped in there too and delivered the rest of the donuts. Y'all. Folks were so stinkin' happy and excited...this was such a fun day! Who knew dressing crazy and giving away free sweets was so much fun? I really need to do it more often! 
 photo signature_zpsd10b3273.png
Read more »

Monday, May 28, 2018

In the Art Room: A Collaborative Painting for Field Day!

Disclaimer: Since discovering Instagram and my love for it, I've gotten super bad about snapping photos with my camera and simply using my phone. So what you have in this blog post are phone photos and for that, I apologize. If you'd like to see me overshare my art room happenings (as well as just my hot mess of a life), you can find me here

In my last post, I shared what we did for the art station portion of Field Day...when I thought it was going to be rained out. The night before Field Day, while I was head scratching what we could do, I thought creating a collaborative canvas painting would be fun (this is what happens when your brain is fried, y'all). So I pulled this giant canvas out of my closet and went to town. 
 I've had this canvas for years. I had started a painting on it years ago and never did anything with it. So I simply painted over it with a cream color paint (cuz that's all I had on hand) and used watered down black acrylic paint to create this. Why watered down acrylic? Because it has better viscosity that way. I began by sketching out four wavy lines across the canvas. Then I wrote out the letters of our school. Once I was happy with the placement, I painted it with a flat brush and called it a night. 
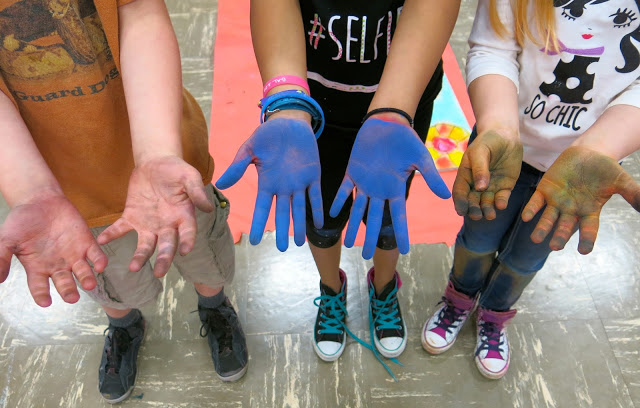
 Along with our other painting station, I let the kids go to town on this. My only "rule" was that one color go in one space...and TRY to stay within the lines. As you can see above, that was a struggle. But it was field day, we were wound up and I knew I could lean up the lines by simply going back over them. So no worries. 
 This was after the first day. I was tempted to leave it this way...and then I added the little pattern on the top and thought it would be fun for the kids to add patterns the following day. 
 Again, so sorry for the grainy photo. My only rule for the patterns was that the kids had to pick one pattern and color and stick with it. For the dots, they used wine corks dipped in paint (fave part of the day? A kid saying, "oh my mom has TONS of these!" Ha!) and thin brushes for the designs. Again, other than that, little direction was given. This was on the last day of school where I had free choice centers set up around the room. This just happened to be one of them. 
 Once dry, I went back over the black to once again clean up the edges. Then I thought it might be fun to add some white highlights to make the letters pop. Look, even the edge got painted!
The admin had no idea we were creating this painting. When I was sharing it with them, our school librarian saw it and LOVED IT. It was decided that this painting would go in the library for everyone to see. AND I'm really excited to share that now the librarian and I are collaborating to create an entire ALPHABET WALL in this style! The kids will kick off the new school year painting a canvas for each letter in the alphabet to showcase in the library. Y'all I'm so stoked! This project was so easy, colorful, happy and fun. I'm looking forward to making more. LOVE to hear if you give this a go! 
 photo signature_zpsd10b3273.png
Read more »

Saturday, April 28, 2018

In the Art Room: Paint Tube Sculptures

 So, a while back I shared with y'all that my students were sculpting art supplies. My first graders made pencils, some of my fourth graders made glue bottles, my third graders made crayons, and my second graders made glue sticks and scissors (which I've not blogged about yet! Stay tuned!). Two of my fourth grade classes made tubes of paint. We JUUUUUUST finished them off this week as I totally forgot about them in the middle of us working with clay, sewing our pizza pillows and end-of-the-year/art show madness. So, without further ado, here they are! 
 For this lesson, we used toilet paper tubes as our armature. We wrapped them with Activa's Rigid Wrap and created the paint with Celluclay. Here's the video tutorial I created:
Instead of having the kids paint the words on the tube, which proved to be a touch difficult for me, they came up with their own names and wrote them on a white label. That was then attached to a black strip of paper which I hot glued to their tubes. 
 Once the tubes were created, we did the 100 Color Challenge to come up with our own unique color for our tube. The challenge was apart of my evaluation. You can check out more of that here:
Once the kids had come up with their color, they added that and their own concoction of gray to the tube. 
 Dreaming up the color names was probably the best part!
 With our art show just two weeks away, I'm excited to see all of our art supply sculptures on display. 
 If we'd had the time, I would have loved for these guys to create palettes and paint brush sculptures too...but the school year just isn't long enough for all the fun!
 For our art show, we're going to have quite the mix of 3D displays: art supplies, super heroes and pizzas! I've tried to think of a way to have them all make sense together...but they just don't and that's okay. 
 I also coulda spent an entire year having the kids sculpt art supplies, it was so fun! 
 I cannot wait to share with you how are art show is progressing. I'm sorry I've been spotty here...it's just the busiest time of the year! You know what that's like, right? 
 To seal these projects, they were covered in Extreme Glitter ModPodge...yes, that's a thing. For the bottom, ModPodge was added and then sprinkled with silver fine glitter.
 The kids and I are thrilled with how they turned out! 
 I'm down to just a few more days of art classes with this fourth grade bunch...which makes me sad. I've taught them since kindergarten...I hope they have as fond of memories of me as I have of them! 
 Thanks for letting me share this project with y'all...if you've given it a shot, I'd love to hear about it!


Read more »

Tuesday, April 24, 2018

In the Art Room: Fourth Annual Chalked Ceiling Tile Event!

 If y'all happened to read my last blog post, then you know that Monday was our fourth annual chalked ceiling tile event with second grade. Each year in the spring, second grade creates a legacy piece that gets a permanent spot in our school ceiling. This year, our amazing cafeteria manager, Ms Rebecca, requested healthy foods for the ceiling in the cafeteria. So we went with fruit. We created them Monday afternoon. By 8am on Tuesday, THE AMAZING MR. SCRUGGS had them all up in the ceiling. He loves this event as much as I do and always does an amazing job of placing them in the ceiling. I love his makeshift poncho from a garbage bag, don't you? GENIUS. 
 Here's how the event goes down: I borrow the multipurpose room from our P.E. teachers and cover the floors with bulletin board paper, unused ceiling tiles, chalk and foam brushes. It takes me about an 45 minutes to set up (if that, I've got it down) for my four 2nd grade classes. My Monday's are my lightest, schedule-wise, so I penciled them in to come in during my plan time and second grade block. That gave us an hour and a half to work. But these kids were FANTASTIC and finished their work in an hour! Here's a time-lapse of the event:
Now I have created a how-to video for the last couple years also and that really helps too. If you are interested, here is the video I created for my kiddos. We worked on the back of the tiles with chalk:
This would be a fun lesson on construction paper too! Definitely a lesson you could do in an art room, sans tiles. 
 My kids looked like they'd just finished working a shift in the coal mines when they were done but they were SO EXCITED with their work. 
 Initially, we gathered in the same area, all four classes, talked about what a legacy piece was and chatted about the others hanging up in the ceiling of our school. I let them know that a special request had been put in for healthy food for the cafeteria from our very own Ms Rebecca. The kids were thrilled that their art would have a permanent placement in the cafe!
 Once the first steps were given, the kids partnered up and found a place to work. When they finished the first phase, they could sit and chat with their partner. I encouraged them to work together and help their partner if needed and requested. I had my art class playlist going...I let them know that when the music stopped, I needed their eyes for the next steps. 
 I did provide templates for my students for the watermelon and the citrus. Teaching a large group solo can be difficult. I wanted all of my students to start with confidence and create something they were proud of in the time that they were given. 
 Our final phase was adding the black outlines. 
 I didn't even put black in their trays...I wanted them to use that last as I know how much it can spread EVERY.WHERE.
 The last step was for them to sign their name and MASTERPIECE COMPLETE! 
 With the help of my music teacher buddy (thank you, Kiera!) it took me about an hour to hose these down with fixative and clean up. 
 Once sprayed, I stacked them all on the dolly that my custodian buddy had placed them on and wheeled them down to the art room. 
 I left them outside the art room. I was tired and I was thinking, "eh, I'll take care of it in the morning."
 Come Tuesday Morning, Mr. Scruggs already had them up in the cafeteria ceiling BEFORE 8am!
 Y'all, the kids were so proud. I told them, "now you'll have THREE places to find artwork at the art show: outside your classroom, the art room and THE CAFETERIA!"
 We always host an Ice Cream Social during the art show which takes place in the cafeteria. So they'll be able to show their artwork then. 
 BIG SHOUT OUT to my admin for the support, my specials team for lending me their kiddos and their space, the second grade team for JUST.BEING.AWESOME. And, of course, MR. SCRUGGS!
AND, last but not least, the hardest working second grade artists I know. Love all y'all! 

 photo signature_zpsd10b3273.png
Read more »

Sunday, April 22, 2018

In the Art Room: Fourth Annual Chalked Ceiling Tile Event!

Well, here we are...it's that time of the year, y'all. Time for ALL THE THINGS TO HAPPEN ALL AT ONCE: Clay Week, Art Show Prep and our fourth annual Chalked Ceiling Tile Event!
 That's right...it's been four years now that my second grade kiddos have created legacy ceiling tiles to be permanently displaced in the ceiling of our school. What started out as an "alternative project" has quickly become a school-favorite and an annual event. You see, four years ago, I had a visiting sidewalk chalk artist come to our school with the idea that my students would also chalk outside right along with her. But on the big day, rain was in the forecast so we had to improvise. My admin had been requesting painted ceiling tiles...knowing that, I had my custodian buddy Mr. Scruggs (see here!) get me a tile and I played around with drawing on it. After fiddling with the front of the tile, I realized that the back actually worked better as it wasn't as porous. And that's how our Chalked Ceiling Tile Event was born. You can read all about our first event here and here
So what do you need for an event like this? The following supplies:

* Faber-Castell Chalk I used to swear by a brand called KOSS but I can no longer find it. So we started using Faber-Castell and it turns out I like it better! The colors are so vibrant and the shorter size is perfect for my student's hands.

* Ceiling Tiles We always have a ton on hand as we do this every year. We ALWAYS use the backside of the tile. One tile per kiddo.

* Foam Brushes These ceiling tiles are huge and would be much too difficult for the kids to blend colors with their bare hands. We use foam brushes for blending. I've had the same set of brushes for years now.

* Baby Wipes This is a messy task, not gonna lie. But with me being in charge of four classes of second graders, I'm not about to let them all loose on the bathrooms. So baby wipes it is!

* Bulletin Board Paper Again, this is messy...like having rainbow dust everywhere. So we try our hardest to control that by putting paper down on the floor of the multi-purpose room.

* Hairspray I always fix the tiles when we are finished by dousing them in hairspray. It will dull the colors slightly. However, the spray doesn't matter too much...the tiles are in the ceiling and therefore no one will be able to touch them and cause them to smear. 
So, how does it work? Well, I usually create a video to walk the kiddos through the process. This saves my voice in a loud space like this big room. I block out about an hour and a half to two hours of time for the kids to spend on their piece. I pool all of my second grade classes together and, well, we just go for it! It's loud, messy but beautiful and so much fun!
 Usually the classroom teachers will take 30 minute shifts during this time or my specials team will help out. Really tho, it's an easy event. Once all the kids are rolling and understand what to do, it's just fun to watch them roll up their sleeves and create. 
 Every year, we do something a little different. Our first year, we did the butterflies. The following year, we created flowers and last year, we made fish! You can watch the action here:
Here's the video I used to teach last year's tile: 
This year, Ms. Rebecca, our cafeteria manager, has requested healthy foods for the ceiling tiles. We're going to be creating fruits for our tiles...you'll have to stay tuned to see how they look!
  These tiles will remain on permanent display. I've been asked before how the kids react to this, knowing that they won't get their artwork back. We spend a lot of time chatting about what a legacy is and how important it is to "leave your mark". I've not had a student yet get upset about having their work up in the ceiling.
The only wear I've noticed from the tiles is some slight fading on the first year's butterflies...but I think that is hardly noticeable. Thankfully, Mr. Scruggs loves to hang these tiles. I hung the ones that are up in my art room and I ended up with a ton of chalk in my eyes! 
 He does a beautiful job of spacing these out and getting them up!
 On top of this big event, I also have first graders painting their clay projects and third graders FINALLY finishing their plaster crayons...the art show is quickly approaching so we are in "wrap it up" mode. 
 photo signature_zpsd10b3273.png
Read more »