As you might have guessed from my last post, I'm on a bit of a polymer clay bender. I have this habit of going thru phases when working with different art supplies. When I'm needle felting, I needle felt EVERYTHING; when I'm painting the walls of my art room, NOTHING IS SAFE; and when I decide to make miniature snack foods out of clay, watch out!
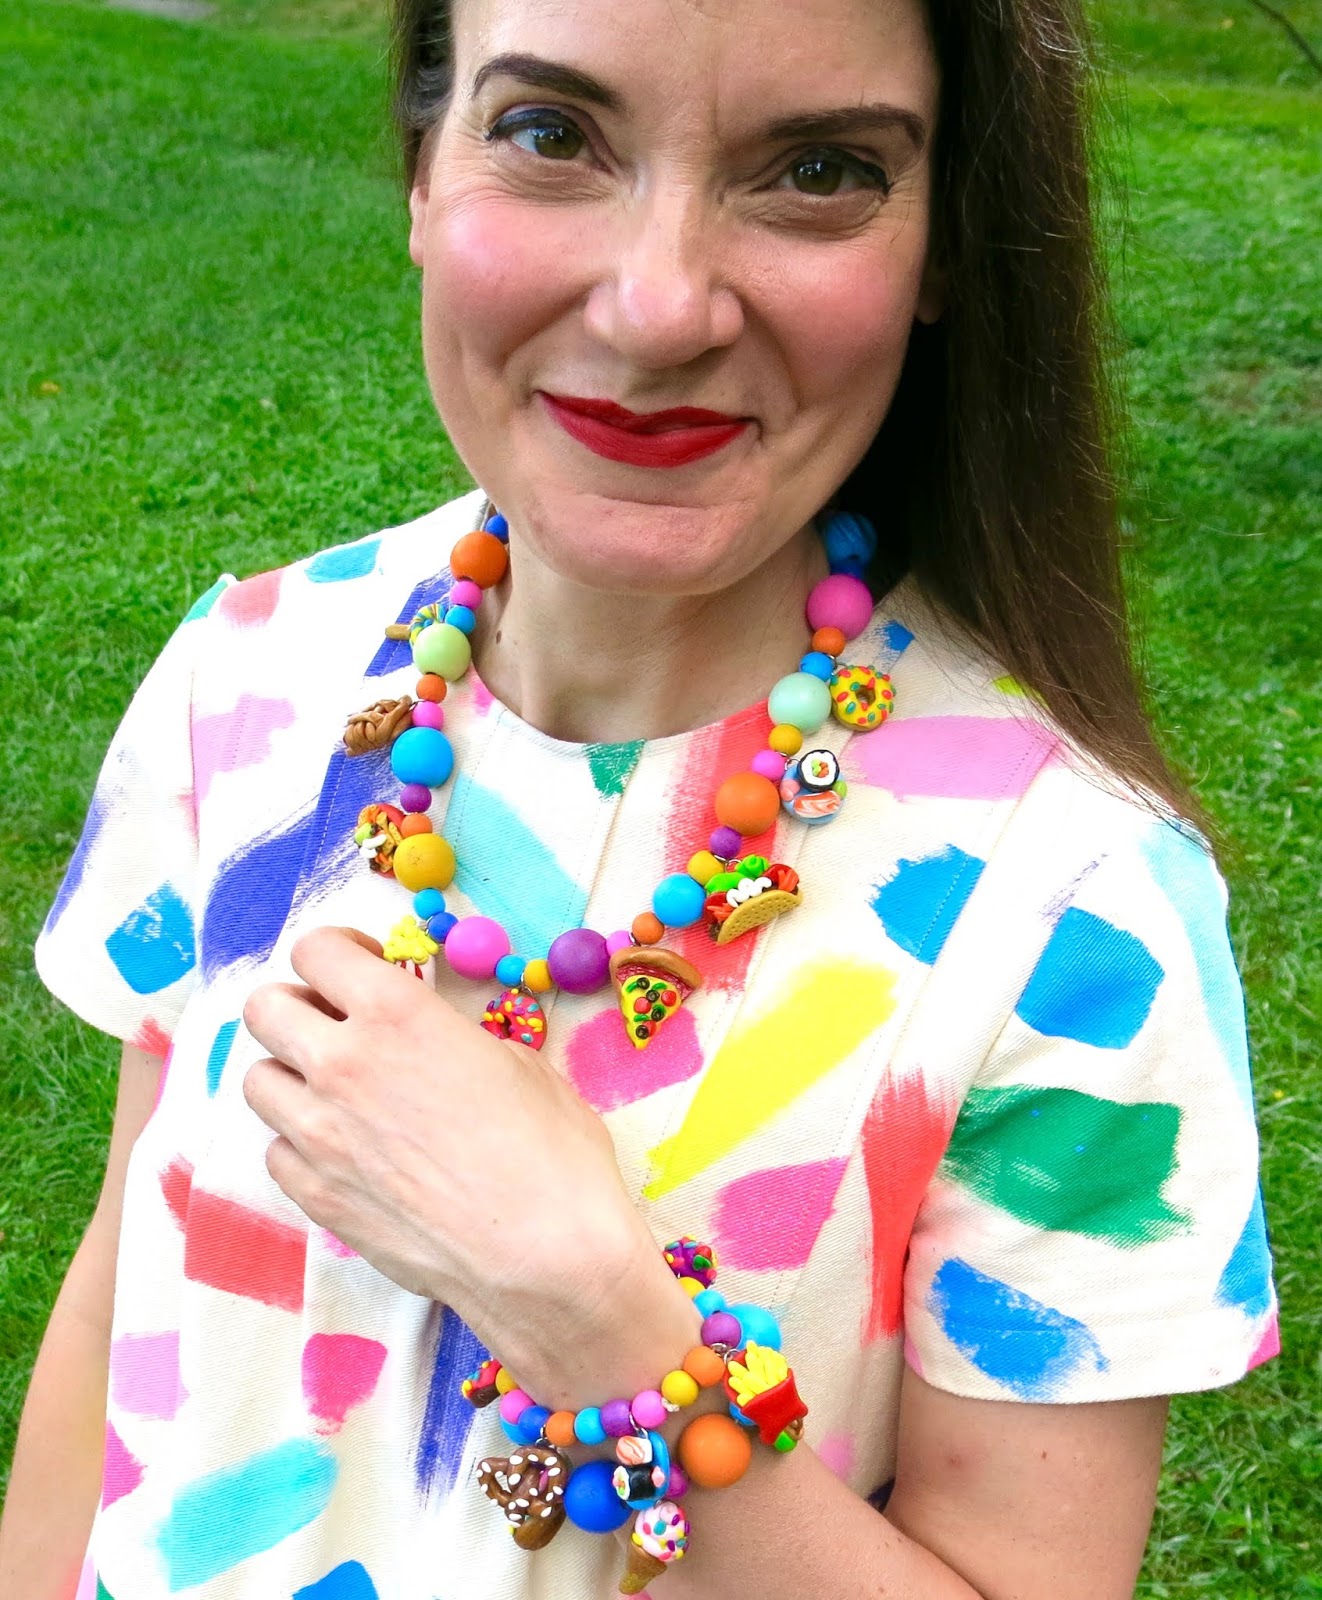
I've got sushi, pie, popcorn, cupcakes, donuts, pizza, tacos, nachos, pretzels, lollies, pancakes, ice cream, bacon -n- eggs and more! I have to blame some of this on my friends over on Instagram who gave me a TON of ideas for what to sculpt. So many that I ended up with enough charms for not one necklace but also two charm bracelets!
I hope this helps!
Because the grand majority of clothing in my closet is just as busy as this necklace, I decided to pair it with the dress I painted and stitched. Yes, this would be one of the more tame pieces of clothing in my closet. Surprised? I didn't think so.
Wanna make some snack food charms of your own? You totally should! I even made a video tutorial showcasing how to make the tacos, nachos, donuts and sushi! Once you conquer those, you can take on all the snack foods. Here's a little list of supplies:
* Sculptey Clay...or whatever your polymer clay of choice might be. I like the big ole 24 pack of the clay for a wide range of colors. Be sure and use all of the craft store coupons you can find as this stuff ain't cheap. * Jump Rings...that's the little metal circles you'll want to add to your clay piece before popping it in the oven. I just slide mind in the back of the clay, sinking them about half way in. You'll be adding two jump rings per creation...but you'll only need to add one before baking. The other one can be added once the clay is cooled and easier to handle. * Jeweler's Tools...or pliers. You'll need small tools to pry the second jump ring open and add it to the one that is already on the clay. Each charm will need TWO jump rings. If you only use one, then your charms will hang sideways. With the addition of the second one, your charm will hang straight on and be visible to all of your admirers. * Elastic...I use elastic string for my necklaces as I truly hate creating jewelry and working with tiny findings and jump rings. So being able to slide my necklace over my big ole head Candy Necklace style works best for me. * Modpodge...I used that to seal and protect my charms once they were out of the oven and cooled. * Wooden Beads...You can find a variety of wooden beads in the wood department (heh-heh) of your local craft store. I use acrylic paint to add color to mine.
My favorite part of making this necklace was making the charms...obviously. I made so many! I still want to make more. But do I really need ANOTHER snack food jewelry item? Probably.
Some tips about polymer clay: it's weird. Sometimes it can sit out forever and never harden and other times, it becomes like a rock.
They sell a kind of polymer clay softener at the craft store for exactly one million dollars (but seriously, it's ridiculously pricey for the size of the bottle). OR you could simply add just a drop of baby oil to the hardened clay, rework and TA-DA! You are back in business.
Another tidbit: I used to sort and store my clay by color in styrofoam bowls and/or thin plastic containers. When I went back to reuse the clay, it had eaten holes right thru the styrofoam! I shared that on my IG and most folks said they had success keeping their clay in plastic bags or thicker plastic containers. I now store mine in a wooden drawer with dividers. WHO CAN EAT THRU STYROFOAM?! I mean, that stuff isn't even biodegradable!
My students LOVE making food items out of clay. In fact, one of our art shows was a 1950's diner where all of the food was sculpted from clay. I think they would so love making these tiny foods...they have tiny hands, they could handle it, right? (okay, MAYBE on a slightly larger scale!)
You can also find a ton of clay food times in my kid's clay book! Shameless plug, over and out.
By the way, is it one MILLION TRILLION degrees where you are? I went outside to snap these photos and was dripping sweat within the first three minutes. Summer in Tennessee is no joke, y'all.
I need to hit my sewing room and start up on my Back to School ensembles but I so wanna make more charms. I made art supply shoe clips out of this clay a couple years ago but now I think I need a art supply charm necklace too. Oh boy. The polymer clay creatin' journey continues!
Hey, y'all! I am so excited with how these kid-created portraits of the faculty and staff at my school are turning out, I thought I'd share. This is just Part 1 of the Gallery of Gratitude posts...I'll be sure and post again once these are on display. In case you missed the first post about our Gallery of Gratitude, you can check it out here. This idea is not a new one at my school...you can see our Gallery of Gratitude from a couple years ago here.
Two of my fourth grade classes got their portraits complete. They did such a great job and I have so much left over modeling clay that I think I'm going to have them create self portraits next week. They've become pros at this and have really loved creating them. Here's the lesson video I created and used:
Here are the supplies we are using: * Modeling or plasticine clay. No one brand is better than another. I have just been purchasing whatever is cheap at the craft store. * Model Magic Glaze. Here's the thing: modeling clay always stays soft. These portraits will be on display for a while in my school...so I knew I'd want them to be protected with a hard varnish. This "glaze" works really well at becoming super hard. I think ModPodge might work pretty good...but this stuff is a lot harder than that. * Plates from Hobby Lobby. So our "frames" are actually plates from Hobby Lobby! You can probably find them online. * Matte board. I cut ours down into 4" squares.
Day #1: It took us some time to cover the entire background, create a skin color and add the head, ears, neck and nose. That took us an hour, believe it or not. Chatting about the project and watching the video took some of the time too.
Day #2: We really made progress. Almost all of the kids finished their portraits...some were super close! I thought I'd share what their works in progress look like.
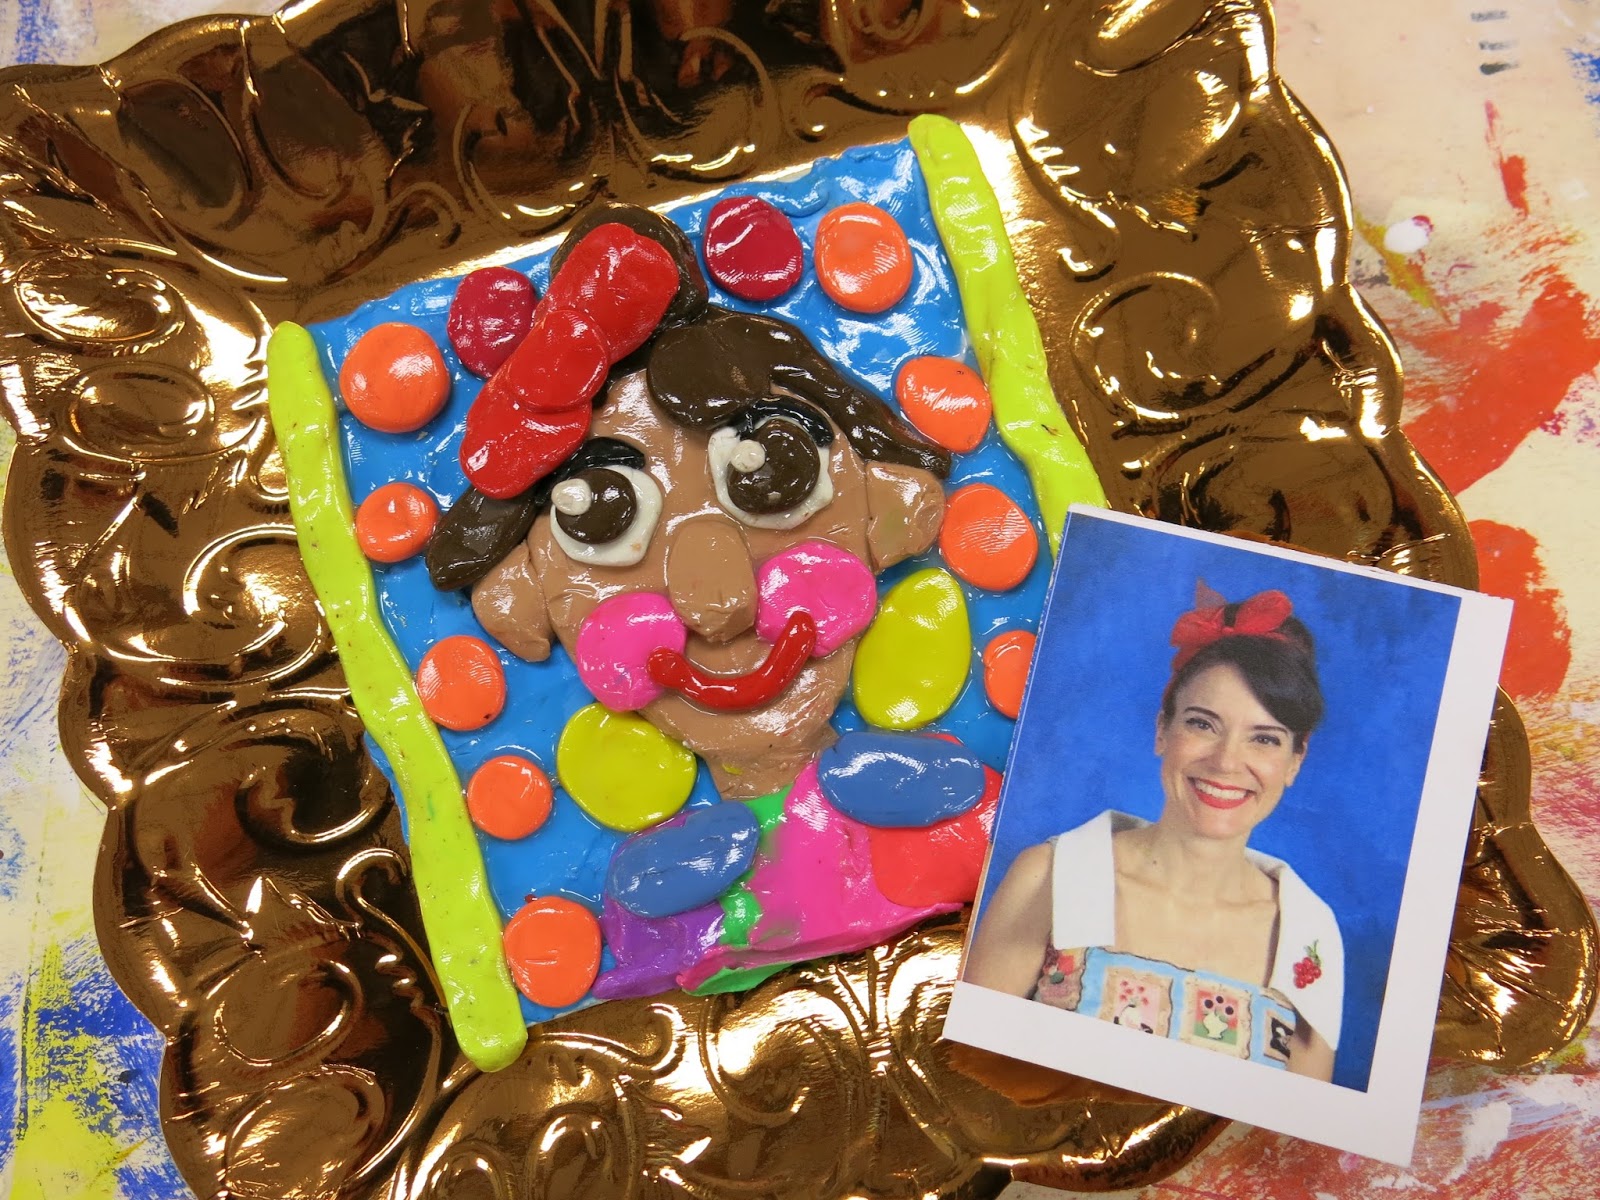
Biggest bit of advice: HAVE PHOTOS! The kids really studied the photos, matching outfits, hairstyles, glasses and more. My sweet buddy the bookkeeper printed off yearbook photos and each student was able to use one as a reference. I plan to hang these photos near the clay creations when on display.
And now, forgive me while I share a ton of these cute clay portraits!
When we take these down, they'll be gifted to the teachers, faculty and staff. The kids will also write a message of gratitude about that person to be hung with their portrait. I'll post about that in Part 2!
In the background, the kids were asked to add something that "said" something about that person. Here's a portrait of a kindergarten teacher.
Those are books behind our library assistant!
And music notes behind our music teacher!
I am loving the giant earrings and the cherries in this portrait.
This teacher plays guitar in his class. The glaze was just put on so it will dry clear, not milky like you see.
One of our custodians is also our school D.J. Here he is, outside on field day with his baseball cap on backwards spinning records.
This background, love!
Incredible attention to detail! This one makes me so happy!
Artistic license was taken with hair color here and I'm loving it. More to come, y'all! I had to share our amazing progress!
Last year, I started a series of videos titled Field Trip! The purpose of these videos was to take all of my students on a virtual adventure to meet contemporary artists, see their creative spaces and witness them creating. You can check out my playlist of Field Trip! videos here. If you subscribe, you can also stay up-to-date as to when I post a video. I actually have three more Field Trip! videos recorded that I need to edit and upload before sharing them with you and my students. Please feel free to use these (and any of my videos) in your art room...I think all students can benefit from learning about these unique, creative and current working artists. I admit, I fell off the wagon HARD last spring when it came to searching out artists, contacting them and filming them. I was starting to feel super overwhelmed with all things art teacherin': the national conference where I presented a couple of times; our school-wide art show which is a beast of an undertaking and our clay unit which we always kick off in the spring. I will also admit this to you...I am very lazy, not consistent, a procrastinator and, did I mention lazy? I'm lazy. One look at Mount Laundry and you would agree. But knowing just how much my students benefited from these videos, I knew I had to continue creating them. So during the spring, I attended an artisan fair and picked up just about every business card that I saw sitting out. Once home, I researched the artist, looked into their location (Nashville and just a little beyond is ideal) and sent them an email. I got a great response...artists are so giving with their time and willingness to share! The first artist I scheduled to visit is the one and only Audry Deal-McEver.
Look at her beautiful home! Audry's studio is right behind her home and it is absolutely stunning, check it out:
When I arrived at Audry's home, she reminded me that we actually met many years ago (we are thinking about 10-12). My brother, who is 10 years my junior, was in a very bad car accident and was in a coma for several weeks. During that time, my administration allowed me to be with him and my family. Audry's mom, an art teacher, stepped in for me. She taught my classes, kept the students creating and made it so I could focus on what was most important. Her daughter, Audry, came in one day and did a wheel throwing demonstration for the students. I still have the photos of that day and share them with the kids when we chat about clay. What a crazy turn of events, right? My brother, by the way, pulled out of the a coma that they said he would not and is now an English teacher on a Native American reservation.
I'm rambling...here's the video!
I have to tell you...Audry is an INCREDIBLE teacher...because she IS a teacher. She's taught ceramics and photography for the past five years at a local school. She is now taking time off from teaching to focus on her work. However, she does such a wonderful job explaining every element of working with clay that I feel this video would benefit all students, upper elementary on up to college.
At the start of the video, you'll find her wedging clay. She explains the reasoning behind that and how to do it. Then she moves on to throwing on the wheel...which she makes look incredibly simple. I could only dream to throw a pot on the wheel that didn't end up looking like Patrick from SpongeBob Square Pantalones.
I love how Audry shares her inspiration...and the origin of paisley! I had to include that in the video, it was new to me. Also, watching an artist work is always hypnotizing and she does her clay carving so quickly. It was fun to watch.
I was thrilled when she explained how a kiln works and the different types of kilns. I know that can help even us art teachers who might not understand how to operate a kiln.
Audry mixes up her own glazes to create the desired color. Her application process was interesting to see.
And I loved the results so much, I had to have one of her vases in my home. She also gave me a beautiful mug...I know the kids will love to see me gettin' my coffee on with one of her pieces.
A big THANK YOU! to Audry for allowing me to visit. Be sure to follow her Instagram as she shares videos and photos of her process.
I hope you enjoyed this visit to Audry's studio as much as I did! Until next time...
If you have a kiln, then you probably have glaze...and you are more than likely well aware of how freakishly expensive glaze is. I swear, it eats about a quarter of my budget. But I just can't give the stuff up: glaze really does give my students the ultimate ceramic experience. So today, I thought I'd share my very favorite glaze brand as well as how I distribute glaze and conserve it...so that I don't waste a single precious (read: pricey!) drop. Here you go:
My dog dishes, ice cube trays and just about everything else were purchased at the Dollar Tree. I love the Dollar Tree, y'all. If I could marry it, I totally would. Cassie Lane Dollar Tree. Has a nice ring to it, no?
Once our glazing days were done, I tossed the press and seal I was using to keep the glaze fresh and let them dry out. Just a crack of the tray works to pop them out. Then put them in the glaze bottles, add water and shake. Clean trays + conserved glaze = happy art teacher!
This is a messy task...and one that you will only want to do once. So get all your glaze bottles and trays out and knock it out in one fell swoop.
You'll be happy you did. Clean (ish) glaze/ice cube trays and fresh glaze for the win, kids!
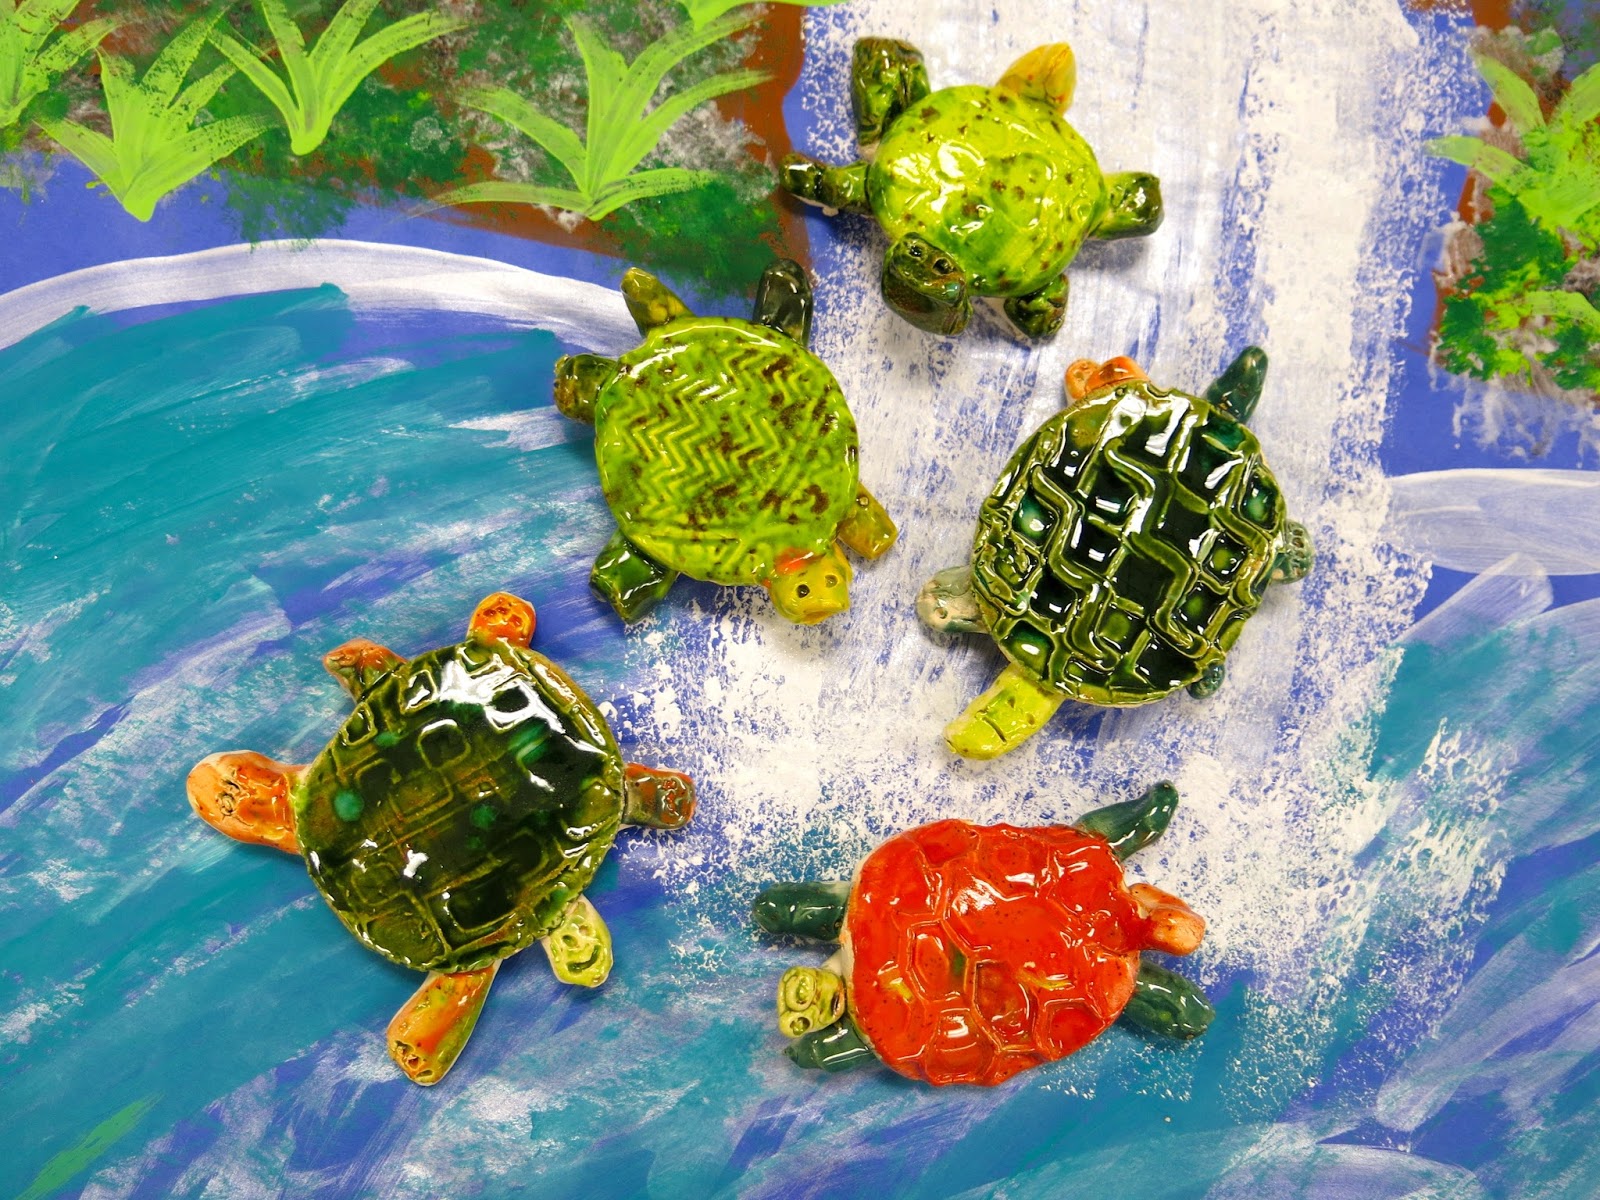
Need a fast and fun clay project that teaches kids all about texture? Try these clay texture turtles on for size! Here's a one minute how-to clip:
So easy!
I did this project with my kindergarten (this was their second clay project...I'll share the other one soon!) and they loved it. Stepping on their clay and seeing the texture that the sole of their shoe left behind was their most favorite thing. Here are the kiddos in action:
Stepping on the clay was def their fave part!
I loved using Mayco's Jungle Gem glazes for these turtles. I stressed to the kids that adding at least three layers of glaze would really make their turtles super shiny.
This is definitely a project that could also be done with air dry clay. In fact, every Wednesday night for the month of May at 8pm CST over on my Facebook page, I'll be hosting a clay chat, starting tonight! We'll also be creating in clay so be sure to bring your favorite clays...or purchase these clays as that's what I'll be working with:
Of course, that book I wrote is nothing but non-kiln fire clay projects...I explored just about every clay medium in the making of that book.
By the way, don't you LOVE that painting in the background? My fabulous P.E. teacherin' friend Ali is painting it as one of the backdrops for the art show! I thought it was a cute photo op for these happy and colorful turtles.
See y'all LIVE tonight at 8pm CST...come armed with your fave clay tips!