Showing posts with label middle school art. Show all posts

Sunday, August 9, 2026

Mixed Media Exploration and Elements of Art Review!


Recently, when I was working on THIS line design lesson...

Where I shared how to make black glue without actually making black glue...quick video here:

It got me thinking. If you can make black glue that way, then couldn't you do the same with any water-based marker on white paper? 

The answer, YEP! You can! And that's how this lesson came to be!

For this project, which I envision would be perfect for 5th grade and up, I started with a 12" square of paper, water-based markers and Elmer's Glue All. Check out the full lesson here:

Once the glue is dry, I used my paper cutter to cut the papers into 4 6" squares. Then I decided to do a mixed media exploration on each!

To alter this lesson, you could always NOT cut the paper and just pick one of the mixed meda methods to do on the entire paper. Just a thought. I did find exploring all of these really fun but I know that would take a several art class days...so I'll leave that up to you!
For the first one, I just used a permanent marker, a cup of water and a paintbrush. I used my Line Design sheet and a permanent marker for the first step. Then I added water to the marker lines to create a blurred line effect with a little bit of a tint of color.

For the next square, I used chalk. Whenever I use chalk in my art room, I always use a color wheel. I created this free color wheel download for you to use, you can access it here!


If you have hesistated to use chalk pastels in  your art room in the past, don't sweat it! I created a whole video and blog post of all of my chalk Tips and Tricks and you can see it here!

I also just recently posted a lesson for 2nd grade and up using chalk and line...and you can check that out here!
Okay, back to the lesson at hand! I LOVE chalk and my students do too. I really enjoyed creating this little chalk square study.

BUT THIS ONE...

Was even more fun! For this, students will use bright and light color oil pastel and saturate their paper in color. THEN...

Using a combination of black paint (I used acrylic but tempera would work) and a squirt of dish soap (I only had Dr. Bronner's on hand but Dawn or any other would work!) blended together well, paint over the areas you wish to do scratch art on.

Allow that to dry COMPLETELY before using a skewer to remove the paint and create line designs. 

I really recommend adding the dish soap. What it does is help the paint scrap off evenly and not in chips. I've tried it without dish soap before and...it just didn't work as well (chips. We had chips).

So fun, right?
And for the final method, we explore wet-on-wet with watercolor.

Now, when it comes to display, I laid my pieces back out like a puzzle. But these could be displayed individually, on in a vertical or horizontal manner...so many options! I'm so stoked about this lesson. I don't often do lessons for upper grades because I never taught beyond 4th. I do think this could be done with fourth (maybe after Christmas, when they are officially fourth graders) and definitely beyond. 

By the way, if you are looking for books, downloads and resources for all things art teacherin', I have a library of them! You can see them all here!


photo signature_zpsd10b3273.png
Read more »

Monday, July 9, 2012

In the Art Room: Weaving, The Final Chapter

When weaving with children, you might be surprised to find that the boys enjoy this activity the most...as long as you don't call the completed weaving a purse, that is. 
 As I wrap up this weaving mini-series, I thought I'd leave you with the following: a little bibliography, weaving finishing touches and my secret to getting these pouches completed without taking half of the school year. In case you missed, here is Weaving, Part 1: Getting Started; Part 2: Learning to Weave; Part 3: Removing the Weaving and Part 4: Weaving the Cord.
My Weaving Bible: You Can Weave! By the amazing Kathleen Monaghan.
 This week, I'm currently at the world's best arts professional development: Tennessee Arts Academy. Several years ago, the author of You Can Weave!, Kathleen Monaghan, was a presenter and she was incredible. Her book is full of clearly written and photographed projects, tips and tricks. I can't recommend it enough.
The ole standby: Goat in a Rug
 I don't just weave with fourth grade, I begin weaving with first grade. You can see their completed weavings here. And the book I use to introduce them to the world of weaving is this one, Goat in a Rug. It's told from the perspective of the goat whose mohair is used by the Native American, Glenmae, to create a rug. It's the perfect balance of factual and funny.
Sometimes the best books are the ones found in the dollar bin, like this one, Grandmother's Dreamcatcher.
 With my second grade, we create quasi dream catchers. The kids love this book as they sympathize with with the main character who is cursed with bad dreams. The author does an excellent job of explaining the origin of the dreamcather and it's believed powers.
This is like the older kids' version of The Goat in the Rug: Weaving a Rainbow.
 This book is an excellent one in that it re-explains to the kids the process of creating wool yarn. This year, we had fun reading this book and dying our own wool yarn with Kool-Aid ice cubes during our science experiment time.
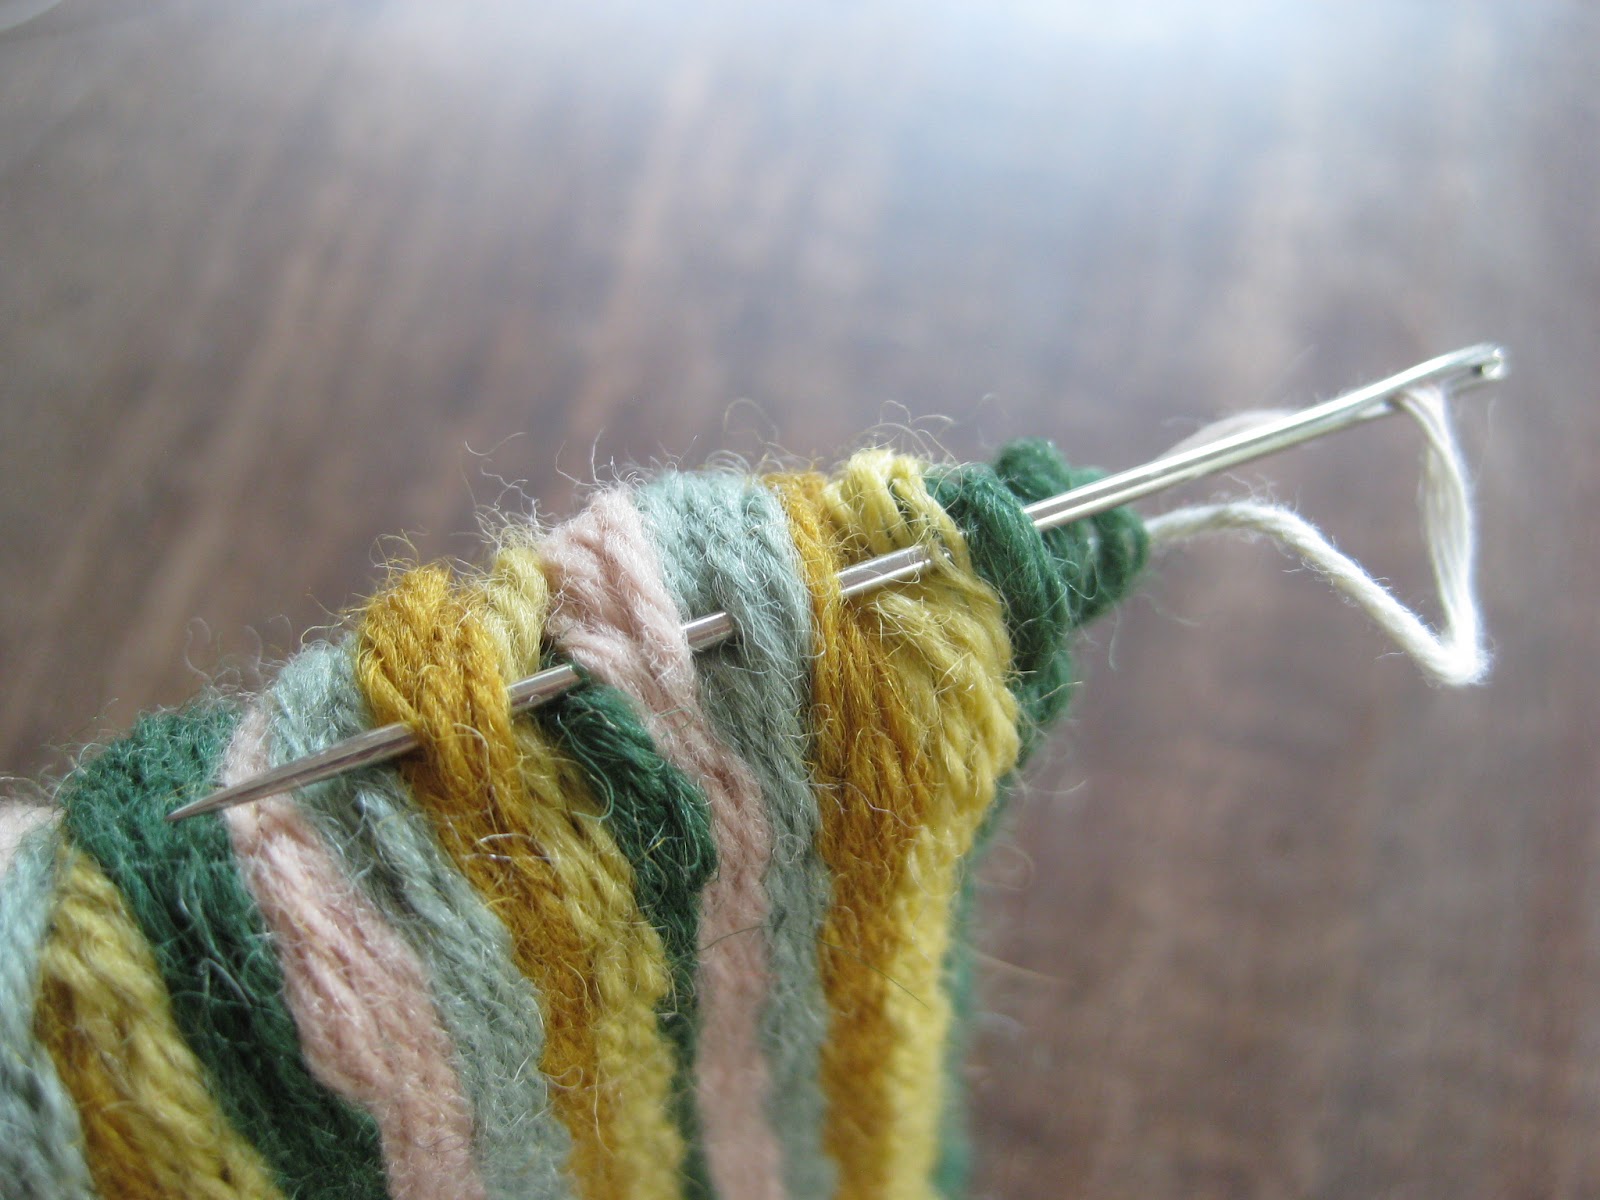
 Now, let's talk weaving finishing touches: Getting rid of that pesky warp tail. To do this, the kids will need a needle (I don't recommend this kind but it's all I had on hand. My kids use 3" plastic or metal needles) and a small folded piece of paper for a needle threader.
 We call the small folded paper the "hot dog bun" and the thread the "hot dog". Put the hot dog in the bun and slide the bun into the eye of the needle.
 Now pull the hot dog bun off of the hot dog thread and, viola!, you have just threaded a needle. No wetting the end of the thread and spreading nasty germs required.
 Now weave your needle in and out of your woven pouch until you run out of warp thread. Pull needle off and you're done. No knotting needed.
 For button sewing, I usually have a sewing circle. The kids pull their chairs up and we sew the buttons on step by step. We begin by threading and knotting our needle. Find a good place on the pouch to pull the needle through like you see in the above photo.
 Slide your button down the needle and thread. Sew a couple of stitches to secure the button. By the way, you'll notice that in the photos of the kids pouches, we use pony beads instead of buttons.
 Now sew a double knot in the back. To create a button hole, just separate the weft threads on the flap and force the button through.
 You can have the kids go about sewing the cord two ways, on the side, like I have done, or across. I began by threading and knotting my needle and pulling the needle through the cord, as shown above.
 Secure the cord onto the pouch with a couple of stitches. If you are sewing the cord across, you'll have a little more sewing to do.

 I will say that the end of this year sneaked up on me and I was in a real bind. The kids did not have time to do the sewing themselves as they had done in the past. Thankfully, I had some very kind parents that took the sewing task on themselves. If you don't have a Mom Army, you need to get one. They have been an incredible source of support in my art room.

Now, just how do we manage to get these pouches woven in 30 minute art classes? After I am confident that the kids understand how to weave, I let them take their weavings home. That's right, they leave my room with a giant zip lock bag with their loom, needle, twenty strands of yarn and a note home that reads something along these lines:

Dear Fourth Grade Students and Guardians, I would not be sending this weaving kit home with you if I did not believe you were mature enough to handle the responsibility. This weaving is not homework so work on it when you have the time. You are to bring this weaving with you each time you have art class. If you forget your weaving, you will receive one reminder before a phone call will be placed. If you lose your weaving, your needle or any part of your weaving kit, it will not be replaced. Have fun and weave!
I know what you are thinking: that would never work for me! Well...it doesn't always work for me either. There's always the kid whose dog devours their weaving, whose kid brother flushes it down the toilet, whose mom accidentally throws it away. So, you make exceptions. You quietly slip those kids a new loom or needle and tell 'em not to spread the word to their buddies that you are actually a softie.

I also promise a grand reward to those that remember to bring their weaving back the following art class (a blow pop is the preferred dangling carrot of choice). But I only do that once. After that, the kids become very competitive. "I have four inches woven, how many do you have?!" Which morphs into, "I finished my flap, what about you?!" This positive peer pressure pushes the kids toward finishing their weavings. 

It's not a perfect system. There are some kids that don't have time or care to weave at home. And that's fine. They can work on their weavings during in-between-project time in art class. As for the early finishers, the kids get to keep their looms and needles, so they can rewarp their looms and begin a second weaving. This year, I had one student that wove five pouches (with cord handles!) in her spare time.

I have been doing this weaving project with my fourth grade students for many years. This is a project they look forward to since the first grade. I believe that excitement is what makes this weaving unit so successful. 

I do hope you've found this weaving series helpful. Thank you so much for sharing your ideas. I look forward to hearing more from you!
Read more »