Showing posts with label sewing with children. Show all posts

Tuesday, August 6, 2019

Fiber Arts Craft Nights!


To celebrate the release of my book Stitch and String Lab for Kids, I thought I'd bring back my Facebook and Instagram  LIVE nights (click the link to follow my FB page or IG account). I ran this past y'all a while back on my Instagram and it was met with a resounding YES...which made me so happy. I love doing live craft nights. I fell off the wagon last year when I was writing the book...now I have a little more free time to start it back up again! The beauty of the live craft nights is that FB archives them so you can always join the fun at a later date and time. 

I said I'd give you all a supply list for the nights...here you go! So take a screen shot so you remember what to have on hand. I tried to think of things you may already have so you wouldn't have to go out and purchase anything. All of these crafts we will be doing are also from my book!  
We'll be doing two crafts on the first night! One to prepare the fabric that we'll use the following week. This way of dying fabric was one I discovered while creating my book and I think you are gonna love it. Then I'll be sharing a simple embroidery for you to do with your students. We'll be doing that on Wednesday, August 14th. 
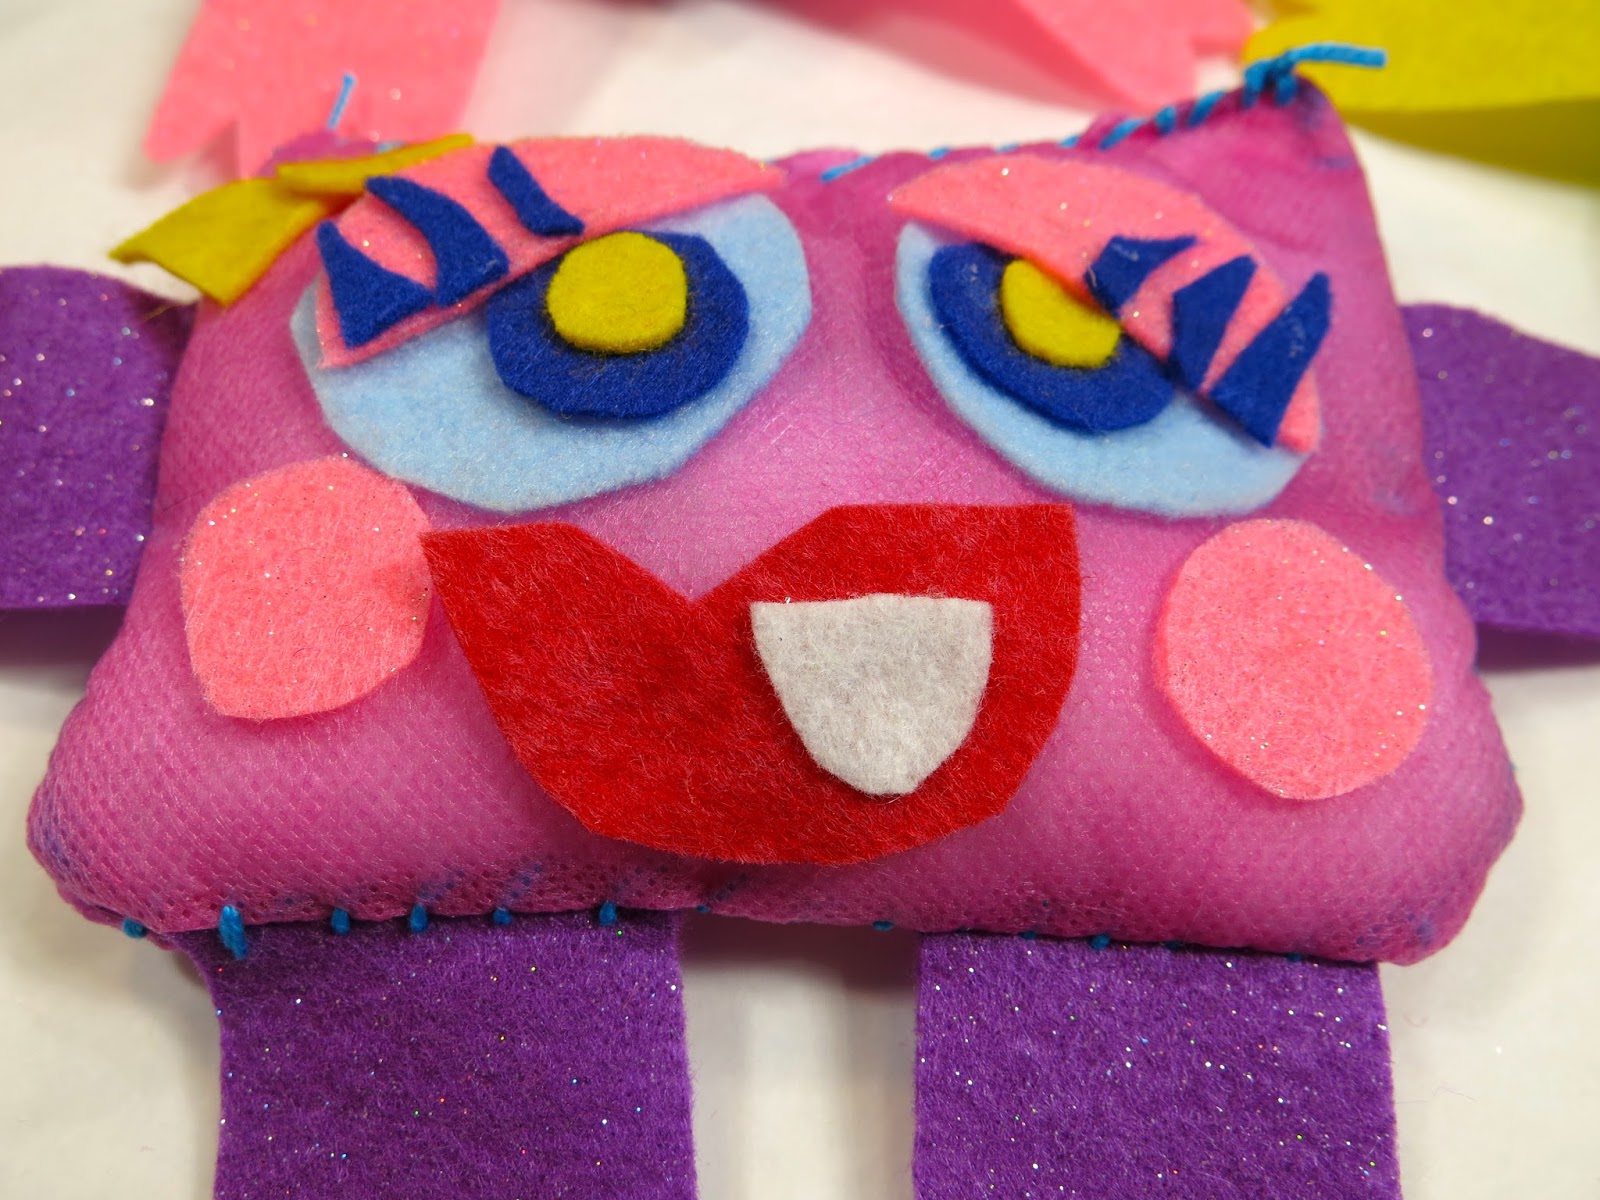
The following week, we'll be using that dyed fabric to make a stuffed pillow! If you don't use your dyed fabric, any ole fabric can be used. I'll be walking you through the steps of sewing as I share it with my students. This way you can see how I teach them how to thread a needle, stitch and tie a knot. I'll also be sharing how to make tassels that week. 
The final week, I'll be sharing with you how to create a cord weaving and how to make pompoms. Cord weaving is a HUGE hit with my students. They absolutely love it and it's one of my favorite things to teach. We use them to add a strap to our woven pouches. I'll also share with you a super easy way to make pom poms -- no special tools required!
 I'm so excited and I do hope you'll join the fun!
ALSO, IMPORTANT ANNOUNCEMENT! There has been date change to my book launch at Parnassus Books in Nashville. It is now on Sunday, September 15th at 2pm. If you would like to attend (and I would love to see you there!), please RSVP here!
 photo signature_zpsd10b3273.png
Read more »

Monday, July 22, 2019

String and Stitch Lab for Kids is...HERE!


ANNOUNCEMENT: I'll be doing a book launch at Parnassus Books in Nashville on Sunday, August 11th at 2pm. If you'd like to join the fun, please RSVP here. Let's PLEASE support our local book stores by purchasing my book at Parnassus. LOVE to see you there!

I CAN'T EVEN BELIEVE IT MYSELF...Stitch and String Lab for Kids is finally (like, FINALLY) here! And I cannot wait for you to see what's inside!
When I was a kid, fiber arts was my favorite. I didn't have art class in elementary school. So I had to get my art-makin' fix elsewhere. I learned straw weaving in Vacation Bible School. My grandma taught me how to embroider and cross-stitch. And my favorite teacher taught me how to do string art (shown above). As an adult, I've carried with me that love for fibers. When I have free time, y'all know I'm usually sewing up a dress or needle felting some wearable art. It didn't take me long to bring my love of fibers into the art room. Twenty years later...my students have experienced all forms of weaving, needle felting, wet felting, sewing, embroidery and more. I packed ALL of my favorite kid-approved lessons into this book...and I'm so happy. I want to share my love for fibers with you and your kiddos!
For that reason...I thought it would be fun to bring back the ole Facebook LIVE Craft Nights. I actually STOPPED doing FB/IG LIVES when I was so busy...writing this book. With that behind me, I'd love to get back to crafting with you. Since school is starting soon and I've got a couple other obligations happening, I can currently commit to these three dates. We'll see where we go from there. Here's the line up:
Mark your calendars and set your alarms! I'll be sharing the supply list shortly. I know if you are anything like me, if I give it to you too far in advance, y'all are just gonna forget all about it. So stay tuned here, follow me here and I'll keep you posted. 

TO CELEBRATE THE BOOK LAUNCH...I created a podcast episode just for you. Have you ever wanted to write a book? Well then I'm spilling the beans on the who, what, when, where, why and HOW in this episode:

By the way, if these photos are sparking your interest, they are projects from my book. There are 44 projects in my book...quite a bit! If you'd like to see me share more about my book and see some super easy projects for the youngin's, you can see my interview on Nashville's Talk of the Town here. 
If you do receive my book and like it, a review here would be AMAZING! You don't even know just how much a review (preferably a good one!) can mean to me. I would truly appreciate it! The amount of work that goes into making a book is bananas. So a kind word and review is a wonderful thing.

Also! I cannot forget to mention that my first book Clay Lab for Kids is also available here...and again, reviews welcome and much appreciated! 
Read more »

Wednesday, June 14, 2017

In the Art Room: Sew a Softie!

I was recently contacted by the author of Sew Together, Grow Together, Trixi Symonds. She's the founder of Sew a Softie (check out the #sewasoftie on Instagram for some fun inspiration!) and has a fun sewing opportunity coming up in the month of July. I'm definitely joining the fun...and I thought you might want to as well. 
Trixi lives in Sydney, Australia where she has been teaching hand sewing to children for over 20 years. She coordinates workshops and leads sessions at galleries, bookstores, schools, you name it. Her goal is to encourage adults to share the love of stitching with children by providing cute, creative and fun sewing tutorials. Are you sold yet? I love her already! 
Trixi came to me with her idea of making July Sew-a-Softie month and asked if I'd be interested in joining the fun. Of course I agreed...and thought y'all might want to as well. Here are the details from Trixi:

The aim of Sew a Softie is to show both adults and kids that hand sewing is fun, creative, fulfilling, and that absolutely everyone can do it. Throughout the month of July simple to sew softie tutorials will be posted daily online. You can find them on the Sew a Softie Facebook page, the Coloured Buttons blog and the Sew a Softie website. Also, check out colouredbuttons on Instagram

You could take part by posting a softie tutorial and join the blog hop or by sewing softies with a group of friends or students anytime in July and posting on Instagam with the tag #sewasoftie.

Thanks, Trixi! I know I'm excited to get started.
I mentioned that Trixi is a book author, you can find her book here!
To clarify, if you want to join the Sew a Softie fun, be sure to follow Trixi's Facebook page. There you can find daily softie sewing inspiration as well as share your own ideas and creations. If you share on Instagram, don't forget to use #sewasoftie. I know I'm looking forward to lots of new tips, tricks and sewing project ideas for my students. 
Doesn't this sound like fun? For more inspiration, be sure to check out Trixi's blog and Instagram. It's sure to get your wheels turning. These cute images are from there. 
I know my students absolutely love sewing and had a blast with our Stitched Monster project. I think this will be a fun way to gain new ideas and collaborate with hand sewing enthusiasts all over the world. I hope you'll join the fun!

 photo signature_zpsd10b3273.png
Read more »

Wednesday, March 8, 2017

In the Art Room: String Art!

Tonight, on Facebook LIVE at 8pm CST, I thought we could talk about how to prepare for a sub. I'll share with you what I do to insure that I'll won't come back to a Hot Mess Express. I'd love to hear your tips. ALSO...I have BIG NEWS about our LIVE chats that I think you are going to love love love! So I'll see you real soon.

My lovely and sweet (ahem) spring-break-ready third graders are starting their string art project this week. We have prepared the boards by painting them (we are using cardboard pizza rounds purchased in bulk via Amazon) and adding texture. We also punctured holes in them to prep them stitching. Next week, we'll sketch out our designs and start stitching. Here's the video I created to introduce the kids to this process. Feel free to use and share in your art teacherin' world.
Even if you don't do this project with the kids, you might wanna watch it for the needle threading trick alone. Or you can just follow me here and catch a short clip.
There are many methods of string art but I'll be introducing my kids to ones that I call Spectrum and Radiating Design. I found the above, the one I call Radiating Design, to be a little more taxing simply because you have to get more yarn to make the lines go all the way around the board. 
This one I'm calling Spectrum. This one is fun because you can use a lot of different colors. It's up to the artist just how much stitching happens within the design. 
 My third graders were at the end of this project when I introduced this new one. So during the second half of one art class, when they were finished with their candy sculptures, I had them quickly color, paint and scrape a texture onto their boards. 
Today, the first half of class, we did this. I had a handful of kids that were absent the day so they worked on coloring and painting while the majority did this. Thankfully, we had this project to also work on. Have I ever told y'all that I have a habit of having the kids work in exactly 37 projects at once? I ain't proud. 
The kids are stoked! I can't wait to share with you what they create. 
 photo signature_zpsd10b3273.png
Read more »

Wednesday, January 25, 2017

In the Art Room: Stitched Monsters!

Going LIVE tonight, Wednesday at 8pm CST to talk about some art teacherin' issues! Hope you'll join me over here. See you real soon! 

As my fourth graders are wrapping up their Candy Heart Sculptures and drawing, I'm thinking ahead to a fun fibers unit for them. Last year, this group explored embroidery and did a really fabulous job. I know they will love expanding their knowledge and creating these fun stitched monsters!  
I wanted a stitching project that would introduce them to the following: pattern cutting, pinning, sewing, stuffing and embellishing. I also wanted a fun contemporary artist tie-in and I found the artist behind Cotton Monster, Jennifer Strunge, to be perfect. 
Aren't her monsters just the most amazing thing ever? I need one in my life, stat. 

Here's the video I created to introduce my kiddos to Jennifer and all things stitching! Feel free to use it in your art teacherin' world. I think it would be perfect for 3rd grade on up.
We will be using the following supplies:

* 9" X 12" sheet of Smart-Fab or felt
* Additional felt for arms, legs and details
* Tacky glue
* Sharp tapestry needles
* 4 pins per student
* Scissors
* Embroidery floss or crochet thread
* Paper needle threaders

I anticipate this project will take my students 3 one-hour art classes. When I share my video, I show it to the kids in short bursts. I then allow them to go work and set my timer for the amount of time I expect it will take them. When the timer goes off, finished or not, all kids report to the floor for the next video viewing. 
On Day 1, we'll learn about Jennifer Strunge, cut out arms, pin them in place and, hopefully, stitch one side. The following day, we should be able to wrap up the stitching, turn inside out and start working on the face. We will pulling out our Monsters of Creativity collages and looking at those for inspiration! 
Day 3 (and, let's be honesty, probably Day 4) will include gluing the parts of the face down, stuffing and stitching closed. 
I'm thinking of tasking my early finishers to think of themselves as toy creators and their monsters as their creation. As such, they'll need to think of their monster as a product. Who will it be sold to? How will it be packaged? What will be the price? Why should people buy it? I'll keep you posted on this adventure!
Have y'all done stitched monster projects with your students? Love to hear what you've done! And if you do this project, please be sure and let me know, I'd love to see your student's creations. 
 photo signature_zpsd10b3273.png
Read more »

Wednesday, December 17, 2014

In the Art Room: Printed Winter Banners

Greetings, giveaway friends! I thought I'd share with y'all the Printed and Stitched Winter Banners my third grade just finished off. Since they aren't Christmas-y, I'm excited that I can hang 'em in the hallway and keep 'em up for a while. AND hope that they bring us the glorious gift of a snow day. Or five. Not that I'd love a couple of days to stay home in my pajamas and power-watch episodes of Pee-Wee's Playhouse (don't judge) when I could be teaching childrens all day (wink-wink, nudge-nudge). But what am I even talking about, I've got 2 weeks of that kind of sloth-esque behavior in my future. So, lemme get back to the post at hand: Stitched and Printed Winter Banners.
 Ohhhhh, but lemme guess. You only came here to see if you won yesterday's giveaway and to see what's up for grabs today. Well, if you must know, like, right meow, scroll yourself downeth and sneak a peak. Then pop back up here and keep on reading. Go on, I'm waiting... 
 Oh, yay, you came back! I'll get to how you can win today's goodies in just a sec. For now, lemme 'splain these banners.
Since we've been jibber jabbering about Mexico this year in art class, I shared with the kids a couple of prezies on papel picado. We also chatted about other cultures that partake in cut paper designs like Japan (with kirogami) and Germany, to name a few. 

Then we talked snowflakes. Now, I go about teaching snow flaking making all wrong according to Phyl. I gave the kids a 5" square of paper which they folded in half and then in half again thus creating a square. Then they rotated the square to a diamond and folded that in half until they had a triangle. Which they cut into bits for their snowflake-y design. 

Using Geli-Plates, fabric and white tempra paint, we covered the surface of the plate.
Our snowflake was placed atop. I told the kids that it was okay if the flake didn't lie flat. If they fuss with the flake too much, it will leave marks on the surface of the printing plate which could result in a not-so-clean print. 
 Place fabric on top (pattern side down if using patterned fabric) and a piece of recycled "massaging paper" on top of that. Rub the entire surface...
 Remove massaging paper and fabric. Proceed to oooooooh and aahhhhhhh over your awesome print!
 The designs were really lovely and the kids enjoyed seeing the negative of their design.
The fabric we used was 7" square quilters cotton fabric. I happen to get a lotta fabric donations which is super great.
 I dig how this one looks very Aztec-ian.
Printing two separate snowflake designs took us one art class. On the following, the kids created the hangers for the banner. They used three small pieces of Sculpey clay that they swirled together.
 Here's how we kept track of everyone's stick. 
About half way into the second hour long class, I called a meeting at the sewing machines. I explained to the kids that only half of them would have the chance to stitch one day and the rest the next. After a brief sewing demo, I called about 4 kids over to the "sewing table" at a time. When those 4 finished, they became assistants to those up next at the table. 
 Meanwhile, the rest of the kids were either working on their hangers or drawing penguins (to be shared in an upcoming post!). Having all kids on task made my life a lot easier when it came to sticking close to the sewing table. 

And there you have it! And now, the winner...
Congrats, Natalie! (Lawd, my nails! Can you tell I was attempting to hold the paper in such a way to hide that thumb?!) I'll get your Tammis Keefe fabric out to you tomorrow!
Lemme share with you what's in store today. I have two miniature easels with canvases (like, cute!), a super adorable vintage book (the illustrations are amazing! I've already made copies of them so I'll have a set once this is outta my hands) and a VINTAGE Milton and Bradley (before they combined with Crayola) unused watercolor set! Yay!

Here's how you can enter to win (just a lil more work for you today):

1. Please follow me on Twitter! You can find me here.

2. I'm curious...why do you come to this blog? For the lessons, the DIY's or crazy outfits? I often feel this blog might be a pinch all over the place. So, I wonder, are there certain topics you enjoy reading about more than others? I truly appreciate your input.

3. Don't forget to leave your email addy so I can contact you. 

Until tomorrow, friends!


 photo signature_zpsd10b3273.png
Read more »