Showing posts sorted by date for query stained glass. Sort by relevance Show all posts

Sunday, December 18, 2016

What the Art Teacher Wore #171

Happy Holi-daze! These photos are completely random and outta order which is fitting for this week, don't you think? disco top: UAL; Christmas tree skirt to lady skirt: found at Big Lots, made by me last year with my tacky teacher buds; tights: Amazon; silver chucks: Journeys; big red bow turn hat: Hobby Lobby

Hello, Craziest Time of the Year! I know I'm not alone when I say WOW. Could things be any more bananas right now? And yet, would we really have it any other way? I think not. 

Adding to the craziness, I also decided to start sharing short videos on Instagram with y'all this week. Stay tuned for more of those. And if you've missed any, I'll be archiving them here

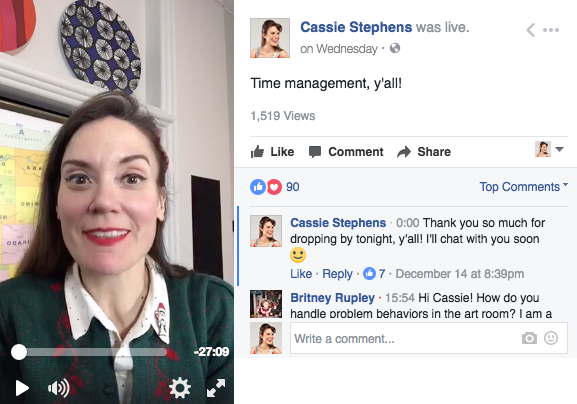
I also hosted my first Facebook Live chat this week! It is still up in case you missed. I'll be back this Wednesday at 8pm CST to chat about classroom management...something I know I'll be cracking down on after the holidays. Hope you'll join me! 

I'm still in school until Wednesday...here's to makin' it, y'all! 
Last year, my kindergarten teacher friend Heather (left) and my second grade teacher buddy Bethany made these skirts from tree skirts found at Big Lots. We wear them every year for our annual Tacky Holiday Sweater day! Aren't they the cutest? We're so famous for our tacky, we were even featured on BuzzFeed
Fourth grade is rockin' and wrapping up their Faux Stained Glass project. I am so in love with their work!
Light Up Dress Ain't Got Nuthin on No Elf: Seriously, after showing the kids the Elf Cam 2016, they were so not interested in my light up dress. They're all, "nice but WHERE IS ESMERELDA?!" sweater: vintage, thrifted; light up dress: made by me, details here; shoes: Aldo
Second grade is weaving right now and it's just the most perfect project for this time of year. I see my second graders at the very end of the day when we are both tired. For the last week, we've been siting on the floor in a "Weaving Circle" while chatting, reading books and helping others learn to tie knots. It's just been the best way to end our day!
Polka Dotted Holidays! I so love this noisy dotted dress. It was a lucky estate sale score and it's one of my faves. sweater: Target; dress and brooch: vintage; boots: Frye...paint splatters by me
This week, I went LIVE on Facebook! If you weren't able to join the fun, it is currently archived here. I'll be back this Wednesday at 8pm CST to chat about Classroom Management. I think that is on everyone's mind at this time in the school year. I hope you'll join the fun!
I forgot to snap a photo on this day...but I did make a run to the grocery store. I was stopped by one woman who said, "My nana had a tree skirt in that same print!". I didn't have the hear to tell her that I probably was wearing her nana's tree skirt. Then a dude stopped me and said, "OMG, I was so going to wear that exact same outfit!" I told him it was a good thing he didn't seeing as how I looked so cute. Nobody wants to be the loser in a Who Wore It Best, right? 
First grade had a blast painting their Bebo-inspired birds. I heard comments like, "I'm a serious artist!" and "I love painting" the entire time we were working. It was so sweet. 
Friday Funday: I think everyone's schedule is cray right now what with programs, plays, etc. I've decided just to let it go and ride the crazy rollercoaster. Having a wacky outfit certainly helps. dress: made by me, here; tights: Amazon; candy cane chucks: Marshall's years ago
One of my favorite things ever is to host a craft night. I try to do one every coupla months but life just got so crazy this summer and fall, I just couldn't squeeze it into my schedule. I was determined to make a Christmas Craft Night a thing this year. So I through out an impromptu invite and we had a house full of food, booze, crafts and laughs. We missed y'all who couldn't make it and so sorry we didn't get a photo with everyone! Our Christmas Crafts of Holidays Past here and here
 The next morning, I went to my first ornament exchange at my friend Camilla's home. I had the best time opening ornaments from these sweet ladies. What a wonderful way to share our talents! You can see my ornaments here
I hope y'all have a fabulous week! May it be full of friends and fun. 
 photo signature_zpsd10b3273.png

Wednesday, December 7, 2016

In the Art Room: Fourth Grade Faux Stained Glass

Hey, y'all! Today I saw a couple of fourth grade classes for their second day working on their Faux Stained Glass Winter Scene project. I was so impressed with their beautiful work that I thought I would share and let you take a peak at how these 12" X 18" beauties are turning out. In case you missed the demo video, here it is:
On our first day, we sketched out our ideas, enlarged our favorite onto our 12" X 18" piece of paper and drew the lines in either black glue or puffy paint. I decided to change the size of the artwork to better accommodate frames. I have had parents tell me that when we do odd shaped artwork, it is difficult for them to frame. I really love the idea of them framing their child's work so of course I'm going to make some changes to have that happen!
Today we watched the second half of the video and dove right into chalkin' it up. I stressed the following: no more than three colors per shape; colors had to be analogous; keep your fingers clean by washing and drying regularly. 
 About 1/3 of the kids finished today, some used glue today (because they were absent last time) and others are still in the middle of creating. Yay! That should be real fun to coordinate all those finishers/almost finishers/no where near finisheders. Such is art teacherin' life. I plan to provide some open ended projects for those wrapping things up as that will be our last class before break. 
 This project was inspired by the success of this third grade project!
One of the half dozen freshly-glued designs from today. We dry these on our messy mats on the floor. I found that placing them on the tilted drying racks causes the glue to run.
The partially finished pieces really stole my heart. These kids were serious about taking their time and doing their best. I love this Hershey Kiss tree!
 This one is really so stained-glass-esque.
 This artist got a big warm hug from me. So stunning!
And this artist, ah! I was so concerned when I saw his glued design as I thought, that is gonna take him forever! I was worried that he wouldn't have the patience to fill it in the best he could but he really is rockin' it!
And this one says Paul Klee to me! 

Please feel free to give this project a go in your art room! I'd love to see the results if you do.

 photo signature_zpsd10b3273.png

Wednesday, November 30, 2016

In the Art Room: Faux Stained Glass Winter Scene

I don't know what y'all call that time between Thanksgiving and winter break but I have been known to call it a naughty name or two. It's that weird in-between time where we are all comin' down from our vacation high and are so exhausted that we need another one. And just knowing that winter break is on the horizon can sometimes just be more than I (and the kids!) can handle. 

This week, so far, back to art teacherin' town has been a good one. I'm happy to be back making big messes with little people. One project that seems to have the fourth grade really excited is this Faux Stained Glass Winter Scene.
 I used black glue for the very first time in my teaching career last month and I (as well as the third graders) was all WHERE HAS THIS BEEN MY ENTIRE LIFE?! It is so much fun to create with! While they were working with it, I got the idea to introduce my fourth graders to the same media. With my Field Trip! series, I've been introducing the kids to contemporary creatives. Unfortunately, I don't personally know any local stained glass artists to film (any leads would be much appreciated!) so I created this introduction to the art of stained glass with a little iMovie wizardry. The fourth grade watched the first half of the video today and got a good start on their faux stained glass. 
The kids were SUPER bummed when I said that we weren't going to work with cut glass (really guys?!) but were excited when I mentioned black glue. I had them move to their seats and silent sketch several ideas for 5-7 minutes.
I really emphasized not creating a Christmas tree knowing that this project just might not be completed until after the holidays. However, I didn't want to limit the kids so I made it optional. Personally, I love that skull tree on the left! 
After our sketch time was up, we regrouped on the floor and watched the part of the video where I talk about drawing on large paper and using the puffy paint or black glue.
Puffy paint leaves a better, crisper line but it does take a little extra work to squeeze that bottle. The black glue (made with one part black tempra and two parts Elmer's Glue All) comes out faster but leaves behind a wider, flatter line. I shared with the kids the pros and cons and let them decide which they wanted to use. 
All but a handful of kids got to the black glue on the first day. I did change the size of the paper from what was in the video as I thought a 12" X 18" would be easier to manage. 
 One thing I had to really emphasize was keeping the drawing large. Showing that clip of the stained glass artist really did help them conceptualize the idea of large and enclosed shapes. 
 Of course, it wouldn't be black glue painting if we didn't have the occasional smearing. We learned to just let it go. The chalk can hide any imperfections. 
Gotta love a tree of Hershey Kisses! I'll keep you posted on the progress of this project. I see so many variations: landscapes, abstract designs, etc. I'd love to know if you have used this method. If you do, please drop me a line and share. 
 photo signature_zpsd10b3273.png

Thursday, December 17, 2015

DIY: Vintage Putz Houses, A Light Up Village!

It's the Most Wonderful Time...for Christmas Craft Night, y'all! I seriously look for any ole reason to have a bunch of boozy and crafty buddies over to blow off some steam and make stuff. And, let's be honest, nothing beats Christmas Crafts especially if they are as kitsch-mas-y as Putz Houses! 
At last year's holiday craft night, my art teacherin' buddy Sara mentioned wanted to learn to make Putz houses. My moms-in-law gave me a glorious box of these made in Japan beauties several years ago and they have a place on my pink tree every year. Here's a wee peak: 

They are easily my favorite ornaments as I love the magical notion of wee people celebrating the holidays in their happy village. 
You can occasionally find these bad boys in antique stores for heavily inflated prices. I've also seen them priced all over the place on ebay-land. But, let's face it, it's way more fun to create your own with a buncha buds, don't you think? 
If you've never hosted a craft night, here's how I usually get the ball rolling: message a group of artsy friends and throw a coupla dates at them. Once one is settled, create a Facebook event so folks can keep up with what you'll be creating and what they might need to bring. I also love to have dinner with a theme of some sort. This time I let everyone know that we'd be having Breakfast Dinner! Folks were encouraged to bring scissors and an adult bevvie of their choice. 
Our craft night was on a Friday, shortly after school. It's good to have drinks ready and snacks on hand because that's what peeps really be wanting. I had planned for the menu to have an egg scramble of some sort and pancakes. Of course, it's no fun to do all that cooking alone (especially when cooking is not your forte!) so I had the batter ready and put one buddy on pancake patrol (thank you, Tamara!) and another on egg-cellent egg-making (thank you, Virginia!). Another buddy served out the Bloody Marys (thank you, Ali!) while another mixed up mimosas. It was a delicious group effort that kicked off the night. 
Once the food had filled our stomachs, we cleared the dining room table and set to work. I knew that the first coupla stages of this house making would be a lil labor intensive but once it was done, the real fun of decorating could begin. 
Since I'd announced and shown a coupla photos in the Facebook event what we'd be creating, some folks brought miniature items to accompany there house like small deer and bottle brush trees. 
 And just look at our happy village!
I got so many sweet photos after the night of houses hanging happily on trees that it made my weekend! If you are interested in making your own Putz house, rustle up the following:
I happened to have a stash of gift boxes from my belt-making days for us to use. However, tag or poster board would work just fine. 
 If you do use a gift box, simply cut it open.
And cut off the tab. This tab will become the base of your house. I curve-cut the base just for interest but you could leave it square or cut it with decorative scissors. 
 From there, I cut off one of the box sections for the roof. 
Everyone created a variety of roof shapes and they each turned out so cute! I created mine with a scalloped edge. 
 I then cut the rest of the box apart and used two for the front, back and side of the house. 
 After about five minutes of playing, I came up with this template. 
 You'll need to cut two of these out and fold 1/4" from the side. 

Fold along the front and back of the house. 
Clip at the bottom of the side fold and bend up. Then clip at the crease where the front of the house meets the side and fold both bottom edges upward. 
 Before gluing the house together, start to think about a door and windows. You could use an Exacto to cut these...but I don't trust a bunch of drunks with sharp blades so we just cut them with scissors. 

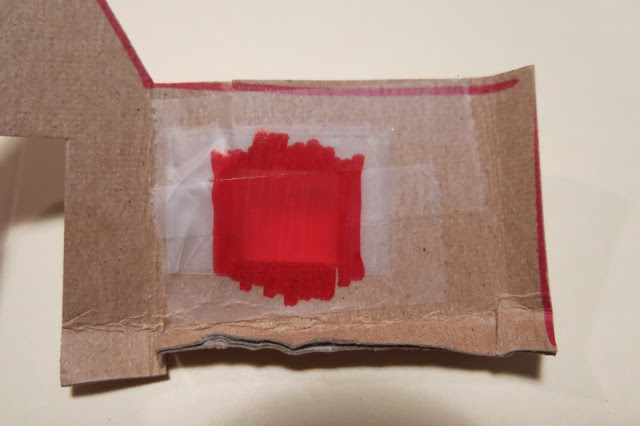
 For the stained glass, you could use cellophane...or you could go the poor art teacherin' route and simply fold a piece of tape back on itself...
 Tape that in the window from the inside...
 Color it ever-so scribble-scrabbily...
And boom! Stained glass!
Of course the over-achievers went and did all this. People like these don't get asked back to craft night (just kidding, Ginny!).
Now you can start to bring in the corner of the house and start gluing into place. My fave glue is Aleene's Tacky Glue because that stuff sets up fast. Aleene is Tacky and she knows it. My kind of gal. 
Hold long enough for someone to go and refresh your drankie-drink.
 Then glue the sides...
 And lay that glue on thick to add the roof. 
 Don't worry too much about craftsmanship, you'll be painting all over that mess anyway. 
Oh, snap! I forgot to mention, don't forget to hole punch a spot in the back or the bottom to insert a Christmas tree light!
 Then commence painting and decorating, the very best part!
 We had so much fun testing out the house "lights" on the tree!
 Aren't they lovely?
 Oh, a happy home. 

Made with such fun friends. 
 Who obviously cannot take a decent photo, ha!

Happy Crafter-days, y'all!
 photo signature_zpsd10b3273.png