Okay, today I'm talking and sharing all about every art teachers favorite art supply: the oil pastel. In this week's podcast, I'm not only excited to share our sponsor Creativity Street's Oil Pastels but also my favorite hacks, my four favorite kinds of oil pastels (from fluorescent to water-soluble) and my favorite lessons. I'm also talking about how to clean oil pastels (yes! you can clean them!) and also how I easily remove the paper wrapper and store these babies. You can hear it all right here!
I don't often repeat lessons but when I do, it's this first grade hit! We call these our Royal Self Portraits and they are a great use of both oil pastels and water-soluble pastels. Check out the full lesson here.
My second graders truly are super heroes and it shows in this project! Fluorescent oil pastels were used in the background of this Vincent van Gogh inspired sky and it really pops with a watercolor wash. Lesson here!
Y'all need some of them sub plan things? I got you right here...and your kids will learn about a contemporary artist too!
Nothing like oil pastel pattern-y landscapes, says me. The pop-up houses with puffy paint also made these a huge hit with the kids. Lesson right here!
This week I've had kindergarten for the first time! They are all kinds of wild, crazy, fun and squirrelly! I recorded a class on their first day and thought I'd share it with you. We ALWAYS do these paper sculptures on the very first day. They LOVE it, everyone is successful and it's great fun. Here's a video of me teaching this lesson:
If you want all the details on this project, then be sure and check out this blog post! I go in to great detail on just how I go about teaching this on the very first day.
Y'all might recall that this is a lesson that I did with everyone last year...but I did it as a Getting to Know You activity. You can read all about that here.
What you see here just might be my new favorite kindergarten lesson! I shared this lesson (and video!) originally here, if you recall. My students began with a foam heart shape purchased from the Dollar Tree. We then added foam sticker shapes and pulled prints (I'll get to that here in a moment but you can scroll down to get an idea). Those prints were used for one project. Then we were left with our printing plates.
I see my kindergarten kids for 30 minutes, twice a week. Here's how I broke the lesson down. Day 1: We read The Shape of My Heart. We learned about organic and geometric shapes. We placed sticker shapes on our foam hearts. The hearts came from the Dollar Tree and the stickers from Michaels.
Day #2: We printed! The kids printed by themselves and did great! They were to pull at least four prints so insure they had two good ones. We used foam rollers and tempera paint. You can read more about that here.
Day #3: We did the 100 Dot Challenge! At least that's what I called it. Each table had 10 Sargent Paint Sticks. The kids were tasked to making 10 different color dots with the 10 sticks. This fell close to the 100th day of school so it was really fun. We also learned to count by 10s! Day #4: We cut out our two favorite heart prints and glued them to our dotted background. Then we went to the glitter table.
And, as predicted, GLITTER GOT EVERYWHERE. Thankfully a kid pointed out the glitter in my coffee before I took a swig!
Day #5: We painted a rainbow! I traced hearts in the middle of the paper before the kids got to class. I did this because our focus was on painting, not tracing. I also wanted them to have enough time to pain.
Day #6: Our last day...I took the hearts outside. With spray glue, I added the foil on top. Thin foil works best. Then I gave the hearts a dusting of spray paint. I like the $1 a can, matte black spray paint from Home Depot. The prep time for this took me about 30 minutes for 2 classes.
Using the finest of steel wool, the kids were tasked with "finding their shapes" by sanding off the spray paint. They LOVED this! They were so excited to see their design come to life.
And I hot glued their hearts in place.
This lesson had it all: shapes, printmaking, 100 dot making, collaging, rainbow painting, metal tooling and more. This is definitely a lesson I'll be repeating. Hope you and your young artists give it a go too!
Hey, friends! If the winter weather is causing you to have brain freeze and you are stumped for ideas on art lessons, I've put together this HUGE blog post filled with my favorite winter art lessons. Many of them also include instructional video...this way if you are out sick or find yourself feeling a little under the weather, you can simply have me be your art teacherin' sub. All I ask in return is that if you post projects that your students have created, inspired by my lessons, you give me a shout out. It's always nice to give art teachers credit for their lessons...especially when they share them for free as I'm doing here. I also LOVE to reshare your projects on my Instagram which would gain your more followers. So it's a win-win! The Heather Galler coffee cups were created by my second graders some years ago and they are still a fave lesson of mine. You can find the details here.
I really am a sucker for black glue and chalk pastel, y'all. Each one of these fourth grade pieces was a stunner...and such a great lesson on using a new supply and color theory. Lesson with video here.
This second grade selfie lesson introduced my students to the world of printmaking! We had a blast creating these prints for our hats and mittens. Complete lesson here.
In need of some lessons for the kindergarten crowd? This one was a hit with mine...video lesson here!
Speaking of kindergarten...here is a winter landscape lesson that I've done with them for years. It teaches tint and shades as well as collage. You can find it here.
As my fourth graders wrap up this lesson, lemme tell you, the results have been amazing and it's quickly becoming my new fave project! More details with video here!
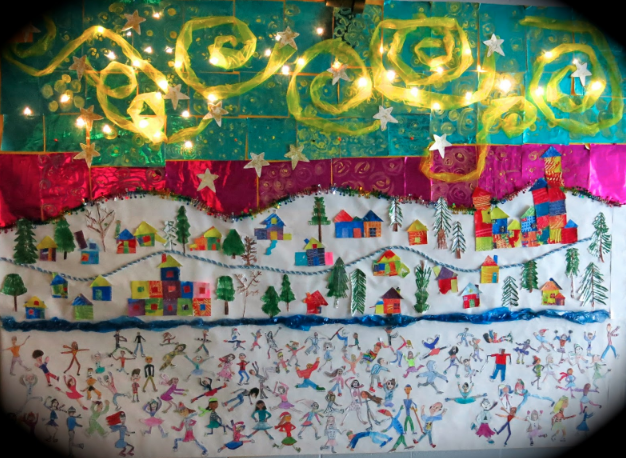
Every time I post on this blog lately, I find myself apologizing for not posting more. I'm tired of apologizing and I miss it here...and y'all! One of my goals this year is to get back here at least twice a week (my goal is three) to share lessons and whatever else that's goin' on. So, to kick off the new year, I thought I'd share a project I wrapped with kindergarten that they totally loved...and I think your kids will too. I created this lesson video for you to share with your students! I'll break it down day by day as to how I taught it in my art room.
Day 1: We painted spirals. I have my kindergarten for 30 minute art classes. Most of them finished their spiral paintings on one day but some wanted to paint the following. We used watercolor paint which is what I demo with in the video. Also, those warm color paintings? Those are by the first grade...and I'll be sharing that lesson with you later this week.
Teaching kids brush control and proper brush use is no easy task...but it can be fun. Here's a clip of me teaching my students how to correctly use their paint brushes and achieve delicate spiral lines.
If I have learned one thing about teaching kids, it's that silly sticks! They'll remember things if they are super silly and fun. That's basically my teaching philosophy.
Day 2: On the second day, we gathered with a clean 12" X 18" piece of paper and met on the floor with our bingo daubers (we call them paint markers). Because our daubers are filled with permanent ink, we placed another sheet of paper under ours to protect the floor...at least that was the idea. We did have a couple of incidences but we managed to get the floor clean. I did try to have them do a draw along with me while at their seats: TOTAL BUST. The kiddos couldn't focus when they were all spread out and it was just not fun. So we did a Round 2 on the floor and it was great. Day 3: We added the chalk and the paint to our snowman.
Day 4: We cut them out and added them to our backgrounds! Most kids added stick hands and a few even added boots.
This little guy got carried away decorating the background of his before cutting it out and adding it to his painted paper. I love it so much! Especially that rainbow scarf!
Something I was considering for y'all: * If you are short on time, skip the painted background. Have the kids create their snowman and then just paint the background of that paper when finished. * If you don't have paint markers or bingo daubers, try using Sharpie markers or black paint! If you use Sharpie markers, work on a sheet of paper that is 9" X 12" as the lines are much smaller than the daubers. * The kids could color in the scarf and hat, not paint. I did that with a couple of classes when I didn't have time to get out the paint and they look great!
Love to hear from y'all if you give this lesson a go. Your kids will love it!