Since I've spent the last couple of weeks in Printmaking Land with my second and third graders, I thought I'd share everything I know about printmaking in the elementary art room! I started to record a podcast episode which quickly turned into TWO podcast episodes. There's a lot to printmaking in the elementary art room but none of it is scary, difficult or even all that messy! My kids love it and so do I. So I'll be sharing both podcast episodes here as well as my favorite lessons. Be sure and click the link as it will take you directly to the lessons which often feature a video for you and your students!
In the first episode in this series, I focus a lot on printing with Styrofoam sheets. They are a great alternative to having small children carve into linoleum or wood blocks (lord, I can see the lawsuit now!) and can produce beautiful results. Here's everything I could think of about printing with Styrofoam sheets!
My favorite tip is to have kids use ink pens when incising the lines into the foam. I have them use a blue pen first and a black pen second. This ensures that they'll incise the lines deeply enough by doing it twice. When I see the black ink pen, I know they've traced their lines not once but twice.

In this episode, I talk a lot about supplies and set up. Here's a visual! My second graders are doing a rainbow roll in this photo. Notice the dollops of ink at the top of the tray where they are to dip their brayer, not roll through the ink. Then, in the space below, they are to roll their brayer up and down only (so as not to mix the colors) to cover the brayer before rolling it onto their printing plate. Messy mats are used to help keep the table clean. Students also place all of their prints on the messy mat during clean up (without stacking them as they will stick together) and slide the entire mat onto our drying rack. Then we toss our printing plates in one sink, brayers and trays in another for me to do a quick wash after school.
In the episode, I also mention printing on newspapers, painted papers, wrapping paper, metallic papers and much more. The results are stunning!
In the follow-up episode, I talk about printing in 30-minute classes. On the first day, we do a single color print like these third-grade robots you see here. The following art class, we do a rainbow roll like you saw above.
On our third day of printing, we spend a hot minute adding more designs to our printing plates before doing a reduction print. The kids were fascinated by this process.
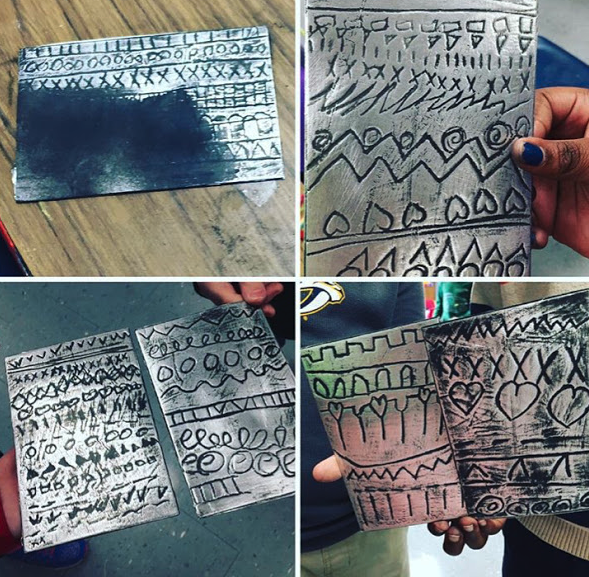
And on the last day, we make these! Never throw away those printing plates or simply send them home. You can make such cool works of art with them with inexpensive foil sheets, steel wool and spray paint. Take a listen to find out how!
Third Grade Cities! This lesson was a hit as the kids were allowed to swap cities to create some diversity in their finished piece. The complete lesson in the link!
Winter Portraits by Second Grade Need a fun way to introduce printmaking and patterns? Check out this self-portrait project!
Egyptian God Portraits Fourth grade students used their knowledge of Egyptian gods and symbols to print the designs in the background of these portraits.
Gelatin Prints I don't do this kind of printing anymore with homemade gelatin printing plates for a couple of reasons: I don't like using the gelatin (it's an animal product that I'm not comfortable using) and it's labor-intensive. BUT the results! There are recipes for making your own more permanent printing plates that don't seem to be difficult at all. I found several on YouTube.
 Sushi Collage with Gelli-Plate Prints I do have a class set of Gelli-Plates and we love them. The best thing to do is just let your kids go crazy exploring different methods of printing on the surface with stencils and texture and color. In the end, you'll have a fun stack of papers like you see below that can then be used to create collages like you see above!
If you would like a video to walk you through more of these processes, be sure and check out this blog post!
That project was very similar to one I did just last year with my kindergarten friends! We used foam hearts from the Dollar Tree as the base and sticky-backed foam stickers for the design. You can see the complete lesson here.
We collaged our completed hearts for these sweet masterpieces.


