Recently, I posted my favorite winter lessons for my students (you can find it here!) Today I thought I'd share my fave Christmas crafts for we adults! These are projects I've done with my friends in years past when I hosted Christmas craft nights. One of my favorite things to do during the holidays...that I've just not been able to do this year. But that doesn't mean we still can't create! You might even want to schedule a Zoom craft night with friends to give these a whirl. So here we go...my favorite Christmas crafts!
A handful of years ago, we created Putz Houses! If you aren't familiar, these little houses were created in the 1950's and used to decorate trees. There's a hole in the back where you can slide them onto tree lights and the houses then light up! You can see all the step by step details in this blog post.
My all time favorite craft is needle-felting. Creating wee needle felted ornaments with small embroidery hoops was a fun and easy craft. Some of us even added some embroidery to our designs. Details here.
To decorate my art room rainbow tree, I used palettes that I just painted as well as old paint brushes and cardboard tube crayons I created! Check it out here.
This majestic thing of beauty actually stays up all year in my art room and is from Treetopia.
For our most recent craft night, we created these! So simple to make. We created them with cardboard cones left over from yarn, yarn bombed them and added details. I'm thinking I may have to create a how-to video of this and the pompoms this week so stay tuned.
Last Friday, I hosted a Halloween craft night and it was a whole lot of fun. We created super simple embroidery and needle felted decorations. My theme for mine was Day of the Dead but, since I was hosting a bunch of art teachers, I decided to just share the basics and leave the options and creativity up to them. Here's what they came up with:
So fun, right?! After sharing these images on my Instagram, I got a lot of questions about embroidery and needle felting basics. This project is all about the basics so I thought I'd create a little easy-peasy tutorial for you and the crafty folks in your life. I do believe children as young as 7 years old could handle this craft with you by their side. Here you go:
If you are not familiar with Day of the Dead and would like to read more, you might want to start here.
Supplies needed: * Embroidery hoop (ours were about 6" wide) * Fabric (scraps work great for the background!) * Embroidery floss * Embroidery or chenille needle * Craft store felt in a variety of colors Optional: * Wool Roving * Needle felting tool * Needle felting cushion
Instead of needle felting, you could always just glue on flowers, jewels or Halloween decor! The fun part on craft night was having a ton of supplies on hand for everyone and just seeing what all they could dream up!
I like to keep my Calaveras (skulls) in the hoops and then hang them that way. I have a Halloween Tree (yes, I'm that person) and they look so cute on there.
I hope that tutorial helps. Have a wonderful time creating! If you like this, you might want to grab MY BOOK, right here!
ANNOUNCEMENT: I'll be doing a book launch at Parnassus Books in Nashville on Sunday, August 11th at 2pm. If you'd like to join the fun, please RSVP here. Let's PLEASE support our local book stores by purchasing my book at Parnassus. LOVE to see you there!
I CAN'T EVEN BELIEVE IT MYSELF...Stitch and String Lab for Kids is finally (like, FINALLY) here! And I cannot wait for you to see what's inside!
When I was a kid, fiber arts was my favorite. I didn't have art class in elementary school. So I had to get my art-makin' fix elsewhere. I learned straw weaving in Vacation Bible School. My grandma taught me how to embroider and cross-stitch. And my favorite teacher taught me how to do string art (shown above). As an adult, I've carried with me that love for fibers. When I have free time, y'all know I'm usually sewing up a dress or needle felting some wearable art. It didn't take me long to bring my love of fibers into the art room. Twenty years later...my students have experienced all forms of weaving, needle felting, wet felting, sewing, embroidery and more. I packed ALL of my favorite kid-approved lessons into this book...and I'm so happy. I want to share my love for fibers with you and your kiddos!
For that reason...I thought it would be fun to bring back the ole Facebook LIVE Craft Nights. I actually STOPPED doing FB/IG LIVES when I was so busy...writing this book. With that behind me, I'd love to get back to crafting with you. Since school is starting soon and I've got a couple other obligations happening, I can currently commit to these three dates. We'll see where we go from there. Here's the line up:
Mark your calendars and set your alarms! I'll be sharing the supply list shortly. I know if you are anything like me, if I give it to you too far in advance, y'all are just gonna forget all about it. So stay tuned here, follow me here and I'll keep you posted. TO CELEBRATE THE BOOK LAUNCH...I created a podcast episode just for you. Have you ever wanted to write a book? Well then I'm spilling the beans on the who, what, when, where, why and HOW in this episode:
By the way, if these photos are sparking your interest, they are projects from my book. There are 44 projects in my book...quite a bit! If you'd like to see me share more about my book and see some super easy projects for the youngin's, you can see my interview on Nashville's Talk of the Town here.
If you do receive my book and like it, a review here would be AMAZING! You don't even know just how much a review (preferably a good one!) can mean to me. I would truly appreciate it! The amount of work that goes into making a book is bananas. So a kind word and review is a wonderful thing. Also! I cannot forget to mention that my first book Clay Lab for Kids is also available here...and again, reviews welcome and much appreciated!
Hey, friends! I'm coming to you today with my very favorite fiber arts projects! Teaching fiber arts is one of my very favorite things to teach, along with clay. This summer and fall, I put in HOURS creating THIS BOOK which will be due out this coming summer:
You can preorder yourself a copy here if you are interested! But if you just can't wait, I thought I'd share some of my very favorite fibers projects right here today. Be sure and follow the links to the lessons as nearly all of them have how-to videos that are perfect for you and your students. Let's start with sewing!
1. These GIANT pizza pillows were such a hit last year with my students that I knew I had to do it again. Because I was wrapping my fibers book this past fall, I decided to kick off the school year with fibers. Usually, I'm all about fiber projects in the spring. This is how we displayed the pillows at last year's art show! This year, we also made both emoji and donut pillows (size: HUGE) but for details on those, you'll have to scoop up my book.
2. If you are looking for a beginner sewing project on a smaller scale, you might wanna try these stitched monsters on for size. My kids used Smart Fab fabric for the bodies but felt would work just fine. If you are curious what types of needles and thread I recommend, be sure and check out this blog post as well as the others where I break it down for you.
3. I learned embroidery from my grandma when I was in elementary school and I LOVED it. It felt so good to learn something so "adult" in my mind: creating a picture with needle and thread. I love sharing this experience with my students now too. You can read all about this Our School Has Heart fiber art's experience right here.
This year, I decided to live dangerously and introduce embroidery to my second graders at the start of the school year...when they are still first graders, really. It was a bumpy start but they got it and loved it. This lesson can be found in my book but I did create this video a while back to help you troubleshoot stitching with kids:
Actually, the above video was created for AOE during one of their online conferences! This is a couple years old but does walk you thru a lot of important details of all things fiber arts and kids.
And here is my troubleshooting embroidery with kiddos video. I hope you find them helpful!
4. For even MORE details on sewing and embroidery, along with a book I strongly recommend, visit here!
5. Needle felting with kiddos is not something I do very often...but I do enjoy doing it! If you attempt needle felting with children, I'd make certain it's with a group of kids that understand the dangers of the needle felting tool and are responsible enough to handle it. As y'all know, I LOVE needle felting and have put in countless hours stabbing stuff. If you are interested in learning more about needle felting, start here.
6. One of the most popular lessons on this blog has been my string art lesson. This is based on a project I did in 5th grade and LOVED. My students have loved it just as much. I've created videos to walk you and your kids through this lesson so be sure and check out this blog post AND this blog post!
7. Paper weaving is a must when you introduce weaving to your students. But what to do with the paper weaving when finished? Last year, we made these woven owls and the kids loved them!
Both this blog post and the one mentioned above have A TON of videos on teaching first graders (and up!) how to make a paper loom and weave.
8. Circle Loom Weaving has always been a huge hit! I normally do with my second graders in the spring but this year, I did it with third grade in the fall. I can't tell you how many videos I have on this! Be sure and check this blog post out if you have any questions about getting started.
9. Have you ever tried CD or Embroidery Hoop weaving? So fun and easy! Last year, my second graders tackled CD weaving instead of plate weaving. It was a great way to upcycle those stacks of CD's I'd been accumulating. This type of weaving takes less time than plate weaving as you don't have to spend two art classes painting the plates. They also look super pretty in the window when light hits the CD. Video and lesson details here!
10. Whenever I get stumped for a lesson, I just think back to the things I enjoyed creating as a kid. I remember the summer I spent at a vacation bible school learning straw weaving. So fun! My kids love this one too. Details and video here!
11. Want a lesson that packs a huge punch? Tree weaving teaches landscape painting, weaving and so much more! This lesson of mine has been another huge hit on my blog. I have many videos to walk you and your kids through this fun technique. You can find it here.
12. I have yet to meet a kid who didn't love making Ojos de Dios. Why not try expanding on that love by making BIG God's eyes?! We did that here!
13. Pouch Weaving used to be one of my all time favorite things to teach. Because it is complex, I created an entire series of weaving videos for you and your students, including how to create that cool cord. You can find the beginning of the series here.
15. Shibori! I love shibori dying and so do my students. I created a video that explains EVERY one of these folding techniques and you can see it here.
So, truth be told: I've been blogging for seven years and teaching for twenty. I KNOW I've left some great lesson links and videos off this list accidentally. So, you are wanting more, give my name and whatever type of fiber project you are interested in a google search...or search in the bar on the side of this blog. Because there are just so many fun fibers lessons out there. AND stay tuned for my book where there are even more!
It has been a long time since I forced myself out of my sewing comfort zone. Like, a really long time. In fact, it's been a long time since I've even sewn anything (I blame the writing of this book for that!). Some months ago, while shopping at the fabric store, the idea to make a Frida dress came to me. I immediately pulled up the image of Frida with the green floral background and purchased all of the fabric I could in that color palette. I thought "this idea seems beyond my capabilities but if I scoop up all the supplies, I just might try it." And so I did.
And, hold on to your pearls, THIS BABY HAS POCKETS!
While shopping, I also scooped up a 1960's style shift dress pattern. I knew that a simple front with no waistline would have to be the "canvas" for this kind of creation. Now, y'all know that I'm all about the needle felting...and that's normally how I while away my winter days...but something about the look I was going for said applique. So I started sketching.
I cut out and laid the front panel of the dress out on some wrapping paper. After tracing around the pattern, I started sketching Frida. If this Frida looks familiar to you, that might be because I was referencing my Frida latch hook design. After sketching her out, the REAL fun of cutting out all of the pieces and adding the iron on backing began.
I have done A LOT of applique but I've never used Heat and Bond...like, what?! I guess I just didn't know it was a thing! When I found it at the craft store and used it, I was like WHERE HAS THIS BEEN MY ENTIRE LIFE ON PLANET EARTH? It's that amazing. BUT a lot of work to add to each piece.
Once the backing was added, then I simply laid it out and ironed in place. I thought I was doing okay...until I started the HOURS of stitching. Applique is not for the wimps, kids.
I went through a lot of back and forth decision making with this dress. First up: to use a floral print for the flowers or stitch flower shapes. I'm happy I went with the floral print. I did something similar with her shawl. Then I had to reach out to my IG fam about thread color. Initially, her face was outlined in peach...but you just couldn't see her jaw line. So I outlined just the jawline in brown...and it looked like a beard. Eventually, I seam ripped the crapola outta the thing and used dark brown for her ears, jaw and neck. And I'm happy with that. Thanks, IG fam!
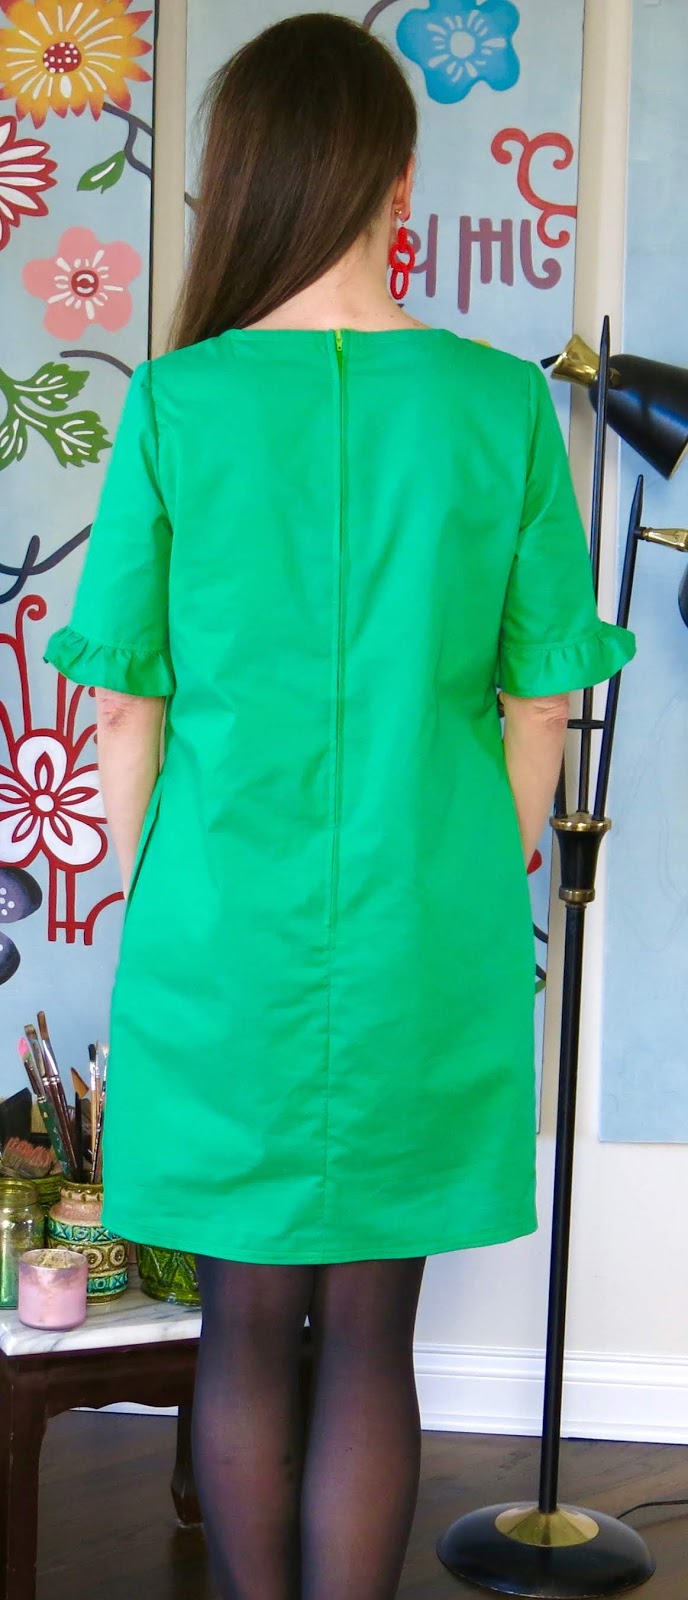
By the way, ANY machine can do this stitch. And look, the back is as pretty as the front!
Because the stitching took so long, I totally dragged my feet on finishing! The dress pattern had a couple options for sleeves. In the end, I wanted the dress to have a fun, tropical and retro feel so I went with the sleeves with a ruffle at the bottom.
What do I hate most about sewing? Basically everything. Is that crazy? I'm not a detail person, I'm not a perfectionist when it comes to sewing ... and these are traits a good sewist has! But what do I REALLY hate? SLEEVES, y'all. Stitching in sleeves.