Wednesday, August 15, 2018

In the Art Room: Getting to Know You Paper Sculptures

Hey, friends! Today I'm sharing what my students, all of 'em, kindergarten through fourth grade, are working on to kick off the school year. I am calling them our Getting to Know You Sculptures!
If you follow me on Instagram, than you know I've been sharing a lot of info about this. I've gotten a TON of requests for the sheet...so I thought I'd share it with you.

I know this sheet has been unavailable for some time...the link has been fixed! You can get two sheets now! 

Here's one!

Here's the other! 

I wanted to create a lesson that the kids would love, would be easy for all to be successful at and help me out...I have to be absent for the next couple of days. So I knew I'd want something that would be easy and fun for my sub. I created a video for my sub (I always do...it just makes for much smoother sailing) and I thought I'd share it with you...just so you could see how I explain this lesson to my students. 
Note: I WILL NOT be using the sheet with my kindergarteners. Here is the lesson that I do with them...very similar but without the sheet of paper as their guide:
So far the kids have been LOVING this project and I am enjoying getting to know them! They've also been chatting to each other about why they picked what and it's so fun to hear them talk about it. I cannot wait to share with you how this lesson will progress...so stay tuned.

You might have noticed that I DO NOT use glue bottles. You can find out why here
Not gonna lie, storage is gonna be an issue until we get these hung up! I'm having some classes do theirs on a white background 12" square paper and others on black. For open house night, I plan to hang them in a checkerboard patter. The strips of paper are cut frmo copy paper.
In an attempt to stay organized, I'm keeping them clipped according to table colors. 

PLEASE NOTE...I love sharing lessons with you all and I do so for free. All I ask in return is that, if you use ANY of my lessons, please give credit where it's due. If you share on social media, please let folks know where you go the lesson from...this way they can benefit from the free resources as well. THANK YOU!

 photo signature_zpsd10b3273.png

Tuesday, August 14, 2018

First Day of Art Class!

Well, all this week I've been experiencing my first day of art over and over and over. All y'all know what I'm talking about...with 20 classes, you have the joy of hearing yourself say the same things on loop. Most of my classes, kindergarten through 2nd, are 30 minutes in length. I thought I'd share today what I do in that very first 30 minute art class...and stay tuned. I'll be sharing my second day of art (and what I do with my hour long classes) later on this week. For now, here you go!
The video I play on that very first day of art is one I created last year. My art room looks SO DIFFERENT NOW! It's kinda crazy to see how much I changed and redid last year. My students LOVE this video and it's such a great reminder of what is expected of them. Here it is:
Creating videos is a great way to share with kids important information without putting yourself on repeat. My students love to see the adults in the building cutting up and misbehaving in this video!
 I've been using a variation of this "cheat sheet" for years...and it really helps. I call it my security blanket. I'm sharing it with you in case you need a lil bit of security!
Here are the random and sometimes off the wall questions I ask the students. These questions are all over the place...which really holds their attention and keeps them on their toes. 
Much more to come on how I do my first days...but I did want to share with you what I cover on that very first day when I have 30 minutes or less. Happy New School Year! 

 photo signature_zpsd10b3273.png

Monday, August 13, 2018

In the Art Room: Clay Projects for the Kiln-less!

Howdy, partners in art teacherin' crime! Today I thought I would share the video I created for The Art of Education's online conference last year. This will give you an idea of what their conferences are like if you've never been (read: they're super fun!). My presentation was all about clay projects for the kiln-less. BONUS: you can STILL do all of these projects even if you have a kiln...with some mild modifications to some. 
This video was inspired by my book Clay Lab for Kids: 52 Projects to Make, Model and Mold with Air-Dry, Polymer and Homemade Clay. That's right...I had to dream up, write up and photograph 52 clay projects so this book is PACKED with STUFF. If you buy the book, I would love a review...a glowing one, of course. 
In the video, you'll see just a snippet of some of the ideas from the book. My favorite air dry clays to use are Crayola's Air Dry (I'm not wild about Model Magic but their air dry is good) but my favorite is Amaco's Air Dry clay. I also love Sculpey and Fimo for polymer clay. Making clay is super fun...in the video and in the book, I'll walk you through some recipes. 
Now, if that clay video doesn't get you excited to share clay with your kiddos than just do a lil search on my blog. I have A TON of clay videos both here and on my YouTube channel so be sure and check 'em out!


 photo signature_zpsd10b3273.png

Saturday, August 11, 2018

What the Art Teacher Wore #201

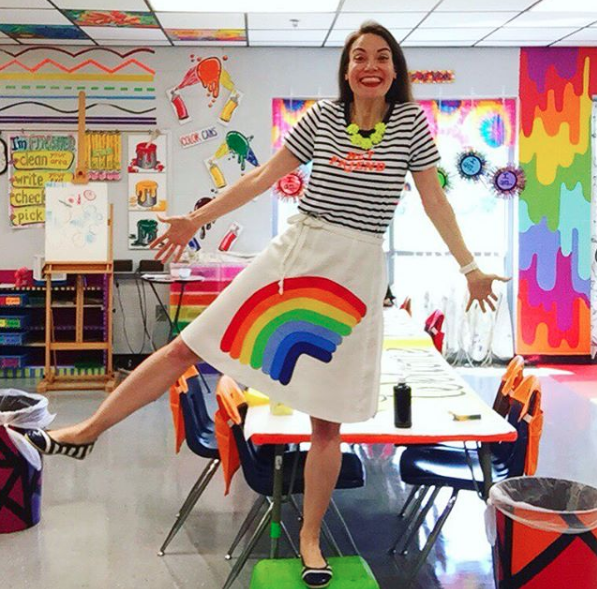
Hey, friend! Well, I made it! One week down (with two of those days being PD and the rest being with the kiddos) and many more to go. I will officially see my artists on Monday...but even without the wee ones in art, this week still wore me out! On Monday, we had some professional development during the day. Our evening was our Meet the Teacher night where I thought my new shirt from Old Navy would be perfect. 
 Normally, at the start of the school year, the halls are barren and drab. If you remember, my students painted this huge HUGE banner on field day. I saved it from that day and hung it right before school started. I added some Welcome Back banners to go above these giant paintings. They make me so happy and brighten our halls. 
Monday: Shirt is from Old Navy; necklace: J.Crew Kids; skirt is vintage from Etsy; shoes: TJMaxx; headband (seen in first photo) was created by a fellow art teacher!
Every new year means trying new things. One thing I'm trying out this year is having a little mailbox for the kids to place their drawings and notes. Like most teachers, I get A LOT of fan mail...and while I love each and every one, it can eat up a lot of instructional time if I go through them during art class. I found this cute little mailbox at Joann's and my buddy Ali used her Cricket to bedazzle it for me. The idea is that the kids can place their drawings in there. I have a special place for notes and drawings called The Masterpiece Gallery. I'll keep you posted on how this goes!
Tuesday: Sweater and headscarf: thrifted; necklace: The Paper Source; belt: Amazon; dress: Modcloth

Tuesday was meant to be a work day and I felt like I got nothing done. I'm so glad that I put in my hours before most folks were in the building. I've noticed that I'm super social and love to go around and visit...and folks love to pop by and visit me. Since I was mostly prepped, it wasn't a problem. In years past, it always stressed me out and put me behind. So I guess there is something to that whole "planning ahead" thing.
Wednesday was our first day back and it was a half day. No kids in art so that meant I had time to slap together a welcome back photo op (with the help of my music teacher friend Kiera!). We were pretty proud of our 5 minute backdrop making skills. I'm just glad I'm so good at hoarding fun finds from the Dollar Tree which is where the flora and fauna are from. 
 Welcome Back Wednesday: I decided to join in on the photo op fun by dressing in my Crayon costume. Scored this bad boy from Amazon a couple years ago. 
Here's what I was wearing underneath: t-shirt: Forever21; belt: Amazon; watches: Swatch; necklace: made by me; skirt: thrifted
Since the kiddos are coming on Monday, I've been prepping our table folders. This year, I decided to laminate them so we can use them over and again each six weeks. Details about them here.
 Nearly every year, for as long as I can remember, I've made a Back to Art Teacherin' Dress. The start of this school year has been just a little busy...and my focus has been on other things. I'm so bummed I didn't make the time to create a BTS dress! I've got so many ideas in my head...just not enough hours in my day. Details on this dress I created last year here

This was our first full day with kiddos. It's been our tradition for as long as I've been at my school, to pool all the kids into the Multi-purpose room and cover school rules, make introductions, talk about arrival, dismissal, lunch and so on. Last year, we got wise and made a video that covered nearly everything. It's a great way for us to make sure all kids get the basic school information that they need to be successful.
 I used to always cover my tables in paper....but it got to be too much of a waste of paper and my time. However, I do love to do it at the start of the year as there is no confusion what table the kiddos sit at. 
 It also allows me to number the spots. I do give assigned seats...so being able to say, "Jimbo, you are Green Table #1" is so much easier when they are marked this way. Once the paper gets too gnarly for use, we'll pitch it and, hopefully, still remember our seats. 
 Fri-yippie! My tables are prepped with our first day(s) activity and I'm feeling pretty good about it. Dress: made by me, details here; shoes: Chucks; belt and crinoline: Amazon! 
 I love LOVE to do collaboratives as apart of our first days back and this year is no different. Details on this to come as I'm still working on those dirty little words: lesson plans. 
Hope y'all had a great week! Details on my Matisse-inspired necklace right here
 photo signature_zpsd10b3273.png

Wednesday, August 8, 2018

Printing with Gelli Plates!

Hey, y'all! Last year I shared this super fun printmaking and collage project over at the AOE Art Ed Now conference. I'm excited to be able to share the video I created for that conference with you now. Here you go:
I teamed up with Gelli Arts to create the video because I love using their printing plates in my art room. They are a wonderful plate to use with kids of all ages and allow for so much exploration. In this video, I take you through a TON of different printmaking methods. Check it out!
 What I love most about printmaking is being left with SO MANY FUN PAPERS once complete. But what to do with them all? In the video, I share a favorite lesson of mine: making them into collage sushi. But, really, the possibilities are endless.
Thanks so much for letting me share. If you have any questions about the processes shared in the video, just ask. AND if you have any suggestions on printing, please drop a line in the comments. I know everyone loves to explore this medium with their kiddos and it's always fun to try out new techniques.
 photo signature_zpsd10b3273.png