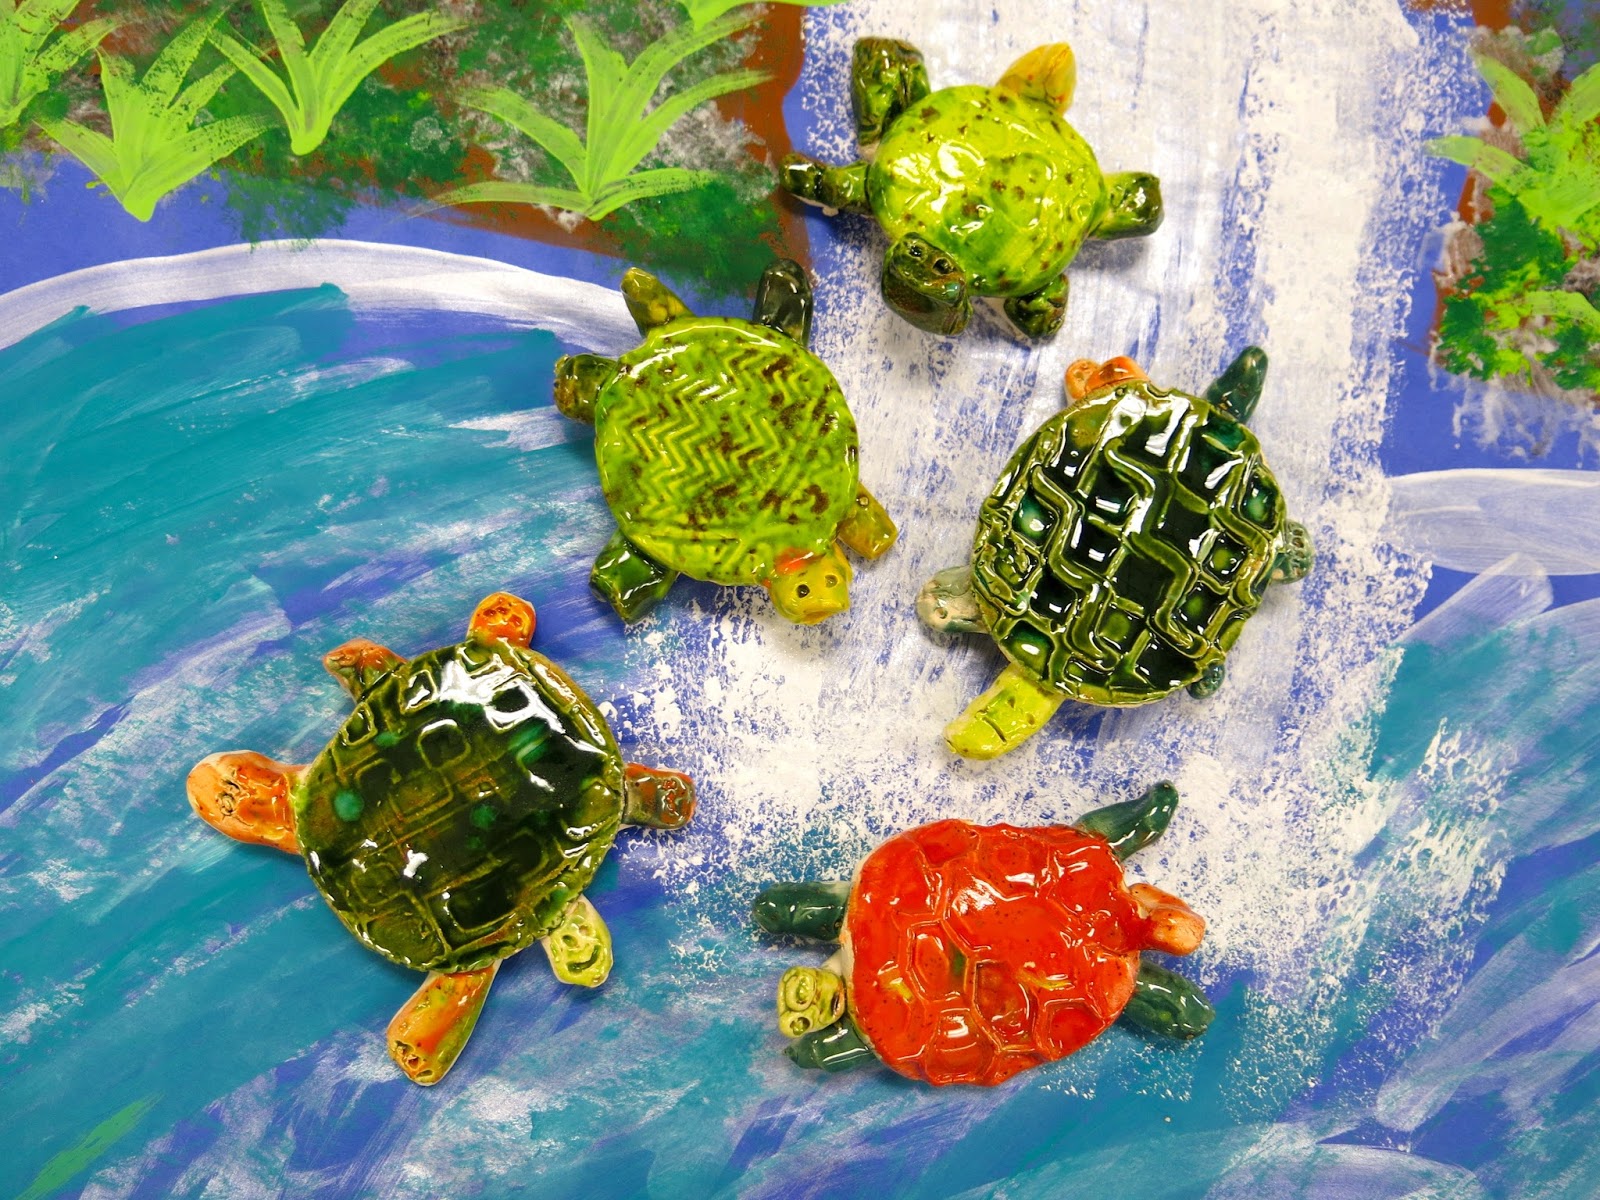
Need a fast and fun clay project that teaches kids all about texture? Try these clay texture turtles on for size! Here's a one minute how-to clip:
So easy!
I did this project with my kindergarten (this was their second clay project...I'll share the other one soon!) and they loved it. Stepping on their clay and seeing the texture that the sole of their shoe left behind was their most favorite thing. Here are the kiddos in action:
Stepping on the clay was def their fave part!
I loved using Mayco's Jungle Gem glazes for these turtles. I stressed to the kids that adding at least three layers of glaze would really make their turtles super shiny.
This is definitely a project that could also be done with air dry clay. In fact, every Wednesday night for the month of May at 8pm CST over on my Facebook page, I'll be hosting a clay chat, starting tonight! We'll also be creating in clay so be sure to bring your favorite clays...or purchase these clays as that's what I'll be working with:
Of course, that book I wrote is nothing but non-kiln fire clay projects...I explored just about every clay medium in the making of that book.
By the way, don't you LOVE that painting in the background? My fabulous P.E. teacherin' friend Ali is painting it as one of the backdrops for the art show! I thought it was a cute photo op for these happy and colorful turtles.
See y'all LIVE tonight at 8pm CST...come armed with your fave clay tips!
Y'all...it's getting down to the wire and I'm all about the last minute at this point in the school year. Between our art show, clay week(s), a ceramic mural undertaking (stay tuned!), our annual 2nd grade ceiling tile project just kinda slipped my mind. Not until a teacher asked did I remember that it was that time of year. After a mishap with a chalk order from China (they sent me HAIR CHALK, y'all!), I reached out to my friends at Faber-Castell and they sent us the most beautiful chalk I have ever seen. Last week, I sorted the chalk, created the following video and today, in just under 2 hours, my 65 second graders created magic!
The video so saved my voice! It's a loud room with lots of echos...I know that I would have struggled to keep my voice going and my patience in check. It was just me, one parent and a handful of super helpful 4th grade girls to assist these four classes of kiddos. The kids did wonderfully! I am so super proud of them...and they were so proud of themselves...here's a short video of them in action:
If only we worked that fast!
In addition to the video, I spent about an hour in the morning with my super helpful specials team laying out large sheets of paper, setting out the chalk trays and the foam brushes. Last night I cut out 65 fish templates (we'll be painting them for our very last art project of the year!) and had them on the kids' tiles. We always work on the opposite side of the ceiling tile as it takes to the chalk so much better.
32 chalk trays were ready for the kids to use. Check out that chalk, isn't it beautiful?
Now, with 65 kids, you know they don't all work at the same pace. So I would share a little of the video and then put them to work. When they finished OR when they heard me ring my chime, they knew they were to stop immediately and meet again on the floor to learn the next steps.
Kids who finished early were asked to walk around and see if there were any friends who might like some help with their tile. I wouldn't normally have the kids work on each other's pieces but this is an exception. These tiles are BIG! And some kids wanted the help of their friends. Also, I emphasized that this was a collaborative project so help from our friends was great...but only if the artist wanted it. If not, move on to another friend!
This is our third year with this project and it's a big hit each time. This particular group was so excited about it! We do a different theme each year. Our first year, it was butterflies and least year was flowers. I'm so pleased with these bright and cheer fish, perfect to create a school of fish in our ceiling!
I get a lot of questions about this project so I thought I'd address them: * How do you seal these? After the kids are done, these are sprayed heavily with Aqua Net. It does dull the color but not much...and def not noticeable from the ceiling. * What does the Fire Marshall think? Our Fire Marshall didn't mention them! And, of course, we didn't ask.
* Do the kids get these back? No. I emphasize that the tiles are there to stay, it's our legacy, our magical mark we leave behind. * How do you get all of the tiles? The first year, my custodian was able to order extra for me. Now, we just use the ones he has taken down. Meaning, when he takes down the clean tiles to hang the fish, we'll use those as our "canvas" next year!
* How did you convince your administration to allow this project? This project came from a request from my principal! She saw artwork on the ceiling of a school and asked if I could do something like that. At that school, the kids had drawn on paper and the work was tacked to the tile. Originally, when our street painter artist came, we were going to do sidewalk drawings...but rain was in the forecast. Thinking that the texture for the tile would be the same as the sidewalk, the night before, I came up with the idea to do the back of the tiles. We do the back because it takes the chalk much better.
* Why chalk and not paint? Personally...I find the surface of the tile to be very porous and just absorbs the paint. This seems to take a lot longer...and I don't always love the look. Chalk, however, works great on the back of the tile and I love the look.
* What happens when you run out of ceiling tiles?! Pretty sure that won't happen any time soon. Our school is large and our librarian just asked today if I'd do something for the ceiling in there! Short answer: I'll retire, ha!
* Who hangs the tiles? One of our amazing custodians. He LOVES doing it and seeing what the kids create. I tried to hang them once...it's a rain of chalk dust! He's the best for doing it for the kiddos. I think that covers all the questions about this question I've gotten in the past. But if you have others, feel free to drop me a line in the comments!
Love to know if you've done a project like this before...or any legacy type project. They certainly add a punch of happy to our school.
I'll be sure to share what they look like once they are installed. Until then, I'll be unloading/loading a kiln, matting artwork, scratching my head over a mural and having a nightmare about the art show. You know, the usual.
If you are anything like me (and bless, as we say in the South, if you are), then you prolly got that art ed degree of yours without being a total pro in all forms of media. I didn't take a single printmaking or ceramics class in college and I got a C in textiles (which is a fave but at the time, I was huffing too many paint fumes, er, REALLY into my painting class, to be bothered with warping that freakin' floor loom). What I did get is a two year degree in oil painting because...you know, that's something we teach to the 10 and under set. Ahem. All that to say, we are expected to be at least somewhat knowledgable about the media we share with our students. But, let's be honest, a lot of times, we are learning right along with the kids.
Now, I've been at this art teacherin' game for sometime now (18 years but who's countin'?) and I have learned a thing or two along the way. One thing is for certain: kids LOVE clay. However, it can be frustrating to teach if you lack experience. Since I've been around the art teacherin' block a time or two (wink-wink, nudgenudge), I thought I'd share some of my fave art teacherin' clay hacks with you. Here you go:
Let's talk about some of the things I've shared and just where you can find them. * Clay mats. I mentioned The Clay Lady and her clay mats. I seriously have had mine FOR YEARS. They are worth the cost of $2 each. * Toothbrushes and doggie bowls. Seriously, what would we art teachers do without places like The Dollar Tree?! Toothbrushes are perfect for teaching scoring and doggie bowls are awesome for holding slip while preventing spills. * Texture! A visit to your thrift store will provide you with a good stockpile of texture for your clay adventures. Placemats, cable knit sweaters, burlap, stamps, you name it. If it has a texture, your clay will capture it. * Skewer sticks. Perfect for cutting, drawing and carving into clay.
Something I failed to mention: what to do with those projects that kids work on for more than one class? To store these effectively, I have a stockpile of old and large zip lock baggies. The kids write their names on the bags in Sharpie, wrap their project in a damp paper towel and place gently inside the back. I tell the kids not to zip their bags shut as that usually traps air inside. Instead, I tell them to push the air out and tuck the opening of the bag under their project. This will keep their clay workable for about a week.
If you would like to continue this clay chat, you are in luck. All throughout the month of May, I'll be hosting clay chats (and craft nights, so come armed with clay!) right here, every Wednesday at 8pm CST. You can work with any ole clay you like...however, I'll be using the clays made available in this kit which you can purchase here. For more info on what we'll be up to, check here.
And now, I thought I'd share with you some of my fave clay projects over the years (many with video links!) for you to take back to your own Art Teacherin' Town. LOOOOOVE to hear your fave clay projects and words of wisdom. Please feel free to leave in el commentos below.
This clay project was one that I did with my second graders FOR YEARS. They love it, it's a great way to introduce texture, slab, coil and glaze. It's also a quickie and with my short art classes, it worked very well.
This was a fun project my third graders did one year. If you've taught clay before, then you've probably done the coils-in-a-styrofoam-bowl project (I know I have!) a different spin on that is having the kids use slabs of clay to create flowers. We had a spring theme one art show and these fit in beautifully.
I almost always do a clay project that emphasizes texture with my kindergarteners. I'll share all of those projects...but this one is always a fave: texture butterflies!
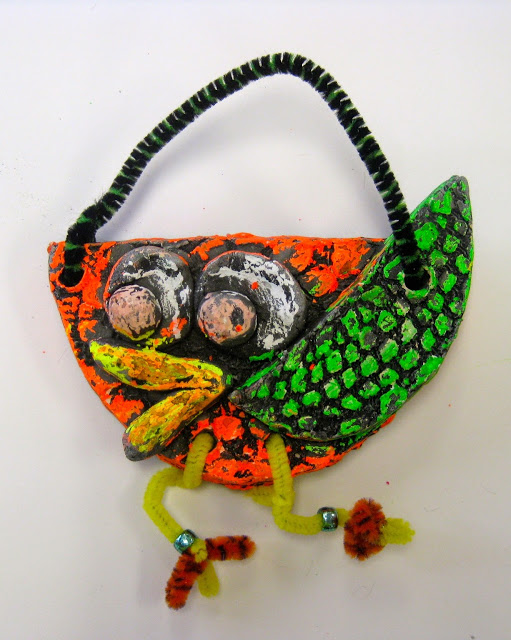
These clay fish by my first graders always crack me up! They had so much fun creating the silly expressions on these a couple years ago. If every glaze is not an option, here is a fun alternative: florescent oil pastels and watered down black paint!
Inspired by the painted elephants in India, my fourth graders created these fun guys one year.
Funky frogs were created by my fourth graders one year. They had so much personality! This was a project we worked on over the course of a couple of art classes...which really allowed the kids to get creative.
One year, to go along with our Asian theme, my fourth graders created these fun pandas. Each had their own wild and wacky personaltiy.
To go along with that theme of Asia, my third grade kiddos created these Chinese dragons which they had a great time doing.
So I might have a thing for animals and clay...what do you think? My kindergarten and first graders created these pinch pot pets a couple of years back when our art show theme was to raise money for a local animal shelter. And, what do you know, animals are our theme again this year!
That year, my second graders created this version of pinch pot pets: two pinch pots put together to create the body of their animal.
And my fourth graders created these! Definitely a favorite by both me and the kiddos.
Yet another spin on pinch pots and animals: using the pinch pot as a container. Our school mascot is the tiger and this particular year, second graders created tiger pinch pot containers.
Now last year, I decided to go for a food theme and create the art room into a 1950's style diner. These projects were not shared in detail like my others because...I was in the middle of writing my clay book and these projects are all featured in that book! The book is written to be used with no kiln fire clay...but, as you can see, you can use kiln fire clay as well. You can scoop up your book here.
My first graders served up these coffee and donut delights.
Second grade backed up cupcakes. Y'all better believe the retro lover in my totally enjoyed decorating for this art show!
Third graders made hamburgers and fries...complete with all the fixin's.
While others made pancake containers with hand painted paper plates.
A kid and crowd favorite were the pie containers. The kids had so much fun googling pies and sculpting their favorite.
While other classes did pizza containers. I reached out to a local pizza place for the boxes to display the pizza in.
This year, we are back at it with an animal theme! We are transforming the art room into a pet shop. Third grade is in charge of the reptiles.
But a crowd favorite so far are these fun and funky birds by second grade. They crack me up!
Many more clay projects are coming up so stay tuned. However, if you just can't wait, you can see a handful of clay projects that have not been shared here but are on my YouTube channel. I always upload there first...so if you'd like to stay up to date, you might consider hitting subscribe.
Hey, y'all! I'm sad to say that last Wednesday was our last #creatingwithcassie Facebook LIVE craft night for felting. I chatted about Fashion Felting and will share a blog post about that super soon (I'm a pinch behind...as per usual). The previous week, we ventured into Sculptural Felting and I shared the basics on how to needle felt little creations...while creating this penguin whom I've named Pepe le Paint...or something. Here's the video from our live creating session:
I've done a ton of needle felting but I've never taken it to the third dimension. Sue sent me a bunch of samples to share with y'all to serve as both ideas and examples of what can be created by needle felting.
Sue created the cardinal, the penguin and the cat. I'm currently working on a ton of felted cacti which I'll share with you real soon (if you follow me here, you can catch some one-minute how-to videos). By the way, Sue has a great YouTube channel with a ton of felting videos. Check it out here!
Now, I mentioned that this past Wednesday was our last craft night for felting. For the month of May, we are moving on to CLAY! We'll spend the first half of our craft nights as we used to do: sharing tips and tricks. So come prepared to talk shop about clay, both kiln and no kiln fire. Then...we'll create! You can use ANY clay you have on hand or you can purchase your clay kit right here. You can also find out more details on what we'll be up to right here.
Now, let's check out this gallery of awesome folks who have been felting along with me. Seeing the work of other folks has really made this experience the best for me...it's one thing to share your love of a craft with someone via a blog post or a video. But it's entirely something else to create live along with people...and see what variety of creatives there are out there. THANK YOU AND HUGS to everyone who participated either live or after the fact, shared their creations and their enthusiasm. Y'all are the best.
And a BIG shout out to Sue at Back to Back Fiber for helping to make this possible. She's still selling felting kits if you are interested!
This van Gogh makes me so happy! Love this creation by Heather @the_doodle_birds.
Who doesn't love a purple penguin? This one is by Sepi @sepi.gol.
This Frida was made by Mariana @parkesphoto 8 year old daughter! Isn't it incredible? I love how the flowers in the crown are three dimensional.
Deborah @visualpraisestudio has been felting the cutest hats. I see an etsy shop in her future. I love these!
I am loving Jen @jtheen palette hat complete with three dimensional paint brush. So adorable!
And who doesn't love a needle felted pet?! I love everything about this creation and photo by @swells17!
Merrill @merrillguinn made a happy little penguin...I love how the beak looks like he's chatting up a storm.
Heather's sweet unicorn...I love this so much! That mane is perfection.
Growing up in the '80's, I have a soft spot for Gremlins! I can't get enough of this one created by @art.teach.at.the.beach.
Love this tie-dye penguin, it's so groovy, baby. This one is by Emily @emily_clonts.
Check out how PERFECT Dana's @daynahbaynah felted beads are...that is no small feat. Kudos, gurl!
Alison's @alison.m.klein colorful creature makes me so happy. I think the big eyes are my favorite.
Angela's @nachtule felted succulents are so pretty. I'm totally diggin the purple one.
Look at how productive Mary @mary5409 has been. I am loving the owl.
Angela's narwhal is so much fabulous. The horn is just the best.
I love two things: the color pink and otters. So when I saw Chapin's @chapin.schnick creation, I was so excited. The cuteness!
Rachel's @mrsp_art penguin with it's little waving flipper is so fun. What a great idea!
This rainbow bird by @echopaitsel looks so cute on display in this Easter grass.
Y'all. Heather's felting game is STRONG. I think this would be a fabulous project for kids!
BB8 for the win, kids! How is this our first Star Wars felted creation? Ima need more where this came from. Megan @mrs.dunstan you get a slow clap and a hats off from me, sister!
Amber @amberakes created the next two felted pieces. I really love how she blends the roving. It gives her pieces a painterly effect.
I could see this on the back of a clutch, couldn't you? So pretty.
Stay tuned for one more needle felting wrap up from our craft nights. If you'd like to be featured here, just use #creatingwithcassie on your preferred social media outlet. Now, go stab something, y'all!