Monday, December 30, 2024

10 Lessons to Ease into the New Year, Valentine's Edition

Okay, listen, I get it. We're still in December and you may not want to be thinking about what's gonna go down in your art room next week (or this week? Do you return to school on Friday?). Regardless, I thought I'd help you out by offering some of my favorite EASY and engaging lessons that will allow you to ease your way back to the art room. Most of these lessons have a video so you can play that for your students while you grab your coffee and try to remember what day it is.

Let's start here! This lesson is ALWAYS a hit and, believe it or not, I do it with kindergarten. HOWEVER...when I return to school after a  long break, the last thing I wanna do is prep like mad for 5 different grade levels. It stresses me out and, because our students our little mirrors who reflect us, it stresses the kids out. SO! I often do this lesson with EVERYBODY, kindergarten through 4th. Does it make for a lotta messy paint trays, paintbrush washing and overflowing drying racks? YES. But does it also make for a gorgeous display of hearts created by the whole school that is ready to be hung BEFORE Valentine's Day (always the goal, right?!). Yes! So, let's go. Full lesson here.
This is a fun one and totally addictive so...beware! 
If you want to start with a little less mess, then just bust out the black, red and white oil pastels and get the kids drawing! They adore drawing cute stuff and these little Valentines critters are perfect for that. I created a video for each. You can check out the blog post with all the info here. We also did a stamped background that is totally optional. Here's the video for the bunny:

Now, if you want a demo on how to create the stamped heart background, be sure and check out the panda video (below) as I walk you through those initial steps. 
Here's how you can draw a long with me to create this fox:

And here's how to create the background and draw that panda:
Here's the video for that:

And last but not least!

Let's draw this cute Valentine's Pup!

For your older students, third on up, they may enjoy creating this 3-D heart!
This one is super low-mess as all it requires are markers, water and a paintbrush (and an oil pastel once dry, but that's totally optional). I share the details in this blog post. 


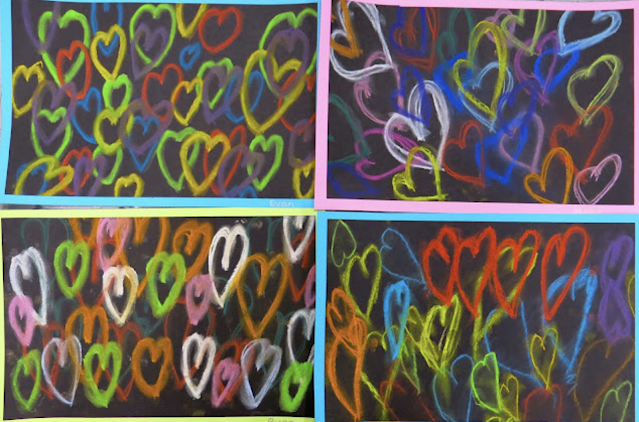
This project was done in just 30 minutes (the length of my art classes) and only uses chalk! I was also able to introduce my students to a contemporary artist for the process. Details here!


This is probably one of my all-time fave kid-approved lessons: this Chris Uphues-inspired heart art! 

If you need a line review lesson, you might want to try these Romero Britto-inspired hearts on for size! 
Of course, you should definitely share my book Larry the Line which also has two printable pages of line-inspiration in the back! 


And if you are looking for a lesson that packs a powerful contemporary artist punch, then THIS lesson with an introduction to four artists who use hearts in their art is the one for you! I did this on a half day with fourth graders and they knocked it out in one class period! 

Of course, since we are going to be talking about hearts, now is also a great time to either introduce or review SHAPES! Don't forget...Alfred can help you with that!
Remember: take it easy as you ease on in to this new year! Have fun!

photo signature_zpsd10b3273.png

Monday, December 23, 2024

Let's Paint a Christmas Tree!

Got paper bags and an itch to paint? Let's create these Christmas trees! You'll just need the following:

*Acrylic paint
*Paintbrushes
*Paperbags
*Chalk (optional)
*Palette (a paper plate or newspaper works too!)

Alright, let's get started!

Right? So fun and easy! I love doing a bunch at a time because then I have a stash for gifts. AND they make great framed works of art!

Have fun!


photo signature_zpsd10b3273.png

Let's Paint a Christmas Wreath!


Tis the time of the year to get to creating! If you are like me, then you just can't seem to part with your paper bag collection. I always see endless ideas on Pinterest and Instagram for bags so I just can't part with them! Last year, I recycled my bags by painting them into holiday motif bags and it was so much fun. I have been doing it again this year and decided to film the process in case you'd like to join me.

Something fun I found is that...once your painting is complete, you have an original masterpiece that can be framed and enjoyed! 

Here's the process:

If you have children who need to scratch that creative itch over the holidays or are hosting a family gathering, this may be a fun activity for everyone!

And now I can't stop painting on bags and stuff!
Have fun!


photo signature_zpsd10b3273.png

Cassie's Christmas Closet!

Hey there! As I was unpacking my Christmas clothes at the start of the month, I decided to film the process. However...it was kinda boring just holding the clothing up so...I thought I'd try some on for ya! I only managed to scrape the tip of the Christmas clothes iceberg but these are my faves. I'd love to hear yours!

And...if you are looking to up your closet game, I highly recommend the following:

*Hit the thrift stores! I PERSONALLY...love to have one-of-a-kind items. So the thrift and resale shops are always the best. For those of you saying "I never find anything at the thrift store"...me neither! The key is to go often. And, if you can, go earlier rather than later in the day.

*Hit those sale racks! I never shop full retail. Never ever. I always put on my blinders and go straight to the sale rack. What other people decide is 'too weird' or 'out there' always ends up on the sale rack and, wouldn't you know, that's always my fave finds.

*MAKE IT YOURSELF! I know, you may not be able to sew but...I didn't either for the longest time. So...start with upcycling outfits by adding to them with your own bit of flair and just gradually go from there. You seriously won't regret learning a new skill like sewing, needle felting or the like.

*Have fun with what ya got! Chances are you have a closet full of possibilities. You just need to mix and match the patterns and prints a bit. You'll get better at this. My hot take: start adding more black and white dots and/or stripes to your wardrobe as THAT goest with everything and offers a flair of fun.

Happy Holidays, y'all!
photo signature_zpsd10b3273.png

Saturday, December 14, 2024

My Christmas Tree Skirts to Lady Skirts Over the Years!

Hello, friends! If you've been hanging with me on this here blog for a while, then you know that I've transformed many Christmas tree skirts to lady skirts over the years. In fact, I've been doing it for so long that it was before I even created videos! So many of my tutorials were old school: photos and WORDS, y'all. Today I thought I'd take you on a little stroll down Christmas tree skirt to lady skirt lane in case you are so inclined to create your own. And you should! It's super fun! You can check out the skirt I made last year...here!
I have a coupla hot tips when it comes to this super easy craft. First...

* Get your tree skirt after the holidays. Pop into your local home dec, big box or craft store and scoop them up when they are half off or even cheaper.

* Vintage tree skirts can be found on Etsy or eBay. I've purchased a couple of my favorite ones from eBay. 

* Be on the lookout all year long! When I hit the thrift stores or estate sales, I always scoop up vintage tree skirts and stash them for later. 

* Get skirts that are large! If you order some online like from Amazon, be sure to check the measurements. Some tree skirts are meant for smaller trees...and could lead to a mini-skirt for ya!

* Get your self a crinoline. I get mine from Amazon. This will really give the skirt it's fullness so it can be admired in all of it's tree skirt glory.

Here's a video tutorial I created just for you:

If you'd like to visit my other blog posts with more step by step details, here's some of my skirts and the blog posts I've shared over the years. 

I can't believe this skirt is over 10 years old now! This was a hand-stitched tree skirt that I found on eBay. More details here. 
The following year, I made this skirt! I will say...this one is super warm and cozy BUT it was impossible to sew threw on my machine. So the skirt is just hanging on in the back with Velcro. This, I don't recommend. Cuz when your behind feels a draft...it's too late. All the gory deets here. 
Here's another vintage one purchased from eBay! Last year the zipper broke on this one so it looks like I'll be doing a little repairing before taking it out again. 
You'll notice how my tree skirts keep changing on my little vintage silver tree...that's because each year I pretty much rob my tree of it's skirt! Now this green tree skirt was a little shorter than others I have used. You can check out more about it here. 
Okay now this one...is actually a vintage round tablecloth! I did add the tinsel to the bottom and made it into a skirt much the same as the other skirts. More info here!

And that's it! I'm not sure if I'll make a tree skirt to lady skirt this year...even though I do have a back stash of skirts. You'll have to stay tuned on that one ;) Have a wonderful weekend, friends!

photo signature_zpsd10b3273.png

Wednesday, December 11, 2024

Marker Print Snow Globes

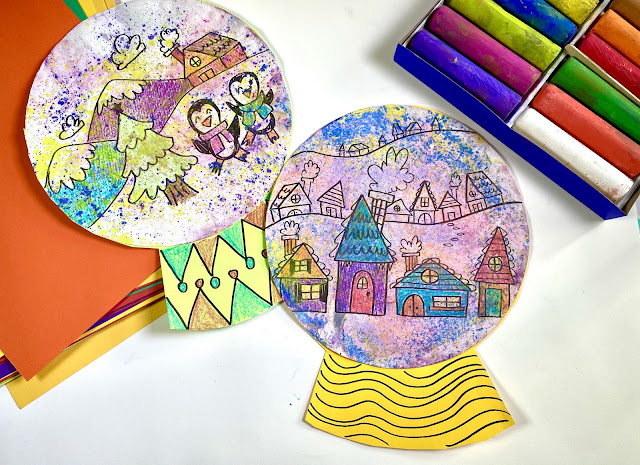
Well, hello there! As you can see, I am CLEARLY snow globe obsessed at the moment. I shared my first Snow Globe lesson here and then shared a floating chalk print version here. Today I thought I'd share a version of adding color the background with little marker and water.  As a teacher...or a parent who loves to create with their artsy kiddos, these ideas will give you three fun options for completing your snow globes!

Let's talk supplies:

* Pizza pan, a sheet of aluminum foil or any non-porous, flat surface

* Paper. I'm using a mixed media paper or one that's a little thicker than copy paper. 

* Black permanent marker

* Water-based markers, I prefer Prang Markers

* Spritz or spray bottle of water

Here's the how-to video:
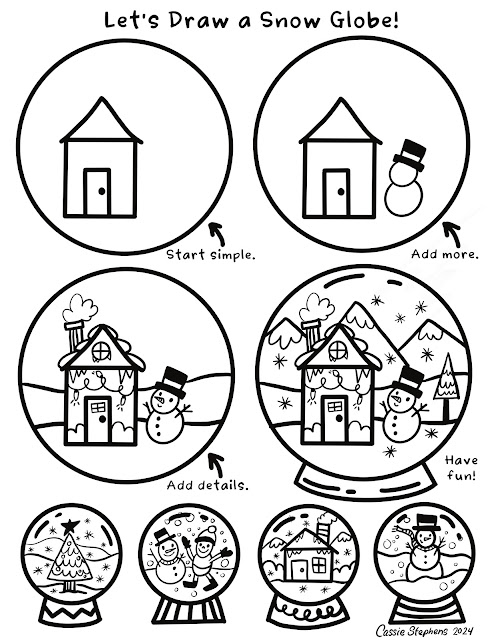
Just a reminder that you can get my free snow globe downloads here.
What I did find is that the lighter color markers work best...as the darker color markers are a little too dark and may hide the drawing underneath. But the real fun is in drawing a lotta these globes so you can explore a lotta printing. Also...I have found that using one of those misting spray bottles is the best as opposed to a regular spray bottle. AND the pizza pan is from Dollar Tree! 

If you need some drawing ideas, I got ya covered. Tap the link to download and print!

I can't wait to see what you and the artists in your life create! If you do share to social media, please make sure you tag me here so I can see!
I've got a lotta winter videos coming to my YouTube channel soon. So if you need some inspo, the best way to stay up to date is to subscribe. You can do that here. Chat soon!


Monday, December 9, 2024

Marker Print Wreath with Pop-Up Bow!

A couple of days ago, I shared a wreath drawing/marker painting lesson here. As I continued tinkering with this lesson idea, I thought it would be fun to try marker prints on a pizza pan. If that sentence leaves ya scratching your head, here's my video here:
For this, you'll need:

* A pizza pan, a sheet of foil or any non-porous surface for printing

* Crayons
 
* Water-based markers (not permanent)

* Spray bottle of water

* Mixed media paper (paper thicker than copy paper works great...but you could totally use copy paper in a pinch)


To add a little dimension to the wreath, I thought I'd add a little pop-up bow demo. I hope you have fun! 

Sunday, December 8, 2024

Let's Play Snowman Bingo!


I know what it's like this time of year...constant interruptions for programs, field trips, classroom parties and the like. It's nearly impossible to keep the kids engaged let alone...keep them on track or start new projects. I found that THIS drawing activity was perfect for my early finishers and for some Winter Centers that keep all kids happy and creating. I created a how-to video just for you and your students AND these two FREE downloads!
Let's start with the downloads! I used these in a sheet protector so that my students could draw on them again and again. I found that the best deal on these protectors was Amazon. You can get a ton of them cheap! However, the plastic IS thinner that the more professional grade sheet protectors made for the classroom. Just be aware of that. 


And you can score this free download here!

Here's the video:
Now, if you want to take the activity a step further, check out the end of the video to see how we make a work of art out of our drawing! It's super fun. 


Check out the kids in action here:


Of course...this fun activity can lead into this big project that I did with my kindergarteners! You can find all the video details and lesson info here. 

In other news...I think I know what some folks are getting for Christmas as I've been shipping out a lot of my books lately! If you are interested in receiving one of my books before the holidays, please consider ordering soon so that they MIGHT arrive in time. 

Art Teacherin' 101 is packed with everything-I-wish-I-woulda-known about teaching art. It has all of my tips and tricks for classroom management as well as discovering just who you are as an art teacher so  you can be your very best. If  you would like to kick off the new year with some new methods to try, this book is for you! 
My new book Find Your Way was written to read to my students as they work. I do this with my second through fourth graders (and on up would work but I only teach thru 4th) and it keeps them focused and working quietly. This book is a choose-your-own-adventure style book where you go on art adventures with 7 different artists! From Vincent van Gogh to Frida Kahlo, Money, da Vinci and more, the reader can decide what adventure to take with up to 32 different endings and over 80 illustrations! Find it here.
As a teacher, I could never seem to find a book on shapes that wasn't too baby-ish. All the books seemed to be simply getting children to recognize and name shapes which...most can already do by the time they enter the art room. However, many don't know the difference between a shape and a form, geometric and organic and how shapes can be used to draw. So...I wrote Alfred the Ape Knows His Shapes and I think you'll love it!


Larry the Line is based on a poem I wrote my first year teaching art. I've shared Larry in many blog posts...before writing a longer version of my poem, illustrating it and crafting it into a book! It's a rhyming book which are always fun to read to students...and, added bonus: they remember the names of lines much better this way! You can check out Larry the Line (and read the 175 reviews!) here. 

Have fun, y'all!


Saturday, December 7, 2024

Floating Chalk Print Snow Globe!

YOU GUYS. I can't tell you how excited I am about this one! After I created my first Snow Globe lesson , I started getting all sorts of ideas on how to add color to the background. I thought...what about chalk prints?! 

I first shared the process of Floating Chalk Prints back in 2014 (that's wild!) and you can check out that post here. But really...not much has changed! You'll need:

* A basin of water. And, seriously, nothing but water.

* Freart chalk, found here. Sidewalk chalk won't work...and artist chalk is so expensive and little...this stuff is seriously the best.

* If you are looking for round paper, Prang just created some!

And that's it! Of course, you might want these free downloads from yours truly...

Okay, now...let's get started. I promise...you and your students are gonna love this!
RIGHT?! Out of all the methods I tried for adding color to the background (and I have another fun one that I'll be sharing here and on YouTube soon...I always post to YouTube first so, please be sure and subscribe to be alerted!) 

Whenever I share the process of floating chalk prints, I always get the question "do you have to spray or set the chalk once dry?" NOPE! Which is what makes it even more amazing!

I hope y'all have fun! I can't open my comment section here on my blog, unfortunately, because I get spammed for days BUT...I am active on Instagram and Facebook! BTW...I recently had a fake Facbeook account created in my name and likeness. It's not me! The one I have linked here is my account. So...if you do this lesson in any way, I'd love to see! Please be sure and tag me. 
And...friendly reminder...that if you are interested in receiving any of my books for the holidays, you may want to order super soon! I sign all of my books before packing them up and sending them your way. You can find them here!

photo signature_zpsd10b3273.png