Showing posts with label what the art teacher wore. Show all posts

Monday, January 16, 2017

In the Art Room: Candy Heart Drawings

Just a note: I'm constantly updating my YouTube channel with new lessons that y'all are free to borrow. The lessons don't typically make it to a blog post until several days or weeks after I've shared them there. To keep updated on those videos, y'all might wanna subscribe here. And please let me know if you use the videos in your art teacherin' world, I'd love to see what your kiddos create!

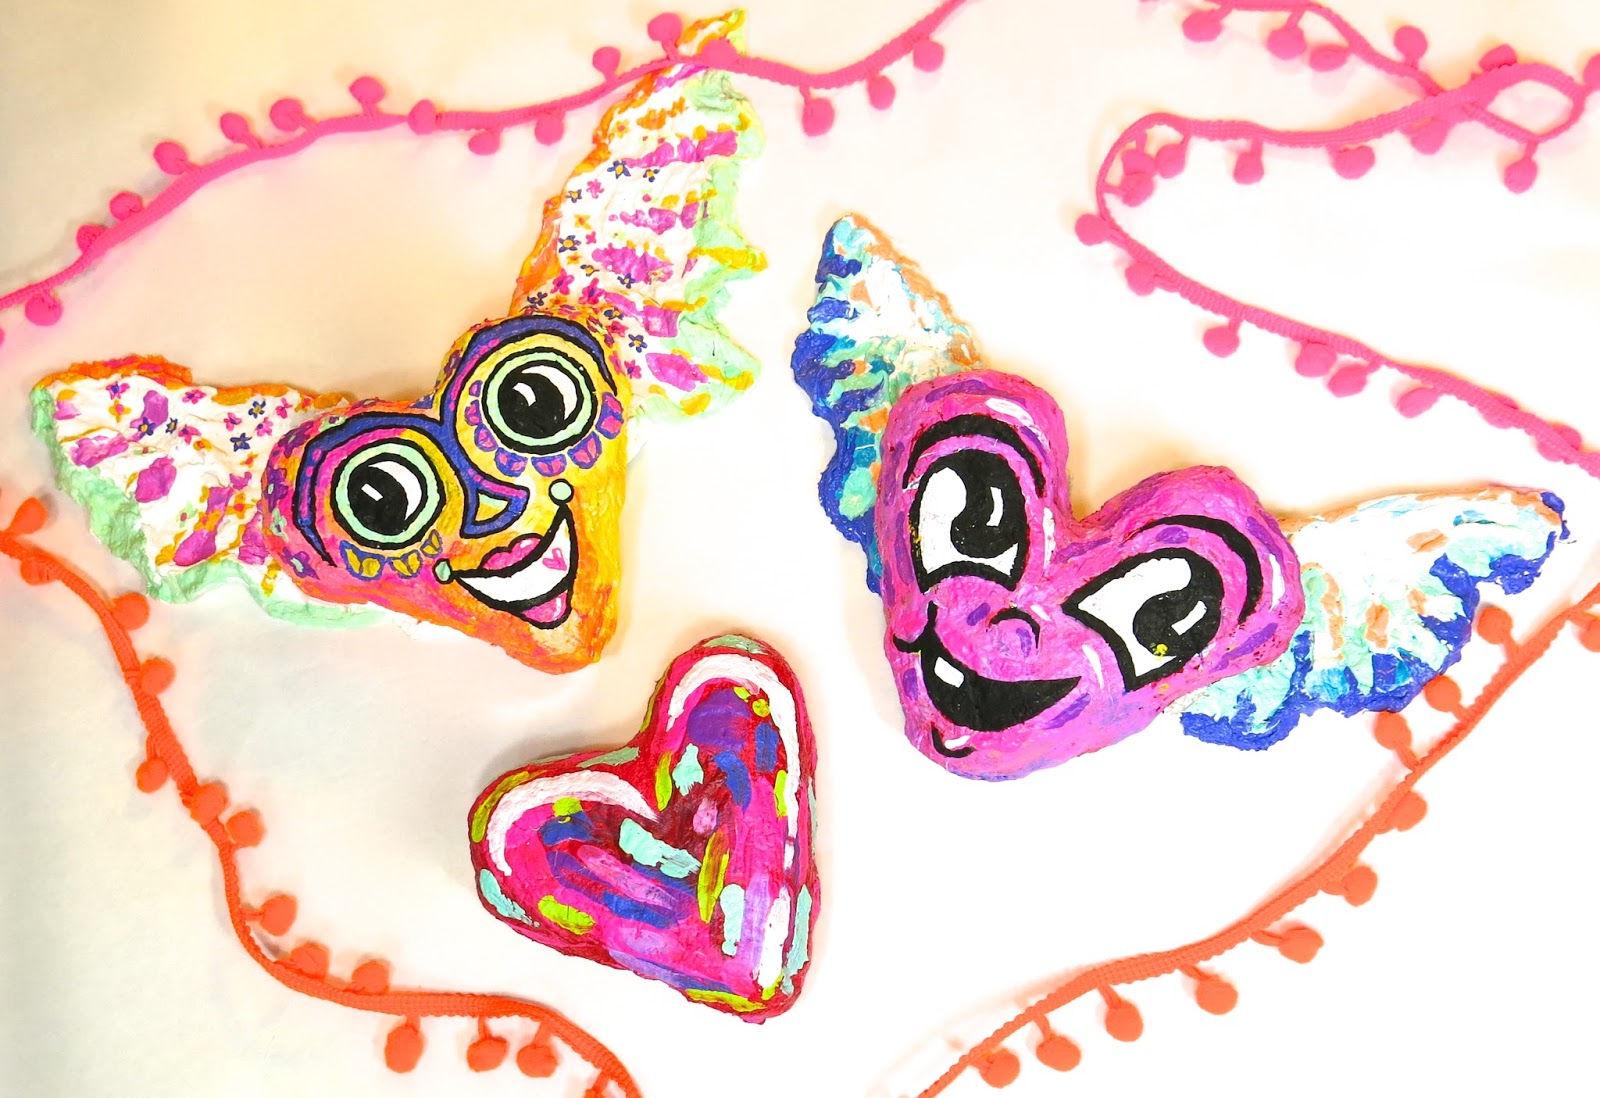
Currently, my fourth graders are creating large scale candy hearts (shown below, lesson here). Because my students work at different speeds, I wanted to have an additional project that they could work on if they finished a phase in the sculpting project early; would tie-in with their sculpting project; would introduce drawing three dimensionally and would be fun...and that's how this Candy Heart Drawing lesson came to be!
I did something very similar to this idea last year when my fourth graders created these large scale crayons and pencil sculptures and worked on these collaborative crayon drawings in addition. This Candy Heart Drawing project could easily be a collaborative drawing project as well...which was originally my intention. But with some kiddos still sculpting while others were ready to draw, it just didn't work out that way. But, if you do this lesson with your students, it would be something that you could definitely try! 
Complete lesson video with tons of technique and vocabulary for your students!
Full Disclosure: I am currently working with Faber-Castell and creating lessons using some of their art supplies. I agreed to do so after testing their supplies out personally and with my students. I feel very confident in the quality of these oil pastels. 

Here is what I found: 

* There is less breakage. Often the oil pastels my students use crumble and break. These did not nor did they produce as much "oil pastel crumbs" as the brands I have used in the past.

* They don't roll off the tables! I love the hexagon shape of the pastel.

* The pack I had didn't have a huge assortment of color...but we don't need it! With the baby oil trick, you are blending the colors and producing a wider range of color and value. 

* They are bigger and will last longer. I used to order a different brand that was about half the size and we wore those out. These are definitely going to last. 
 If you decide to do this lesson and you want to have visual steps for your students, here you go. I having the visuals up as well as the video rolling (on silent, if it has already been played once) can be a helpful reminder of the steps. 

Supplies:

* 12" X 18" watercolor or heavy stock paper. Because you'll be using baby oil, thin paper will not work. 
* Oil pastels
* Baby oil
* Q-tips
* Heart-shaped templates (not necessary but helpful)

1. Trace several hearts all over the paper using the template. Think about a spilled box of candy hearts. Have some hearts overlap, other only partially on the paper.

2. Create the illusion of three dimensional hearts by drawing only on the right or left side of the heart. 
 3. Using an oil pastel, outline your heart and then color in one direction. 
 4. Cross-hatch over that with a white oil pastel. 
5. Using a Q-tip and baby oil, blend the colorful oil pastel and the white together to create a tint, or a light color. 
 6. To create depth, color only the top and bottom of the side of the heart in color and the middle in white.
 7. Blend with Q-tip and baby oil.
 8. Think of what you'd like your Candy Heart to say. Write it out on a piece of paper the same size as your heart. 
 9. On the reverse side, color very hard with a pencil using cross-hatching. Place the paper heart over the oil pastel heart and trace your words. 
 A copy will appear!
 10. Go over your words again in red oil pastel or a color of your choice. Continue with this process until your masterpiece is complete!
 My students have already started their hearts and they are looking fabulous! I'll be sure to share a follow-up post when they are complete. 
Feel free to share this lesson and video with your students! I'd love to hear from you (and see the amazing work of your kiddos!) if you do. Have fun!
 photo signature_zpsd10b3273.png
Read more »

Saturday, January 14, 2017

What the Art Teacher Wore #172

Allow me to just kick off this here What the Art Teacher Wore by saying No, I did not create that AMAZING felt flower Frida-esque crown I am wearing. It was created by art teacher Linda McConaughy who was so sweet and kind to send it to me. You can check out and purchase Linda's designs here. If there is something you have in mind, message her! And, if you've ever been to NAEA, you might also know Linda by her paint brush crown pieces (you can see me wearing mine here!). In fact, she'll be at NAEA in NYC this March (as will I, so excited) so you can check out more of her wares there. Thank you so much, Linda, I LOVE my flower crown and my students did as well. Matched my color wheel shirt completely!
 Target, You have the Best Kid's Clothes: I ain't ashamed to admit I just about purchased the entire Cat and Jack line at Target...for myself. Yes, it's kids' clothes. No, I don't care. That color wheel shirt is currently on clearance for something crazy like $2, y'all! top and skirt: Cat and Jack for Target

So. Did y'all survive Friday the 13th, the full moon and Mercury Retrograde (I'm not exactly sure what that is but if it had anything to do with the painting of one's hands and then licking it off episode I witnessed this week, I ain't down with it)? Thankfully, I have a long weekend to recover. It was my first week back after the break and we hit the ground running: weaving, sculpting, painting, printing. You name it, we were doing it. And all of it was in the name of LURVE...
 Before break, my firsties had finished these weavings. Honestly, I had NO idea what we were going to do with them until Monday morning. I remembered that before break, these kids had whizzed through weaving. So I decided to see if they could handle a little bit of hand stitching. Y'all, they rocked it! You can check out the complete lesson here
With all the possible bad luck floating around, I decided to ward it off with some freaky evil eyeball jewelry. You can see more of this craziness here. I'm so on a 80's kick right now, y'all. I've had a hair crimper in my Amazon shopping cart for a week now. 
 The Problem with Wearing Kid's Clothes: Is that half of your students wear them too. I was told that I match several kiddos in our school, a couple in kindergarten and a few in first grade. Yep. I've got the fashion sense of a 6 year old. Sounds about right. top: Cat and Jack; skirt and tights: Target; boots: Frye
Second grade printed this week and learned about the artist Chris Uphues. I love his artwork but his street art hearts are my faves. The kids really got into his work. Lesson to come!
 Wonderful Wednesday: I was so excited about Wednesday because my fourth graders started on their Candy Heart Sculptures! sweater: thrifted; pins: vintage; top: JCrew; skirt: resale find at Buffalo Exchange (I knooooooow!); yellow tights and hot pink fishnets: who knows
We got out armatures complete and started on the process of cutting the plaster into strips. I wasn't about to do that myself so I put the kids on that one. Next week, we cover in plaster!
 When You Look as Ridiculous as You Feel: All day long. That's what happens when you dress like a kid, y'all! top and skirt: more Cat and Jack. I done told you I bought everything they had. Gift cards from Christmas came in mighty handy; shoes: Aldo
Second grade had so much fun printing hearts that I decided to create more stampers and have kindergarten do it as well. You can see how I made the stampers here. More to come on this lesson! 
All Eyeballs on Me: Yep, I had to. Details on this dress here. Shoes from Modcloth
 photo signature_zpsd10b3273.png
Read more »

Monday, January 9, 2017

DIY: Eye Love Jewelry

Lately, I've been getting that 80's itch: I've had a hair crimper in my Amazon shopping cart for weeks, I've started shopping the 80s-inspired kids section at Target and my hair has been reaching bigger and bolder heights (thank you, Aqua Net!) Pretty soon I'll be busting out the Bangles, Bruce Springsteen and Def Leppard (okay, seriously, these are always on repeat in el Honda Azul). I can't help it, it's the era I grew up in...and the best era EVER. After the 20's, 40's, 50's and 60's/70's, of course. Ahem.
After making The Eyeball Dress, I've been [eye]balls to the wall obsessed with all things peepers. So when the dress was complete, I started painting eyes...an everything!
I have a decent assortment of wood beads and bangles thanks to etsy and late night online shopping. I've seriously had this stash of wooden beads and bracelets FOR YEARS and when I got the itch to paint over winter break, they were the victim. The diamond shape resembled eyes and, well, the rest was history. 
Did I mention it was winter break and I was power watching the following: Schitt's Creek, Transparent and Arrested Development? Yes, twas good times. 
It's so evident I have 80's-itis. Just a quick scroll thru my Insta-feed is proof of that. I think it's the color that gets me...and the patterns...and the happy memories. ALL of it! Can we just bring back jelly bracelets, charm necklaces, leg warmers and neon eyeshadow already?! Please check your banana clips and pegged pants at the door, ermkay?
After painting my beads, I decided that I couldn't have a necklace that was all eyes...so I splurged on some polymer clay and created some extra beads. Some I mixed and others I painted...
And I really had the very best time. Like, totally, It was rad, dude. 

By the way, I spoke with my 80's Gag-Me-with-a-Spoon accent today in art class...and a second grader whispered, "she's trying to sound young." Needless to say, I seriously contemplated sending him to Time Out. Like, whatever, eh!

 photo signature_zpsd10b3273.png
Read more »

Thursday, January 5, 2017

Art Teacherin' 101: Episode 28

Last night, over here, we had a fun live chat titled: What I Wish I Knew as a First Year Teacher. We chatted for nearly an hour and so many of you contributed to a wonderful chat. Thank you! If you'd like to view the chat or learn from the awesome comments, the chat is still archived here

I did go ahead and condense the chat into my Top Ten Things I Wish I Woulda Known. Here are the Cliff's Notes:

1. Befriend your custodians. They are one of your biggest allies.

2. You ARE NOT the following:

* A Craft Supply Store. Share your supplies sparingly.
* Support Staff. You have your own curriculum. You were hired to teach art...when you can squeeze in other subject areas, AWESOME! But don't build your curriculum around anything other than the art education of your students.
* The School Sign Maker. Do those favors sparingly, your time is precious!

3. Test Drive ALL of Projects. Make examples...not to necessarily show your students but so you can troubleshoot any issues they might have along the way.

4. Don't Sweat the Verbage. There is gonna be so much stinky-smelly edu-talk that it will make your head spin. Don't get caught up in worrying too much about the latest edu-trends. Because just when you think you have it figured out, they'll switch the script.

5. Keep the Peace. Stay away from Negative Nancys, Patty Pot-stirrers and Glinda Gossips. Nothing good can come from those friendships.

6. Nail that Classroom Management. That should really be rule number one. You got that on lock-down and you can do anything. Not sure how to get your management under control? Then...

7. Seek a Mentor. Find a fellow art teacher and ask them for tips. See if you can go and observe them. Find a teacher in your building who you admire for his/her teaching style and seek their guidance. 

8. CREATE! Make time to make stuff. This is what you teach! You gotta practice what you teach.

9. REST! Take time to unplug from school. You'll be a better teacher for it.

10. Reach Out. Attend your state and national art education conference, professional development opportunities and art classes. You can learn so much from other artists and teachers, reach out and find them!

Love to hear your tips, y'all. Let's share with those newbies what we wish we would have known.
 photo signature_zpsd10b3273.png
Read more »

Wednesday, January 4, 2017

Hearts with Wings Sculptures

GOING LIVE TONIGHT, JANUARY 4TH AT 8PM CST RIGHT HERE. We'll be chatting about What We Wish We Knew our first year(s) teaching. Chat soon! Until then...

How about a fun heart sculpture project where kids discover an artist and use them as their inspiration? That's exactly what I had in mind when I came up with this simple and effective project using papier mache pulp and plaster! My buddy Natalie Waggenspack over at smART Class (one of my favorite art teacherin' blogs!) inspired this lesson. Here is the process video with an introduction to the artists I found inspiring:
Originally I was calling this project the Jim Dine Hearts Sculpture...but I didn't want my artists to feel limited to one artist. Shoot, they don't even have to use an artist's style as their inspo, they can come up with their own. But if you are looking for a project where your students do a little bit of artist investigation, I think this would be super fun.
I think this project would best be suited for students from third grade on up. I'll be doing the Candy Heart Sculpture with my fourth graders so I might either reserve this lesson for next your or try it with my younger kids. Here are the supplies needed:

* Aluminum foil. I really liked using the sheets of foil as they were precut and just the right size.

* Activa Product's Celluclay or Fast Mache. Both are very similar and work great. If I were doing this with my kids, I would definitely premix the clay. 

* Activa Product's Rigid Wrap Plaster. Used for the wings.

* Tempra or acrylic paint.
 I love the work of contemporary artist Chris Uphues (I know my students will as well...check out his street art, so fun!) and he inspired this heart. 
And I had Frida in mind when I painted this heart. I really loved creating these hearts and see so much potential with this project. 
Love to hear from you if you give this project a try! Don't feel limited to the sculpture supplies I used. I really think a variety of mediums could be used to create these fun hearts.

Full disclosure: Activa Products and I are working together to create fun projects with their products. I received these sculpture supplies from them. Thank you, Activa Products! 

 photo signature_zpsd10b3273.png
Read more »

Monday, January 2, 2017

In the Art Room: Candy Heart Sculptures!

Hello, Cutie Pies and Love Bugs, won't you Be Mine on this Candy Heart Sculpture adventure? I'm so excited (and maybe a pinch sugar'ed up from one too many candy hearts) about this project I've got planned for my fourth graders. I've been kicking this idea around for sometime...but there were some issues I thought the kids might struggle with. After finding solutions that will make their sculpture making adventure a little easier, I put it all together in this here video.
To make your own Candy Heart Sculpture, you'll need the following: 

* Tag or poster board, one 2" X 24" and two 8" squares
* Scissors
* Stapler
* Tape
* Rigid Wrap Plaster Cloth from Activa Products 
Approximately 24" of wrap per student. The wrap comes in a width of 6" so I cut it in half for this project. My plan is to have the kids do the cutting when they finish their armature.
* Tempra paint
 I played around with a couple dimensions with the heart and decided that the 2" edge would be the best. It's the most accurate appearing ratio and it requires a lot less plaster wrap. Having the kids create those tabs of tape and fill in the gaps with excess tape will really help when they are creating their armature.
 I also played with several ideas for putting the wording on the heart. I first toyed with the idea of just letting them write on their hearts but my students do not have the best of handwriting, not even gonna candy coat it for ya (pun intended). Giving them a guide like the sheet which will ultimately become their carbon copy paper seemed like the best solution. 
I will definitely keep y'all posted on how my fourth graders do. While their projects dry, they'll be working on another sweet project that I'll be certain to share with you soon. Check ya later, Love Bugs!
 photo signature_zpsd10b3273.png
Read more »

Friday, December 30, 2016

DIY: Marimekko Memory Game Wallhanging

I am a complete, total and utter procrastinator. I always have the best of intentions in mind but I rarely follow through with my ideas. I have this habit of psyching myself out that a task is too daunting; too difficult for my skill set (or lack thereof); too time-consuming; you name it, it's an excuse I've put to good use. One of my resolutions over my break has been to do the following: relax (things have been too crazy for me and I don't handle crazy well) and stop putting things on the freaking back burner. That burner is boilin' over! If you follow me on Insta, you know I've been hitting the sewing machine hard with that crazy eyeball dress (and matching jewelry, stay tuned!), a Mary Blair-inspired quilting project and this here Marimekko wall hanging. I've had the idea to create this bad boy since I scooped up all things Marimekko this spring at Target. Well, I can finally scratch this one off my To-Do!
I have a habit of buying frames whenever I find unique ones at the thrift store. I always spray paint them a satin black so they create the illusion of matching. I have an enormous stockpile which comes in super handy when I get an idea like this one. I remember picking up this one a couple of years ago because I liked the rectangular shape and the angle of the frame edge. You can see it better below.
If you go here, you can see what used to hang in this place at the end of our upstairs hallway. 
When Target was selling all things Marimekko this spring, I'm not ashamed to admit that I went bananas. Marimekko has been my muse since I discovered the fabric design company many years ago. If you know anything about the brand then you know their prices are pretty steep. So when a place like Target partners with them and sells their wares at affordable prices, well, you go bananas. I scooped up a couple of these memory games. One I gifted to my best bud and the other I kept.
But what to do with the game? Selfishly, I didn't want to take it to school and chance it getting ruined (sorry not sorry). And the hubs and I are more of a Cards Against Humanity and Exploding Kittens kinda card game playing types, not memory games, no matter how cute. So I got pulled all of my thrift store frames outta the closet and found one that seemed to work the best. 

And that was last spring. 

Did I mention that I have issues with procrastination? Yeah. Obvi. 
 So the other night, I decided to scratch this one off my list. I had a large sheet of cardboard in the garage that I cut to fit the back of the frame. Then I started to lay out the design. 
Once I got it all in place, I started to hot glue the back of the pieces. Purists will not be happy with me about this one...but I will get so much more enjoyment out of my memory set now that it is out of the box and up on my wall. 
To secure the cardboard in place, I did add hot glue but I also added tape. Then I hammered in one of those wall-hanger-thingies and was ready to put it up!

I hung it at the end of the hall that leads down these steps to our bonus room...which has become my crafting and recording-of-lessons area. 
For a more thorough tour of this room, visit here. And, yes, my Christmas decor is still up. I don't like to take things down until after the first. The sparkle makes me so happy!
The large painting on the left was created by me years ago and is a direct copy of a Marimekko design. In fact, you can see my much loved copy of a Marimekko book on the far right under the lady vase. 
Yesterday, before heading out to catch up with a long lost friend, I realized I even match my decor. Wow. 
Speaking of thrift stores, it's there and estate sales where I find my favorite things. Oh and the sale room at Anthropologie (I don't even bother with the rest of the store!). 
 All the gory details on these finds here
 Speaking of Marimekko, these large plates are from the Target line as well. I waited until they were half off and I'm so glad I scooped them up. I need to eventually hang them but for now they are happy to be propped right here...just above the map I trash picked from school (which hides all of my hubs drum gear and our big-butt television. Yes, we still have one of those). 
And there you have it! I'm so glad I stopped putting at least one thing off, I'm so happy with how this turned out. 
 photo signature_zpsd10b3273.png
Read more »