Showing posts sorted by relevance for query chalk prints. Sort by date Show all posts

Sunday, September 18, 2016

In the Art Room: Printmaking Made Easy!

Hey, y'all! I'm in the middle of lesson planning for some upcoming fall-themed projects in the art room. Since my third graders are getting ready to embark on the above printed leaves project, I thought I'd share the lesson video with you as well as my fave printing projects. By the way, I often update my YouTube channel before sharing here. So if you wanna see some art teacherin' videos as soon as they launch, you might want to subscribe here
Every since I learned about marker prints from my art teacherin' buddy Don over at Shine Brite Zamorano, I have been in love. The technique is so simple and yet so impactful. I think my third graders will have so much fun creating their leaf collages. We are going to be tying in science by discussing just why leaves change colors. The background will be a lesson in glue resist and watercolor techniques. I'll be sure to share the complete lesson when we are finished. Until then, here are some of my very fave printing projects!
Last year, my first graders explored printmaking with these LOVE collages. They did both marker and ink prints and had a great time doing so. 
In this video, I share with you some more tips on marker prints as well as printing with ink. When I first started teaching, printmaking was a daunting teaching task for me. Over the years, I've come up with some things that work for me...maybe you'll find 'em helpful as well.
I love the powerful impact of these positive and negative leaf prints. The amount of prep time needed to make these printing surfaces is well work the results they produce. 
Last year, third grade got their toes wet with this printmaking project that explored cityscapes, depth and watercolor techniques. I created a couple of videos to walk the kids through the processes.
By the way, I create these videos for the following reasons: 1. my sanity; 2. so that all of my students can see my demos and 3. for anyone else who wants to use them! Seriously, feel free to play my videos in your art room. It's the reason I share them on my YouTube channel.

Last year, I was super smart and did printmaking with all grade levels at once. That meant all supplies were out and ready for the entire day. No switching visuals, supplies, etc. It really made printmaking a snap for me. Second grade worked on these sweet printed winter selfies
Fourth grade created these amazing Egyptian god portraits a couple of years ago. So much in one project: drawing, printing, metal tooling! 
A fun variation on traditional printing are floating chalk prints. If you've not tried this, I highly recommend it, so fun, easy and beautiful!
Why not print on fabric? My third graders not only enjoyed the printing process but also stitching their fabric pieces together. 
Making your mark with untraditional materials like cardboard is fun too. My third graders learned about the history of the Eiffel Tower while creating these beauties
And, of course, I've been sharing these fun radial prints that my fourth graders just wrapped up. 
Kids love printmaking because it's good, messy fun. I love teaching printmaking because it is a wonderful medium that allows the kids to see that art is not just a one-n-done. But it is all about trying over and again to create something awesome. 
I'm always looking for fun printmaking projects for my students as well as helpful tips and tricks. If you've got 'em, please share 'em in the comments below! 
 photo signature_zpsd10b3273.png

Tuesday, February 23, 2016

In the Art Room: Printed and Collaged Winter Self Portraits by Second Grade

So I kinda sorta told the kids that if they painted and printed their winter selfies really well, we just might get the magic of snow. Snow seems to elude us in these parts...but not this year. Turns out these cute things really DID bring on the snow which was totes fab...except for the fact that it meant we've been working on these bad boys for a coupla days weeks. But that's all right. I mean, just take a lil look-see at how stinkin' awesome these printed and collaged winter self-portraits are!
I knew I wanted to introduce my second graders to printmaking but how? I remembered that my buddy Laura over at this fab-o blog taught her students how to create adorable winter selfies last year. I thought it'd be fun to add the printmaking element to this lesson and viola! Here you have it!
This lesson was chuck full o' art teacherin' moments: we learned how to use the elements of art to create pattern, we learned how to make both marker and ink prints, we learned how to create a tint of blue and print snowflakes in the background, how to draw selfies and design a pleasing composition. In short, we was busy. 

Lemme break it down for you:

Day #1: Intro to carving a print. We used Scratch-Art Foam Board but styrofoam plates would work in a pinch. I had created hat and mitten templates so that we could move on to the pattern designing and printmaking faster. I have 30 minutes art classes so I have to take the guess work outta some things. After the first class, most of us had this:

Day #2: On the second day, we continued our pattern design with ink pen. I encouraged the kids to go over their lines more than once just to make sure they'd have a successful print. Early finishers colored with marker and we started to pull marker prints. You can see that in the video...if you've never done it, it's magical!
Day #3: We are ready to use brayers and ink to pull prints! I like to use water soluble Speedball ink because it's the jam. I usually lay out a couple of colors and the kids rotated creating two different color prints on colorful copy paper. (This video was created for my third graders but it's the same idea so I thought I'd share!)

Day #4: We learned how to create a tint of blue and painted a piece of construction paper. We also used cut pieces of mat board to dip into white paint and print snowflakes. It was fun to introduce the kids to a coupla printing processes.
 Day #5: Selfie time! The kids had mirrors, this idea sheet and sketch paper. They had to create three thumbnail selfie sketches before moving on to drawing on their final paper. Pink chalk was used to show just how cold it was outside!
 Day #6: Time to start assembling our collage. We had a long chat about composition and balance before going on this adventure. The kids could use their favorite prints, whether that was their marker or ink prints (we'll use the extra prints for another project, stay tuned!). I happened to have a ton of scrap paper from another project so many of the kids used oil pastels to create scarves!
Some of the girls used chalk for their long hair. 
So in love with this self-portrait! I love how vibrant the marker prints are, it made my happy when the kids chose them. 
Several students decided to arrange their composition on a horizontal format. 
 Last thing added was the pompom! For that, have the kids wrap an 18" long piece of yarn many times around a 2" piece of cardboard. Carefully slide it off and double knot tie another string around the middle. Trim the loops of yarn and you have a pompom!

Now...maybe sharing these snowy selfies here will get me one more snow day, eep!

 photo signature_zpsd10b3273.png

Thursday, March 26, 2020

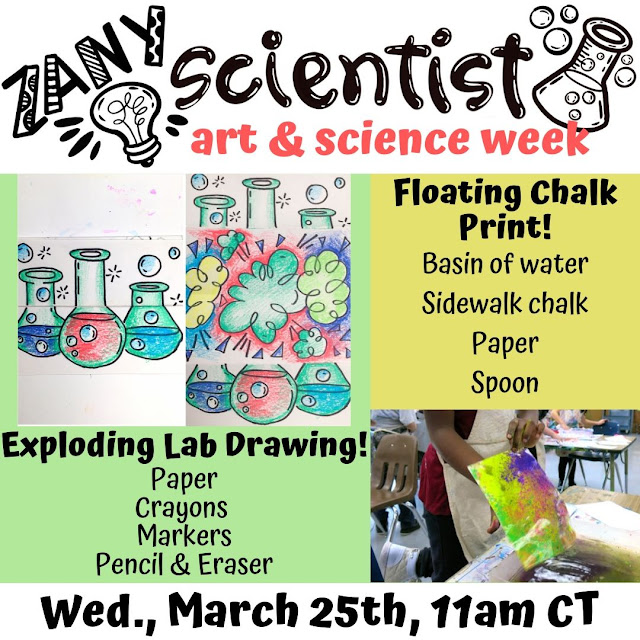
Zany Scientists! Exploding Beakers and Floating Chalk Prints!

Yesterday we did one of my favorite art projects so far: Exploding Beakers! We followed that up with a fun science experiment of making floating chalk prints. In case you missed the fun, no worries, here's the video:
In case you need a list of supplies, here you go:


 If you want to join the fun today, you can do so here on Facebook or here on Instagram. Be sure and subscribe here on YouTube so you can keep up with all of our Zany Scientist happenings! You can also catch all of the Robot Week videos there too! 


 photo signature_zpsd10b3273.png

Sunday, March 21, 2021

My 15 Favorite Art Lessons for Spring!


Not sure if spring has sprung where you are but, according to my allergies, it's in full swing here! You know, I never had allergies in my life until moving to Tennessee. Now I have the pleasure of a sneezy nose, watery eyes and sinus pressure like a hammer through the skull for a couple weeks on end twice a year. Good times, for sure. But I suppose the floral and fauna make it all worth is. Or something.

Anyway, I thought I'd share with you my very favorite art lessons for spring! I'm just wrapping up my spring break and trying to get my 'head in the game' as I think about how I'd like my students and me to close our school year. So today I'm sharing my very favorite Springtime Art Lessons!

First up is this lesson I posted way back in 2012! It is one of my most popular blog posts but, to be honest, not a lesson I've repeated frequently. Why? Well, it does involve a lot of prep work, especially if you are going to make your own gelatin plates. Making your own gelatin plates is a lot of work, a lotta smelly and it's not vegetarian friendly. Gelatin is made from the bones of animals (which is totally gross if you think of all the Jell-o we ate as kids) and that always made me feel badly. However, these days, you can do a couple different things: make permanent gelatin plates (the ones in my blog post last for ALMOST a week before getting rather funky) or you can purchase the permanent Gelli plates. That's what I've done. And that's what I used for this lesson...
This Andy Warhol-inspired flower print lesson (and video lesson!) was so much fun to do and a whole lot easier because we used our Gelli plates. Springtime is when we embark on a whole lot of printing in my art room so I am definitely thinking that this project will be on the agenda. We used fake flowers found at the dollar store but real ones would work as well. They just tend to fall apart a little more. Initially, I did this lesson at the beginning of the year with a second-grade class...and I think they were too young. This time, I may try it with my fourth graders or my second grade after they finish their first printing project. Printmaking is so fun to teach because once they have the basics, the kids become their very own printing factory!

You can also print on fabric! I created a bunch of these printed squares using the same materials and method and then stitched them onto a dress from the thrift store. Your students could make a quilt with this idea! More info here. 
Nothing says spring like a big, beautiful and colorful mural! I have done two versions of this mural. Details on how my first graders created the flowers for this mural in this blog post. Curious about our What a Wonderful World mural? Video tour and more photos can be found here. 
Something we do every spring is a ceiling tile project. You can read how we started on this adventure here. The back story is that it was all by accident! We were hosting a sidewalk chalk artist and we were all to draw outside on the sidewalk. Unfortunately (or fortunately!) the day was to be a rainy one. So I had to think fast and we had the idea to draw on the backside of ceiling tiles with chalk. The back side has the same texture as a sidewalk and holds chalk perfectly (much better than paint!). Since then, we've done a ceiling tile each year! One year, we did flowers...which could easily translate to paper as well. Video and lesson for this right here. 

Looking for a fun springtime lesson for your students? These clay flowers were created by my third graders and were a hit! They came out of the kiln just in time for Mother's Day! Complete lesson here. 

Nothing says spring like these second-grade butterfly prints! This could also tie in perfectly with those Andy Warhol flowers as these look like early Warhol paintings! Video demo here. 

Whenever we are weaving, we always have tons of yarn scraps. The kids and I hate to throw them away so one year, we decided to create little still lives with them! These are the results. It was so fun to create and recycle. 
Looking for something for kindergarten? Look no further than these super cute collage flowers! We tied this in with a flower pot painting project too. So much fun!

Nothing says spring like landscape paintings! Especially colorful ones like these. Check out this lesson here. 

If you're hesitant about using chalk in your art room because of the mess ane the fact that it never seems to set, then you might want to try this lesson on for size. It's always a hit and the results look like a cross between oil painting and watercolor...and it's done with chalk and liquid starch! Lesson and video here. 

This collage lesson began as a sub plan! And as a way for us to use up our bottomless supply of popsicle sticks (anyone else have exactly one million trillion?!). Less own with video here!
A lesson I come back to year after year is this one! We go big with these drawings and the results are always stunning. Full lesson here!

Love these beautiful cherry blossom paintings created by second grade! Lesson details right here. 

And there you have it, friends! 

My top 15 art lesson for the spring. Thanks for dropping by!


photo signature_zpsd10b3273.png

Wednesday, November 7, 2012

In the Art Room: Printed Paris

Goin' out with a bang! We are slowly wrapping up our unit on Paris, France and what better way to say goodbye than with fireworks.
As my third grade students were finishing up these printed and chalked Parisian pictures, I was so impressed, I thought I'd share them with you. They were mighty proud of them too which lead to the following back and forth:

Kids: Can we PLEASE take these home today?
Evil Art Teacher: No! I must keep all of these masterpieces for the end-of-the-school-year art show!
OTL Kid [OTL = Out To Lunch]: When's the end-of-the-school-year art show?
EAT: The end-of-the-school-year art show is next week. 
OTL Kid: Yay! What time?
The Rest of Us: face palm.
Once we got OTL straightened out, I convinced the kids that this kind of art activity is one they could easily do at home. All that is needed is the following:
  • cardboard cut into 1" X 2" rectangles. Be sure to cut it so that the wiggly corrugated cardboard line is visible on the 1" side. This will keep the cardboard sturdy enough for printing.
  • tempra paint
  • paper
I know, I know, paint on the floor? Really? I never claimed to be the Smartest Artist Teacher.
Group of finished third grade prints.
Want to make some printed Eiffel Towers of your own? Well, it's super easy. I thought I'd share with you the steps I had on display for the kids to follow.


  1. We began by folding our paper in half both vertically and horizontally. After unfolding the paper completely, we brought the bottom of the paper up to the middle line and created another fold.
  2. From there, we printed a vertical line from the top of the paper to the first horizontal crease. We added two diagonal lines and an intersecting horizontal line at the top.

3. We chatted about parallel lines and created two parallel lines from the ends of the diagonal lines. These were both the same length of the initial vertical line.
4. We crossed the initial vertical lines with intersecting horizontal lines. These were filled with diagonal lines that created X's.
5. All along we are learning factoids about the Eiffel Tower and it's creator Gustave Eiffel. We used the Eiffel Tower bulletin board and my windows as a helpful reminder. The second level of the tower was created with a printed rectangle shape.
6.  A triangle shape was created underneath that as were the long diagonal lines of the side of the towers legs.

7. From there, we created the arch and filled the legs of the tower with horizontal, vertical and intersecting diagonal lines.

And while I loved the end results of the prints, I wanted the kids to experience working in another medium and add their own personal flair to the project. Hence the chalking of their prints. I created the display of directions shown above to allow the kids to work independently on this portion of the project.

We also chatted about some of the famous structures in Paris that could be included in our chalked landscape like Sacre Coeur, Arc de Triumph and Notre Dame.
The key is not to let your paper move as you smudge the chalk upwards. If this happens, you might lose image in your design.
The kids had great fun with this project. I've already received a couple "I did this at home!" versions of both the prints and the chalk. Nothing makes this Evil Art Teacher happier. You'll have to let me know if you decide to give this a go. Just don't let me get my hands on your masterpiece...it's likely you won't get it back. That is until the end-of-the-year...which I could only dream was next week (just kidding...we have entirely too much fun in store!).