Showing posts with label art class. Show all posts

Saturday, December 10, 2016

In the Art Room: Elf on a Shelf

Every since the ole Elf on the Shelf hit the market, I wanted one in my art room. I love the idea of bringing magic into my kids' lives even if they don't celebrate the holidays...we can all believe in magic, right? I never really knew just how I would make it happen and I really didn't wanna splurge on that expensive book/doll set I'd seen at the big box stores. But this Thanksgiving, when I was at Michael's, I saw they had a colorful elf (and a wee elf door!) for 70% off and I scooped it up. I have a habit of over-thinking things and then not following through. With this elf, I really had no idea what I was going to do, how the kids were going to respond but just decided to go for it. Y'all...I'm so glad I did! 

Every since the first day Esmerelda appeared (by yarn bombing the entrance of my art room, making all of my classes crawl under the mess), the kids have been super stoked. They stop me every day to ask what she's been up to, they peak in my room at every chance, they leave notes and drawings for her outside of her door. I teach kindergarten through fourth grade and EVERY child is all in with this elf. I've never seen anything like it.

However, there are always the nay-sayers. Last week, when a third grade student claimed he didn't believe, another child spoke up. "You should set up a security camera, Mrs. Stephens. That would prove that she's real."

At first I scoffed at the idea. I ain't got time for that! When I shared the conversation with my husband, he was like, "No. You HAVE to do it!" We chatted about the scenario and even what music should accompany the video. I filmed and edited last night and I'm excited to share a preview with y'all. Here you go!
I cannot wait until Monday to share this with the kids. I really think they are gonna freak! My plan is to hide paper elves all over the art room and allow my best behaved tables to go on the hunt (it's THAT time of year where we need a little extra incentive to make good choices). Only a few of the elves will have a green hat which will get the kids a special surprise from Esmerelda. Oh, y'all. It's gonna be a fun week!
 One reason I'd never done an elf before was because I wasn't sure how to do it and if I'd have the time. Let's face it, this is the busiest time of the year. Here's how I do it: every morning, I come in and slap together the most insane mishap in less than 5 minutes as that's all the time I have. I do something different everyday because the kids ask EVERY DAY what she's been up to. Not only that but I do see some classes from one day to the next. 
The best part of having an elf is that you can be messy! I'm leaving up her holiday decor as I feel it embodies my life right now. 
 An incentive for a kindergarten class? If you behave, Esmerelda will let you have one of her special snowballs. 
I'll keep you posted on Esmerelda and her adventures! Stay tuned to the reaction to the video, that should be super fun. Love to hear if you have an elf on the shelf or any other magic happening in your art room!
 photo signature_zpsd10b3273.png
Read more »

Saturday, December 3, 2016

In the Art Room: Sound Effects!

Hey, kids! In lieu of Art Teacherin' 101, I'm hanging out with The Art of Ed this week talking about how I love me some sound effects in the art room. I actually have a slight sound effects addiction (yes, that is a thing and no, I've not been to my last coupla meetings). The Dollar Tree is one of my fave places to find fun stuff like that hand clapper and a service bell, to name a few. Here's more:
So, yeah, funny story about how I acquired the gong: I was at a musical instrument store with Mitch (the hubs) and I remarked how much I dug the gong. I vaguely remember saying, "I need one of these for my art room!" Fast forward to our 10 year wedding present and THIS was gifted to me, "wrapped" with a sheet thrown over it. The kids LOVE this thing! I'll occasionally get the overzealous kid who hits the gong hard, gives us all a fright and has us falling out of our chairs in laughter. For the most part, it's got a great calming effect. Now, if only I could get the kids to remember that it is a GONG not a DONG or a BONG, that would be fabulous (that time my principal walked in and a kid was shouting across the room to the gong-hitter, "HIT THE BONG! IT'S TIME TO HIT THE BONG!" was not my finest hour).
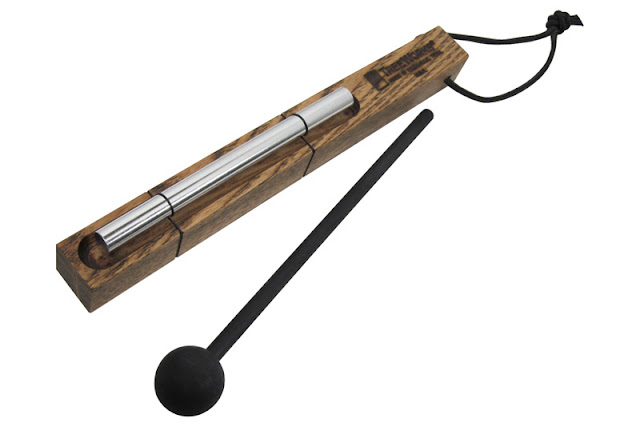
One thing I use multiple times daily is that energy chime. Shameless-husband-plug: these are handmade in Nashville (and signed by the artist) by my husband's company Treeworks Chimes! You can find them for under $12 and you won't regret it. Mine is covered in paint and well-loved. 
I love these little red guy. I've seen these guys at shops like Old Navy, Target and Kolh's...but if you need one in a pinch, there is always this place. I mentioned us playing this during the Smartest Artist which is a favorite wrap-up game for my kids. 
In other news, I'll be apart of The Art of Ed's Winter 2017 conference! I'm sharing my tips and tricks on making fun video content for your art rooms (trust me, it's easier than you think. I can't even open my email but I can make a video...so there's that). Here's a better description of my chat: 

Recording Instructional Videos with Personality and Flair


Creating filmed lessons for your students is a wonderful way to insure that each of your classes receive the same quality instruction every time. But what if you want to take those videos one step beyond instruction and make them fun and entertaining for you students to view? In this presentation, I’ll share with you how to film and edit videos that will have your students learning, laughing and excited to create. You’ll even find out how to rope your coworkers into the art teacherin’ film makin’ mix. AND, action!
Until the end of this month, use the code SAVE10WITHCASSIE to save 10%! With that savings, you can go invest in some fun sound effects, right?
 photo signature_zpsd10b3273.png
Read more »

Monday, November 28, 2016

In the Art Room: First Grade Bebo Birds!

Today a couple of my first grade classes finished off their Bebo-inspired birds and the kids were so pleased with themselves. Each masterpiece was as colorful, unique and fun as the wee artist who created it. If y'all recall, I had the opportunity to visit the folk artist Bebo, watch him create and film him doing so. I have been calling these filmed clips of visits to art's studios Field Trip! Here is what our Field Trip! to Bebo's home studio looked like:
After watching the video, we stood, stretched and moved around the room pretending to be some of the animals that Bebo created (this helped get our wiggles out...and was a fun review!). From there, we watched the first half of this video to learn about creating our textured paper for the background of our masterpiece.
That was our first day! The following art class, we got to do the fun part: paint our birds!
We chatted about making just one bird or two. We discussed having our paper go vertical or horizontal. The elements of art like line and shape were our big focus in this lesson. Finally, we talked about creating a pattern for a "frame" around our birds and in the background.
 The kids were so thrilled with their results. Each was so eager to share their work with their friends...but with 30 minutes in art, we didn't have time. So we placed them on the drying rack with the promise that I'd show them on the Big Screen T.V. (by placing them under the Elmo) tomorrow. 
Gotta love it when an artist requests a small brush "so I can do some detailed hearts"...well, okay then!
This artist was certain his would be going off to an art museum, it's just that good, y'all. 
 What I loved about this project was that it only took two art classes, which, in my world equals two thirty minute classes. Most of my lessons take much longer...I loved how short and sweet this one was. And the kids loved learning about Bebo. In fact, they want to create more animals inspired by him. How can I say no to that?!
 I would love to paper the halls with these happy dudes.
Until then, have a fabulous week back, y'all!
 photo signature_zpsd10b3273.png
Read more »

Wednesday, November 23, 2016

Art Teacherin' 101: Episode 24


Let's face it, we can't always be "on" for each and every kiddo and each and every art class. And that's okay. It's perfectly fine to every now and then be the World's Okayest Art Teacher.
The key is to realize that being an "okay" art teacher is only okay if it's temporary. You can only scoot by at level 3 for so long before you and the kids start to lose interest. That's when you gotta punch that art teacherin' energy level back up to a 10 (okay, let's be honest, a 8.25 will do).
In all seriousness, if you are feeling meh, try not to beat yourself up over it. Just the fact that you are aware of it means you care. If you are experiencing guilt-free meh, then, yeah, you might wanna hang up the apron and call it a day. I remember I used to come home and tell my husband that I felt like I wasn't doing my best, that I was doing a disservice to the art education of my students. He said that even on my worst days, what those kids are getting is better than no art at all. 
So on those days that you are feeling just okay, you might wanna focus on accentuating the positive at both the beginning and end of your art classes. Like I said in the video, I start each class with that little "Hello, my most amazing artists!" call and response. I also love ending it with a little "I love you" send off. It helps to bookend my classes on a happy note even if what happened during our art time was just okay. Listening to this song, a fave of mine, always lifts me outta my okayest funk. Because you ARE awesome, bringing creativity and light to your students!

I hope y'all have a wonderful Thanksgiving! Know that I think you are much better than Okay, but seriously The Best. 
 photo signature_zpsd10b3273.png
Read more »

Monday, November 14, 2016

In the Art Room: Royal First Graders

Brace yourself. You're in for an overload of First Grade Fantastical Cuteness in the form of Royal Self-Portraits!
Like, riiiiiight?! I can't even, y'all. These selfies are so sweet it's like a lollypop dipped in Fruity Pebbles dipped in milk chocolate and covered in sprinkles (guess who has a strong sweet tooth? GUESS). My fab-o first grade artists completed these just in time for me to get them shipped off to Artome for their frames. And I'm so excited for these are totally frame-worthy. 

I don't often repeat projects but when I was dreaming up a self-portrait unit for all of my classes, I knew I wanted to give this lesson another go-round. I did have to alter the lesson quite a bit as the format of the Artome frames is half the size what I usually have my students work. Lemme tell you how we created these bad boys, er, royal dudes and dudettes. 
I'll break the lesson down for y'all...keep in mind that my classes are 30 minutes in length. This project took us about two weeks to complete. On the first day, the kids were given a 9" X 12" sheet of white paper and tasked to paint that paper the color of them. Before doing so, we read this great book:
In the book, a young girl paints portraits of her friends mixing up their unique skin color. The kids were given brown, black, white, red and yellow paint. We chatted about tints, shades and mixing up a variety of flesh tones. The kids painted their sheet of paper their unique skin tone. 

The following day, on that sheet of painted paper, the kids traced a head template in the middle of the paper and added two vertical lines for the neck. This was done independently and in pencil. Once complete, the kids met with me on the floor for a little guided drawing. We chatted about the proportions of the face and facial features. We drew together in oil pastel. When using oil pastel, I always stress to the kids to use black last and never to wipe their paper as it can smear the pastel. That was completed on our second day.
During our third art class, we cut our portraits away from the painted paper and glued it to a new sheet of 9" X 12" paper. We had a nice chat about painting hair: mixing the right color and creating texture. Once the hair was painted, the kids put those on the drying rack and worked on their crowns. For that, we used gold painted papers and crown templates. I had cut pieces of metallic paper (I found some metallic origami paper to be just the thing!) and the kids added jewels to their crown. I did chat with them about symmetry and balance when it came to the placement of the jewels. It's always good to pack as much educational punch into those lessons as we can!
Our fourth day, crowns were attached to heads and clothing was created. For our clothes, the kids were given a rectangle for their shirt and two squares for their sleeves. These were decorated with my favorite florescent oil pastels (really, where have these BEEN all my life?!) and attached at the bottom of the paper. 

Finally came the background! We used Crayola's water soluble oil pastels for that. The kids could use either warm or cool colors for the background before adding water to paint. 
Ta-da! You might have noticed that some of my fancier friends added coffee filters for a ruffly collar to their shirt, sparkly earrings and more jewels. They really had a lot of fun getting all kinds of royal for their selfies. 
Finally, they had to come up with a title for their piece. "Princess Cutie Cute" will forever go down in history as my favorite title for these precious masterpieces. I cannot wait to see them framed and in our Artome art show! Love to hear about your favorite self-portrait projects, y'all!
 photo signature_zpsd10b3273.png
Read more »

Friday, November 11, 2016

In the Art Room: Sandra Silbertzweig Inspired Portraits by Third Grade

A couple of weeks ago, I shared with y'all a video I created for my third graders. The video (seen below) introduced my kids to the colorful work of Sandra Silbertzweig and allowed them to explore creating a colorful and abstract self portrait. This lesson is currently  one of my faves! Check out how stunning these beauties turned out. All of my students are currently creating a wide variety of self portraits for our Artome fundraiser...and I daresay, these just might be my faves. 
For this project, we used:

* 9" X 12" black or dark blue construction paper. I would have loved to make these bigger but that is the size of the Artome frames.

* Black glue or black puffy paint. There are a couple of ways to create black glue. My friend Ginger creates black glue with a mixture of Elmer's All Purpose glue and India Ink. I created mine with a one part mixture of paint to two parts glue. The key is to use Elmer's All Purpose, not the school grade stuff as it's runny. Also, I had some students use black puffy paint which worked great. Another alternative is to use glue on black paper as it dries clear and will leave behind a kind of transparent line that the dark paper can show through. 

* Chalk. I'm a big fan of Koss Brand chalk which can be found on Amazon. It's pricey but GREAT. 
 This project took us two plus art classes to complete. On the first day, we watched the video, learned about Sandra and did a little guided drawing. If you watch the video, you'll see I left the drawing portion open to many levels of drawing alternatives. Once the drawing was complete, the kids traced their lines in glue. From there, if time allowed, we watched a bit more of the video as a kind of sneak peak to the following week. 
The real fun came with the chalk. In the video, I really stress how to use the chalk properly...and we do a whole lot of chatting about analogous colors. I really felt like this lesson was a wonderful exploration of color theory. 
 Here is how each table of four children was set up: a laminated colorwheel that I found online and two bowls of chalk, one warm, the other cold. Students were to use the colorwheel as I did in the video. Many of them took the time to pair up and lay all of their chalk out on the wheel. This way, they could easily see what colors were available to use. I love that they were so into picking the correct colors for this project. 
After the second day, several kids were not finished. This was fine with me...I mean, look at those results! The following art class, as they wrapped up their drawing, we chatted about how their artwork was going to be hung like work in a museum. I had them get a notecard and create a label for their work. On their label, they were to write:

Artists Name
Title
Medium
Process or Description

The information from this card will be used as both an assessment and also info for their Artome paperwork. 
 Once all pieces were complete, I blew off the excess dust and sprayed them liberally with Aqua Net. I did that three times to insure the chalk particles were attached. I'm hoping hey remain as vibrant and colorful when they are framed. 
Because of our small format, I decided to opt out of having the kids add designs to their work. I had a feeling it might have gotten a little muddy if we did. If the pieces had been of larger format, I think that would have worked well. 
I'm so looking forward to this winter art show. All of the kids have been creating beautiful works of art! I'll be sharing the work of my other grades soon. 
Until then, have a bright and colorful weekend!
 photo signature_zpsd10b3273.png
Read more »

Wednesday, November 9, 2016

In the Art Room: My Favorite Tool in the Art Room

In lieu of my usual Art Teacherin' 101, I thought I'd share with y'all a wee video I created with The Art of Ed involving one of my favorite tools in the art room: my Time Timer

I use this thing like crazy in my art room. I use it to break up my instructional time, keep students accountable and keep me on schedule. You can hear me chat about more ways to use the Timer here:
I even have a small Timer Timer that I use at home! I have a bad habit of wasting time (in second grade, on my report card, my teacher marked me as being a "Poor Time Manager"...I remember asking my mom what that meant and she replied, "You are a lollygagger." I blame my day-dreamy Pisces nature). It helps me not to get tasks completed within a timeframe that I can check at a glance. 

I'm sure a timer on my phone would work as well...but I just love having these big visuals both in my home and my art room. 

Love to hear how y'all keep track of time in your art teacherin' world! 

 photo signature_zpsd10b3273.png
Read more »

Wednesday, November 2, 2016

In the Art Room: Romero Britto Inspired Self Portraits

If you follow me here, then you already know that all my kids are currently creating self-portraits for our upcoming winter art show with Artome. I shared what my third graders are up to here (Y'ALL. THEY ARE TURNING OUT SO AMAZING). My second graders are making a variation of this Super Hero Selfie project that I did with my fourth grade last year...I'll be certain to share those with you soon. My firsties are becoming royal with these Royal Self Portraits while kindergarten is doing a variation of Ain't Gonna Paint No More selfies. Because the Artome frames fit 9" X 12" artwork and I usually have my kids work twice that size, I've had to really rethink and adjust some of these projects. I'll be sure to share them with you in the near future. To get the ball rolling, I thought I'd share with you this videoed Romero Britto lesson and the fourth graders' results. 
In case you don't know, Romero Britto is a Brazilian neo-pop artist who lives in Miami. I have shared his colorful work with my students when we did this project:
My fourth grade kids are so great at creating colorful designs and patterns that I thought this project would be perfect for them. 
 But I had to give 'em a little inspo first...
Before diving in to the video:
Here's what we cranked out the first day!
They did a bang up job and were pretty stinkin' proud. I teach doubled up fourth grade classes (meaning there are about 35 kids in the room). After doing the first portion of the video independently at our seats, we returned to the floor with clipboards, our papers and pencils to do a guided drawing together. I really liked having them watch the video as there were less interruptions. I did pause it every now and then to reexplain or allow the kids to catch up.

Once we were finished drawing on the floor together, the kids had mirrors at their seats. I told them that the guided drawing was a kind of template for them that they should alter and change once at their seats. I encouraged them to really study their faces, freckles, glasses and details and add them to their selfies. Once completed in pencil, they traced over their lines in Sharpie.
I really thought the kids would get further along than this...but they were so into drawing their likeness that I didn't want to rush them ahead. Next up, I'll provide them with some pattern idea sheets for them to draw their designs before adding color. 
I really can't wait to see how these turn out!
I have noticed that teaching self portrait drawing to older kids is pretty tough. Not cuz they can't handle it but because they are so hard on themselves! So I really REALLY discourage any erasing until they are back at their seats. I tell them that it is "just practice" and that they are learning something new...and to go easy on themselves. Only when they return to their seats are they allowed to change and erase...but I don't allow them to get another piece of paper. When I had a students say, "I don't like mine," I asked, "what do you not like?" When she replied with an "everything!" I told her to pick one thing she liked the least and we worked on that. Then we picked the next thing and we worked on that. Within five minutes, she was much happier with her drawing. It's a process with this age group. You gotta do what works without letting them throw in the towel. 
Next up, we'll add patterns of things that interest us (I used paint splatters and music notes in mine to give them some ideas) as well as color. 
I'll be sure to share our progress! Until then, feel free to use this video and lesson in your art teacherin' world. I'd love to see what your kids create! Shoot me an email if you do. 
 photo signature_zpsd10b3273.png
Read more »