Showing posts with label kindergarten. Show all posts

Sunday, October 3, 2021

Kindergarten Rainbows and Self-Portraits!

Hello, friends! My kindergarten is wrapping up a self-portrait lesson and it's one that I've never done before with them. I'm super happy with the result and I wanted to share with y'all. Mostly I wanted to share some of the tips and tricks and things I learned in hopes that it may help you, if you decide to go down this rainbow/self-portrait path. 

But first, let's chat about where this lesson falls in my kindergarten line of projects. We start the school year in kindergarten with Line Sculptures. From there, we moved on to Dot Painting. Following this, we painted Rainbows! Now, in the past, I completed this Line Unit before moving on but the last couple of years I've mixed it up a bit. I will bounce back to those lessons but for now, we are painting. We've also not finished our rainbows (by adding the sun and clouds) but that will happen this week. 
My favorite supply for painting with kindergarten are tempera cakes. This is a little what my set up looks like. I always serve up paint (or have the kids get their own paint) on trays. This helps us carry the supplies easier and contain the mess incase there are spills. If you know me and my paint set up, then you know that we normally use dog dishes for water and a sponge. But sometimes we are using them for other things so this is my back up set up: water pot (these are my favorite and you can find them here, they are NO SPILL!), sponge for 'drying' our brush (sponges are called Dirty Ole Sponge Bob and I get them from the Dollar Tree) and a tray to hold the sponges (old sushi dishes!).
My tempera cakes are usually a mess. You can purchase tempera cakes in a set but they always end up getting crumbly or with a big hole in the middle. The tray the cakes come in is crap and a thing plastic. I noticed huge messes of paint left on tables a couple of years ago...which was from the thing plastic tray splitting and paint leaking out the bottom! So now I NEVER order the whole tray, just the refills like I do my pan watercolor paint. I love Prang's tempera cakes as well as Jack Richesons. I order all the colors in the rainbow. I use muffin tins and plastic condiment cups to create a palette for the kids. When we are painting our skin tone, the palette is changed to have only red, orange, yellow, white, brown and black. For painting rainbows, this is how I set up the palette. 
We spend a LOT of time listening to this song and this song as well as learning the ASL for all of the colors in the rainbow! Then we hit the ground running and paint our rainbows. 
Even in 30 minutes (the length of all my art classes), I always have early finishers! So early finishers are given another sheet of paper and told to paint a rainbow pattern. We wrap those up the following art class. 

Hot Tip: Cut 2" off the paper that you plan to frame that way it's ready to frame on traditional size construction paper! I plan to frame these self-portraits on black construction paper 12"X18".
The following art class, we learn what a self-portrait is! This video REALLY helped and we loved it! 

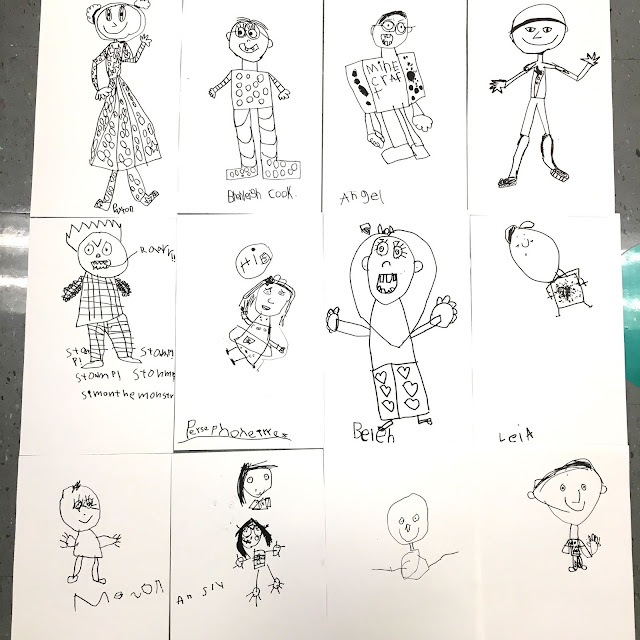
After listening, dancing and singing with the song, I demonstrated drawing a large self-portrait as the kids directed me. I asked "what should I draw first? What shape should I use? How big should I draw?"

Afterward, they were given paper and a permanent marker (I wished I would have had them use a regular black marker as the line would have been thicker). They did an amazing job! 
The following art class, we learned all about scissor safety! And how to carry and wear our scissors correctly. Below is a video on how I explain scissor safety to my students (if you cannot see this video, try viewing this blog post from your laptop):


After cutting out, kindergarten glued their selfies to their rainbow backgrounds!
This is definitely a project I'll be doing again! 

photo signature_zpsd10b3273.png
Read more »

Friday, November 8, 2019

In the Art Room: ASL in the Art Room

A couple of year ago, my students created a giant collaborative piece that says Learning for All. We had a great time making and my P.E. teacher buddy Ali and I had a not so great time trying to figure out how to assemble it (thanks, Ali!). But now it proudly hangs in our front lobby. Here's look:
 At my school, we have a few deaf students who have interpreters. And, while the interpreters speak for me, I often feel there is a disconnect between myself and those children. At my school, every morning on morning announcements, students throughout my school are taught signs to better communicate with everyone. Recently, I decided to start doing the same in my art room. We have an Art Class Catchphrase as well as an Art Class Greeting. We recently learned how to sign them. And, slowly, we are adding signs to more areas of our art education. Here's a clip of us signing our greeting and the colors in Mouse Paint.
The interpreters in our building have been WONDERFUL at helping my students and I learn how to properly sign. It is not easy! It is a new language to learn so it does take time. But I'm so glad we are doing it and hope to continue to reach all of our amazing learners. If you've not tried introducing sign language to your students, start with something simple, like color. You won't regret it. 


 photo signature_zpsd10b3273.png
Read more »

Monday, August 26, 2019

In the Art Room: Taming the Kindergarten Beast!

 Well, today was my third art class with my kindergarten friends. If you wanna see what my first day looked like, you can visit here.  I always start my school year with kindergarten the very same way: get 'em in my art room, get them to learn the "cmon in and sit down on the floor" procedure and GET THEM TO MAKIN'! On that first day, they are just too young and curious and excited and afraid and ALL THE EMOTIONS (same for their art teacher!) to be learning rules and routines. So we save that for the second week of art. Instead, we begin our line unit with our line sculptures. You can check out our first day here: 
The second day looks very similar but I introduce how to make a zigzag and a spiral line. On the final day, I start learning a little bit more about the class and how they work. I learn the names of the students by the third day and start easing them in to our routines. One of the things I introduce them to are our Quiet Critters. This idea is from my amazing art teacher buddy Mia! Give her a follow! 
You can read more about Quiet Critters here (not my original idea!). They really do work...if you "believe" they work. Meaning, you gotta sell 'em hard to the kids so that they'll believe in them too. I use these with my kindergarten kids but even my first and second graders dig them. Shoot, even my fourth graders ask about them! They are a great way to help me establish the calm and kinda-sorta-quiet classroom I strive to have. I mean, I love for my students to chat with one another...softly. I want them to be engaged in conversation...without shouting. It's a skill that has to be taught and learned. And these wee friends do the trick!
Quiet Critters come in all shapes and sizes. In fact, these little guys are just made from extra large glitter pompoms (found at the craft store), felt for the feet, googly eyes and pipe cleaners. But even a collection of stuffed animals found at the thrift store would do the trick. I mean, really, anything you can hot glue a pair of googly eyes on will work. I'm not kidding! But remember, it's all about how hard you sell it. I also tell my students not to touch them. They are SUPER shy, you see. Because so many of my kids have an Elf on a Shelf at home, they are used to that concept. 

Here's a video of our third day of art. On this day, we are finishing our line sculptures to take them home. We review the word sculpture, the ways we learned to create the lines and were introduced to our Quiet Critters.
Now that we are finished with our introductory art lesson...it's time to start sharing with my small artists the art room rules and procedures. Next up we will be learning how to play the Clean Up Drums and Clean Up Gong! I'm ready for that excitement and so are my students. More to come on that!

 photo signature_zpsd10b3273.png
Read more »

Tuesday, February 26, 2019

In the Art Room: Kindergarten Hearts, a Follow Up!

What you see here just might be my new favorite kindergarten lesson! I shared this lesson (and video!) originally here, if you recall. My students began with a foam heart shape purchased from the Dollar Tree. We then added foam sticker shapes and pulled prints (I'll get to that here in a moment but you can scroll down to get an idea). Those prints were used for one project. Then we were left with our printing plates.
 I LOVE doing this technique with our old printing plates. I've done this same process with cut paper snowflakes, leaves, round printing plates and styrofoam printing plates. I'll explain the process and supplies here...or you can just check out the video.

 I see my kindergarten kids for 30 minutes, twice a week. Here's how I broke the lesson down. 

Day 1: We read The Shape of My Heart. We learned about organic and geometric shapes. We placed sticker shapes on our foam hearts. The hearts came from the Dollar Tree and the stickers from Michaels.
 Day #2: We printed! The kids printed by themselves and did great! They were to pull at least four prints so insure they had two good ones. We used foam rollers and tempera paint. You can read more about that here. 
 Day #3: We did the 100 Dot Challenge! At least that's what I called it. Each table had 10 Sargent Paint Sticks. The kids were tasked to making 10 different color dots with the 10 sticks. This fell close to the 100th day of school so it was really fun. We also learned to count by 10s!

Day #4: We cut out our two favorite heart prints and glued them to our dotted background. Then we went to the glitter table.
 And, as predicted, GLITTER GOT EVERYWHERE. Thankfully a kid pointed out the glitter in my coffee before I took a swig!
 Day #5: We painted a rainbow! I traced hearts in the middle of the paper before the kids got to class. I did this because our focus was on painting, not tracing. I also wanted them to have enough time to pain. 
 Day #6: Our last day...I took the hearts outside. With spray glue, I added the foil on top. Thin foil works best. Then I gave the hearts a dusting of spray paint. I like the $1 a can, matte black spray paint from Home Depot. The prep time for this took me about 30 minutes for 2 classes.
 Using the finest of steel wool, the kids were tasked with "finding their shapes" by sanding off the spray paint. They LOVED this! They were so excited to see their design come to life. 
 And I hot glued their hearts in place. 
This lesson had it all: shapes, printmaking, 100 dot making, collaging, rainbow painting, metal tooling and more. This is definitely a lesson I'll be repeating. Hope you and your young artists give it a go too!

 photo signature_zpsd10b3273.png
Read more »

Wednesday, February 13, 2019

In the Art Room: Kindergarten Hearts!

Not long ago, I was at Dollar Tree and found these foam heart shapes. I got an idea to use them in conjunction with the book, The Shape of my Heart with my kindergarten friends. I've ALWAYS wanted to do a project inspired by this book but I just couldn't think of a way to make it work...then, I got the idea to use foam shapes and pull prints. We've been doing it all week and we are loving it. I made a process video for you and your kiddos!
I see my kindergarten for 30 minutes, twice a week. On the first day, we used foam shape stickers purchased at Michaels to fill our hearts. We read the book and chatted about the difference between organic and geometric shapes. 
The following day we were ready to print! A friend on Instagram suggested that I use foam rollers and tempera paint for the printing portion...here is a peek at our table set up:
And here's a look-see at our prints!
Don't you love them!? Each kiddo pulled two prints. Next week, we'll begin cutting them out and adding them to our dotted backgrounds. Details about that in the video.

Now, what to do with our heart printing plates? Well...check out that first image and be sure to watch the video! I'm so excited, we'll be making metal reliefs with them. I did not explain the process of how we will frame those metal hearts in the video as I'm still working that through. I'll keep you posted tho. Have fun with this lesson...I know we have been!
 photo signature_zpsd10b3273.png
Read more »

Wednesday, January 23, 2019

In the Art Room: Chris Uphues Lesson for All!

 Hey, friends! A while ago, I created a Chris Uphues-inspired video for my sub to use. Because my classes are either 30 minutes in length or an hour, the video is broken up a bit. For example, as you watch, you'll see that my 30 minute kids learn about Chris and then do some sketching on dry erase boards before tackling paper. My older kids did this too...and then about 30 minutes in, met on the floor again to view the rest of the video. As I've said before, I LOVE having my students sketch on dry erase boards...it's their favorite because of the slick and forgiving surface. And it's mine as it uses less frustration and time with erasing and reworking. Here's that sub video...feel free to use it in your art teacherin' world. All I ask is that you give credit to lil ole me when you share your student's work or resources. 
Side Note: Jen and Chris Uphues are some of my most favorite folks on the planet. You'd be hard pressed to find two kinder or more down to earth people. I LOVE introducing them to my kids because I know that these are some seriously AMAZINGLY good people. And I'm super judge-y so you know I'm tellin' ya'll the true (insert winky-tongue face emoji). 
Meeting them this fall was one of the highlights of my school year!
When I initially created the lesson, I wasn't sure how I wanted the kids to finish their work...just this week did we dig the drawings back up and I started letting my early finishers work on them. All my kids are in the middle of some big projects that they all seem to finish at totaly different speeds. So this lesson has been a fun and quick in-between project. They kids love drawing these funny faces!
FOR THE FREE DOWNLOADABLE IDEA SHEETS, JUST CLICK HERE! 

FOR THE FREE HEART SHEET, CLICK HERE!
Have fun! 

 photo signature_zpsd10b3273.png
Read more »

Monday, November 12, 2018

What the Art Teacher Wore #209

Hey, Pencil Dress! You can find out all the details of this dress, including where I scored the fab fabric right here

HOW DID IT HAPPEN THAT IT IS NOVEMBER ALREADY?! Like, who allowed that to happen? Who gave this year permission to fly by at the speed of light leaving me behind on all things! Y'all I know I say this all the time but MY HEAD IS JUST BARELY ABOVE WATER...maybe it's because...well, I'm in the midst of finishing my SECOND BOOK
Sweater from Urban Outfitters, skirt by me, details here

That's right! This one is the same format as my Clay Lab book but it will be all fibers. Coming up with over 50 fibers projects for kids has been a feat. Y'all know that I love to teach fibers and have been doing sewing, weaving, felting and more with my kids forever...but coming up with even more projects has basically fried my brain. It was a small brain to start with. And now it's basically burnt to a crisp. 
And I feel bad because I know I've missed out on sharing so much here, on this blog. This is such a fun place for me to share lessons, what I'm wearing and what I'm creating...but I've had to give up some of that to push on with the book. I know I'll be happy in the end (like, when I'm DONE!) but right now, it kinda bums me out that this space has been neglected. I'm sorry! More videos and posts to come. By the way, these Loud Mouths were created by my KINDERGARTENERS and you can find the video lesson here
Found this old photo of me back in '81, totally rockin' the teacher bun! AND kinda lookin' like a hostess from Shoney's. 

I've also been busy hitting fall state conferences! Last month I went to Florida's conference where I was one of the keynote speakers and presenters...y'all. It was such a blast! Florida knows how to conference! I'm excited to be heading to Connecticut this weekend to speak and present there too! 
I've also been getting ready for our Artome Art Show! I'm doing a new lesson with my fourth graders this year and I'm so excited about the results. I will DEF be sharing this lesson with you as it was one that the kids and I really enjoyed. 
Crayon sweater needle felted by me, details here!

Also...it seems that I don't often share that I have a podcast so I'm just gonna throw this out there as a reminder! A new podcast airs each Thursday and I'd love it if you gave it a listen. Also, if you have any suggestions for podcast topics, I'm always open. Feel free to drop me a line in the comments.  
After saying all that...I guess I can see why I feel like my head is just above water! In other news, check out these cute suns that my kindergarten created...it inspired one of my fourth graders to stitch up this sun pillow during her recess/stitching time. Isn't it the cutest?
The suns were created for these cuties. I'll be sure to share this kindergarten lesson with you soon!
I hope y'all have a wonderful upcoming week! Check out my pencil dress here
 photo signature_zpsd10b3273.png
Read more »

Monday, October 29, 2018

In the Art Room: Teaching Scissor Safety

There's nothing quite like finding a pile of clipped hair in the art room just as your email inbox pings with a not-very-happy message from a parent of a child with brand-spankin' new bangs. In a miserably short and asymmetrically style ("But I hear it's all the rage on the runways right now...?"). Who knew we were hosting Beauty School Dropouts up in the art room?! NOT ME!

Look, I learned long ago that with kids, you gotta teach EVERYTHING. Like, EVERY-shouldn't-you-know-that-already-THING. And how to use scissors properly, safely and correctly in the art room is one of them. So, here's my scissor chat with my kindergarten as they prepared to cut out the clouds to add to their rainbow collages (lesson details to come!).
Here are the three things we cover when it comes to Scissor Safety:

1. SCISSORS ARE ONLY FOR PAPER. Not people, hair, clothing, applesauce, pizza, eyelashes (yes, that's happened)...just for, REPEAT AFTER ME, paper! The end. 

2. When scissors are not in use, they are closed. For some reason, I hate seeing scissors sitting on a table open. It looks like an accident waiting to happen.

3. Scissors have a HANDLE. It's where your hands go! That's how it got it's name. When HANDING someone scissors....HAND them the HANDLE. 

Additional pet peeve: do not walk around with scissors. They stay at your seats. With you. And your paper. That you are cutting. With said scissors.
 Kids these days, y'all, they don't know how to hold a pencil let alone scissors. I blame technology. I pretty much blame EVERYTHING WRONG WITH THE WORLD TODAY on technology...but I don't say that too often for fear of sounding like an old lady (which, hello, I am). But, for real, have you even seen how kids hold scissors these days? If it strikes you as odd...then guess what, chicken butt? IT'S YOUR JOB TO TEACH THEM! Remember, we gotta teach them everything. After all, they've only been on the planet for, like, 5 years. 

So, here's how I teach Scissor Usage:

1. Your dominant hand (the one that pretty much does EVERYTHING) is your scissor hand. It's job, when cutting, is to ALWAYS FACE OUT. Never toward you, but away from you.

2. All that hand does is open and close those scissors while FACING OUT (stress this...otherwise you gonna find kids with clipped clothing). Now, that hand that usually does NADA MUCHO? When cutting, it does almost all the work. 

3. The "lazy hand" turns the paper for you! Pretend glue your cutting arm to your side. Put it in FREEZE mode so it only faces OUT. Remember, all it does is open-close-open-close those scissors. That other hand does all the paper-steering like mama does when she drives a car.
Y'all. I know it is a lotta explaining. But, seriously, you'll thank me later. And LOOK at how beautifully they cut out those clouds! And I'm happy to report that not a single one ended up with one of those asymmetrical bobs! 

P.S. Giant scissors came from a flea market...but a fake pair could totally be made with cardboard and a brass roundhead fastener thing. DO IT. 
 photo signature_zpsd10b3273.png
Read more »